
みるかなた本棚>Nice Origami素敵折紙>>p135サンダース
◆0134シャワーズ◆0135サンダース◆
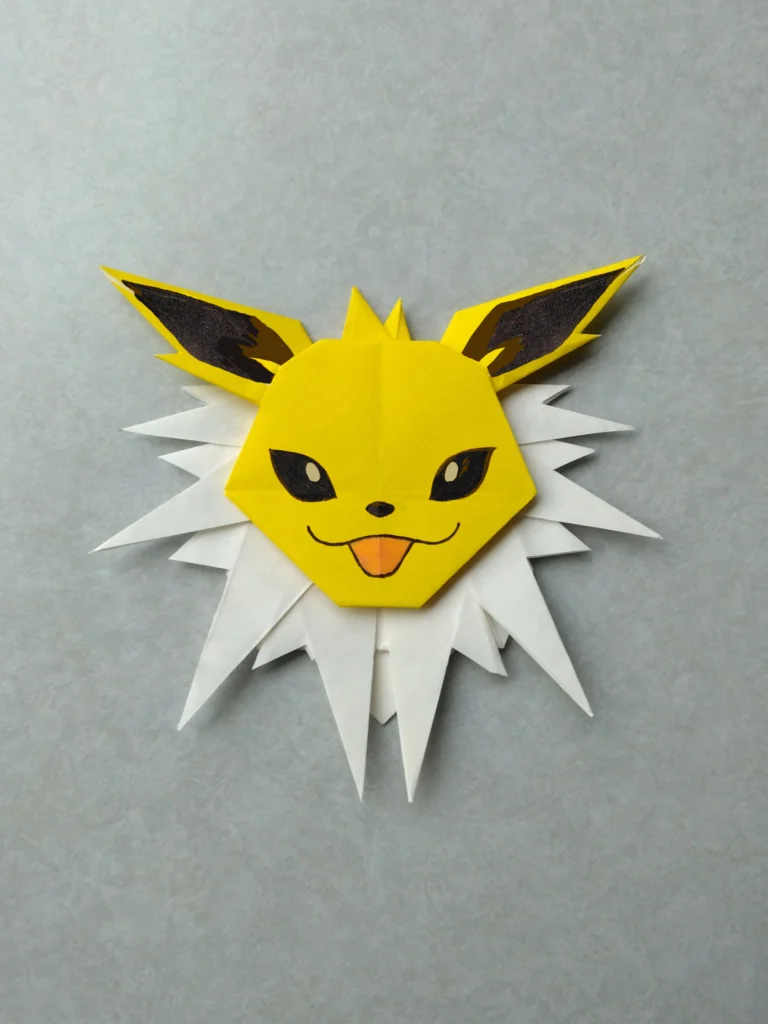
0135 サンダース 2号
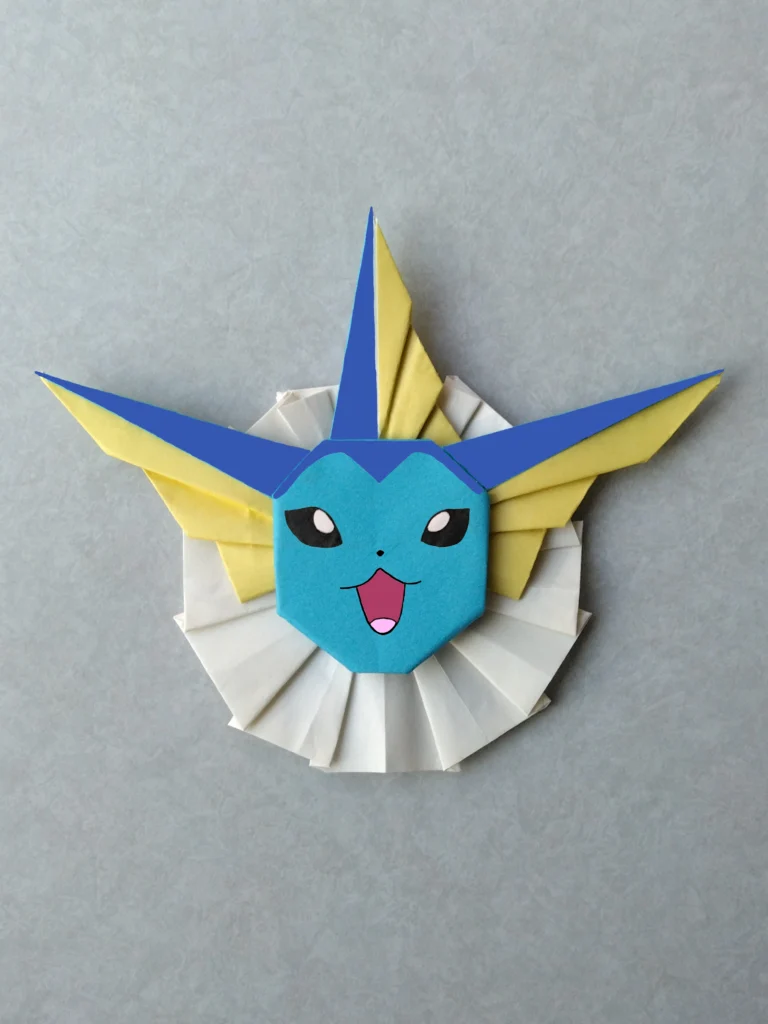
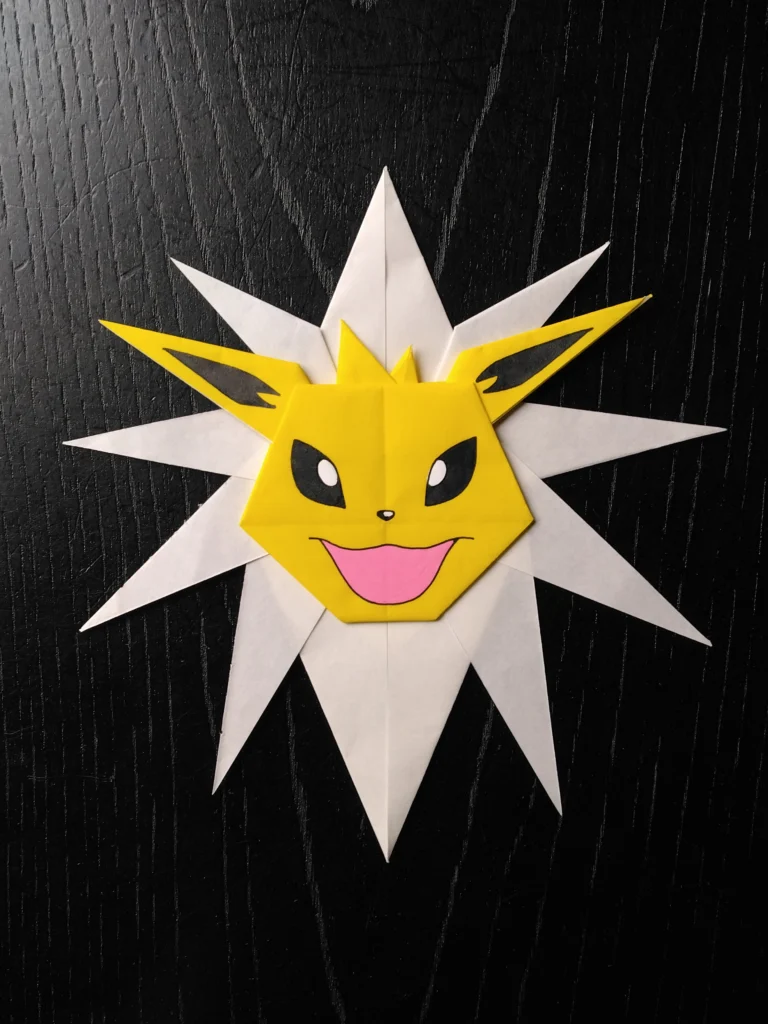
鋭敏なサンダースのテイストを表現しているような、首周りの純白の「えり毛」。
サンダースの姿を思い浮かべてイメージし続けていたら、自然に、どう折ったらいいか、思い浮かんできました。
紙の折りで、羽のように左右対称に拡げたかたちをつくり、そこから長さのバランスを見て、紙の折り位置を決めていきました。
そうして、整然としたかたちが手の中に、出現したのです。
その美しさに呆然としてしまいました。
おりがみ自身が内包している幾何的な構造が、おのずからそうなりたいと望んでできた、とでもいうような人の作為を超えたかたちのように思いました。
完成に移行するのが寂しいくらいでした。
気に入っています。
ちょっとほかでは見たことのない、とびきり繊細で美しいえり毛ができあがりました。
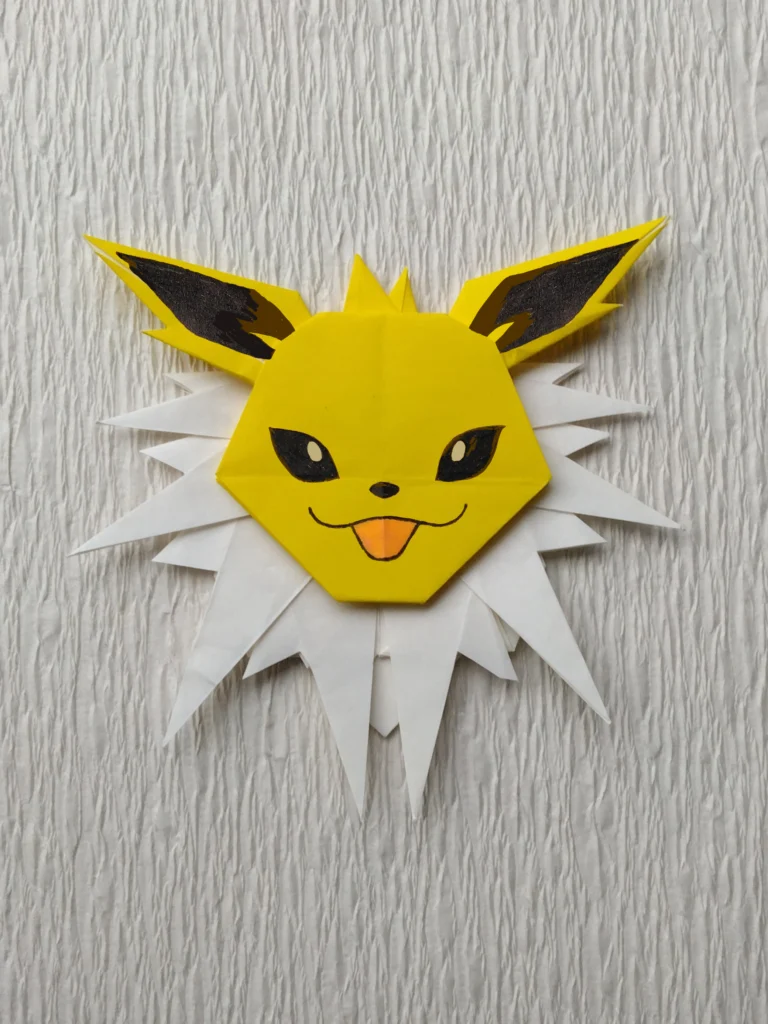
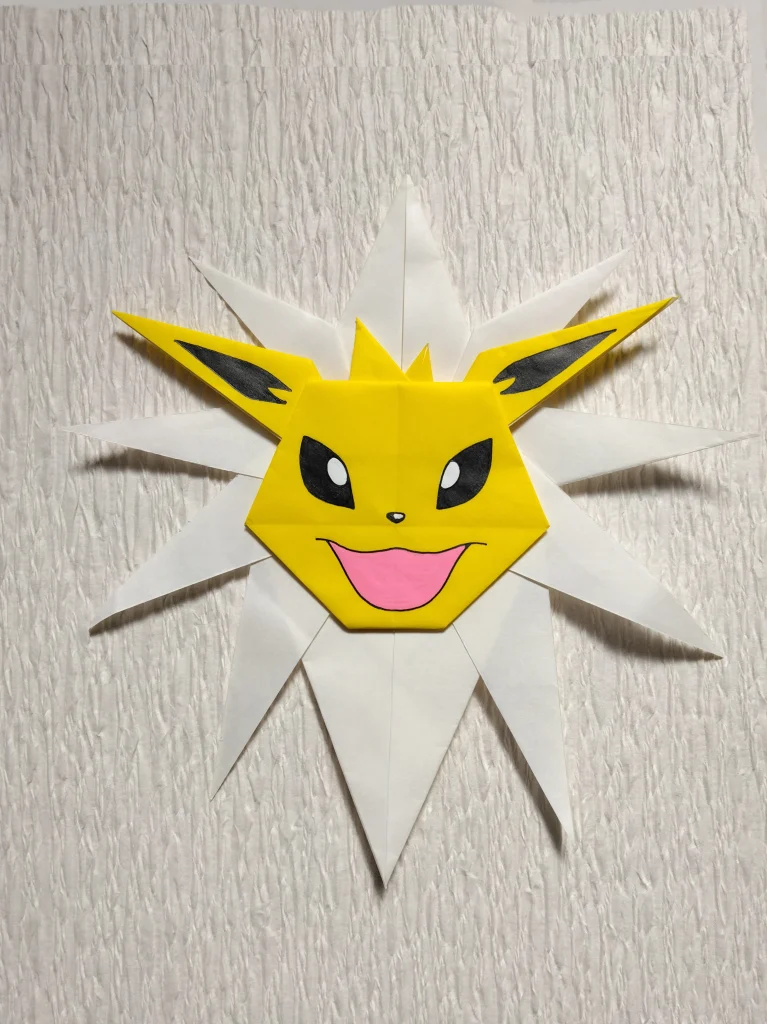
2000年の本に掲載したサンダースの「えり毛」は、図式的な、様式化したものでした。
子どもたちと一緒に折り紙をつくりながら教えるには、ある程度簡略なものとならざるをえないからです。
でも大人としては、もうちょっと何とかしたいなあ、サンダースのテイストを表現したいなあ、とずっと思ってきました。
ようやくこの機会に、納得のいくものをつくることができました。
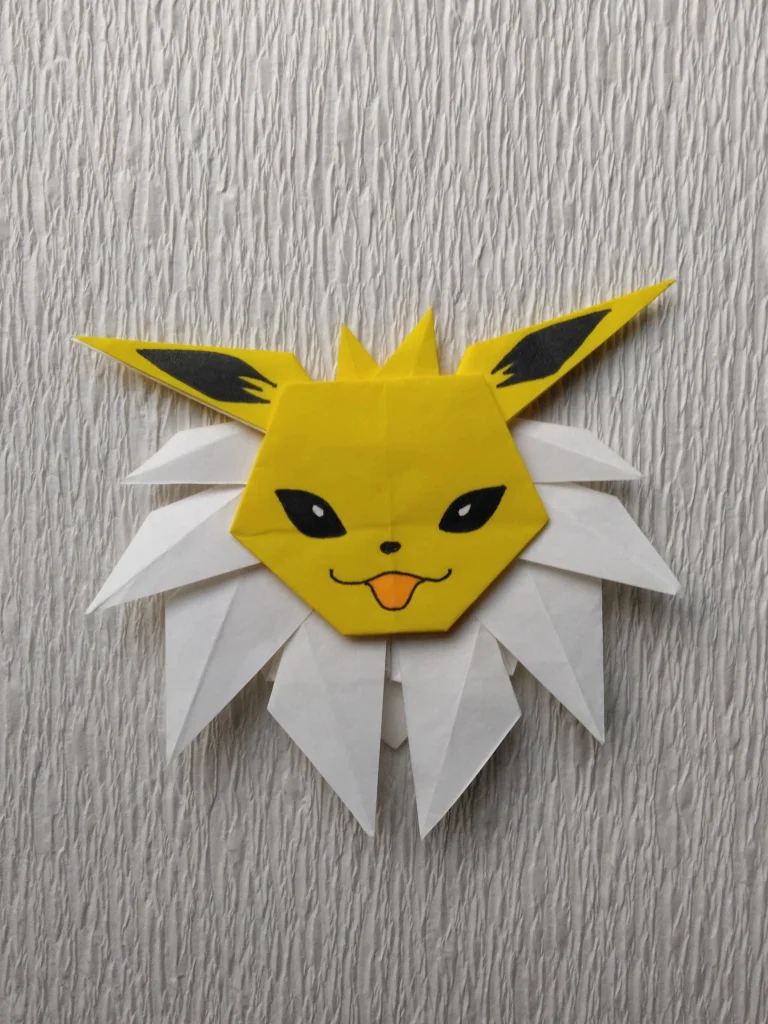
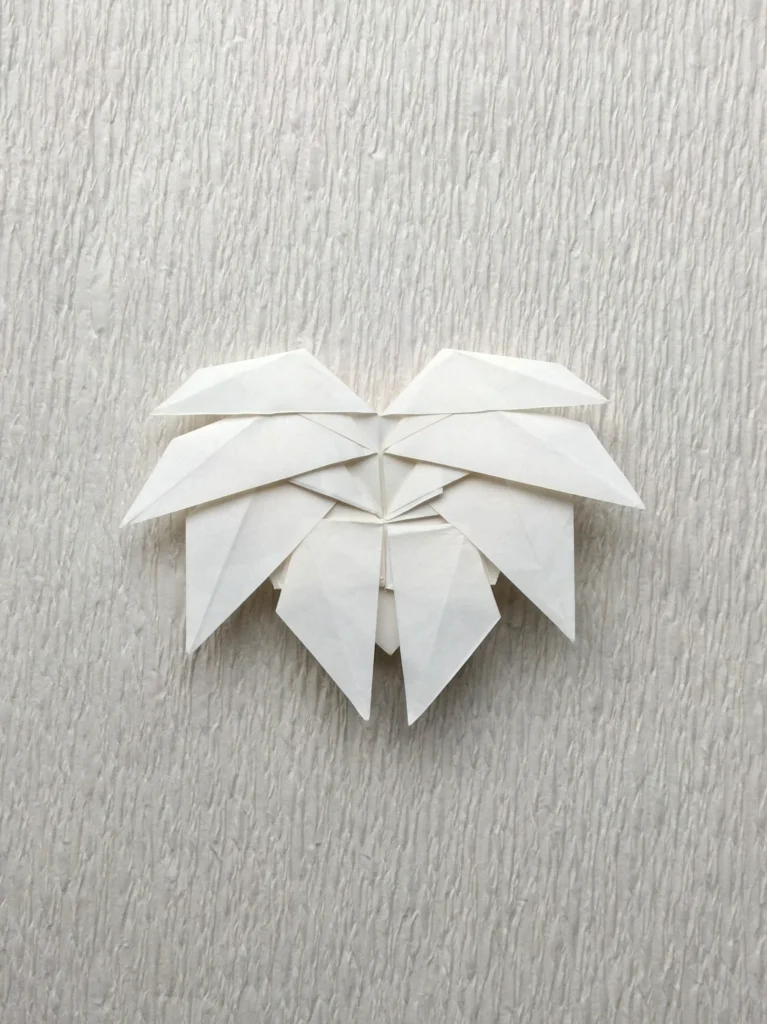
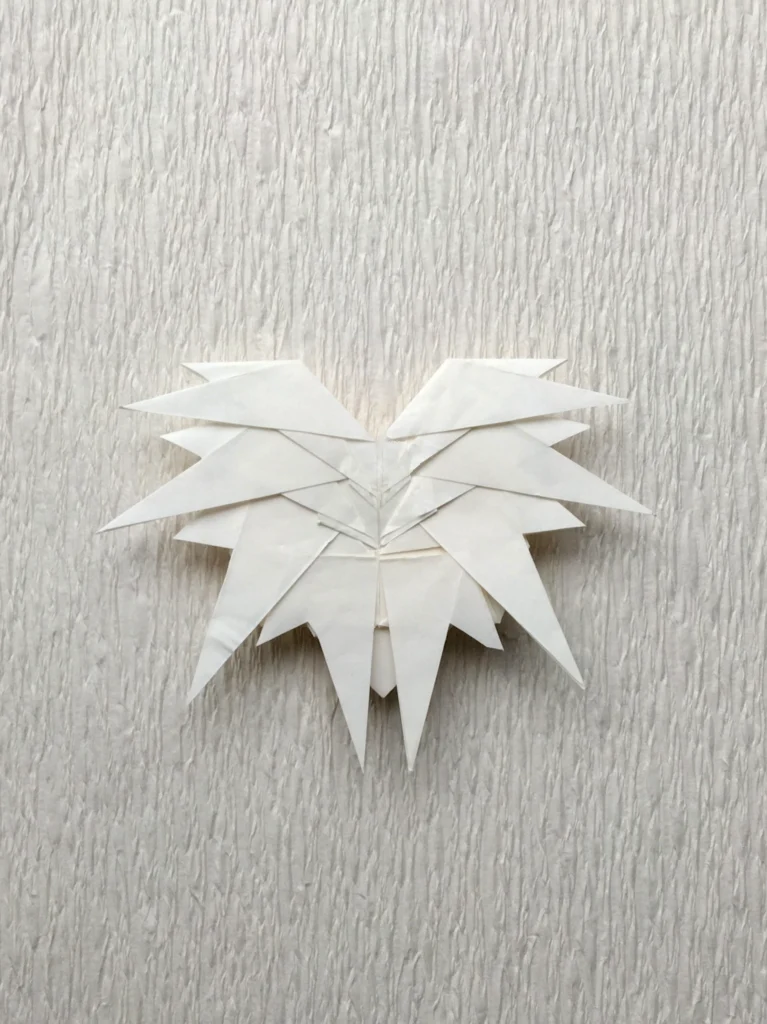
◇ここにご紹介するものは個人的に制作したファン創作です。
◇著作権者の許諾を受けていない未監修のものです。
つくり方の折り図
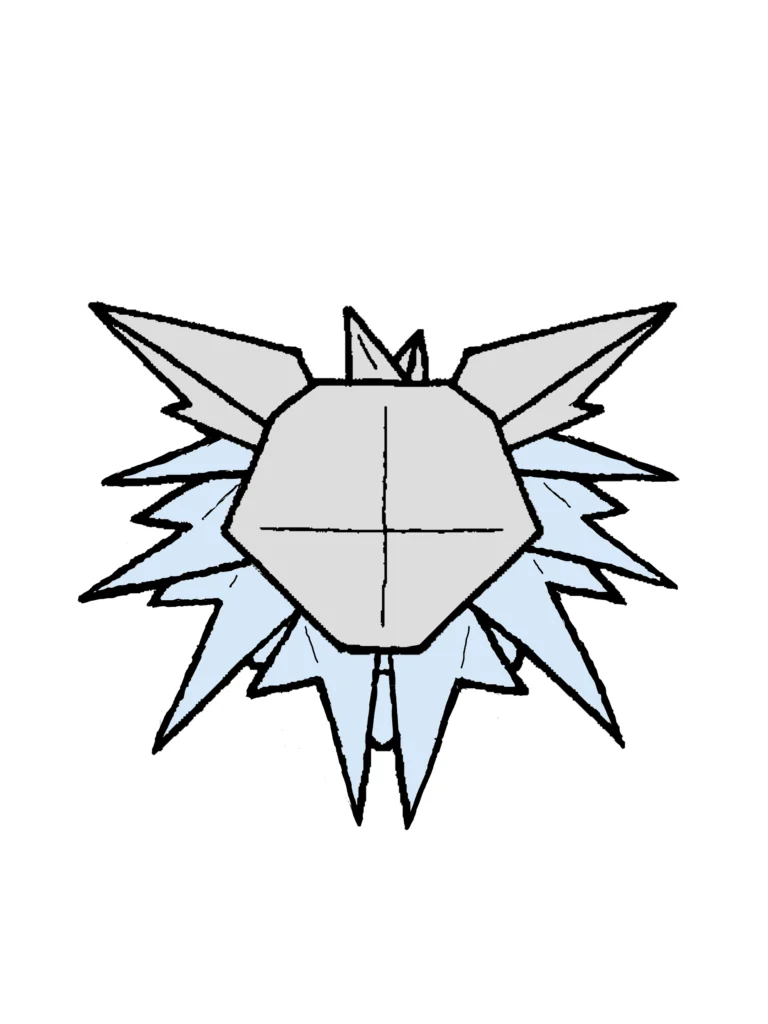
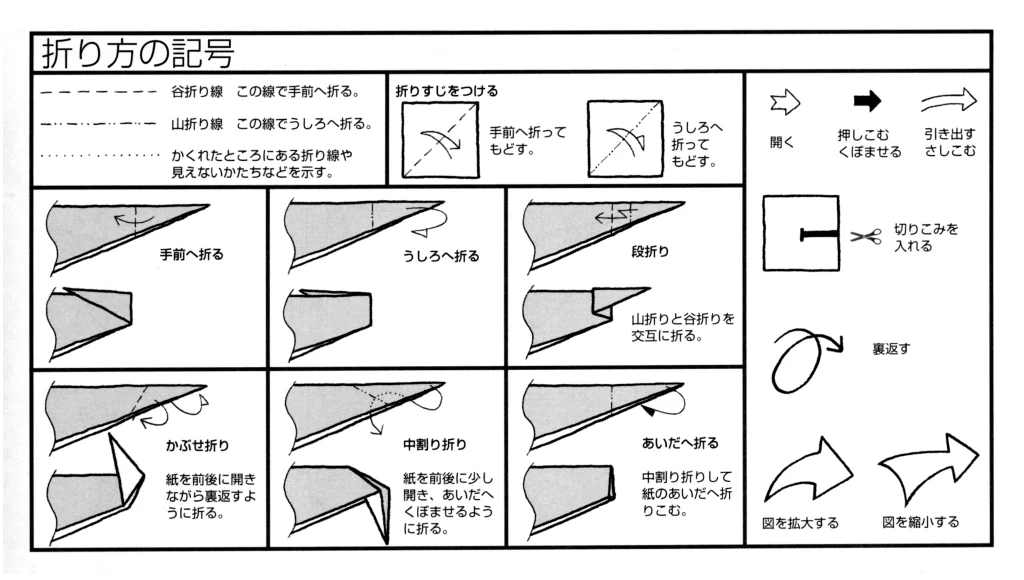
今回制作した折り図
◇折り図
1 基本折り
2 サンダースのあたま 2号
3 サンダースのえり毛
■サンダースのあたまは黄色の紙で、まず基本折りの図20まで折る。
■サンダースのえり毛は白い色の紙で、こちらも基本折りの図20まで折る
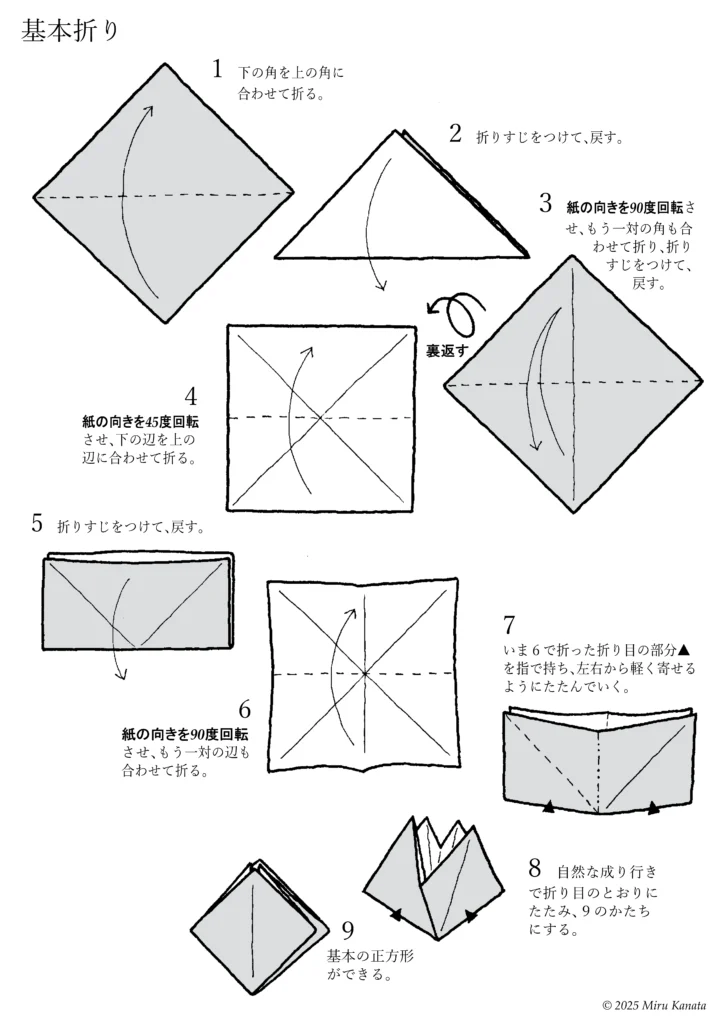
1 基本折り
English Commentary
Basic Folding
1 Fold the bottom corner to meet the top corner.
2 Make a crease and return it to its original position.
3 Rotate the paper 90 degrees, fold the other pair of corners together, make a crease and return it to its original position.
{Flip}
4 Rotate the paper 45 degrees and fold the bottom edge to line up with the top edge.
5 Make a crease and return it to its original position.
6 Rotate the paper 90 degrees and fold the other pair of edges together.
7 Hold the crease ▲ made in step 6 with your fingers and fold gently from both sides together.
8 Let the paper naturally fold along the creases to form the shape of 9.
9 A basic square is created.
English Commentary
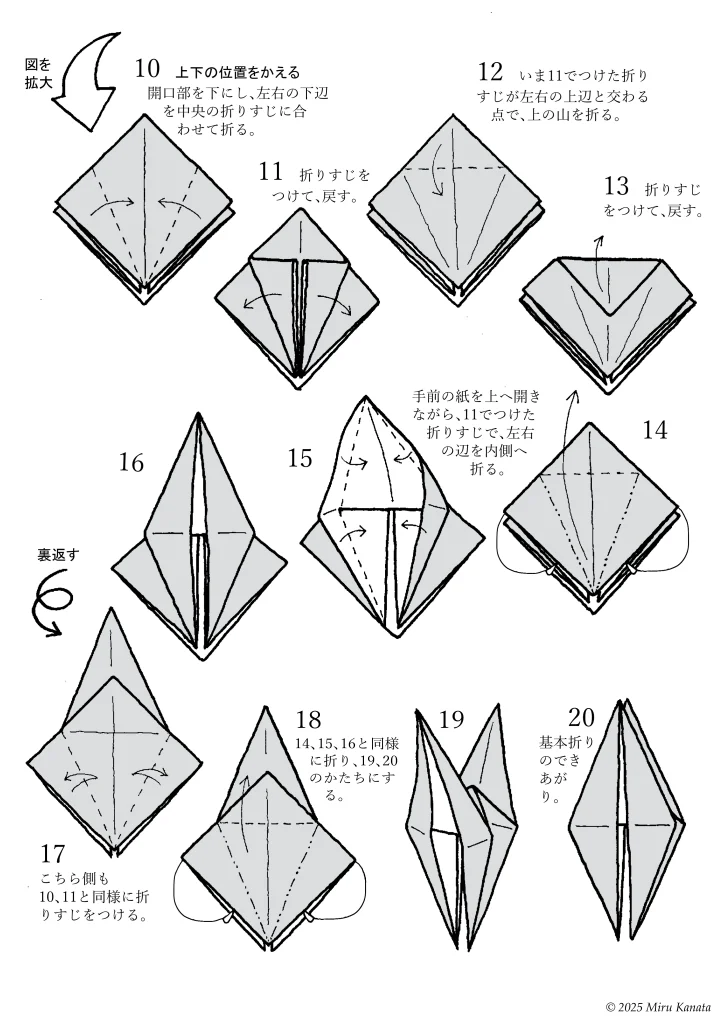
{Enlarge image}
10 Change the top and bottom positions.
With the opening facing downwards, fold the bottom left and right edges to meet the crease in the middle.
11 Make a crease and return.
12 Fold the top at the point where the crease made in 11 intersects with the top left and right edges.
13 Make a crease and return.
14 While opening the front paper upwards, fold the left and right edges inward along the crease made in 11.
15
16
{Flip}
17 Make creases on this side in the same way as 10 and 11.
18 Fold in the same way as 14, 15 and 16 to form 19 and 20.
19
20 The basic fold is complete.
2 サンダースのあたま
English Commentary
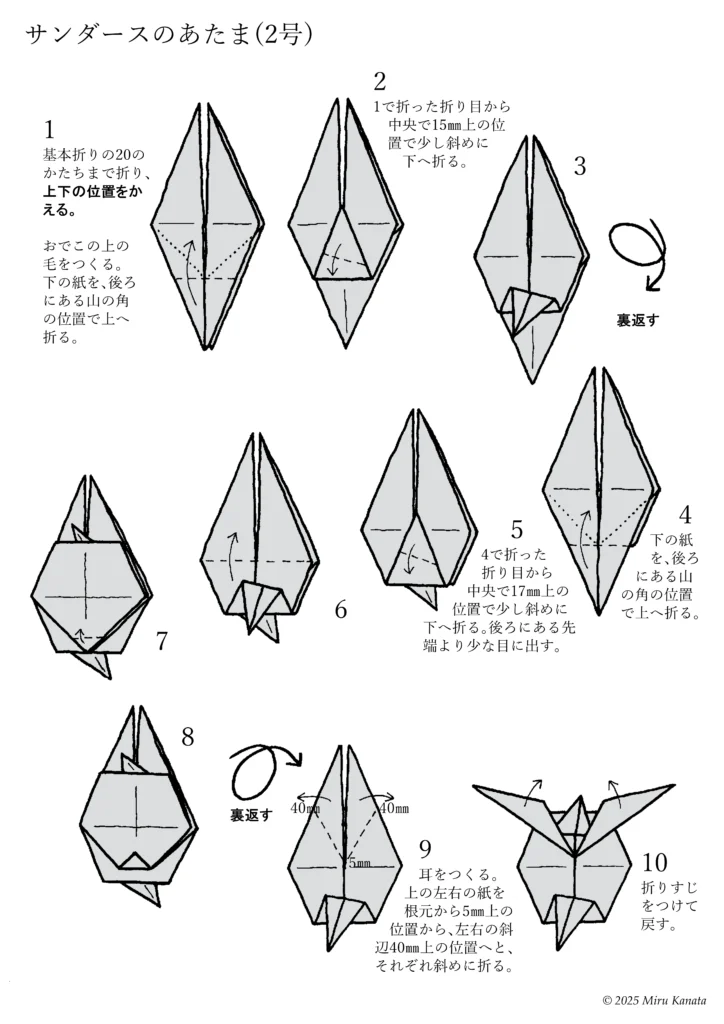
Jolteon’ head (No. 2)
1. Fold up to the 20th basic fold. Change the top and bottom positions. Make the hair on the forehead. Fold the bottom paper upwards at the position of the corner of the mountain at the back.
2. Fold slightly diagonally downwards at a position 15 mm above the center from the crease made in step 1.
3.
{Flip}
4. Fold the bottom paper upwards at the position of the corner of the mountain at the back.
5. Fold slightly diagonally downwards at a position 17 mm above the center from the crease made in step 4. Leave slightly more than the tip at the back.
6.
7.
8.
{Flip}
9. Make the ears. Fold the top left and right pieces of paper diagonally from a position 5 mm above the base to a position 40 mm above the left and right hypotenuses.
10. Make creases and unfold.
English Commentary
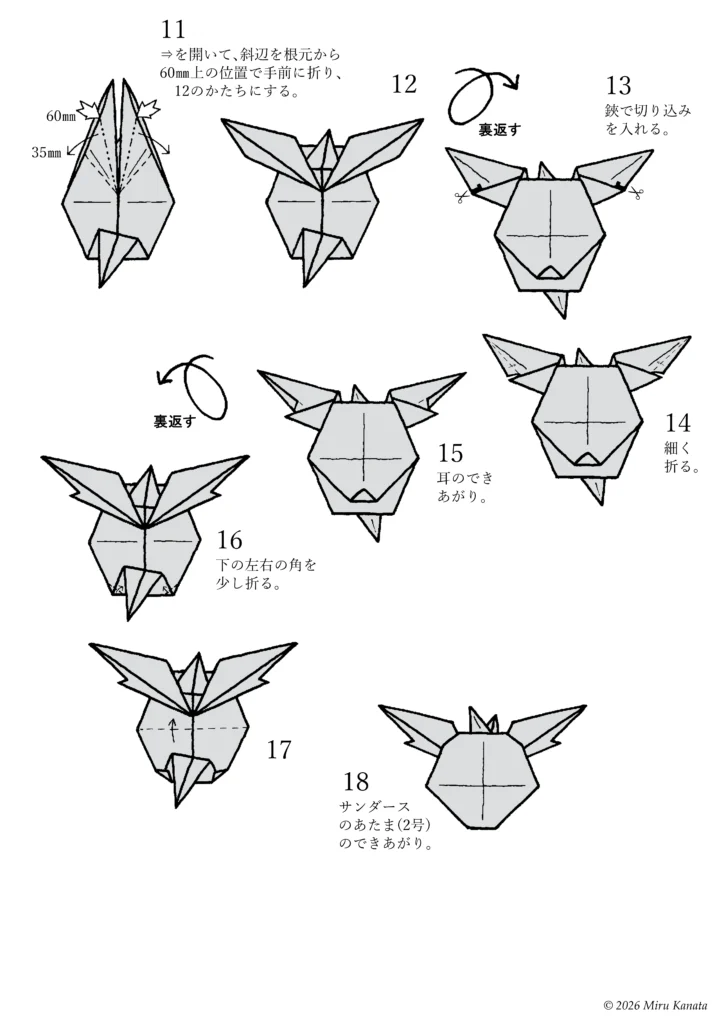
11 Open the arrow and fold the hypotenuse towards you at a position 60 mm above the base to make the shape of 12.
12
{Flip}
13 Make cuts with scissors.
14 Fold thinly.
15 The ears are complete.
{Flip}
16 Fold the bottom left and right corners slightly.
17
18 Jolteon’ head (No. 2) is complete.
3 サンダースのえり毛 2号
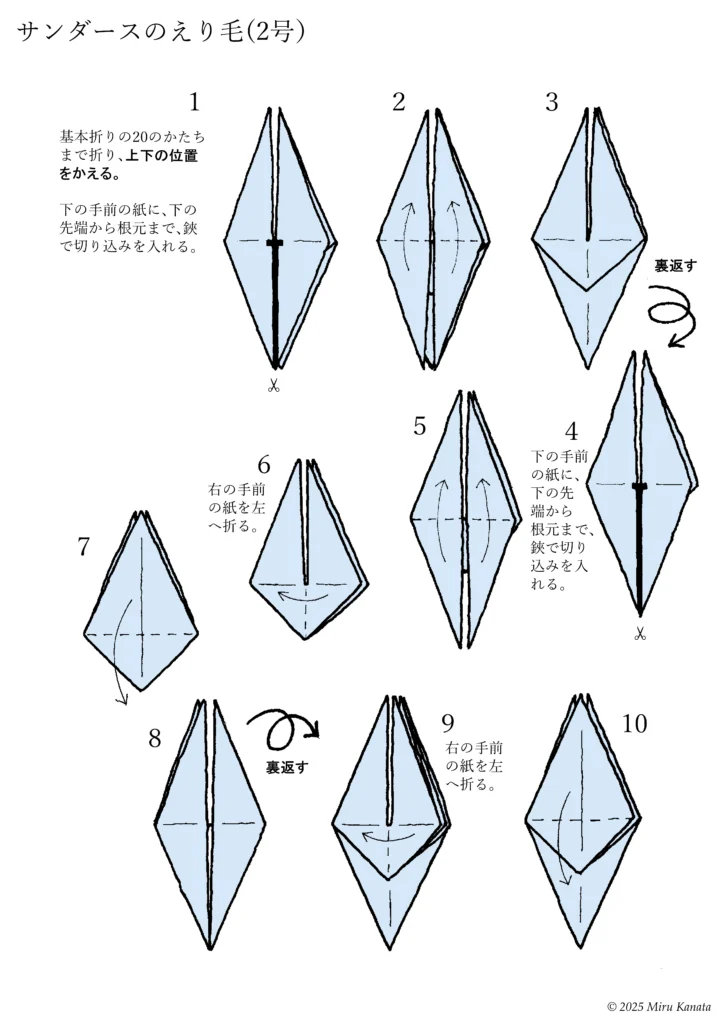
English Commentary
Jolteon’ nape hair (No. 2)
1. Fold to the shape of the 20th basic fold, then change the top and bottom positions. Make a cut with scissors from the bottom tip to the base of the bottom front piece of paper.
2.
3.
{Flip}
4. Make a cut with scissors from the bottom tip to the base of the bottom front piece of paper.
5.
6. Fold the right front piece of paper to the left.
7.
8.
{Flip}
9. Fold the right front piece of paper to the left.
10.
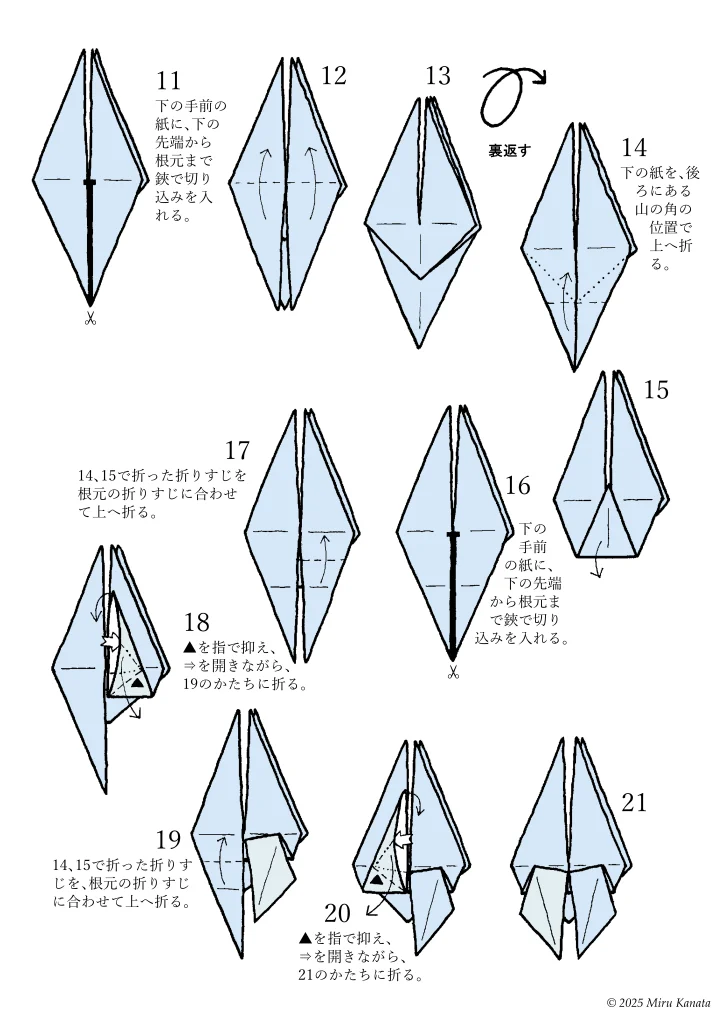
English Commentary
11 Make a cut with scissors from the bottom tip to the base of the bottom paper in front of you.
12
13
{Flip}
14 Fold the bottom paper upwards at the position of the corner of the mountain at the back.
15
16 Make a cut with scissors from the bottom tip to the base of the bottom paper in front of you.
17 Fold the creases made in 14 and 15 upwards to align with the crease at the base.
18 Hold down ▲ with your finger and fold it into the shape of 19 while opening the arrow.
19 Fold the creases made in 14 and 15 upwards to align with the crease at the base.
20 Hold down ▲ with your finger and fold it into the shape of 21 while opening the arrow.
21
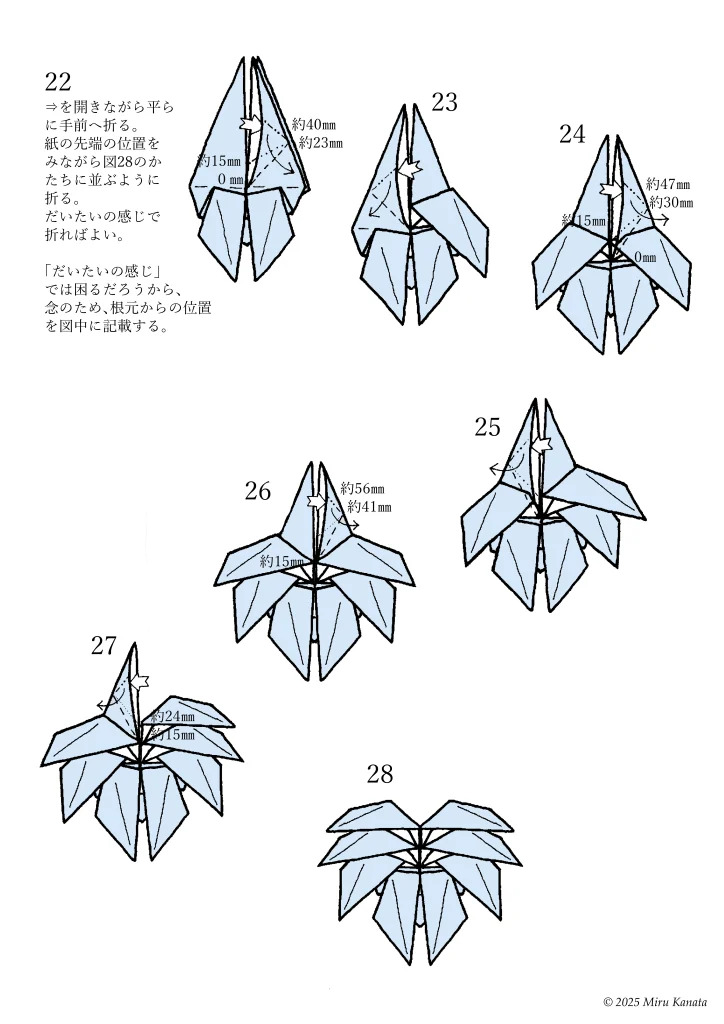
English Commentary
22. Fold the paper flat towards you while opening the arrows. Fold it so that it is aligned as shown in Figure 28, keeping the position of the tip of the paper in mind. An approximate alignment is fine. (Since “an approximate alignment” might be problematic, the position from the base is indicated in the diagram for clarification.)
23
24
25
26
27
28
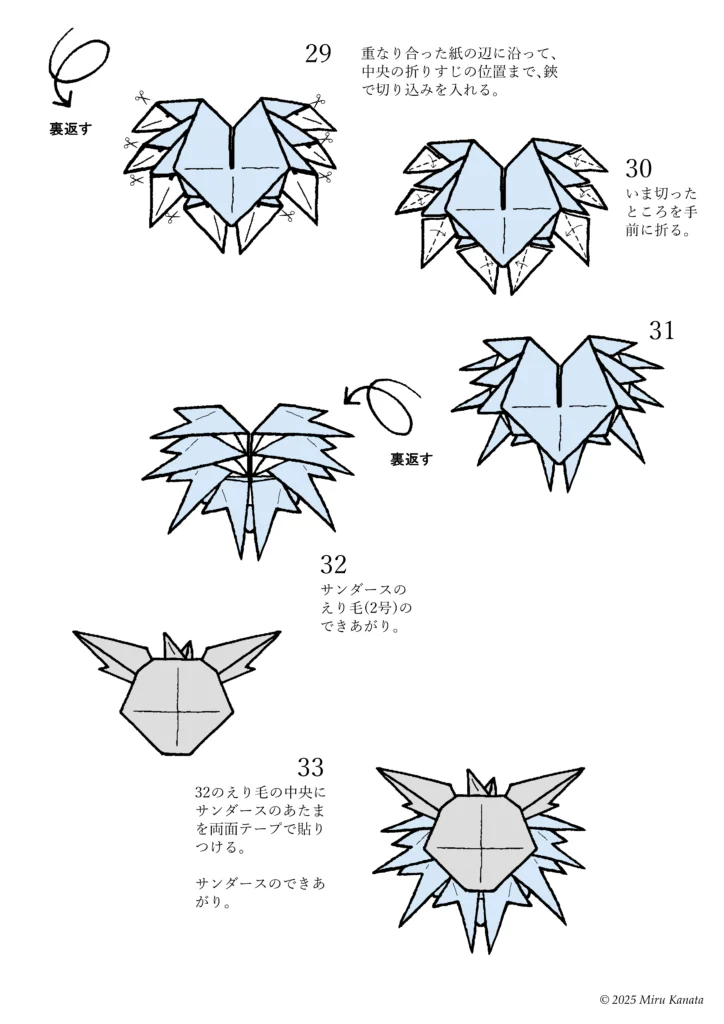
English Commentary
{Flip}
29 Cut along the edges of the overlapping paper with scissors up to the center fold line.
30 Fold the part you just cut towards you.
31
{Flip}
32 Jolteon’ collar (No. 2) is complete.
33 Attach Jolteon’ head to the center of the collar from step 32 with double-sided tape. Jolteon is complete.
みるかなた本棚>Nice Origami素敵折紙>p135サンダース
p135サンダース
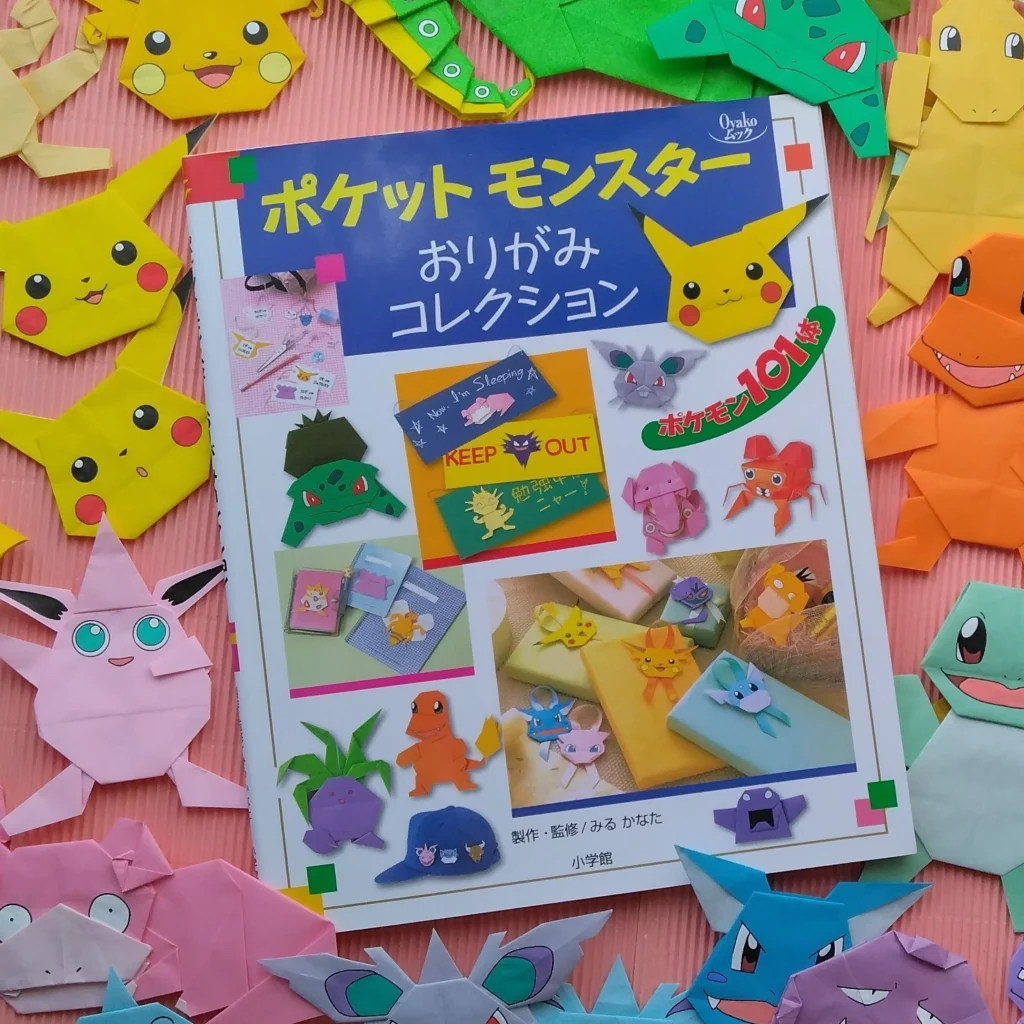
◆ポケットモンスターおりがみコレクション
◇ ◇ ◇