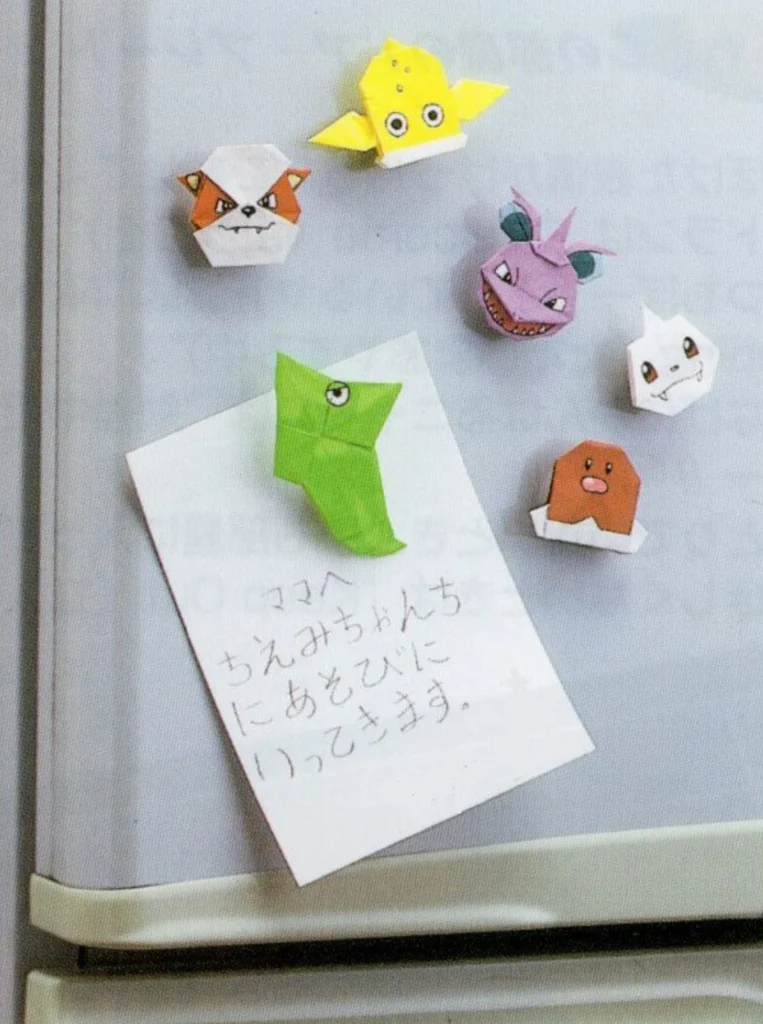
みるかなた本棚>『ポケットモンスターおりがみコレクション』>ポケモンおりがみ一覧表>0070 ウツドン
◆0069 マダツボミ◆0070 ウツドン◆0071 ウツボット◆
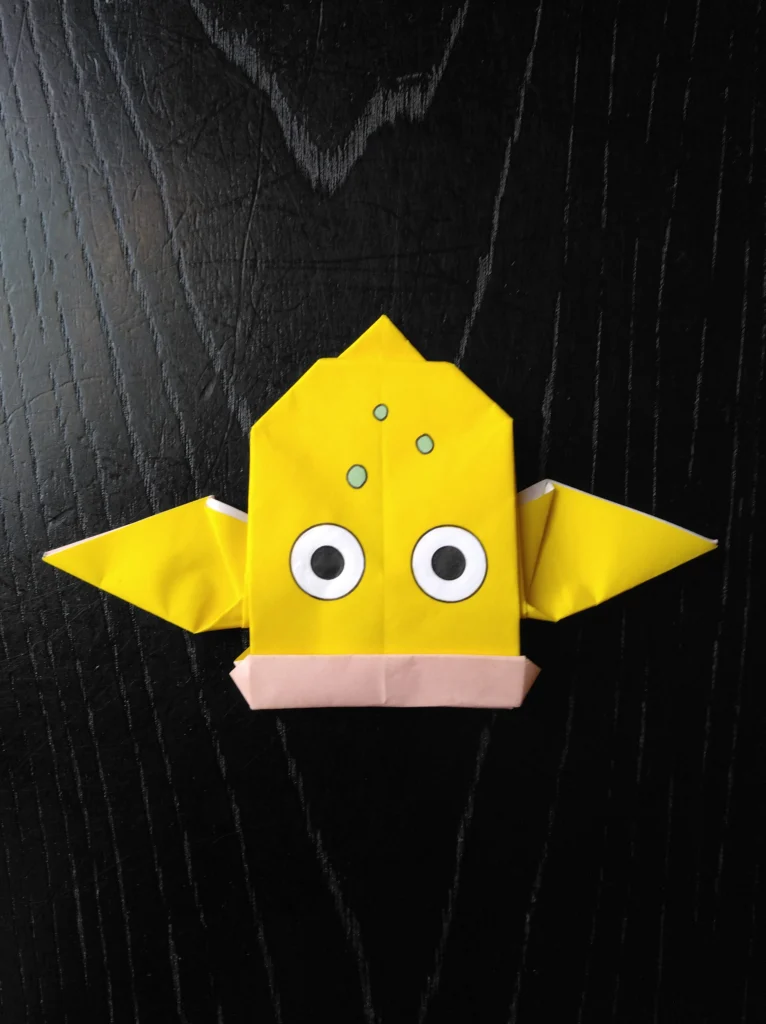
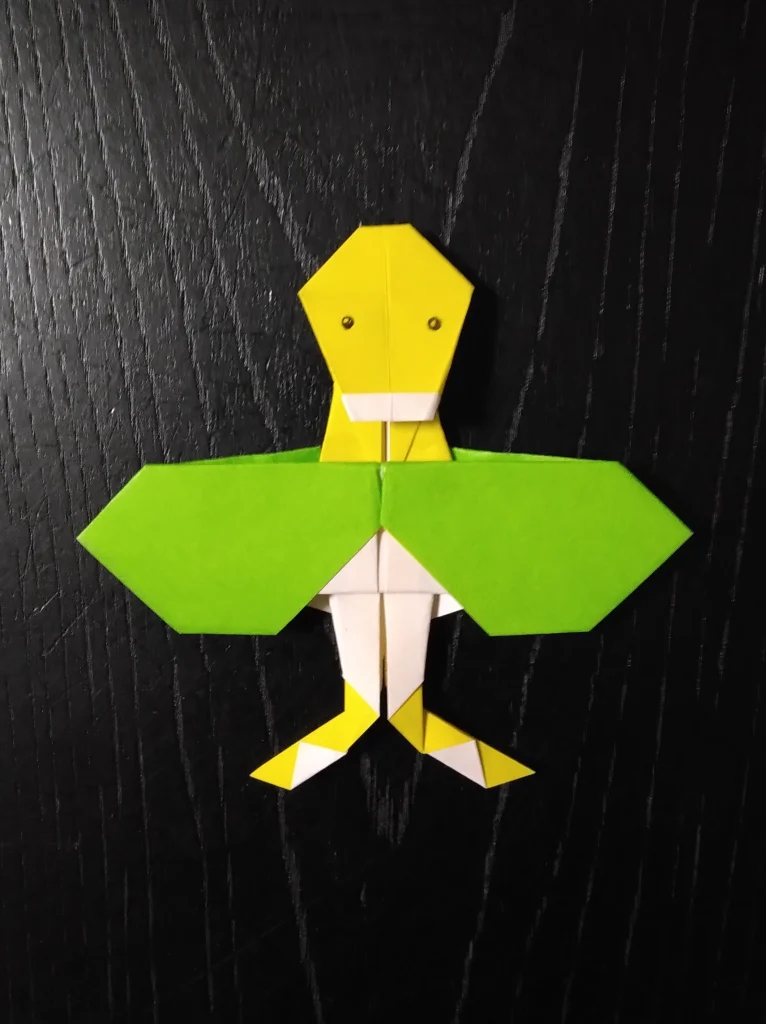
0070 ウツドン 初号
ゲームフリークのチェックでOKをいただいて、本に掲載した最初のウツドンです。
変にかわいいので気に入っています。
ディグダと同じ折り方をベースとしていますが、はっぱ部分をつくるため、ちょっと工夫しています。
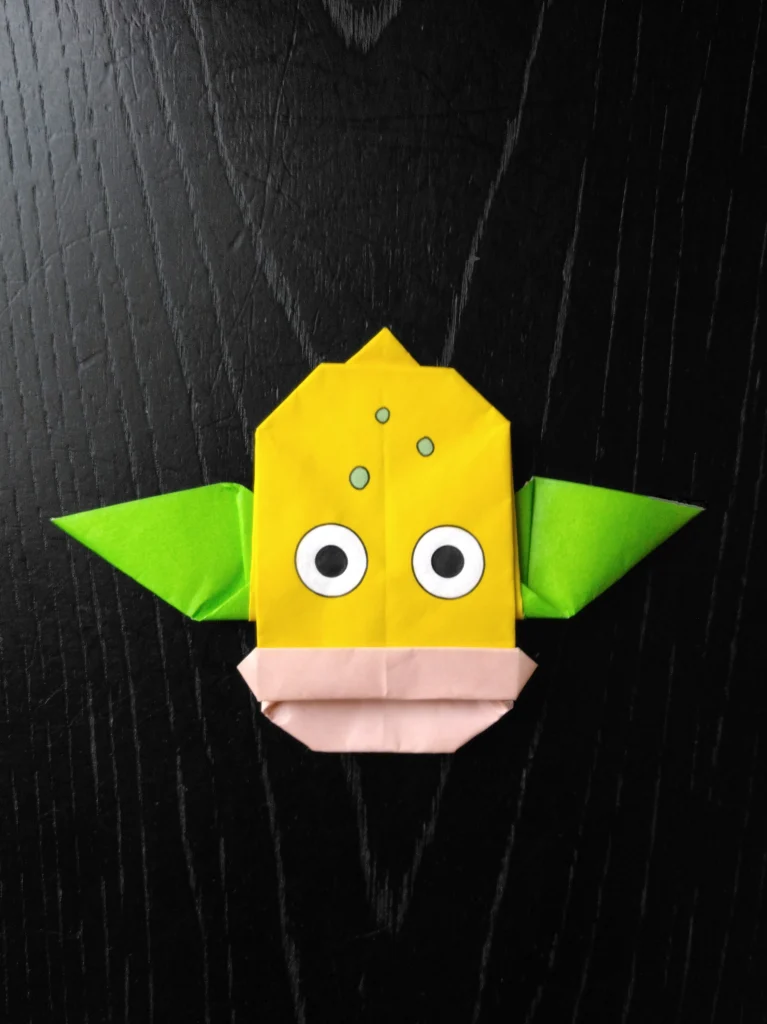
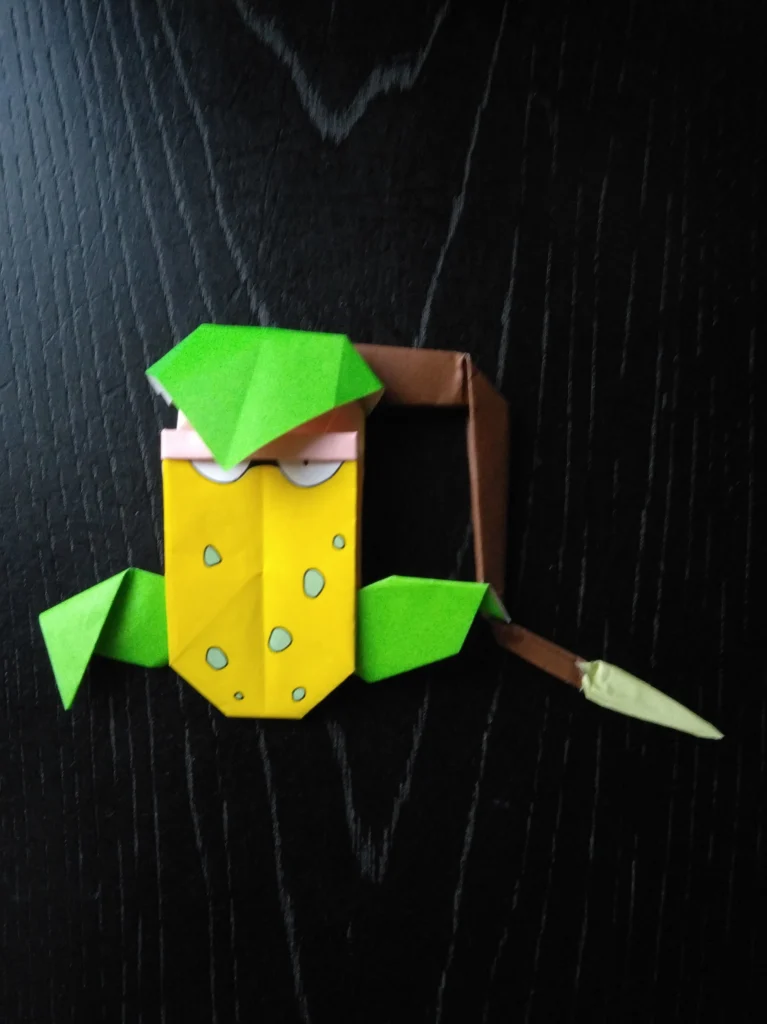
0070 ウツドン 2号改訂版
今回制作したウツドンの2号改訂版です。
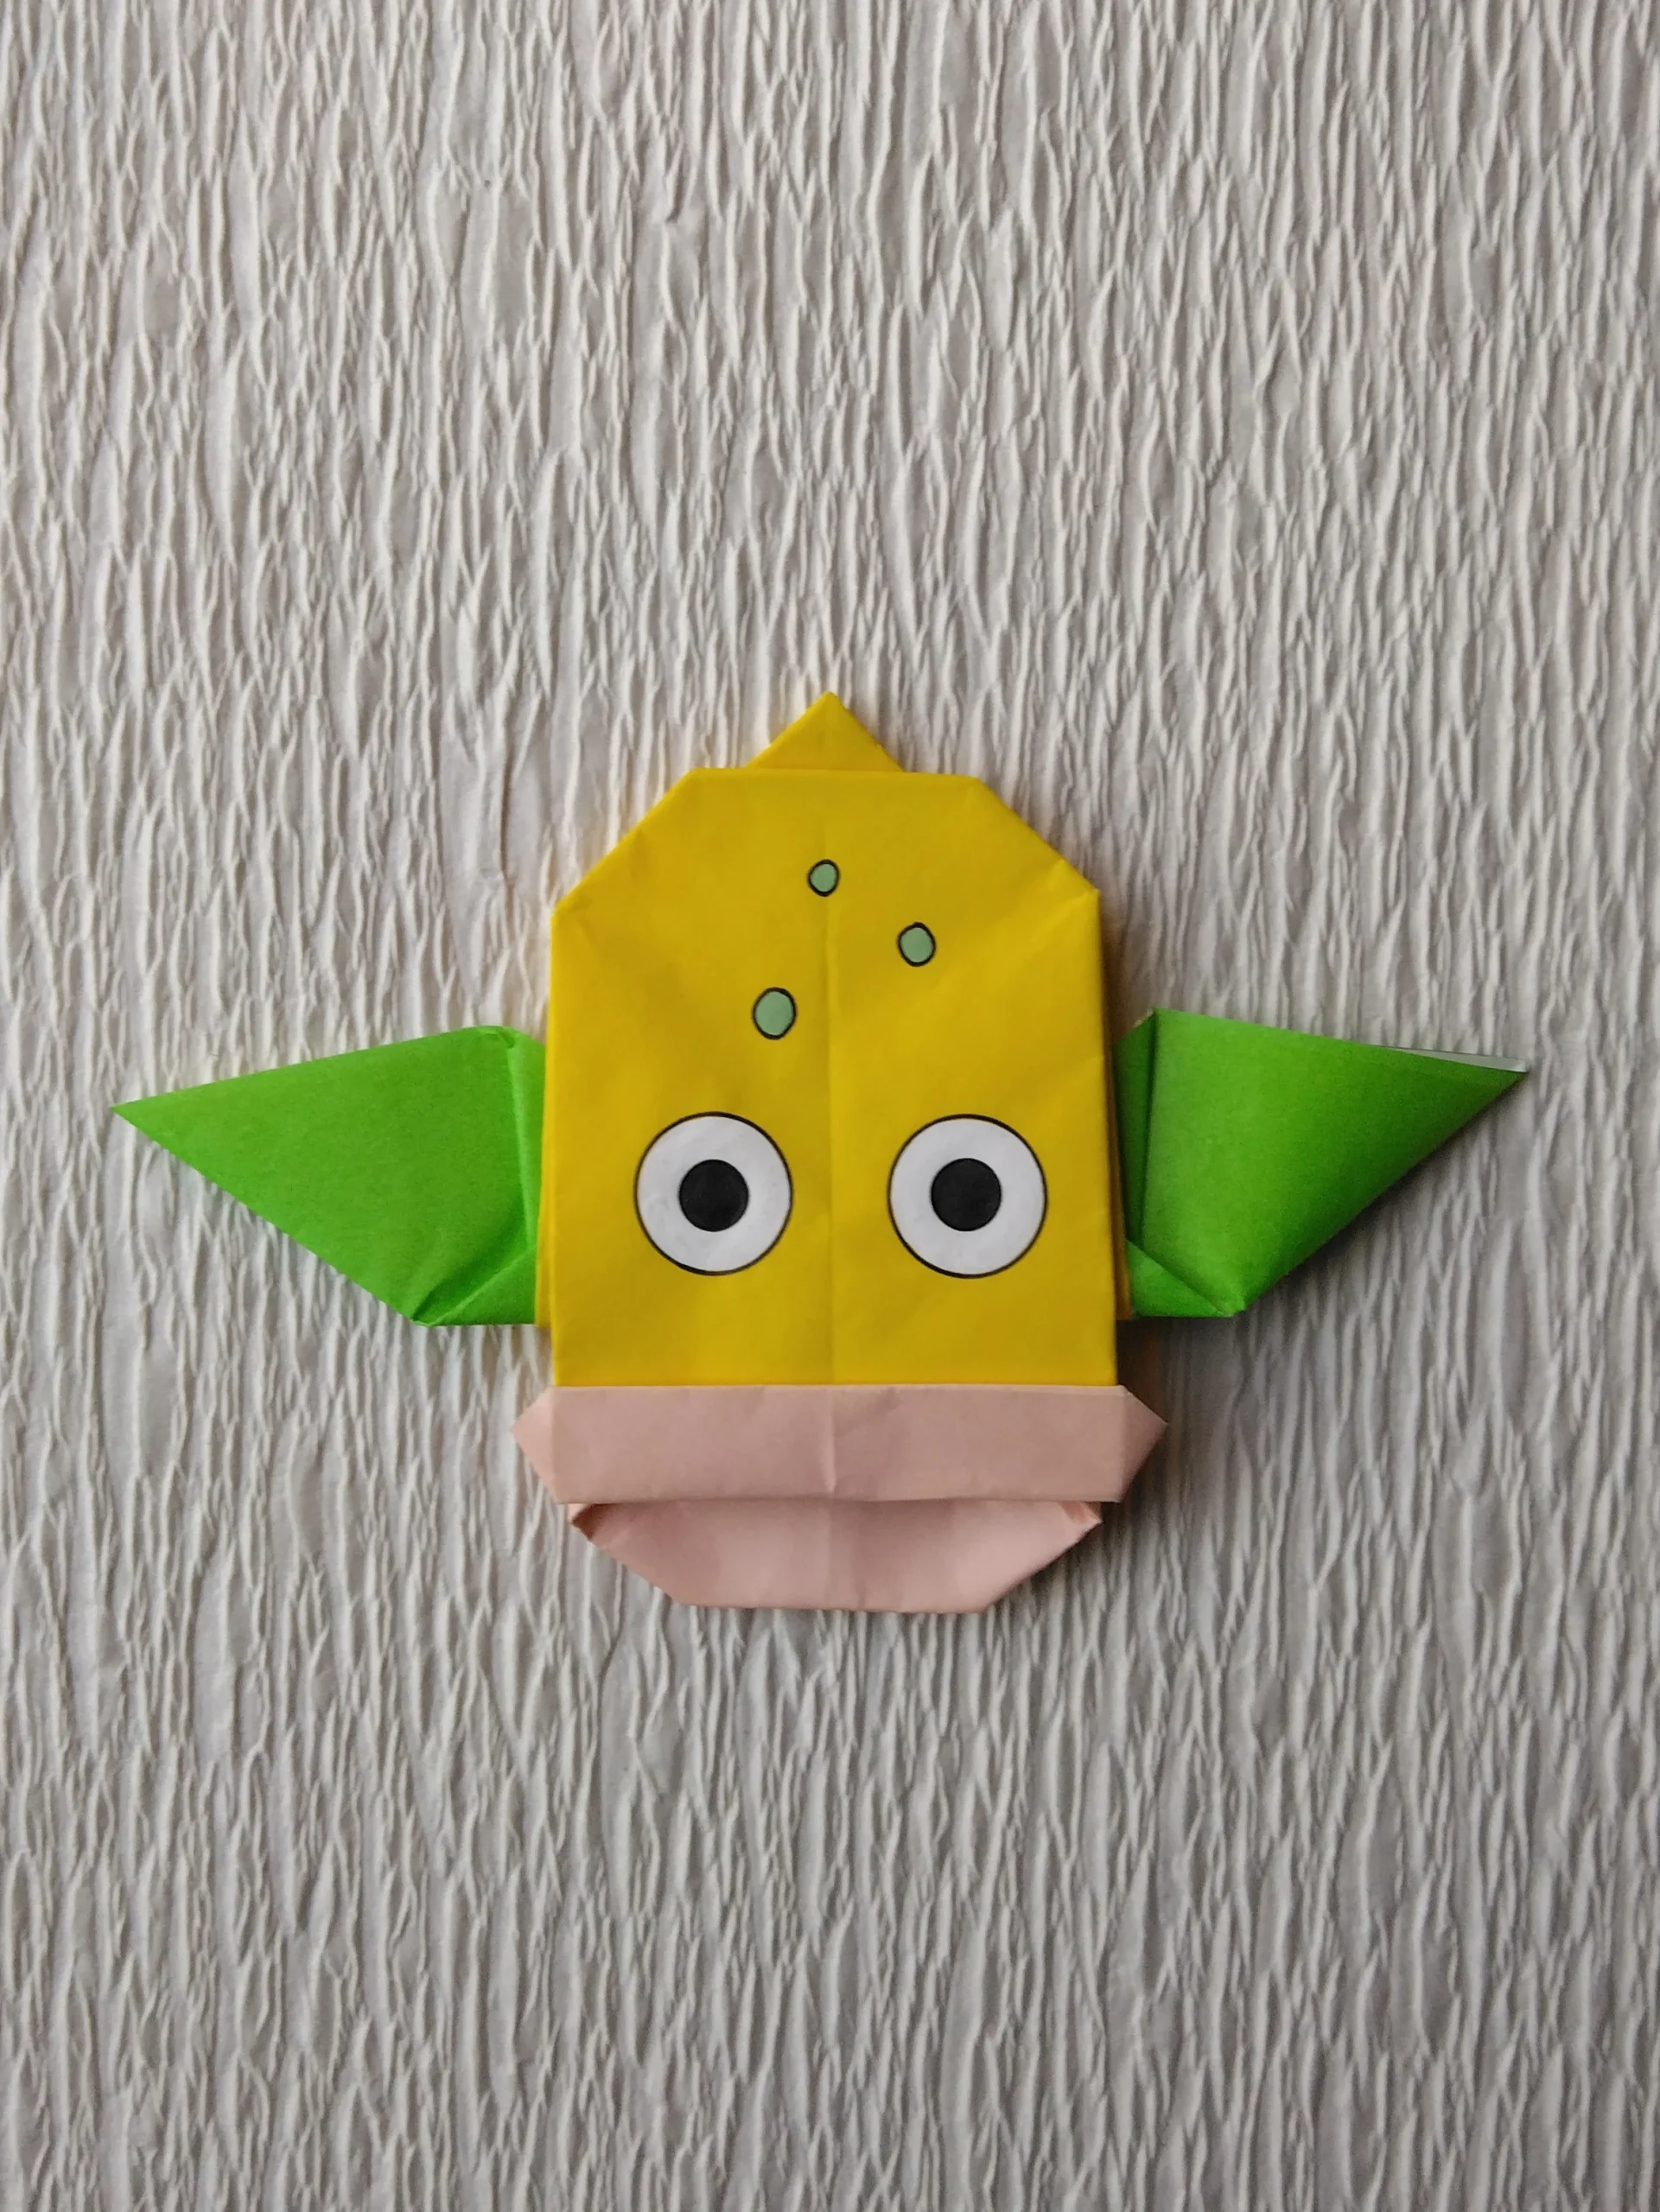
構造は初号と同じですが、後ろ側の唇部分を下唇として、あごに見立てることにしました。
これだけで、ずいぶん雰囲気がかわりました。
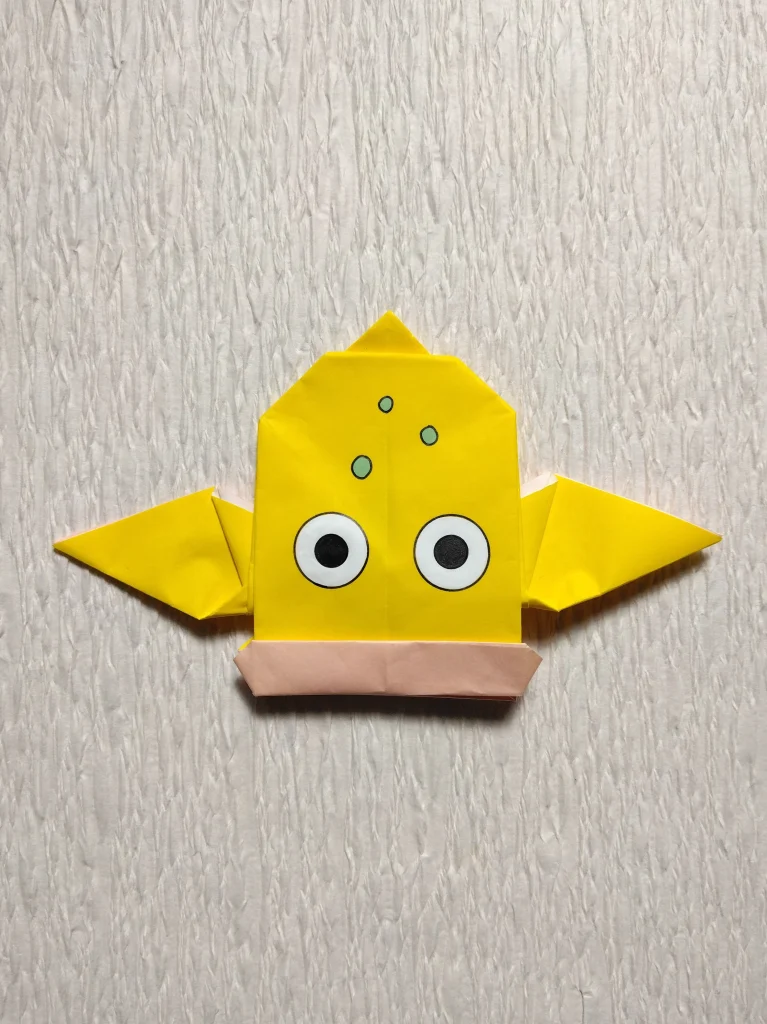
初号のウツドンは、ゲームフリークのご希望で、唇の色をかえるため2枚重ねで折っていました。
紙の厚みがあるので、はっぱの緑色を加えるのはちょっと困難な状況でした。
今回、2枚重ねでなく、別色を差し加えるかたちで、唇とはっぱの色替えを実現しました。
長年の気がかりが解消できました。
★ゲームフリークのチェック
◆姿かたちは、最初のチェックでOKをいただきました。
◆はじめ1枚で折っていましたので、唇は紙の裏の白い色でした。
「くちびるの色を違う色のおりがみに」と、肌色っぽい薄いピンクの紙をご指定でした。
それだけでなく「くちびるの色、塗りはN.G.」というご指示も。
それで2枚重ねで折ることになりました。
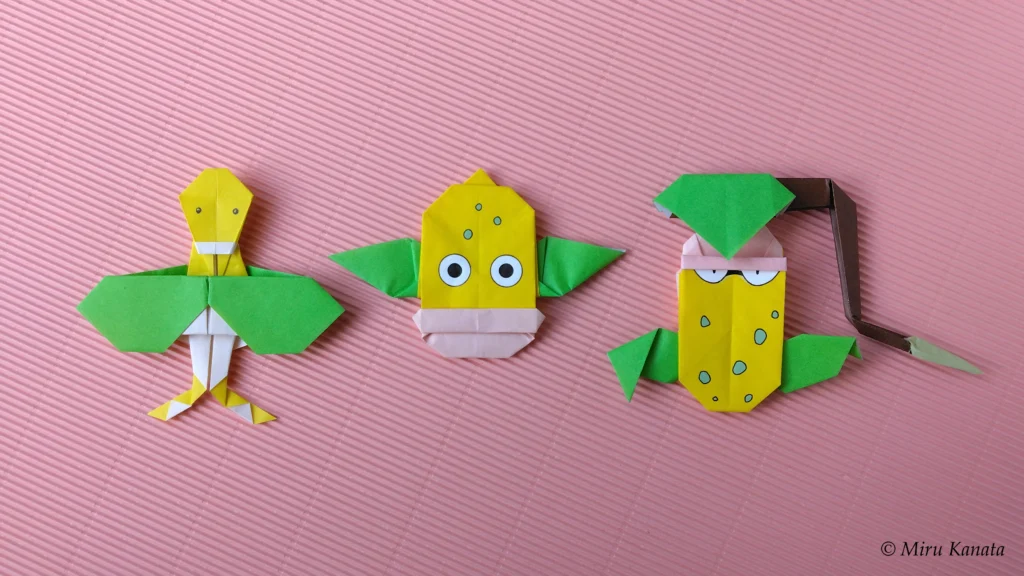
Evolution
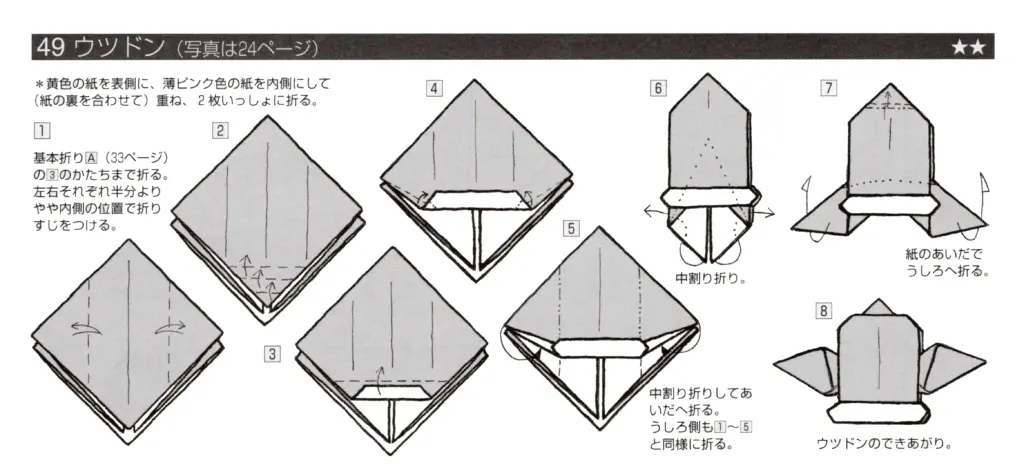
つくり方の折り図
ウツドンの初号も2号改訂版も構造は同じで、下あごのかたちだけが異なります。
また、2号改訂版ウツドンは、別色の紙を差し加えて折りますので、紙がずれないよう注意が必要です。
まずはじめに初号ウツドンを一通り折って、構造を理解してから、2号改訂版に臨むとうまくいきます。
今回制作した折り図
ウツドン初号の折り図を先に掲載し、その次にウツドン2号改訂版の折り図を掲載しています。
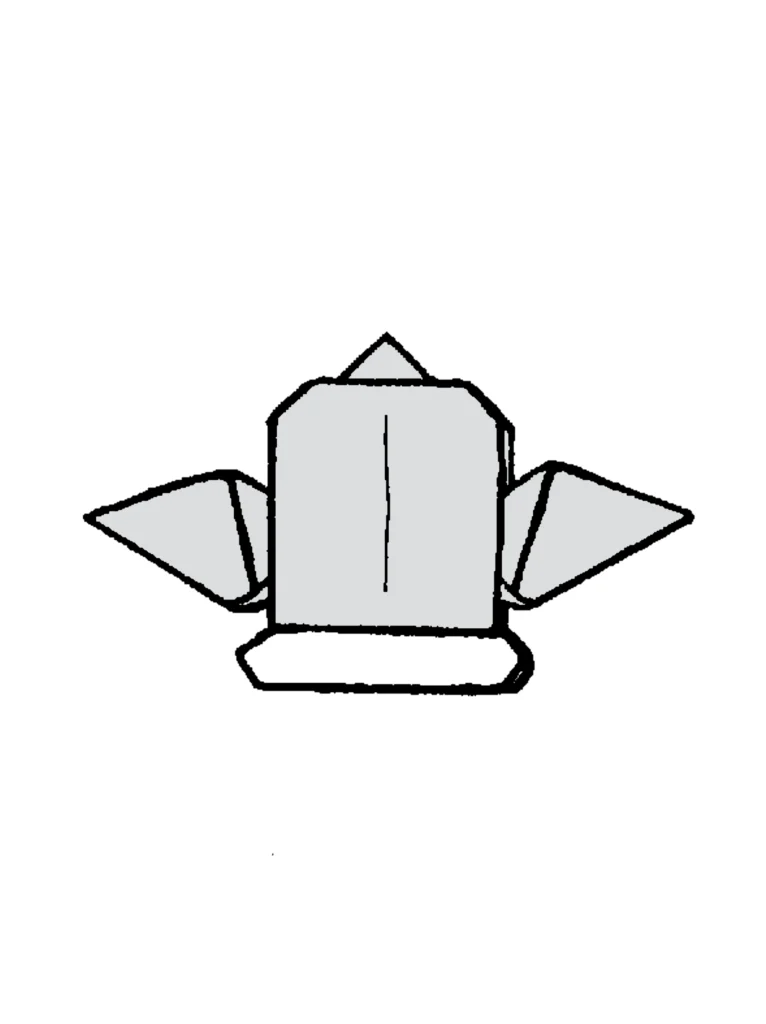
ウツドン 初号
■黄色の紙で折る。
■唇の色を変える場合は、黄色の紙を外側に、薄いピンク色の紙を内側にして、紙の裏の白い面を合わせて重ね、2枚一緒に折る。
English Commentary
Weepinbell First Edition
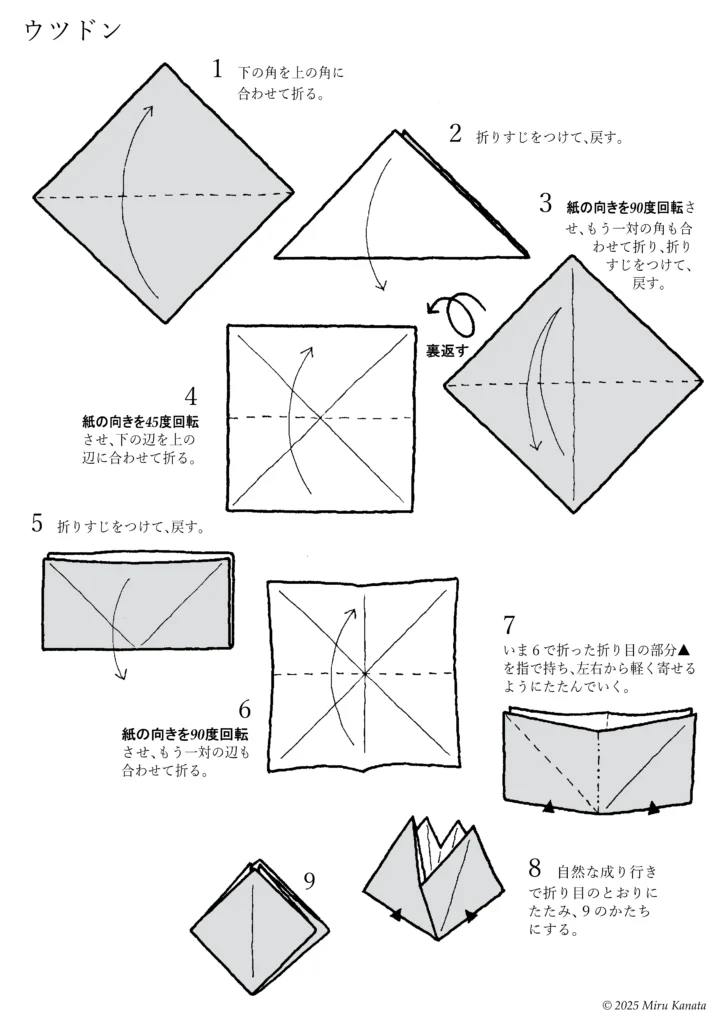
1 Fold the bottom corner to meet the top corner.
2 Make a crease and return it to its original position.
3 Rotate the paper 90 degrees, fold the other pair of corners together, make a crease and return it to its original position.
{Flip}
4 Rotate the paper 45 degrees and fold the bottom edge to meet the top edge.
5 Make a crease and return it to its original position.
6 Rotate the paper 90 degrees and fold the other pair of edges together.
7 Hold the crease ▲ made in step 6 with your fingers and fold it gently from both sides.
8 Let it naturally fold along the creases to form the shape of 9.
9
English
{Enlarge image}
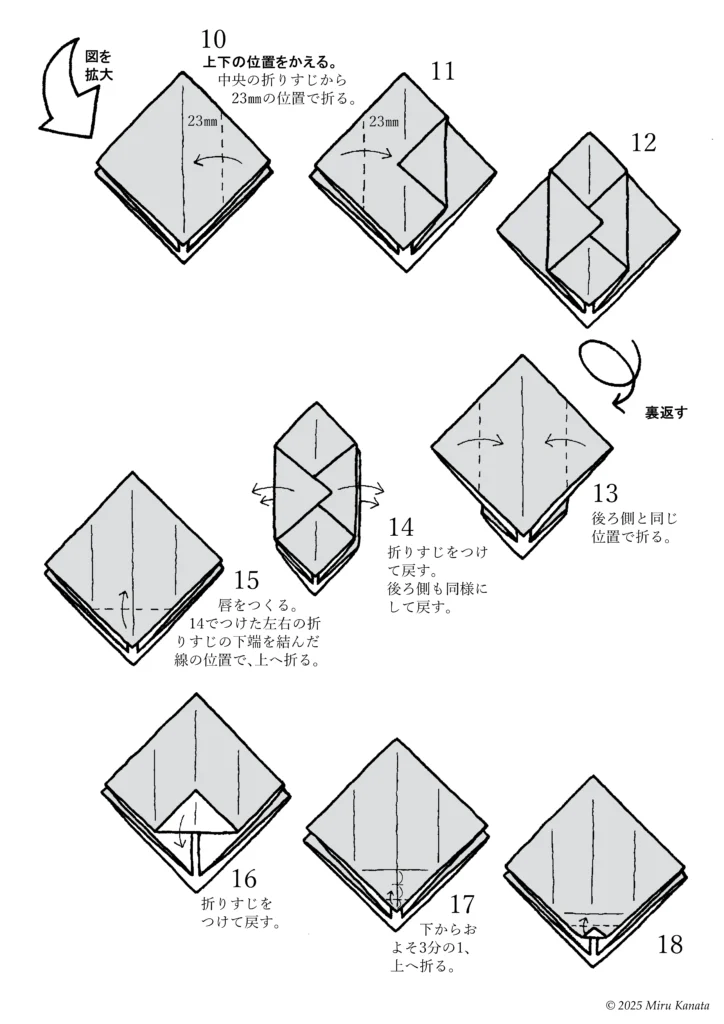
10 Change the top and bottom positions.
Fold at a position 23 mm from the center crease.
11
12
{Flip}
13 Fold in the same position as the back side.
14 Make a crease and return it to its original position.
Return the back side to its original position.
15 Make a lip.
Fold up along the line connecting the bottom ends of the left and right creases made in 14.
16 Make a crease and return it to its original position.
17 Fold about one-third of the way up from the bottom.
18
English
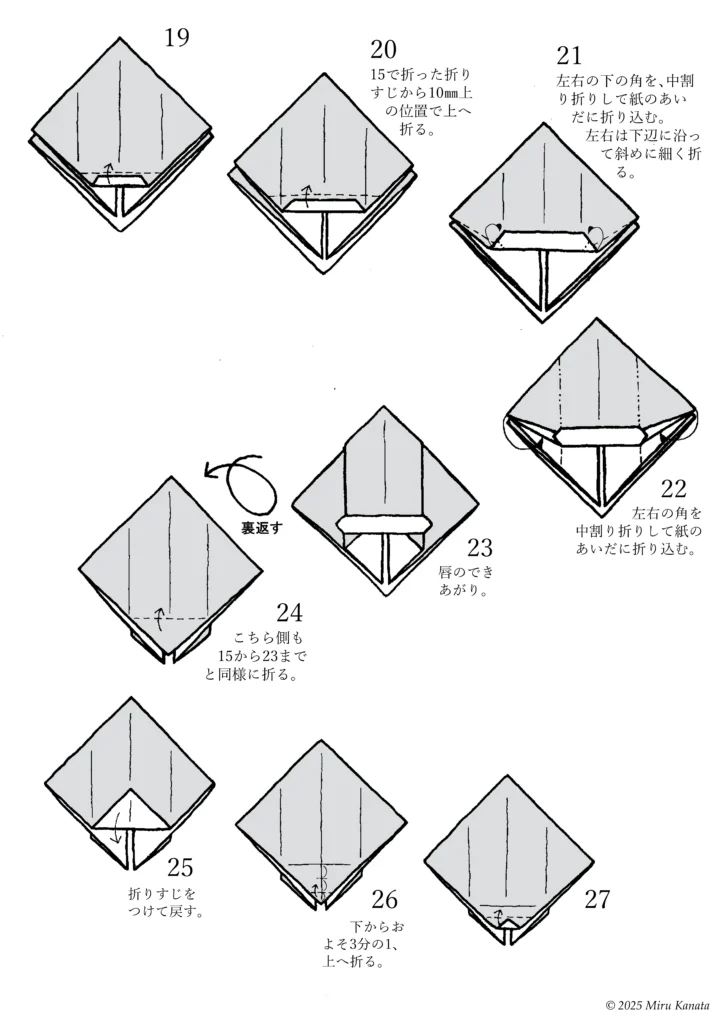
19
20 Fold upwards 10mm from the crease made in 15.
21 Fold the bottom left and right corners in half and fold them between the sheets of paper. Fold
the left and right corners diagonally along the bottom edge to form a thin fold.
22 Fold the left and right corners in half and fold them between the sheets of paper.
23 The lip is complete.
{Flip}
24 Fold this side in the same way as steps 15 to 23.
25 Make a crease and turn it back.
26 Fold about one-third of the way up from the bottom.
27

English
28
29 Fold upwards 10mm from the crease made in step 24.
30 Fold the bottom left and right corners in half and fold them between the pieces of paper. Fold
the left and right corners diagonally along the bottom edge to create a thin fold.
31 Fold the left and right corners in half and fold them between the pieces of paper.
32 Make the leaf.
Fold the pieces of paper in between in half and expose them diagonally.
33 Fold diagonally upwards.
34 The leaf is finished.
Make the vines on top.
Fold the top peak down, then back up.
35
{Flip}
36 The first Weepinbell is complete.
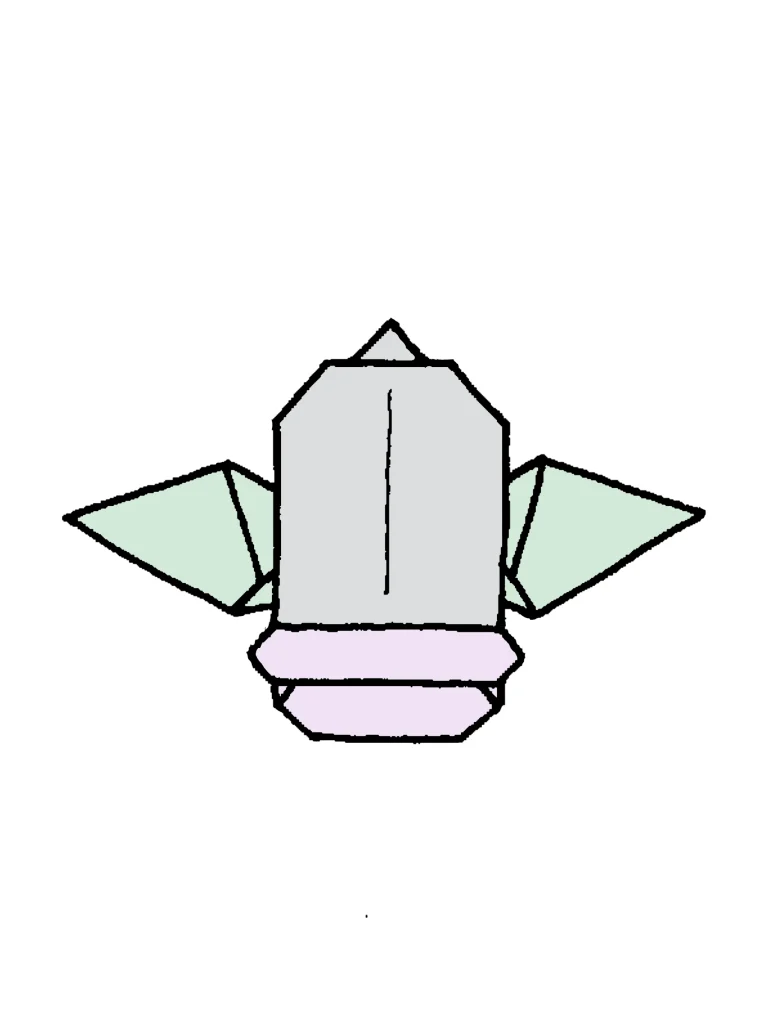
ウツドン 2号改訂版
■黄色の紙で折る。
途中で、唇のために、4分の1に切った薄いピンク色の紙を2片加えて、折る。
さらに、はっぱのために、9分の1に切った黄緑色の紙を2片加えて、折る。
English Commentary
Weepinbell No. 2 revised edition
1 Fold the bottom corner to meet the top corner.
2 Make a crease and return it to its original position.
3 Rotate the paper 90 degrees, fold the other pair of corners together, make a crease and return it to its original position.
{Flip}
4 Rotate the paper 45 degrees and fold the bottom edge to meet the top edge.
5 Make a crease and return it to its original position.
6 Rotate the paper 90 degrees and fold the other pair of edges together.
7 Hold the crease ▲ made in step 6 with your fingers and fold it gently from both sides.
8 Let it naturally fold along the creases to form the shape of 9.
9

English
10 Prepare a light pink piece of paper for the lips, separate from step 9, and mark halfway along each side.
11 Cut it apart.
12 Use only two pieces.
13 Insert it in front of the paper behind step 9.
14
{Flip}
15 Insert it in front of the paper behind step 9.
16
{Enlarge the image}
17 Change the top and bottom positions.
Fold it 23 mm from the center crease.
18
19
English
{Flip}
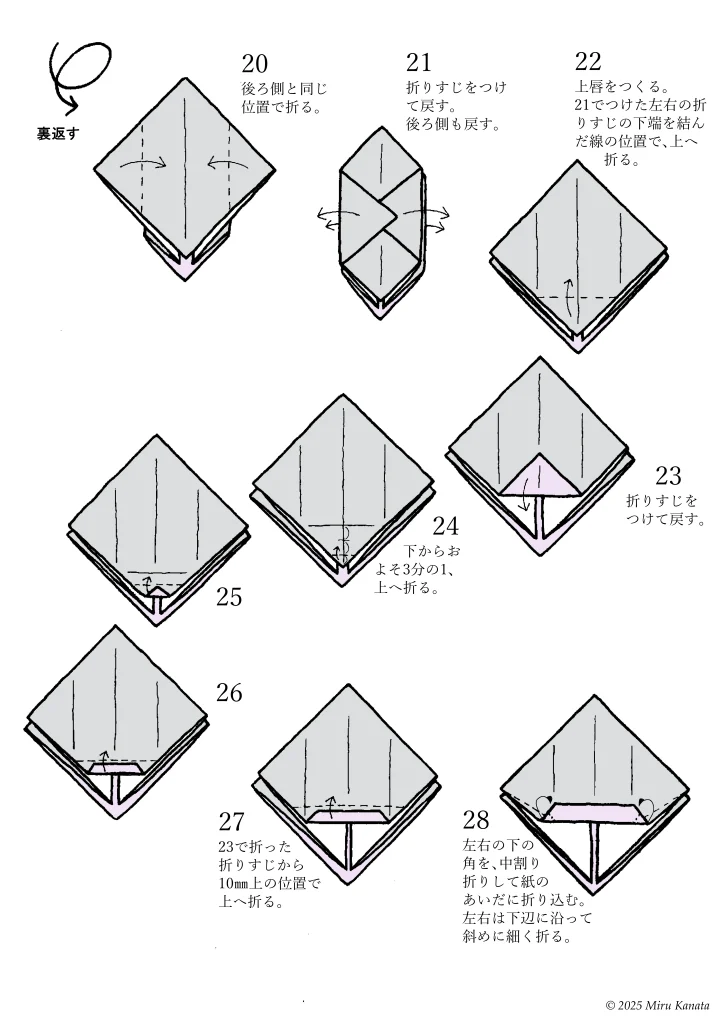
20 Fold in the same position as the back.
21 Make a crease and turn back. Turn back the back as well.
22 Make the upper lip. Fold up along the line connecting the bottom ends of the left and right creases made in 21.
23 Make a crease and turn back.
24 Fold up about one-third from the bottom.
25
26
27 Fold up 10 mm above the crease made in 23.
28 Fold the bottom left and right corners in half and fold them between the pieces of paper.
Fold the left and right sides diagonally along the bottom edge.
English
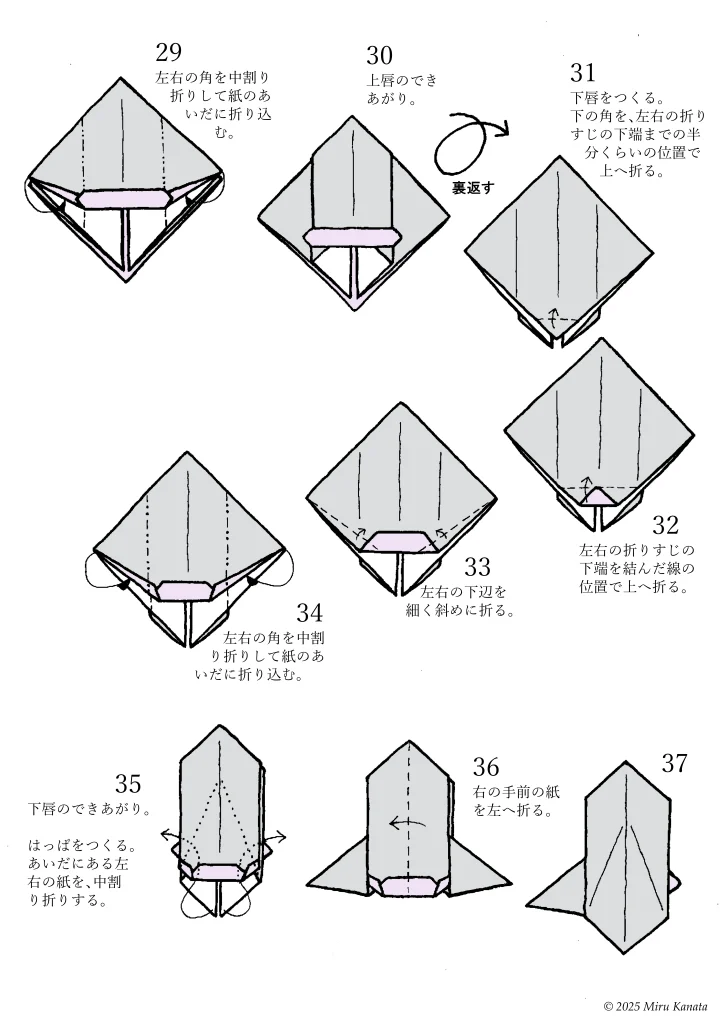
29 Fold the left and right corners in half and fold them between the pieces of paper.
30 The upper lip is complete.
{Flip}
31 Make the lower lip.
Fold the bottom corner up about halfway down to the bottom of the left and right fold creases.
32 Fold it up to the line connecting the bottom of the left and right fold creases.
33 Make a thin diagonal fold at the bottom of the left and right edges.
34 Fold the left and right corners in half and fold them between the pieces of paper.
35 The lower lip is complete.
Make a leaf. Fold the left and right pieces of paper in between in half.
36 Fold the front right piece of paper to the left.
37
English
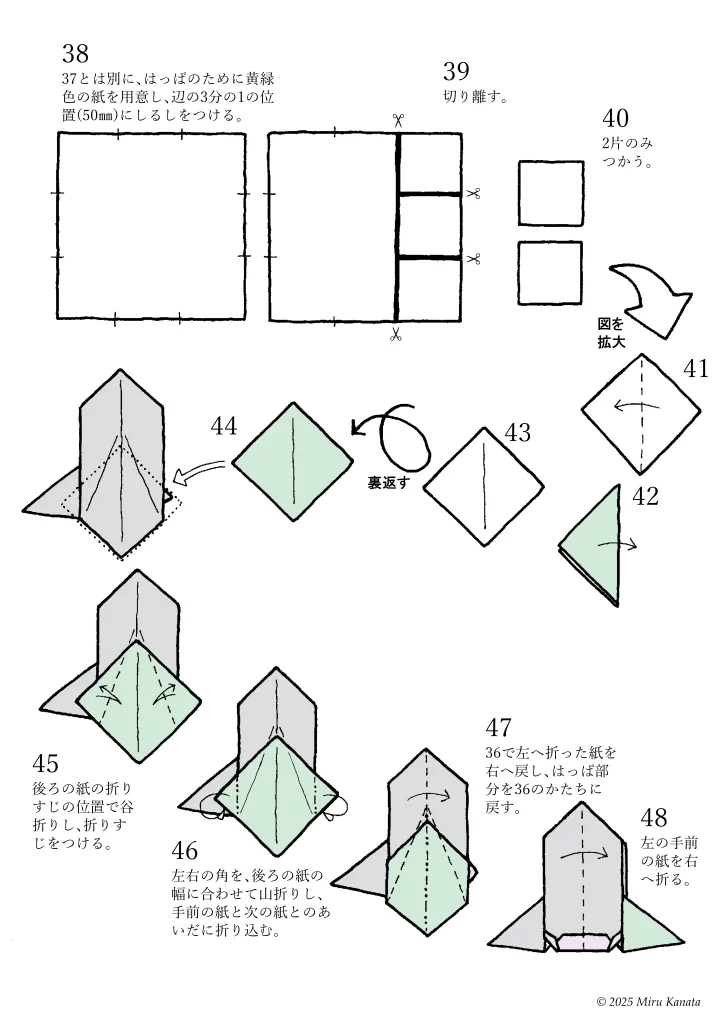
38 Prepare a piece of yellow-green paper separate from 37 for the leaf and mark one-third of the way along the edge (50 mm).
39 Cut it off.
40 Use only two pieces.
{Enlarge}
41
42
43
{Flip}
44
45 Make a valley fold along the crease of the back paper and make a crease.
46 Make mountain folds on the left and right corners to match the width of the back paper, then fold them in between the front paper and the next paper.
47 Bring the paper folded to the left in 36 back to the right, and return the leaf part to the shape of 36.
48 Fold the left front paper to the right.
English
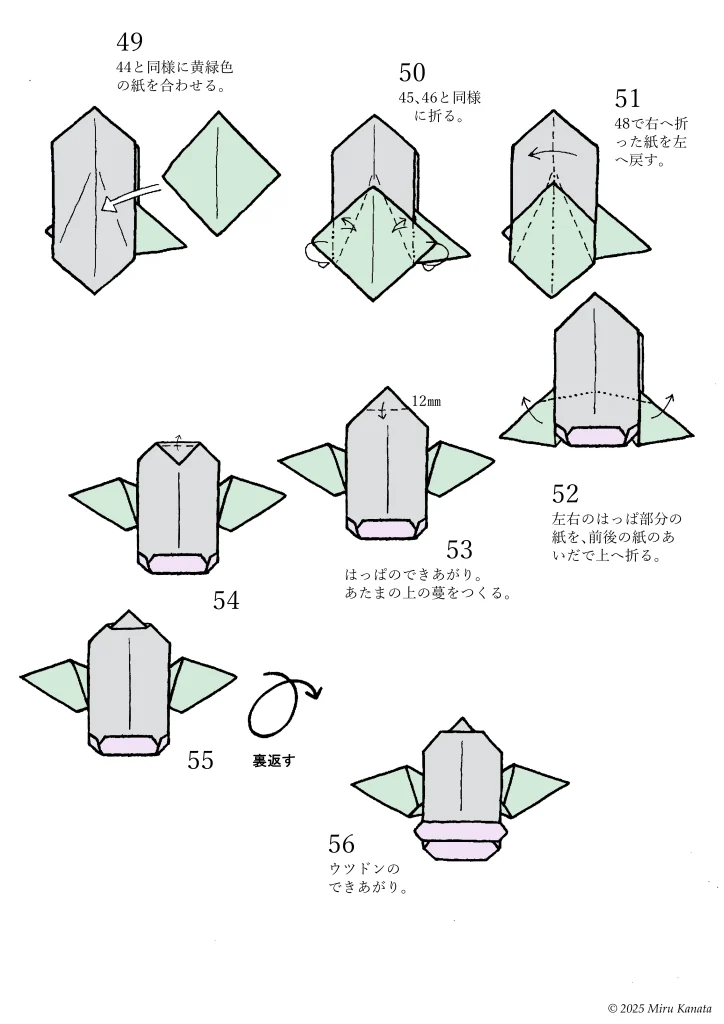
49 Place the yellow-green paper in the same way as 44.
50 Fold in the same way as 45 and 46.
51 Return the paper folded to the right in 48 to the left.
52 Fold the paper on the left and right leaf parts up between the front and back pieces of paper.
53 The leaf is finished.
Make the vines on the top.
54
55
{Flip}
56 The revised version of Weepinbell No. 2 is finished.
参考・2000年の本に掲載した折り図
みるかなた本棚>『ポケットモンスターおりがみコレクション』>ポケモンおりがみ一覧表>0070 ウツドン


◇ ◇ ◇