
みるかなた本棚>Nice Origami素敵折紙>p070ウツドン
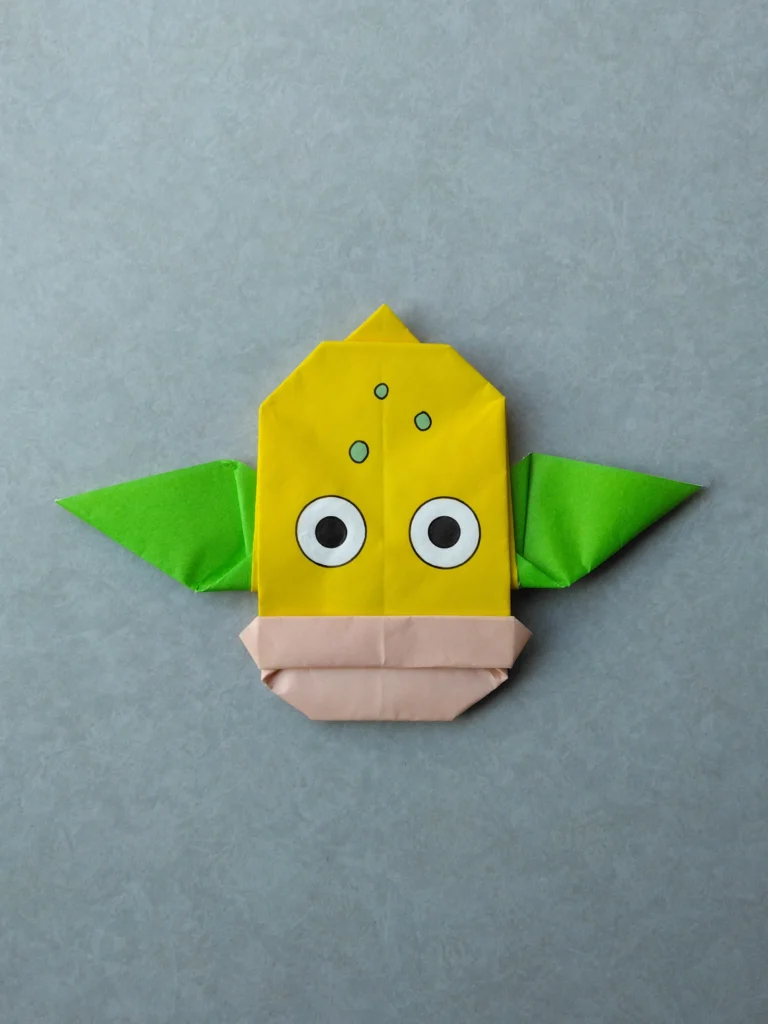
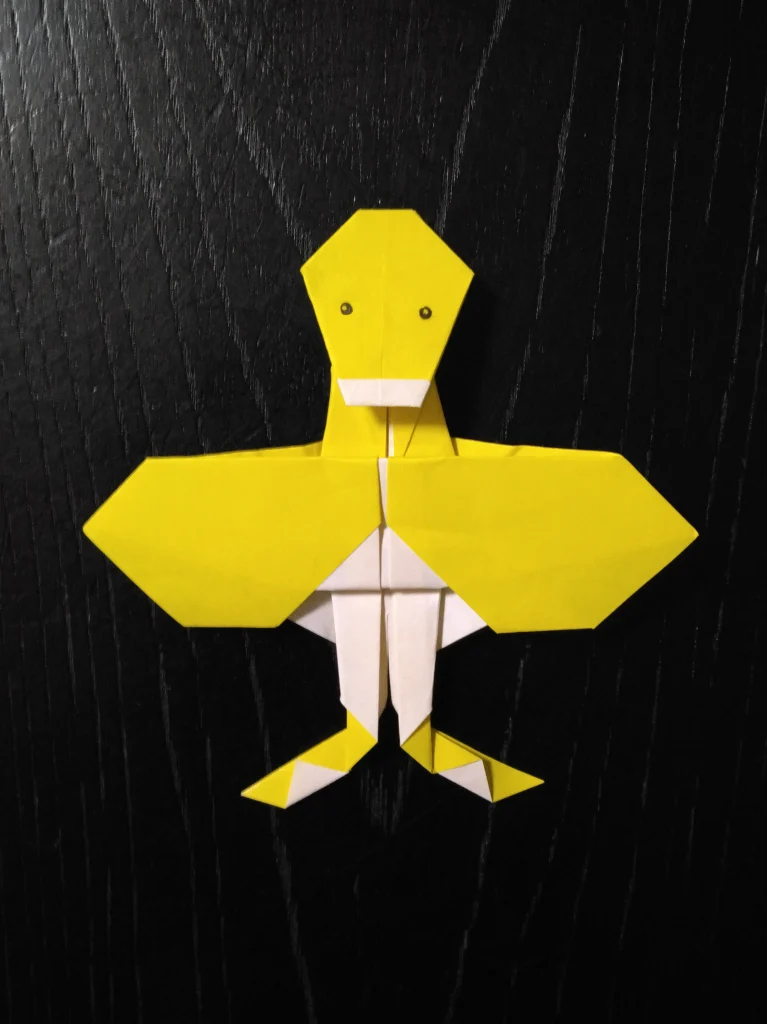
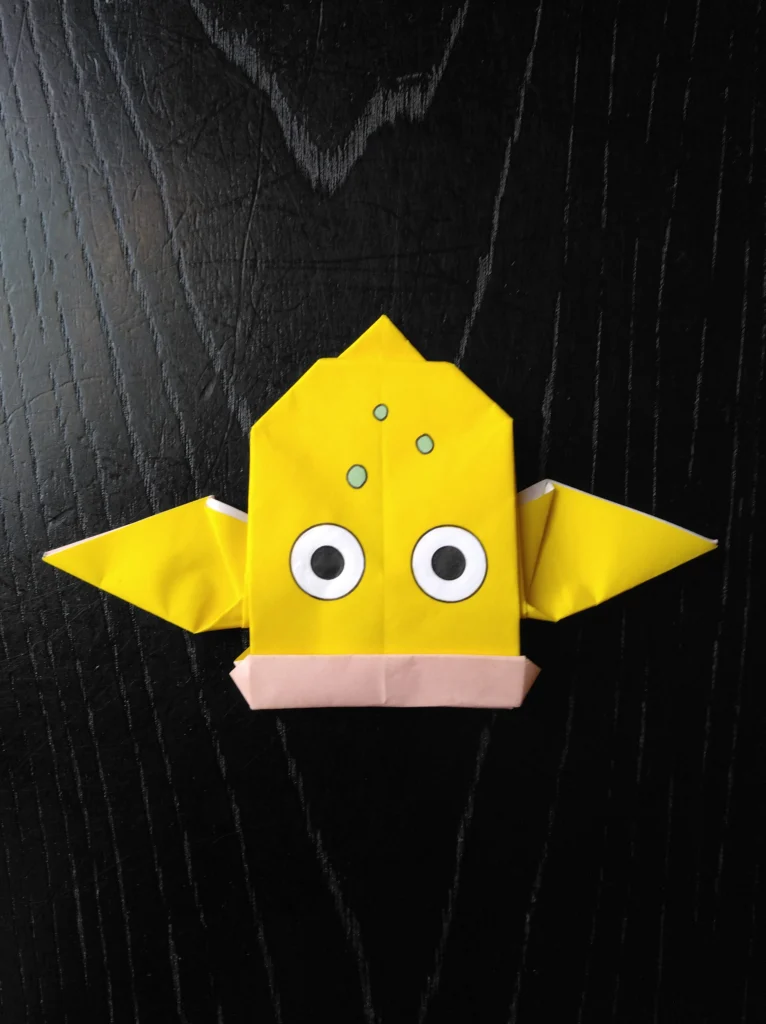
0070 ウツドン 2号
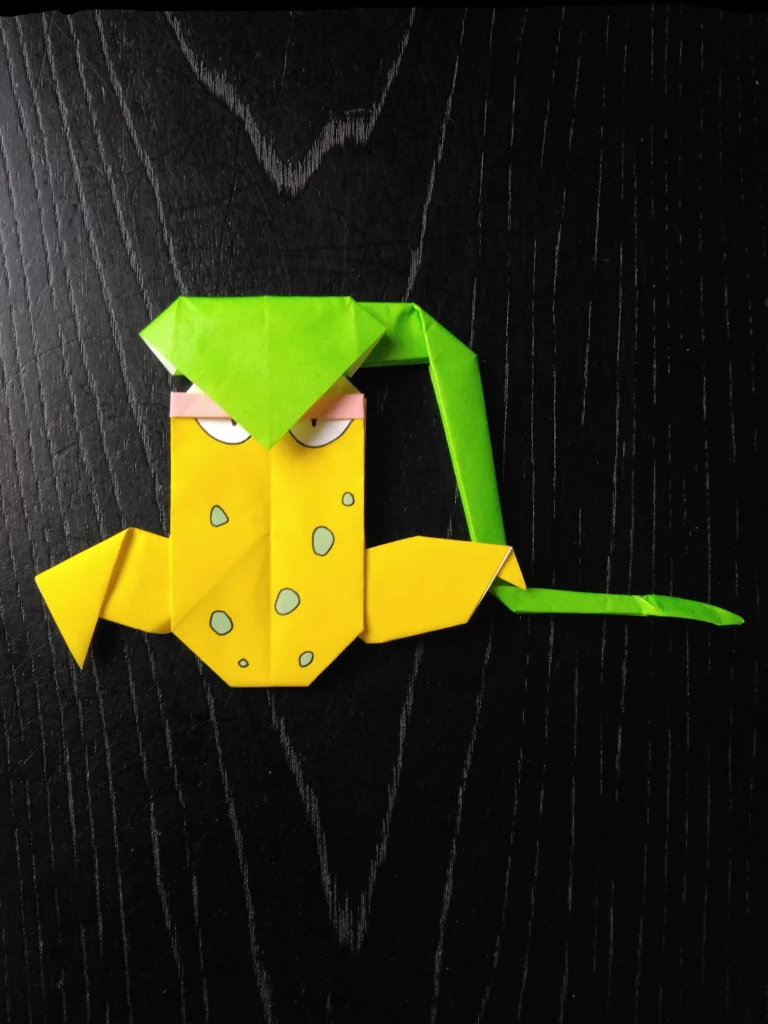
2025年8月に制作したウツドンの2号です。
構造は以前のものと同じですが、後ろ側の唇部分を下唇として、あごに見立てることにしました。
これだけで、ずいぶん雰囲気がかわりました。
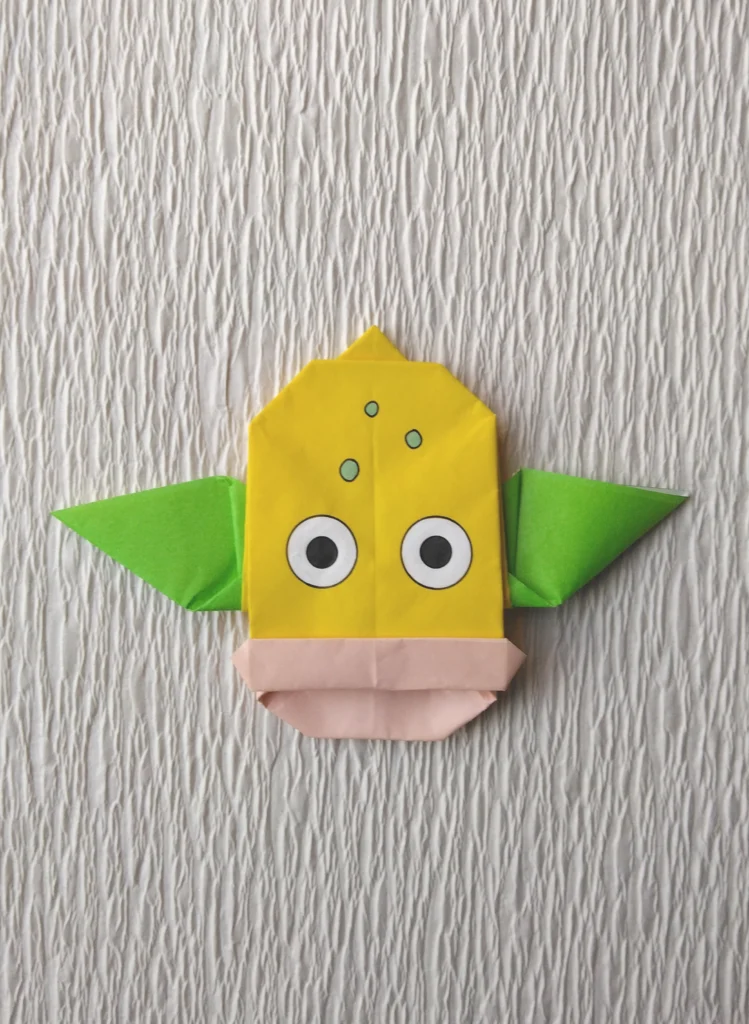
以前のウツドンは、ゲームフリークのご希望で、唇の色をかえるため2枚重ねで折っていました。
紙の厚みがあるので、はっぱの緑色を加えるのはちょっと困難な状況でした。
今回、2枚重ねでなく、別色を差し加えるかたちで、唇とはっぱとの2か所の色替えを実現しました。
長年の気がかりが解消できました。
◇ここにご紹介するものは個人的に制作したファン創作です。
◇著作権者の許諾を受けていない未監修のものです。
Evolution
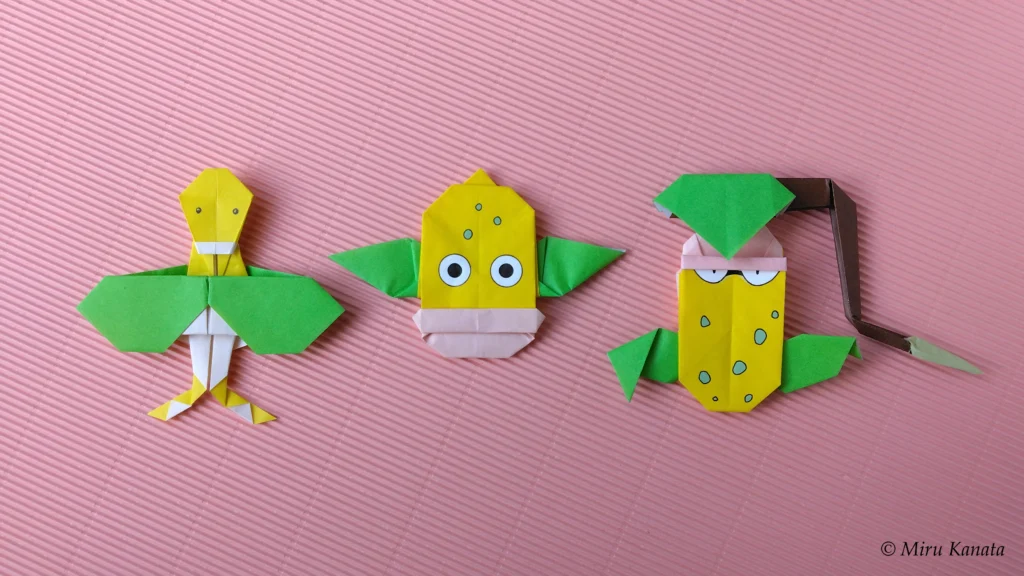
つくり方の折り図
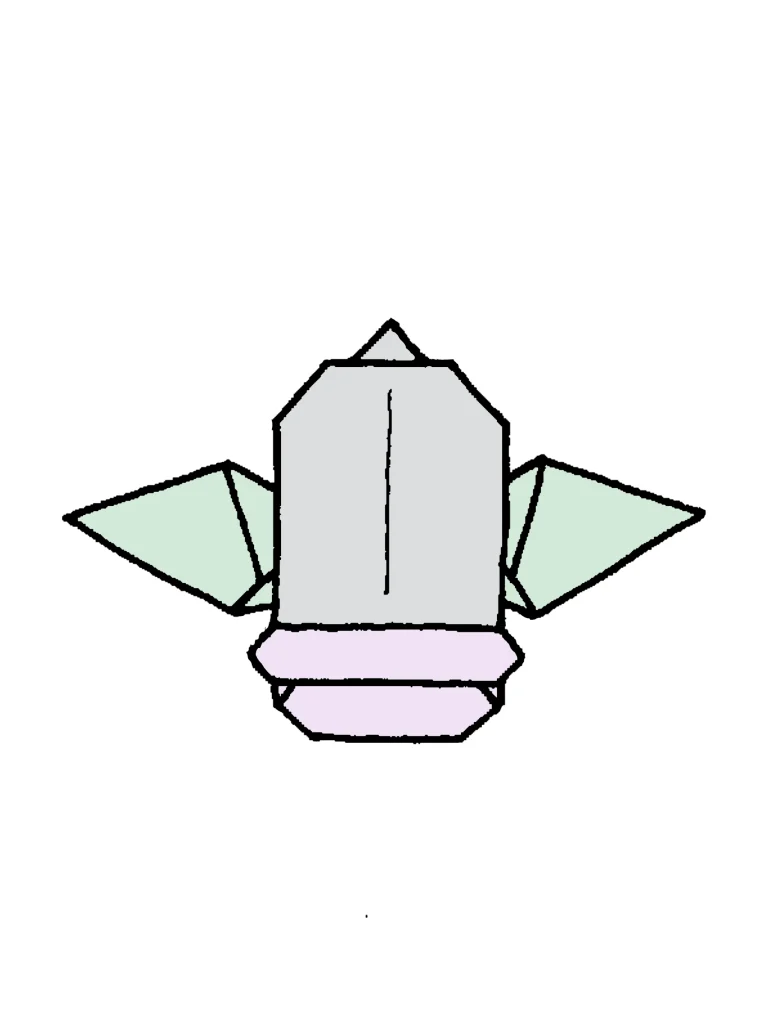
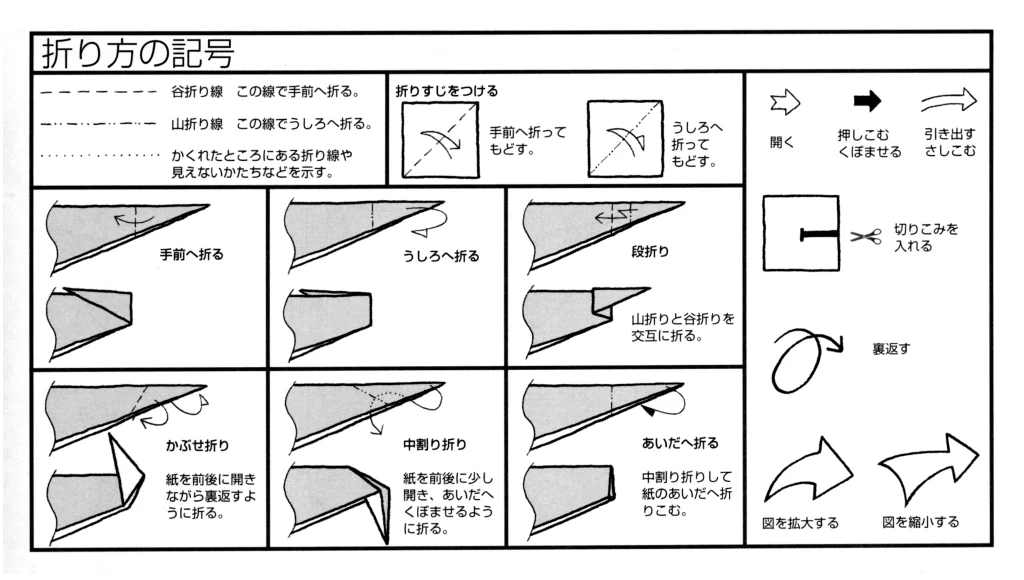
今回制作した折り図
◇折り図
1 ウツドン
■黄色の紙で折る。
途中で、唇のために、4分の1に切った薄いピンク色の紙を2片加えて、折る。
さらに、はっぱのために、9分の1に切った黄緑色の紙を2片加えて、折る。
1 ウツドン 2号
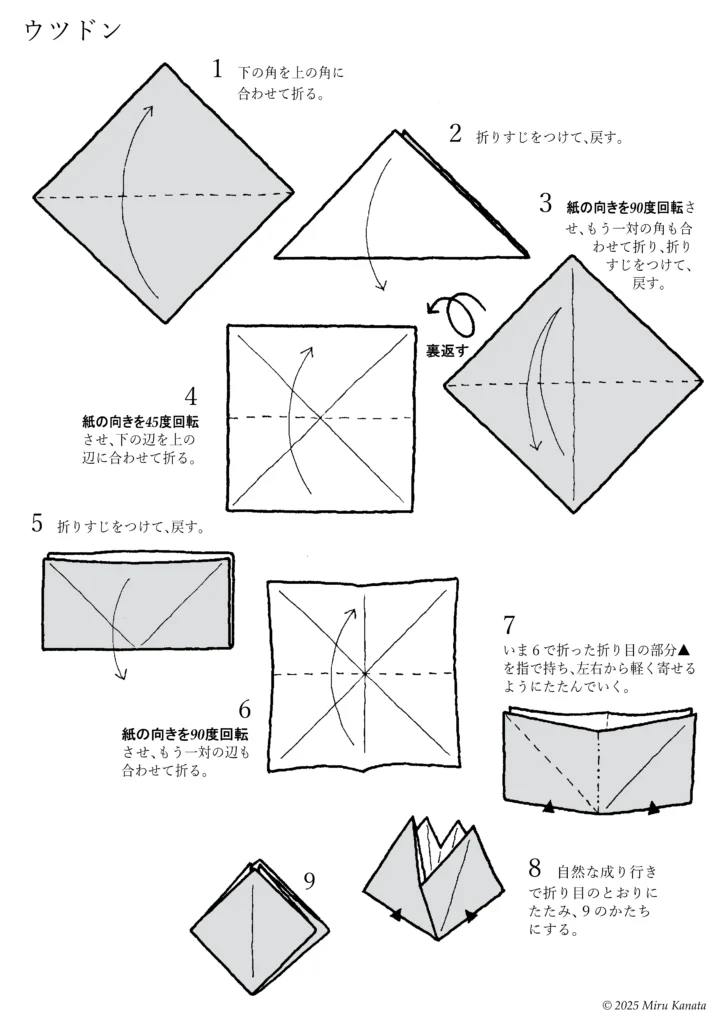
English Commentary
Weepinbell No. 2 revised edition
1 Fold the bottom corner to meet the top corner.
2 Make a crease and return it to its original position.
3 Rotate the paper 90 degrees, fold the other pair of corners together, make a crease and return it to its original position.
{Flip}
4 Rotate the paper 45 degrees and fold the bottom edge to meet the top edge.
5 Make a crease and return it to its original position.
6 Rotate the paper 90 degrees and fold the other pair of edges together.
7 Hold the crease ▲ made in step 6 with your fingers and fold it gently from both sides.
8 Let it naturally fold along the creases to form the shape of 9.
9
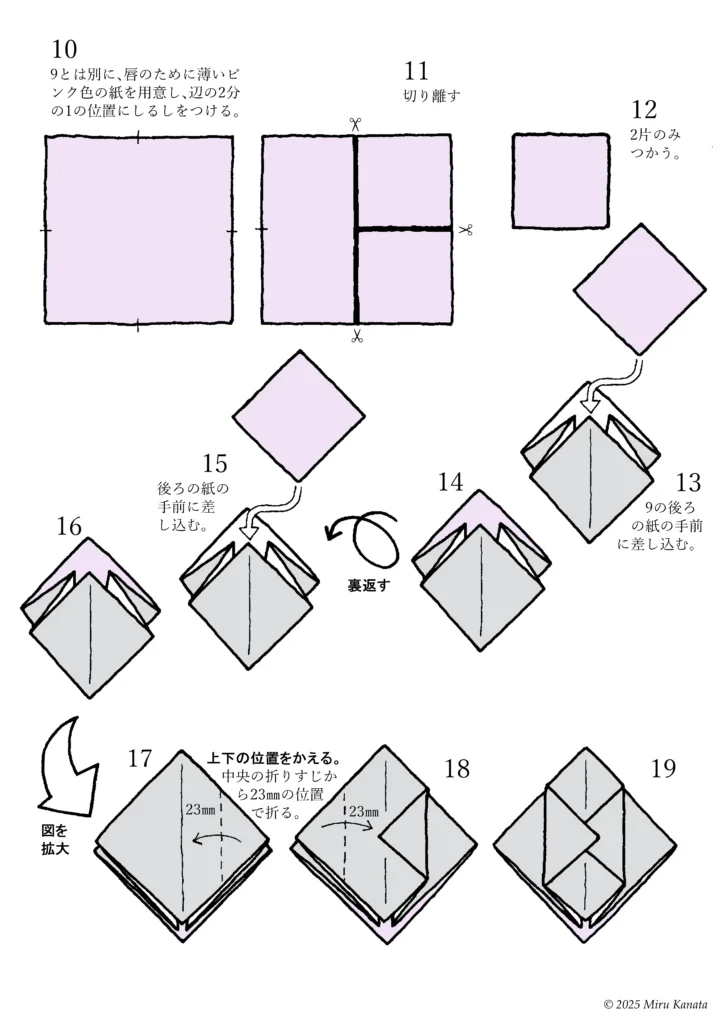
English Commentary
10 Prepare a light pink piece of paper for the lips, separate from step 9, and mark halfway along each side.
11 Cut it apart.
12 Use only two pieces.
13 Insert it in front of the paper behind step 9.
14
{Flip}
15 Insert it in front of the paper behind step 9.
16
{Enlarge the image}
17 Change the top and bottom positions.
Fold it 23 mm from the center crease.
18
19
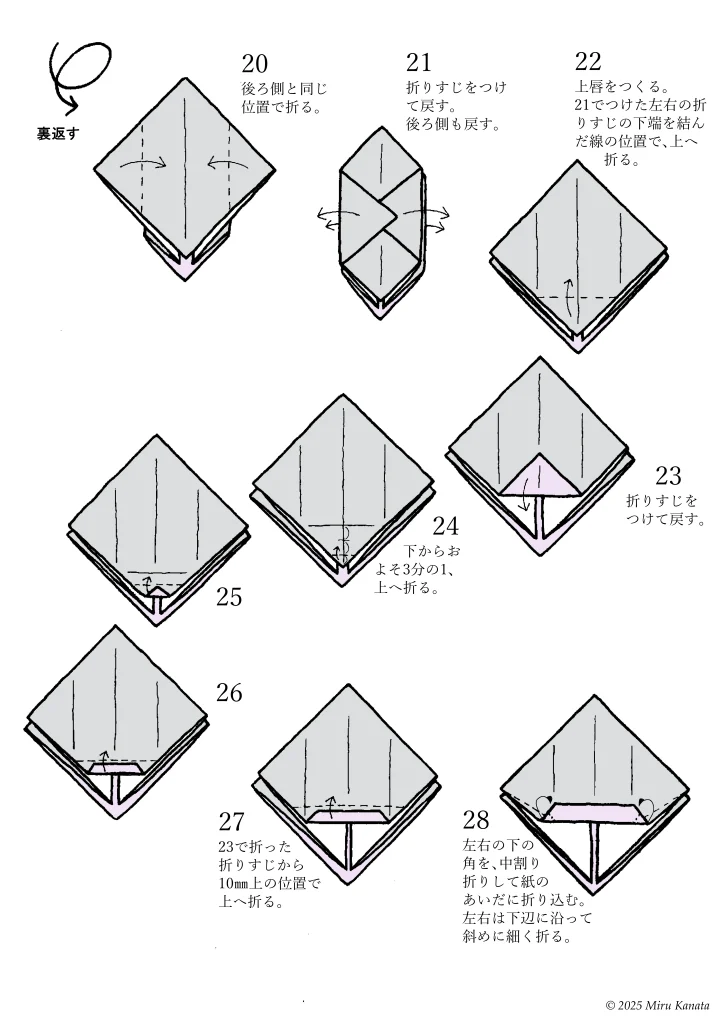
English Commentary
{Flip}
20 Fold in the same position as the back.
21 Make a crease and turn back. Turn back the back as well.
22 Make the upper lip. Fold up along the line connecting the bottom ends of the left and right creases made in 21.
23 Make a crease and turn back.
24 Fold up about one-third from the bottom.
25
26
27 Fold up 10 mm above the crease made in 23.
28 Fold the bottom left and right corners in half and fold them between the pieces of paper.
Fold the left and right sides diagonally along the bottom edge.
English Commentary
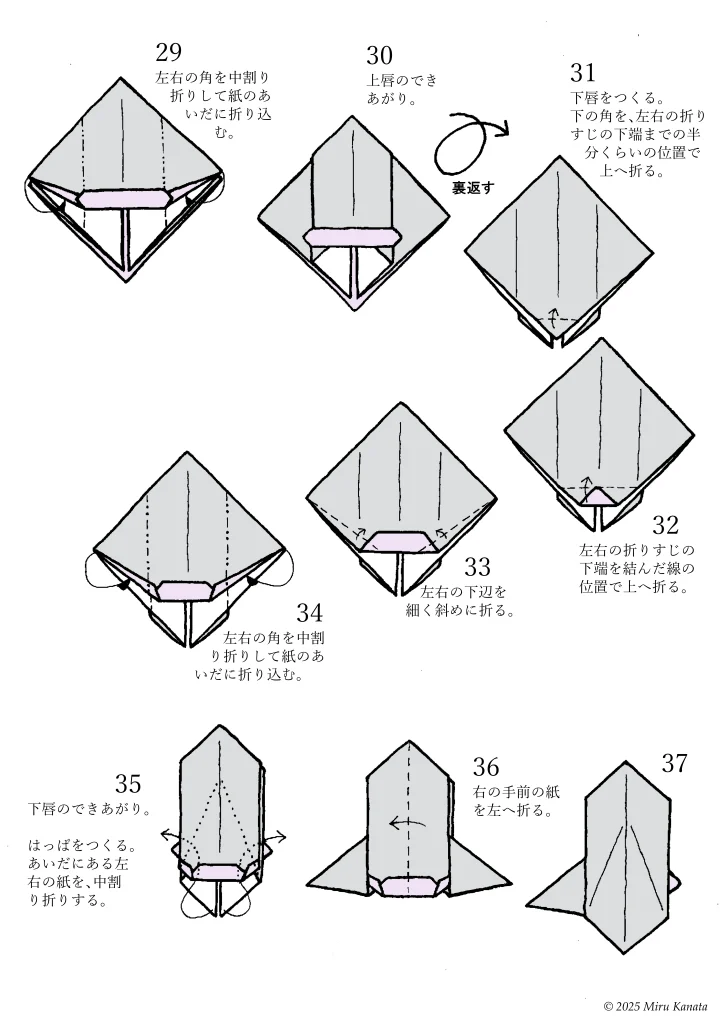
29 Fold the left and right corners in half and fold them between the pieces of paper.
30 The upper lip is complete.
{Flip}
31 Make the lower lip.
Fold the bottom corner up about halfway down to the bottom of the left and right fold creases.
32 Fold it up to the line connecting the bottom of the left and right fold creases.
33 Make a thin diagonal fold at the bottom of the left and right edges.
34 Fold the left and right corners in half and fold them between the pieces of paper.
35 The lower lip is complete.
Make a leaf. Fold the left and right pieces of paper in between in half.
36 Fold the front right piece of paper to the left.
37
English Commentary
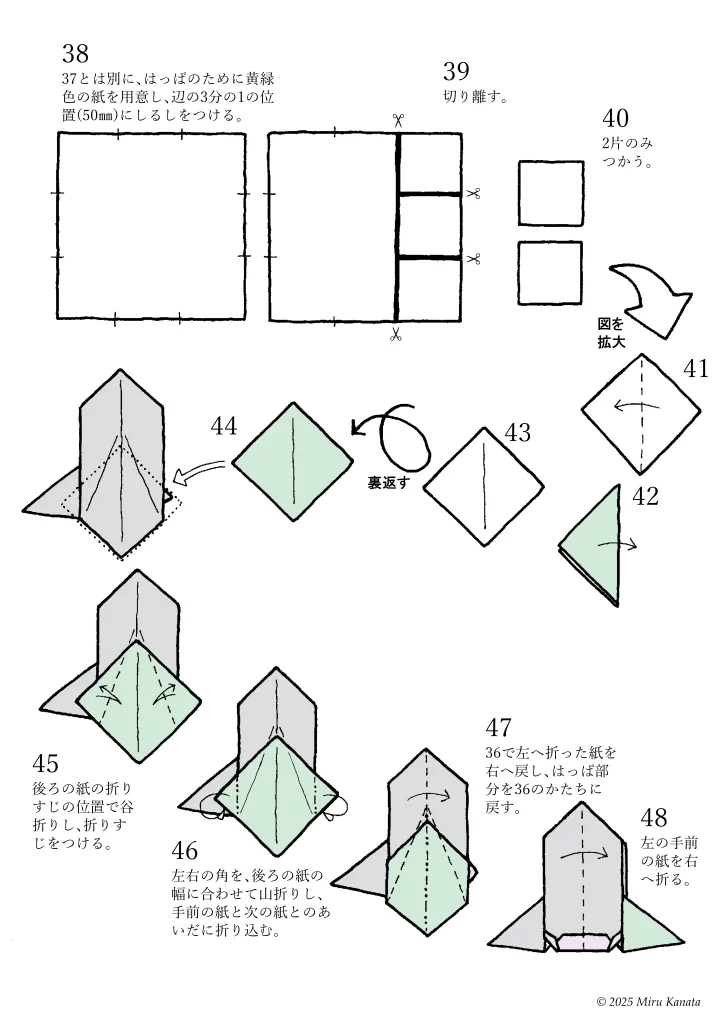
38 Prepare a piece of yellow-green paper separate from 37 for the leaf and mark one-third of the way along the edge (50 mm).
39 Cut it off.
40 Use only two pieces.
{Enlarge}
41
42
43
{Flip}
44
45 Make a valley fold along the crease of the back paper and make a crease.
46 Make mountain folds on the left and right corners to match the width of the back paper, then fold them in between the front paper and the next paper.
47 Bring the paper folded to the left in 36 back to the right, and return the leaf part to the shape of 36.
48 Fold the left front paper to the right.
English Commentary
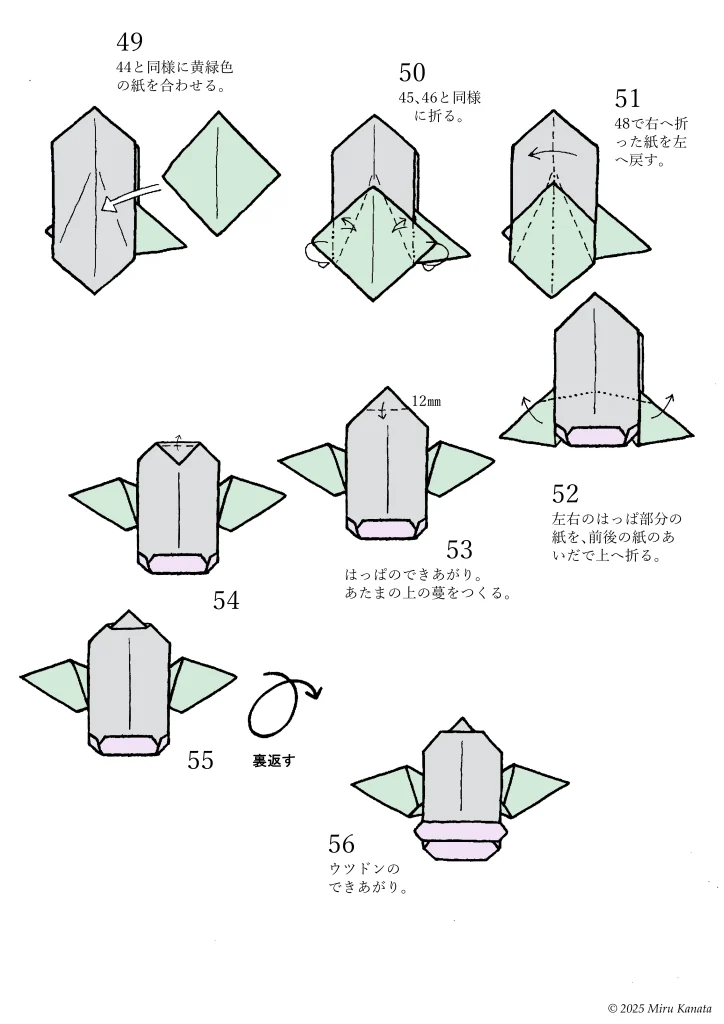
49 Place the yellow-green paper in the same way as 44.
50 Fold in the same way as 45 and 46.
51 Return the paper folded to the right in 48 to the left.
52 Fold the paper on the left and right leaf parts up between the front and back pieces of paper.
53 The leaf is finished.
Make the vines on the top.
54
55
{Flip}
56 The revised version of Weepinbell No. 2 is finished.
みるかなた本棚>Nice Origami素敵折紙>p070 ウツドン
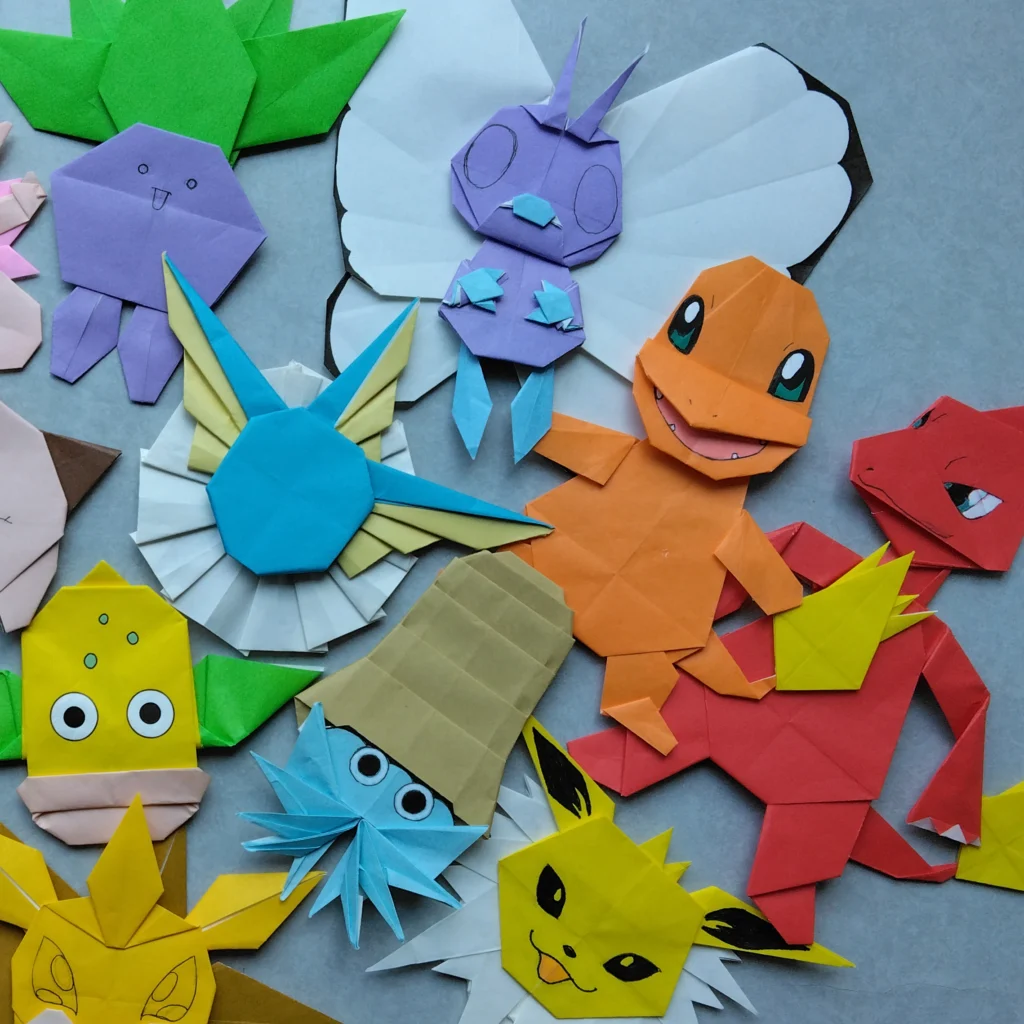
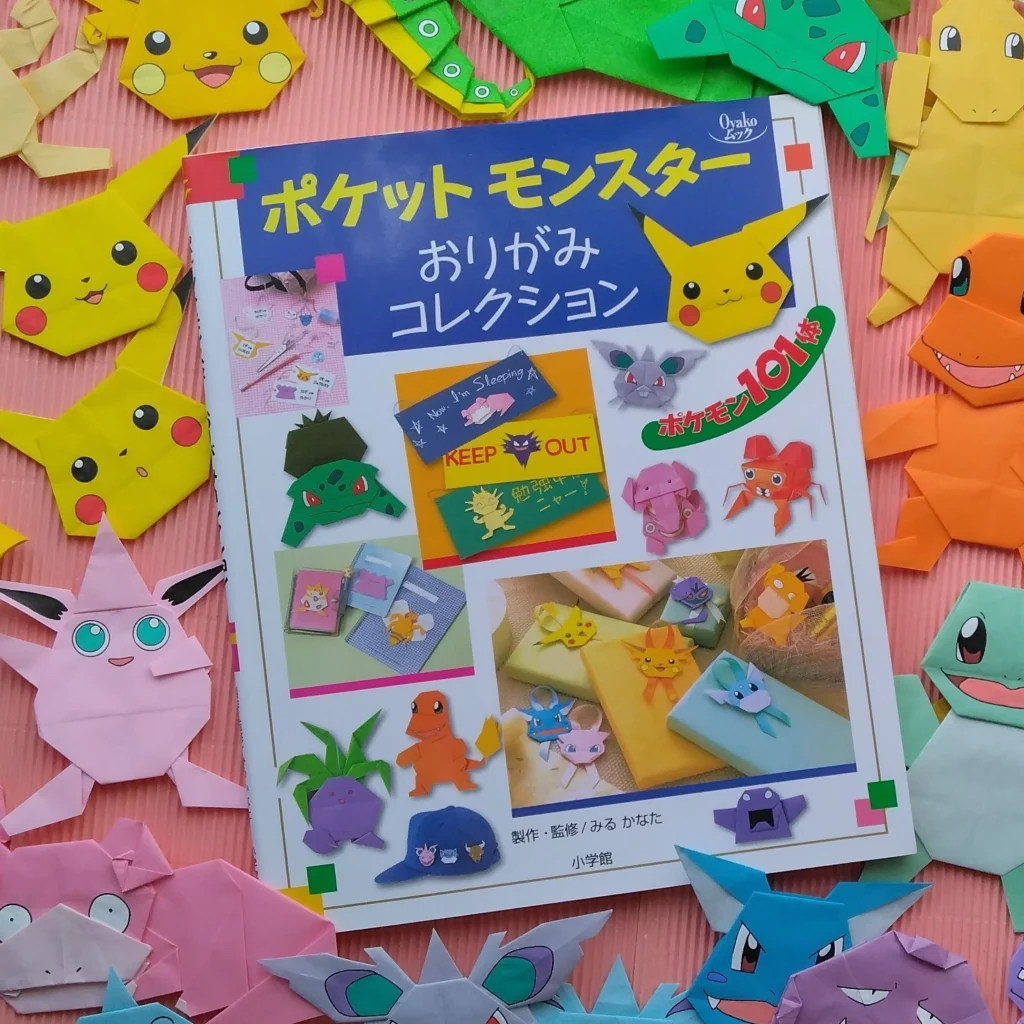
◆ポケットモンスターおりがみコレクション
◇ ◇ ◇