
みるかなた本棚>『ポケットモンスターおりがみコレクション』>ポケモンおりがみ一覧表>0094ゲンガー
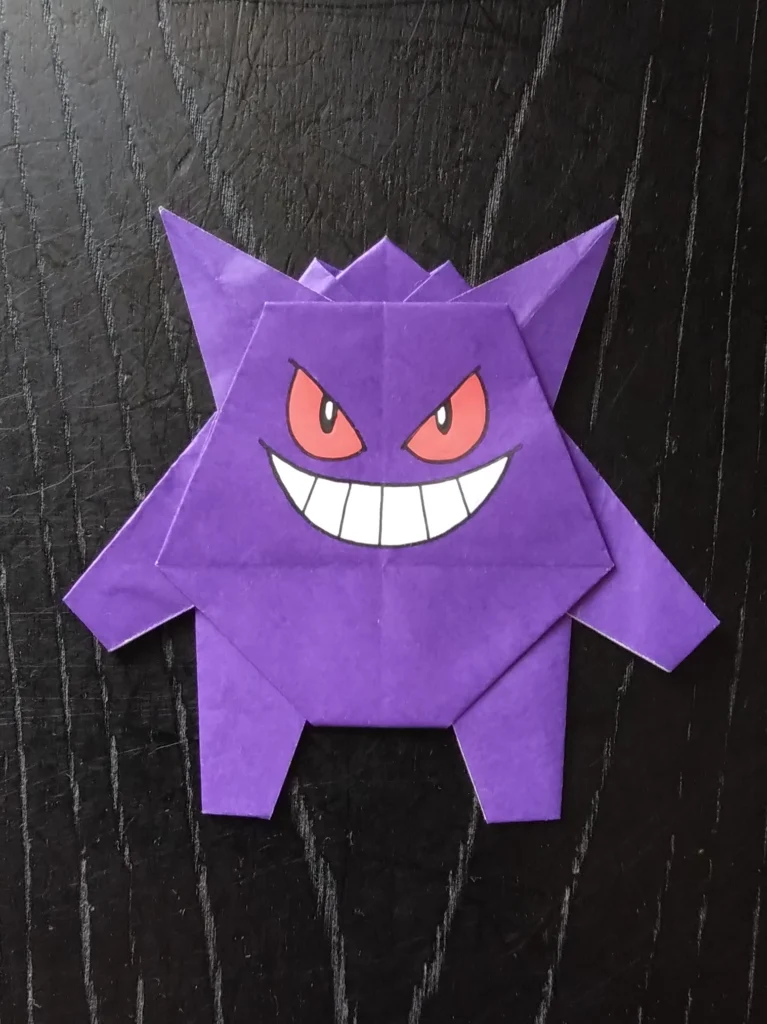
0094 ゲンガー
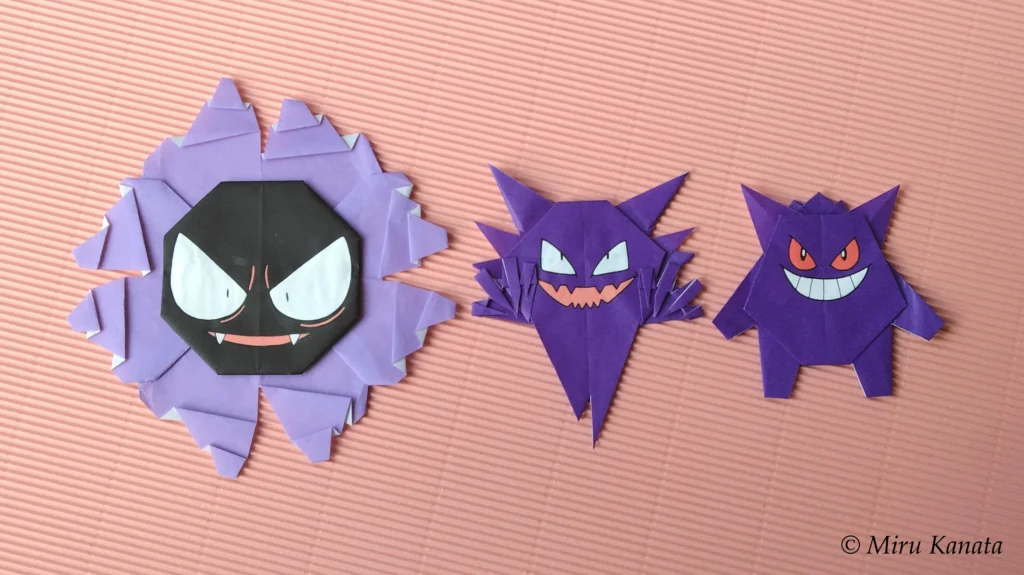
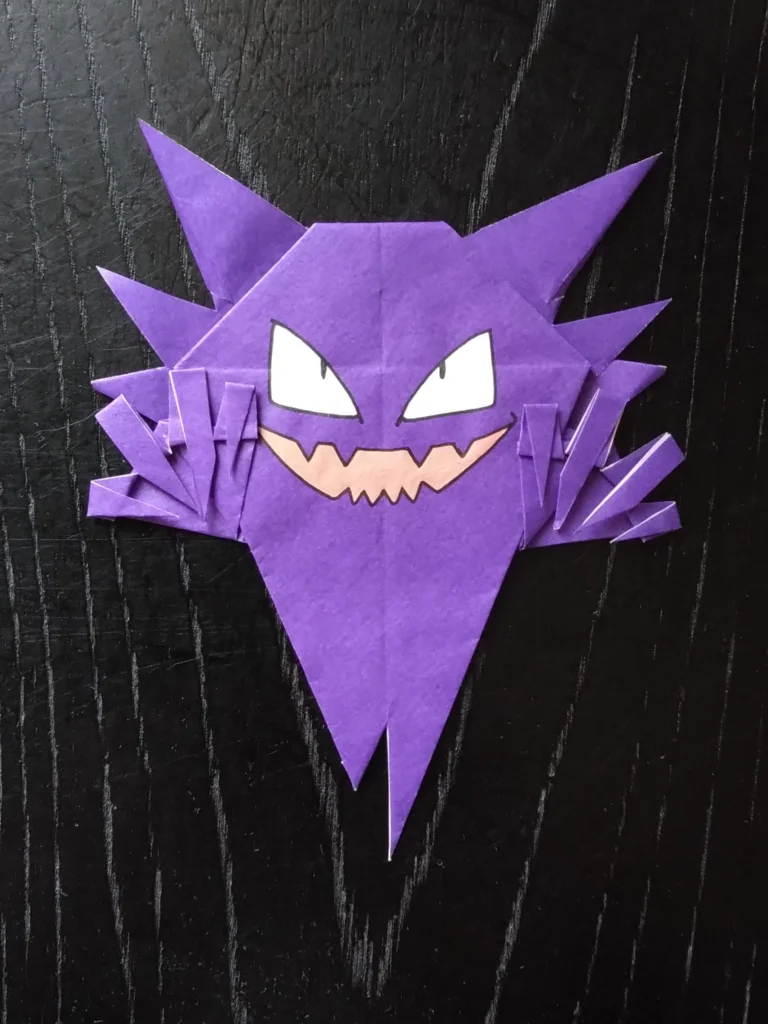
はじめ、全体のかたちをシンプルにとらえていたため、あたまの上は直線でした。
そしたら、ゲームフリークのチェックで「おでこの上のギザギザも表現してください」と言われてしまいました。
それで、ギザギザをつくって、2回目のチェックでOKになりました。
ゲンガーの、堂々として、ふてぶてしい感じがだせたと思います。
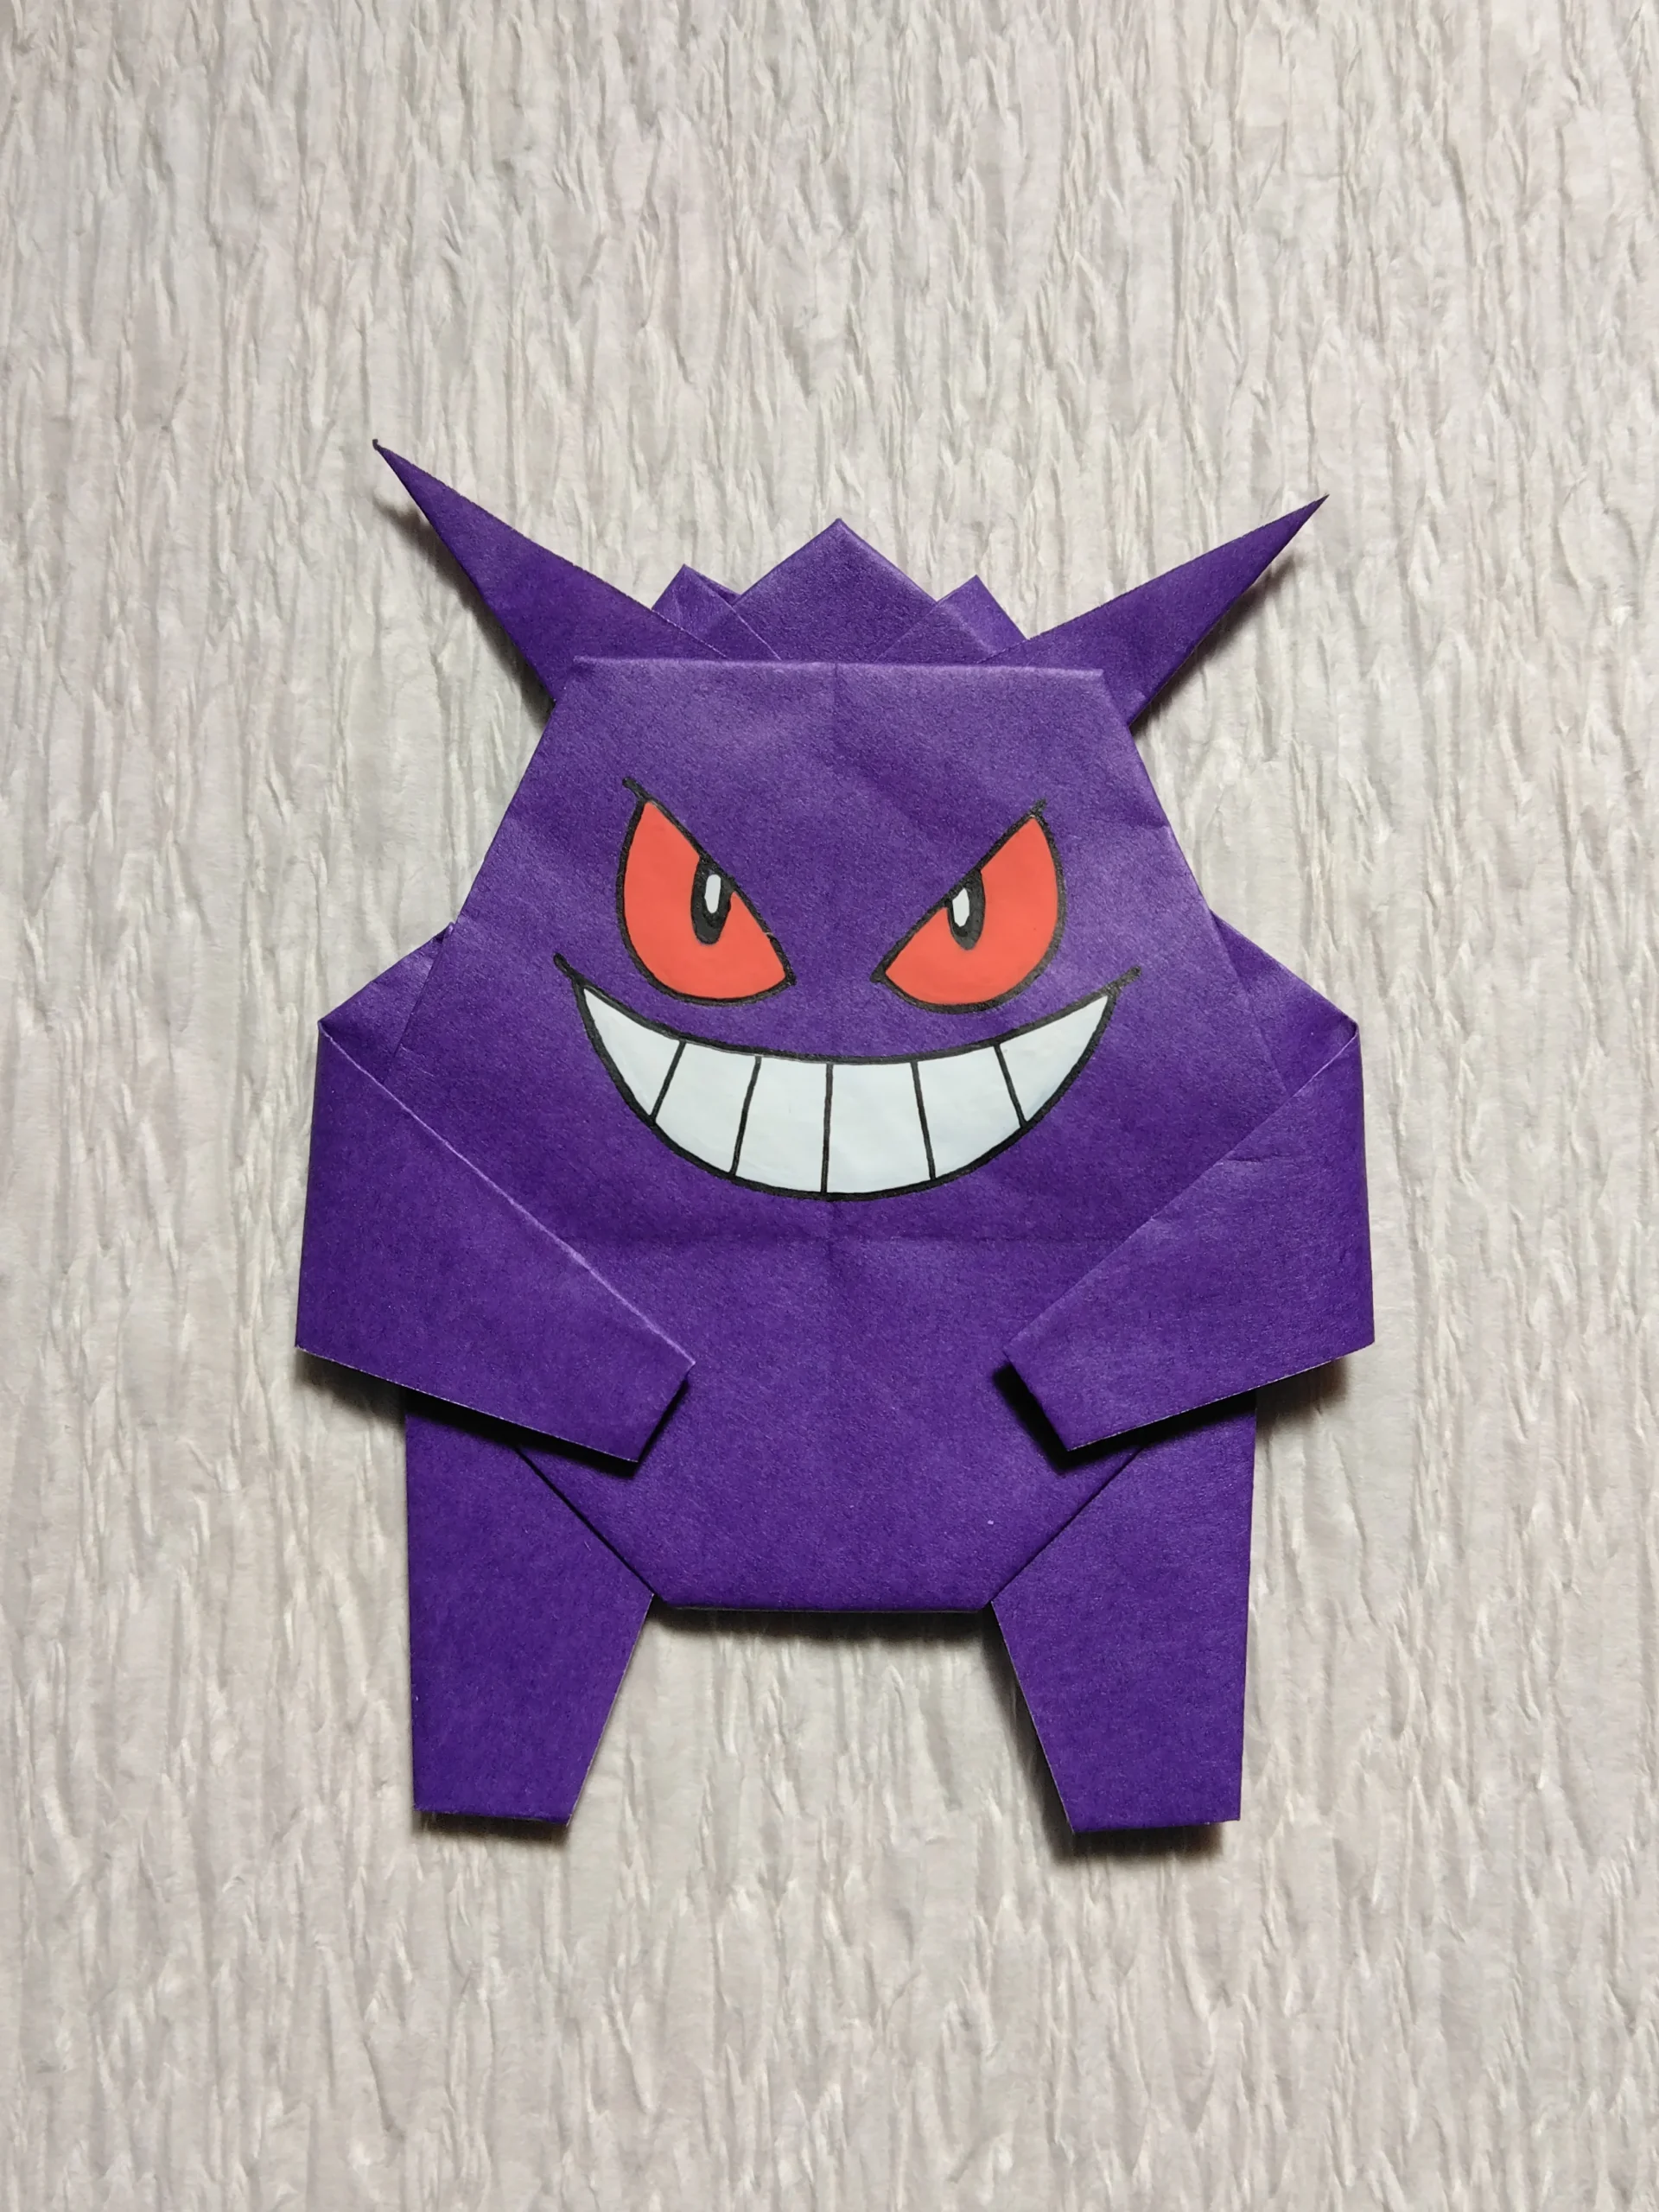
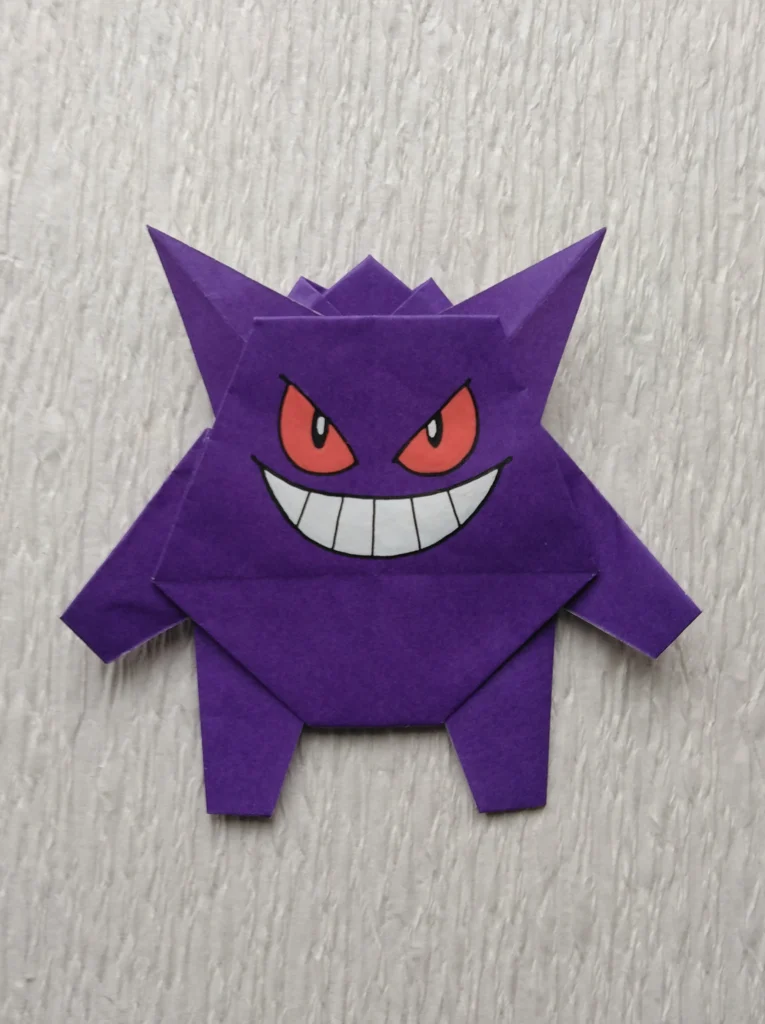
かつてのゲンガーの、あたまの上の左右のとげが細いことが、ずっと気になっていましたので、少し直しました。
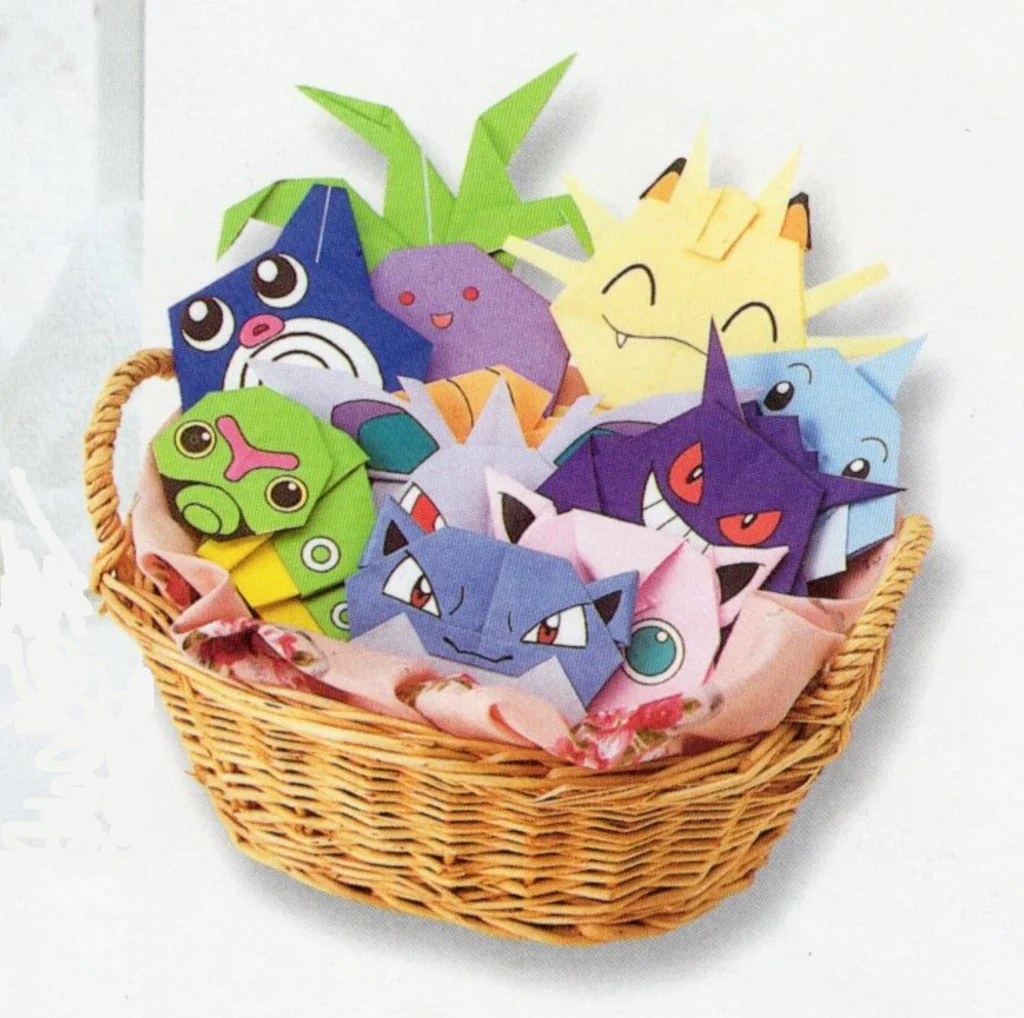
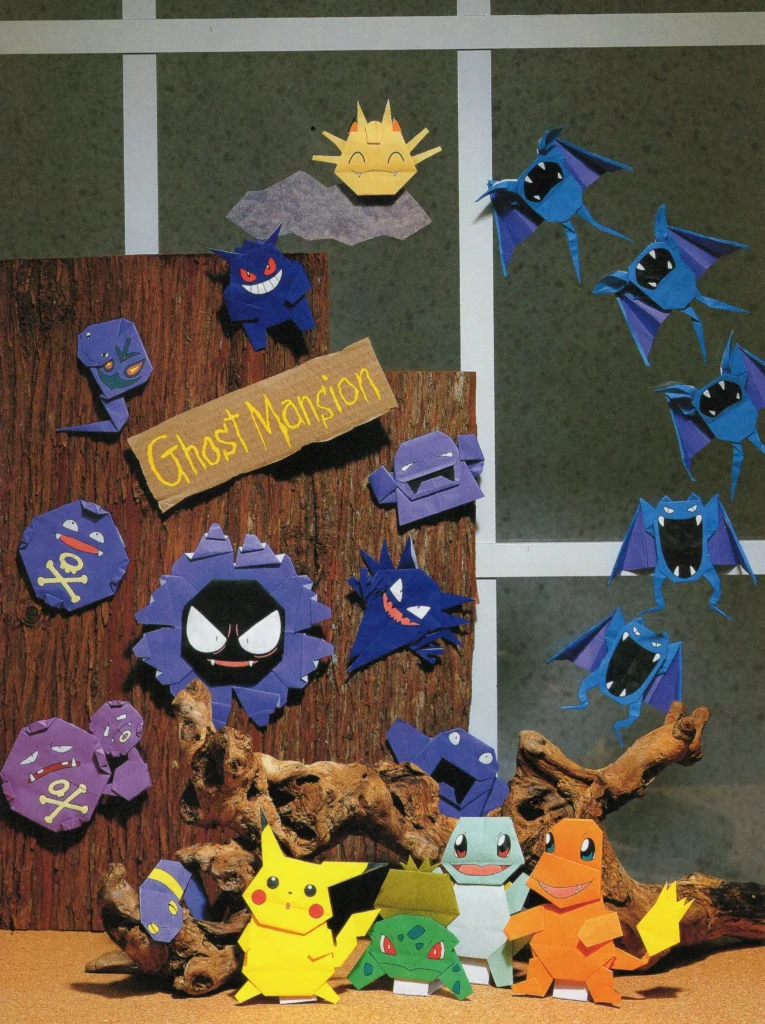
この作品は1999年に著作権者の監修を受け正式に許諾を得たものです。
★ゲームフリークのチェック
◆はじめ、あたまから背中へと生えている細かなとげを省略していたところ、「おでこの上のギザギザも表現してください」と言われてしまいました。
それで、ギザギザをつくって、2回目のチェックでOKになりました。
Evolution
つくり方の折り図
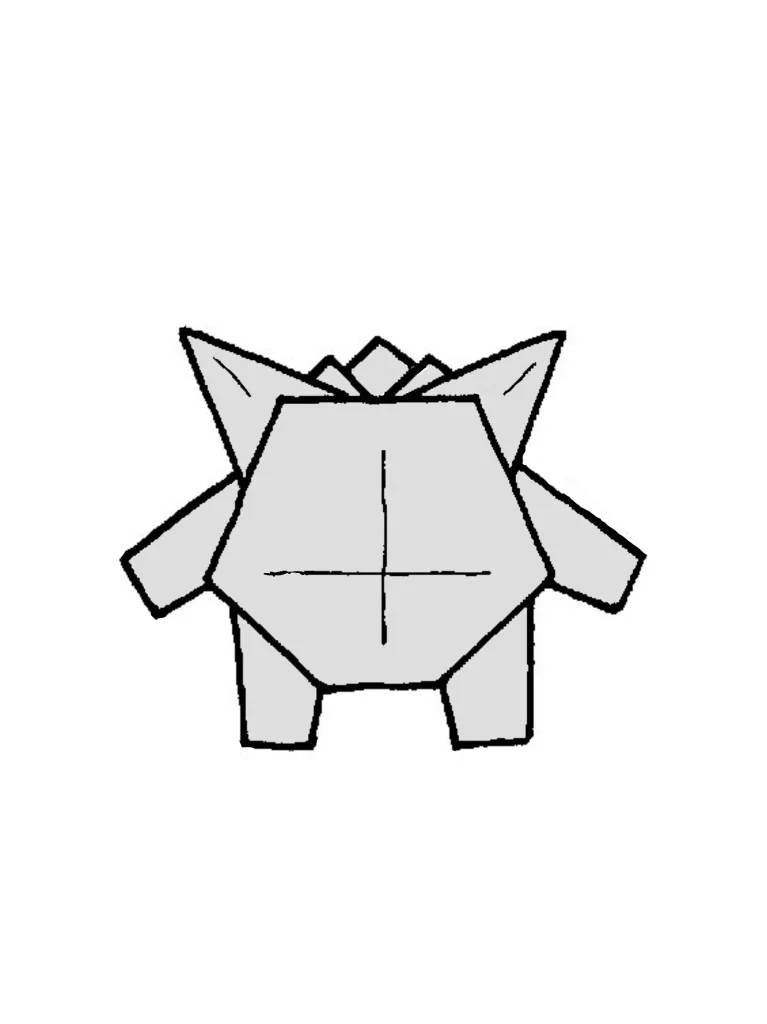
腕は、折る角度によって、いろいろな位置が可能です。
今回制作した折り図
◇折り図
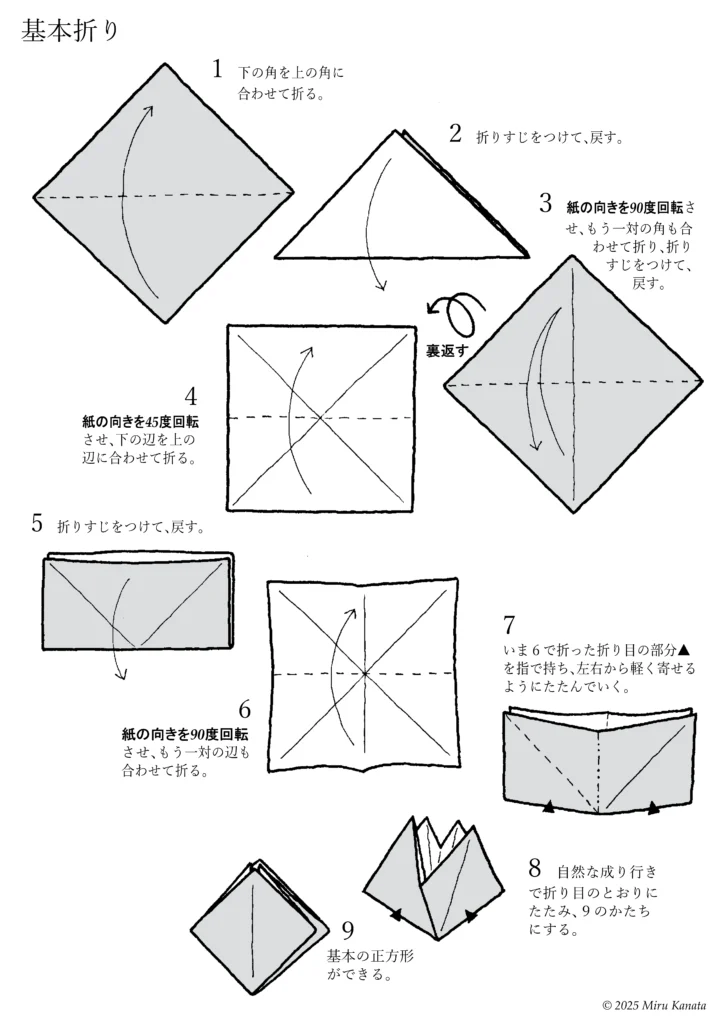
1 基本折り
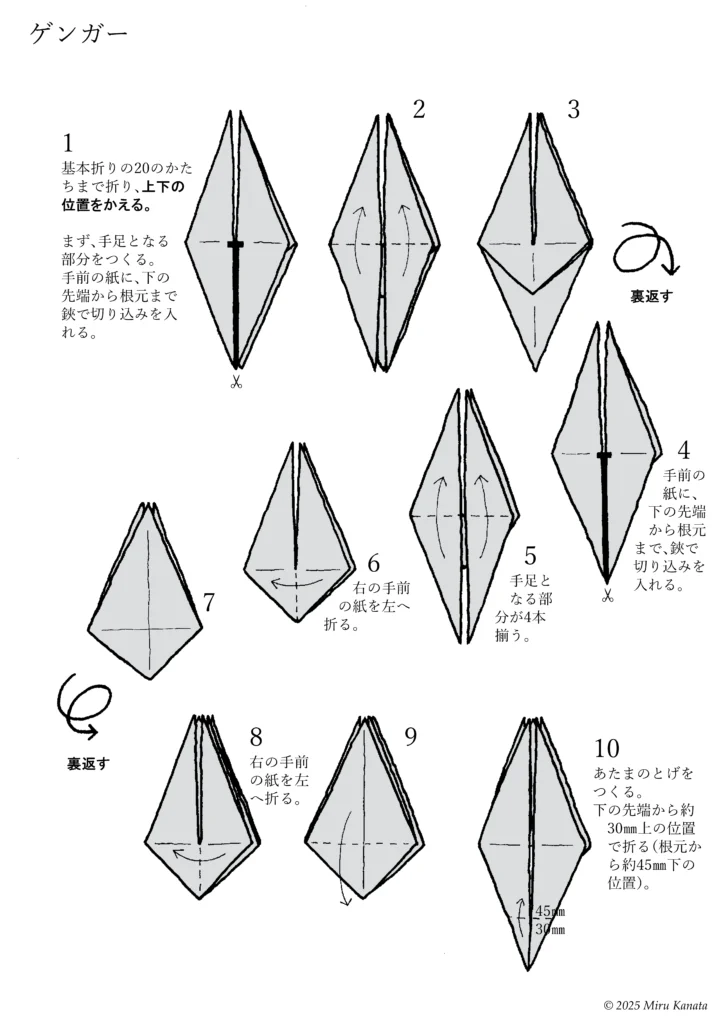
2 ゲンガー
3 ゲンガー・腕を曲げる場合の折り位置
■ゲンガーは、紫色の紙で、まず基本折りの図20まで折る。
1 基本折り
English Commentary
Basic Folding
1. Fold the bottom corner to meet the top corner.
2. Make a crease and return it to its original position.
3. Rotate the paper 90 degrees, fold the other pair of corners together, make a crease and return it to its original position.
{Flip}
4. Rotate the paper 45 degrees and fold the bottom edge to line up with the top edge.
5. Make a crease and return it to its original position.
6. Rotate the paper 90 degrees and fold the other pair of edges together.
7. Hold the crease ▲ made in step 6 with your fingers and fold gently from both sides together.
8. Let the paper naturally fold along the creases to form the shape of 9.
9. A basic square is created.
English Commentary
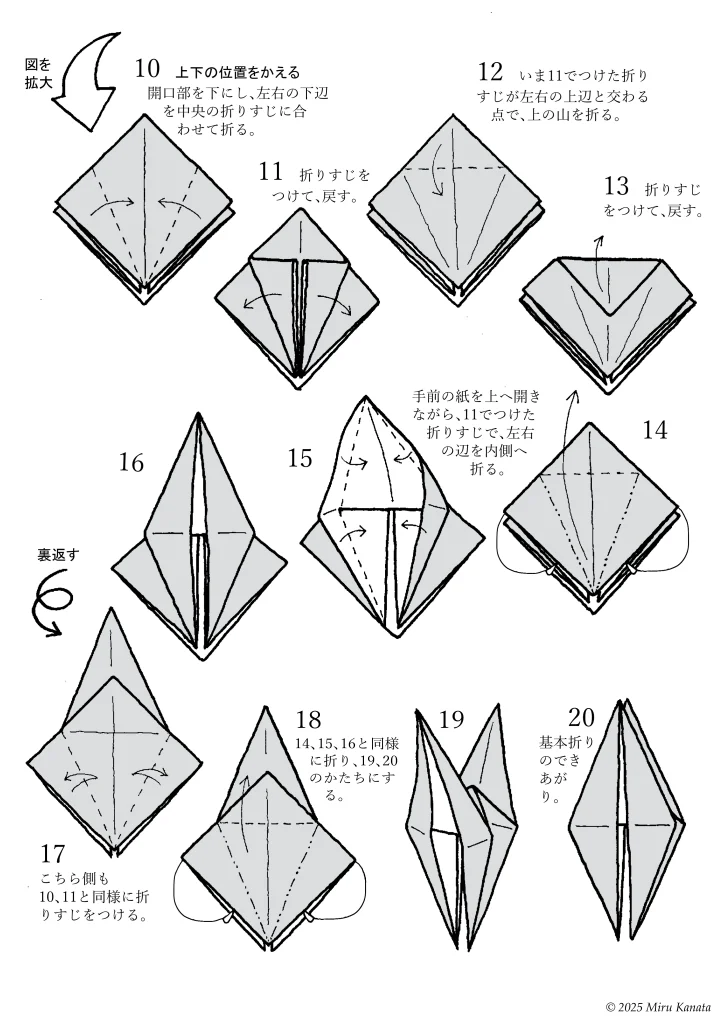
{Enlarge image}
10. Change the top and bottom positions.
With the opening facing downwards, fold the bottom left and right edges to meet the crease in the middle.
11. Make a crease and return.
12. Fold the top at the point where the crease made in 11 intersects with the top left and right edges.
13. Make a crease and return.
14. While opening the front paper upwards, fold the left and right edges inward along the crease made in 11.
15.
16.
{Flip}
17. Make creases on this side in the same way as 10 and 11.
18. Fold in the same way as 14, 15 and 16 to form 19 and 20.
19.
20. The basic fold is complete.
2 ゲンガー
English Commentary
Gengar
1. Fold the paper to the 20th basic fold, then change the top and bottom positions. First, make the parts that will become the arms and legs. Make a cut with scissors from the bottom tip to the base of the front paper.
2
3
{Flip}
4. Make a cut with scissors from the bottom tip to the base of the front paper.
5. You will now have four parts that will become the arms and legs.
6. Fold the front right paper to the left.
7
{Flip}
8. Fold the front right paper to the left.
9
10. Make the spikes on the head. Fold them about 30 mm above the bottom tip (about 45 mm below the base).
English Commentary
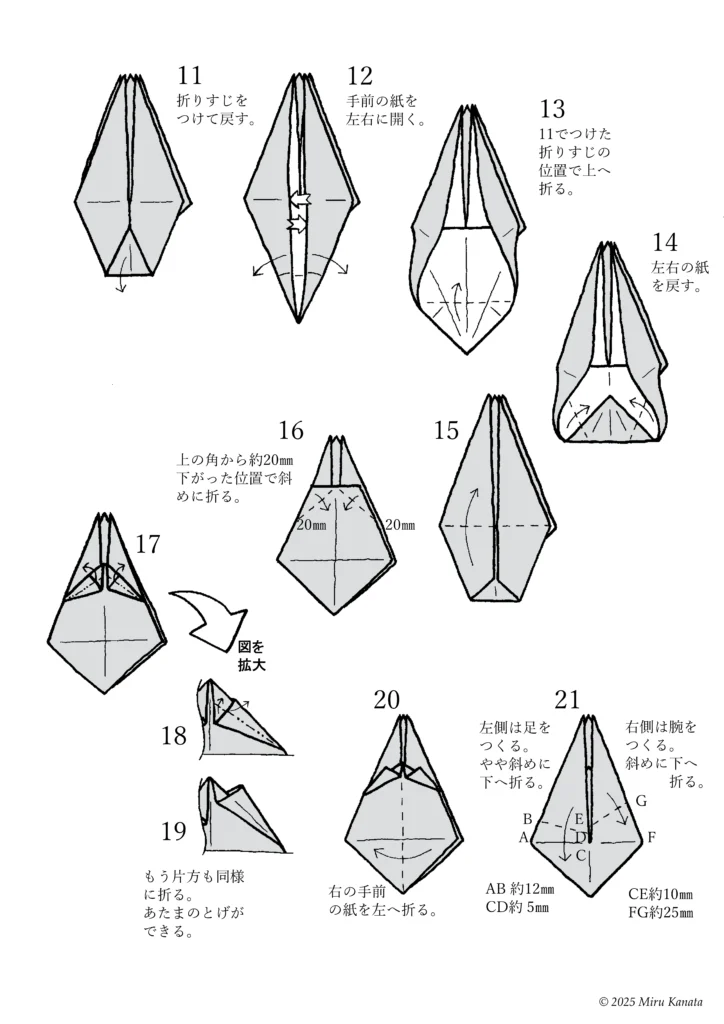
11 Make a crease and unfold.
12 Open the front paper to the left and right.
13 Fold upwards at the crease made in step 11.
14 Unfold the left and right papers.
15
16 Fold diagonally about 20 mm down from the top corner.
17
{Enlarge the diagram}
18
19 Fold the other side in the same way. This creates the spikes on the head.
20 Fold the front right paper to the left.
21 Make the legs on the left side. Fold slightly diagonally downwards. Make the arms on the right side. Fold diagonally downwards.
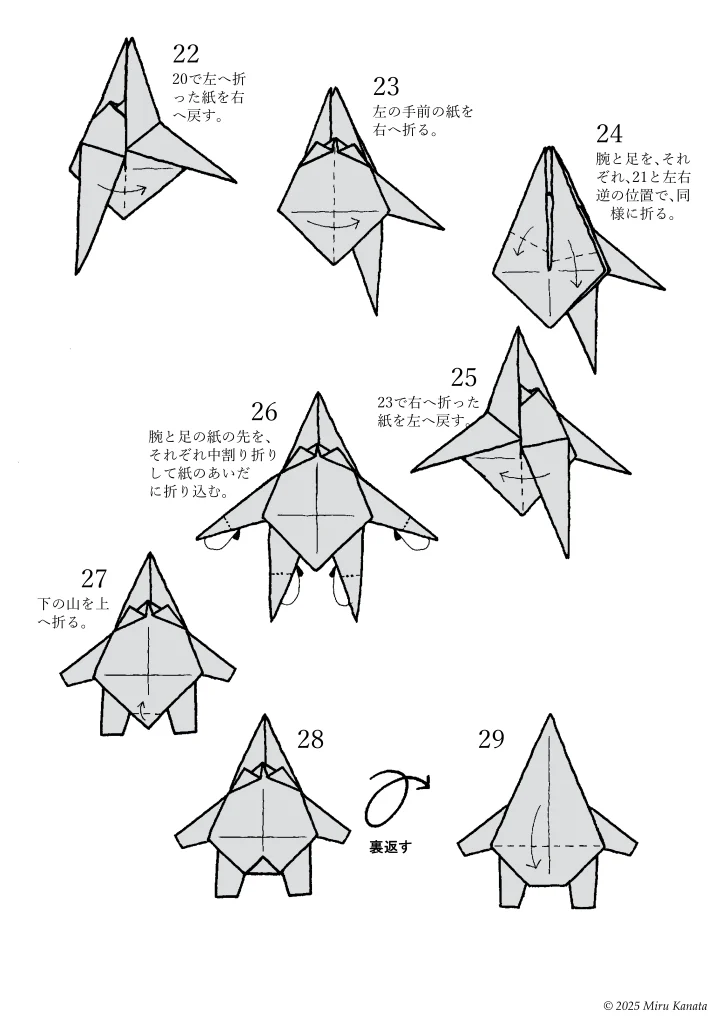
English Commentary
22 Fold the paper that was folded to the left in step 20 back to the right.
23 Fold the front left piece of paper to the right.
24 Fold the arms and legs in the same way as in step 21, but in the opposite positions.
25 Fold the paper that was folded to the right in step 23 back to the left.
26 Fold the ends of the arm and leg pieces inwards using an inside reverse fold.
27 Fold the bottom fold upwards.
28
{Flip}
29
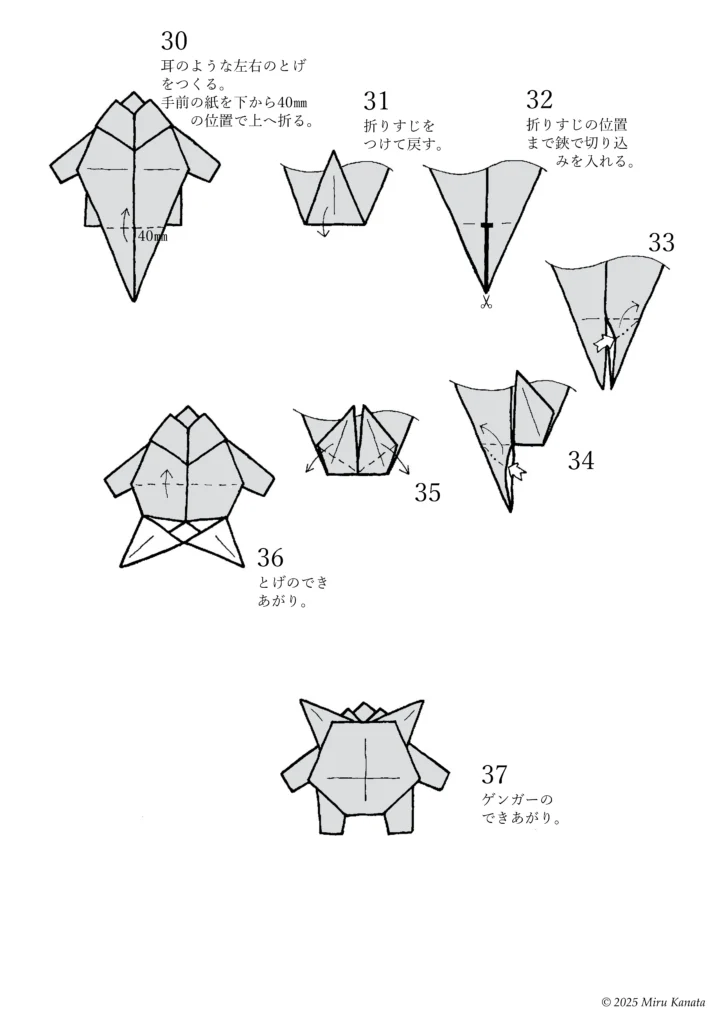
English Commentary
30 Create the ear-like spikes on both sides. Fold the front piece of paper upwards at a position 40 mm from the bottom.
31 Make a crease and unfold.
32 Make cuts with scissors up to the crease.
33
34
35
36 The spikes are complete.
37 Gengar is complete.
3 ゲンガー・腕を曲げる場合の折り位置
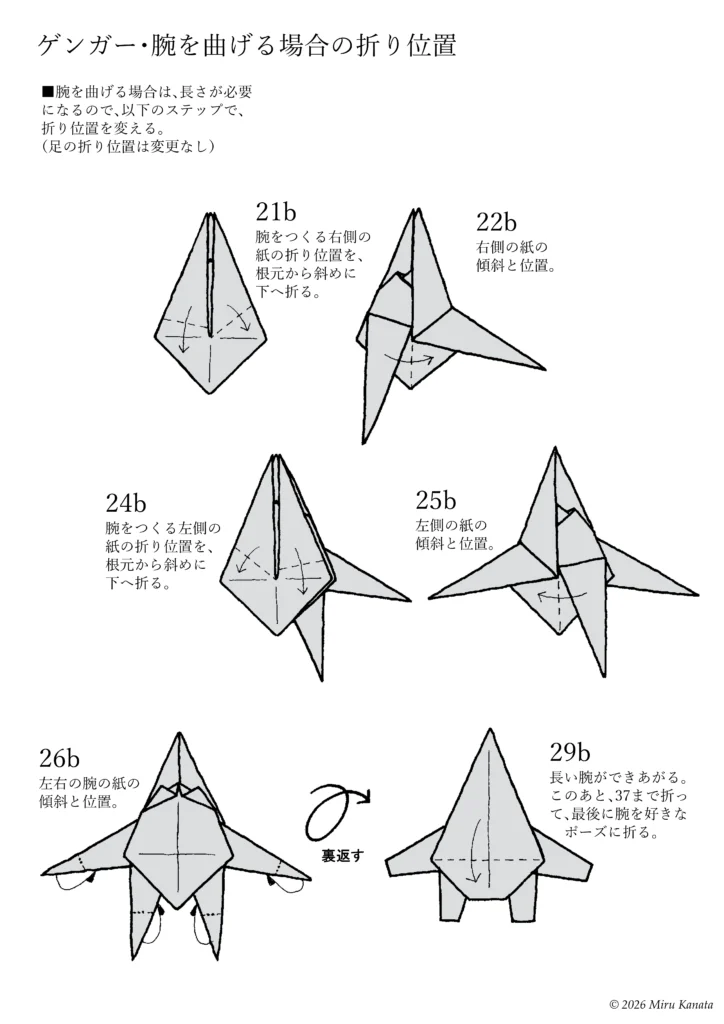
English Commentary
Gengar – Folding position when bending its arms
■If you need to bend the arms, you will need to adjust the length, so change the folding position using the following steps. (The folding position of the legs remains unchanged.)
21b Fold the right side of the paper, which will form the arm, diagonally downwards from the base.
22b The angle and position of the right side of the paper.
24b Fold the left side of the paper, which will form the arm, diagonally downwards from the base.
25b The angle and position of the left side of the paper.
26b The angle and position of the left and right arm papers.
29b A longer arm is created. After this, fold up to step 37, and finally fold the arm into your desired pose.
ORIGAMI Topics
■ゲンガーのあたまの上のギザギザの折り方ですが、これをつくった1998年、他所でこの折り方を見たことはありませんでした。
浮かび上がってくるように自然に思いついた折り方です。
個人的には「あたまのとげ折り」と呼んでいます。
*1998年当時、複数の図書館から古今のおりがみの書籍20冊あまりをお借りして、掲載されているおりがみをすべて折りましたが、この折り方の前例はありませんでした。
*本の出版後、日本折紙協会の、おりがみ専門の月刊の機関誌『おりがみ』のその時点で入手できたバックナンバー65冊の、おりがみ作品をすべて折って確認しましたが、前例はありませんでした。
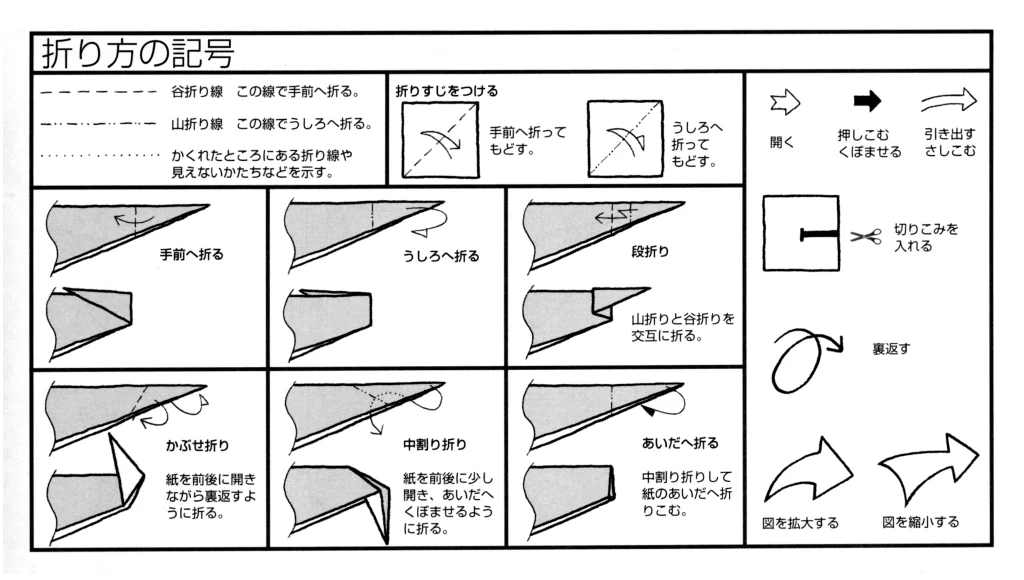
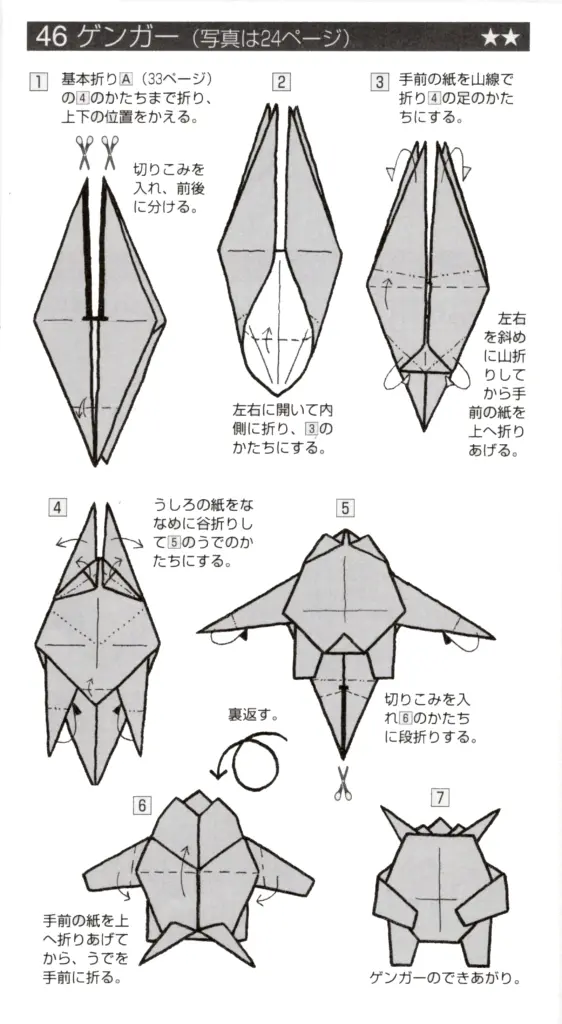
参考・2000年の本に掲載した折り図
みるかなた本棚>『ポケットモンスターおりがみコレクション』>ポケモンおりがみ一覧表>0094ゲンガー

◇ ◇ ◇