
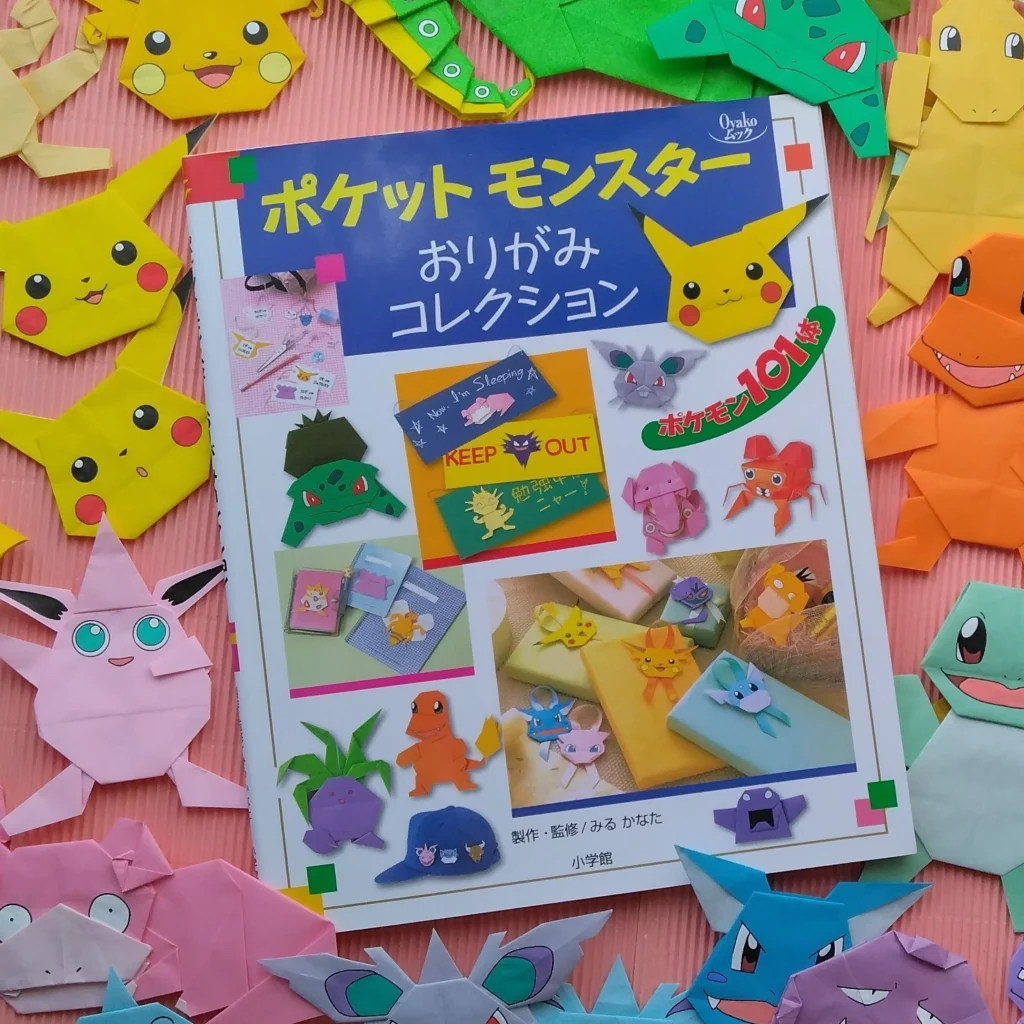
みるかなた本棚>『ポケットモンスターおりがみコレクション』>ポケモンおりがみ一覧表>0147ミニリュウ
0147ミニリュウ>0149カイリュー
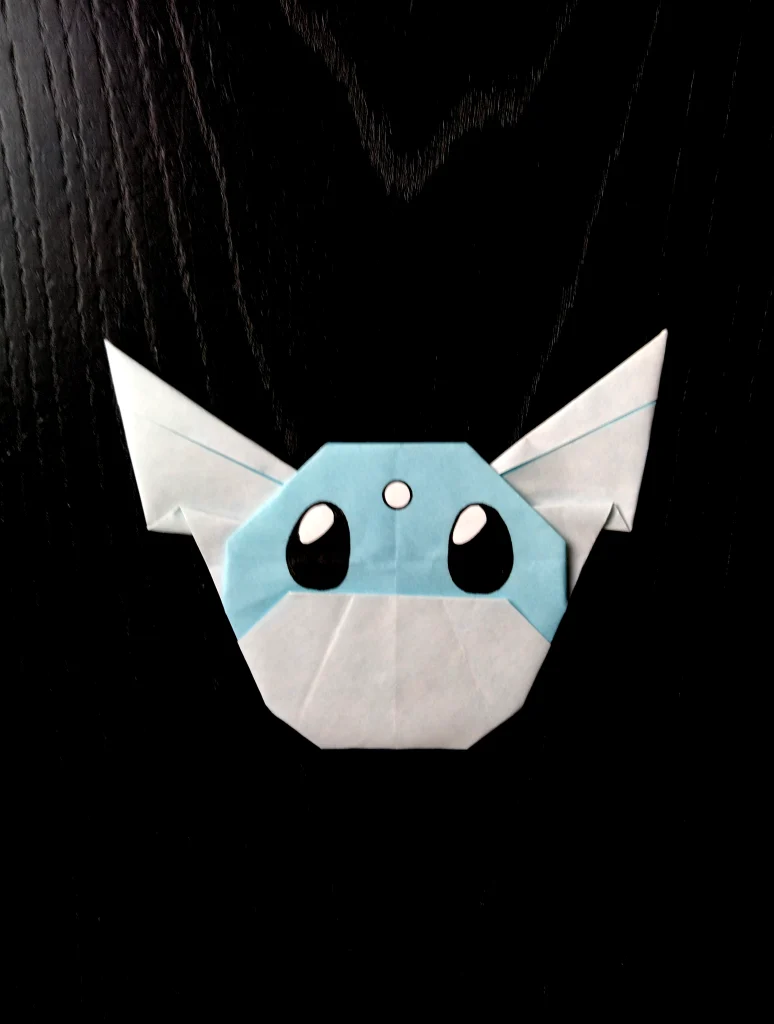
0147 ミニリュウ
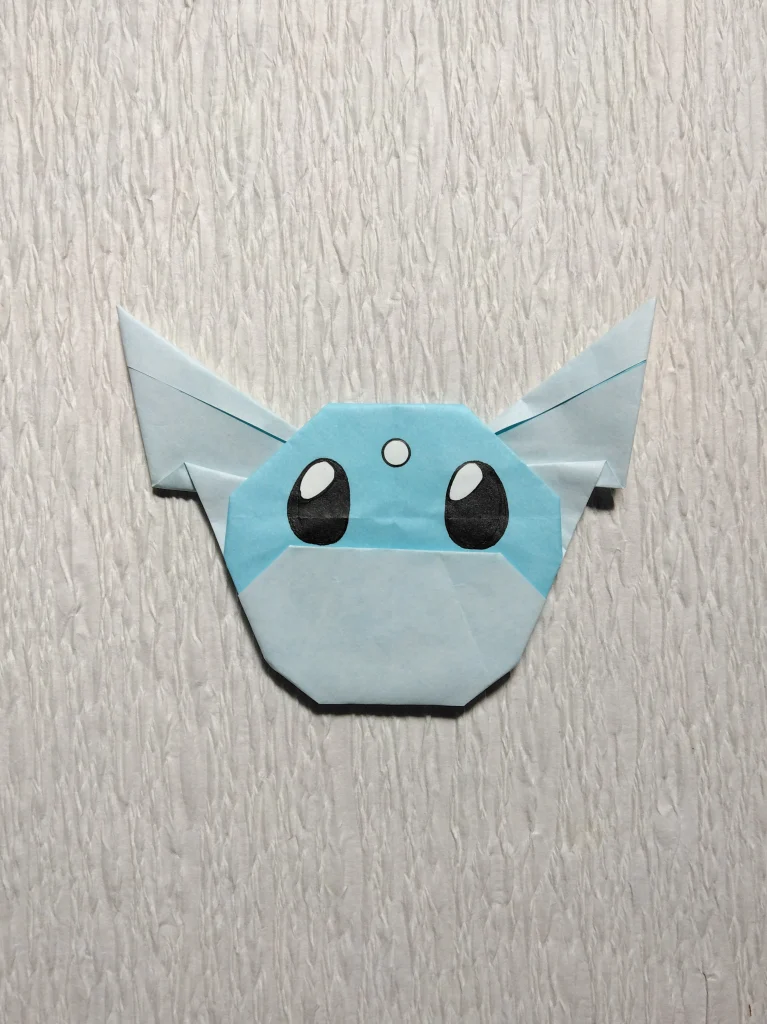
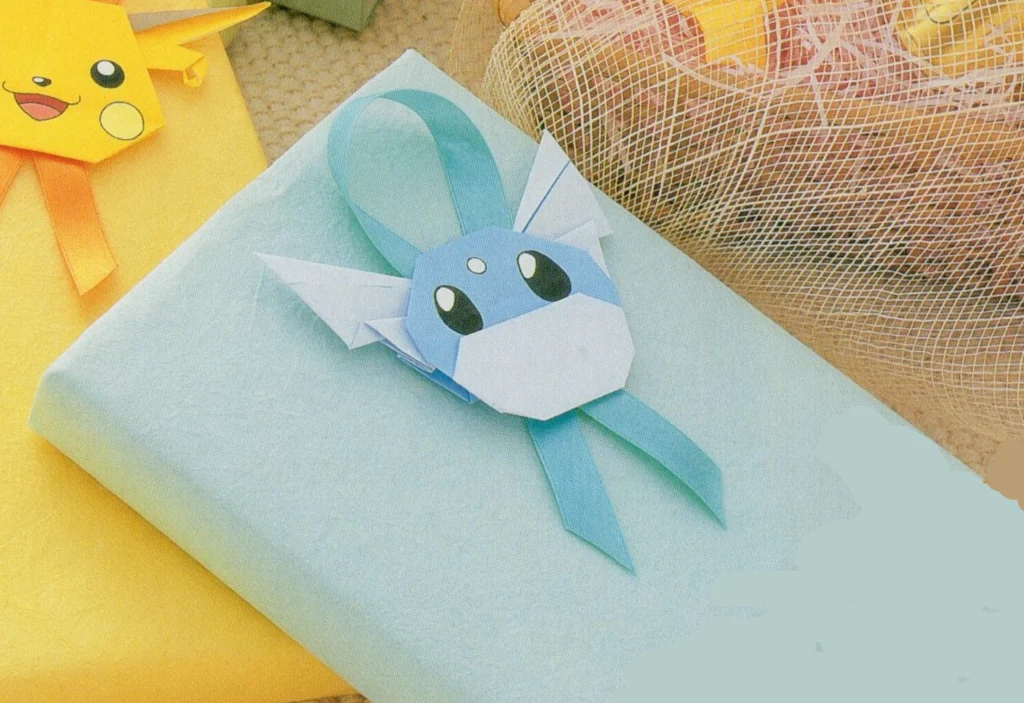
この作品は1999年に著作権者の監修を受け正式に許諾を得たものです。
★ゲームフリークのチェック
◆最初のチェックでOKをいただきました。
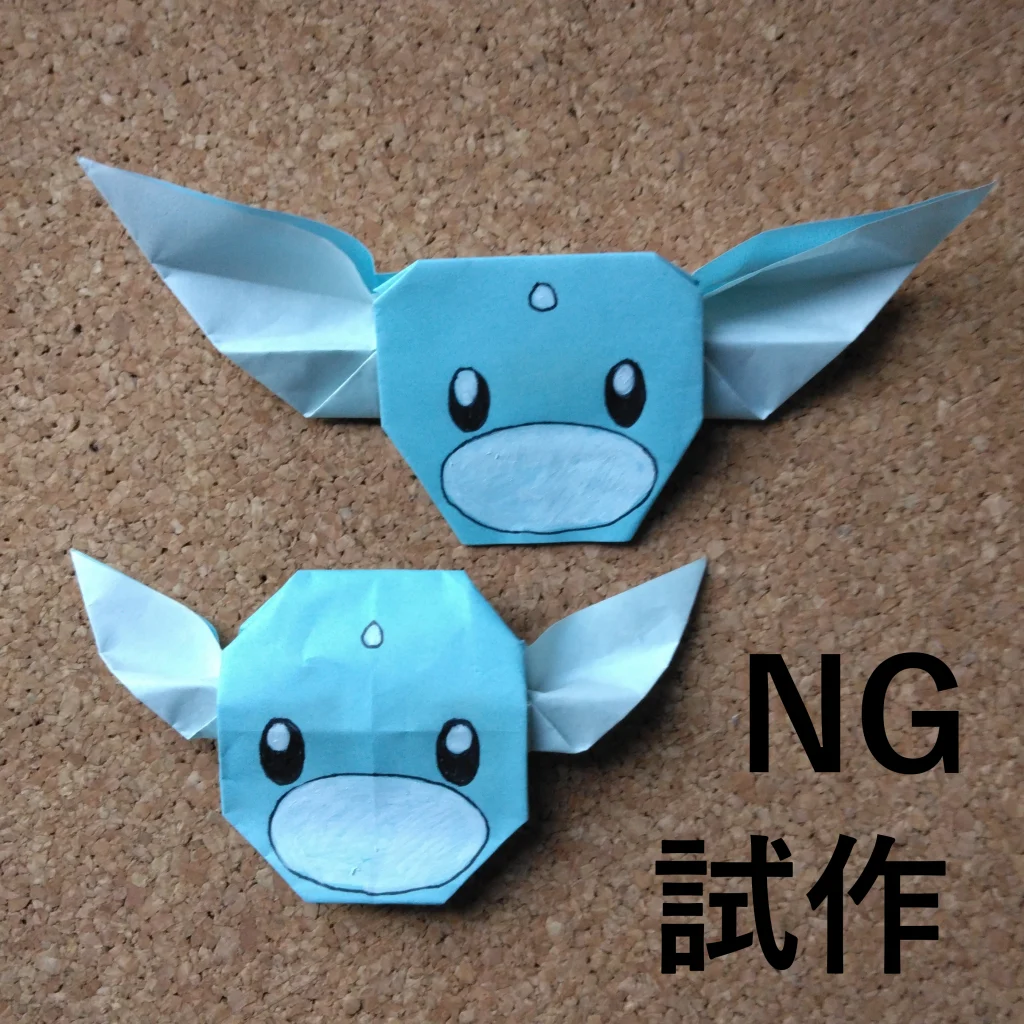
なんとなくそれらしい感じというのは、いろいろつくれても、「これで完成」といえるかたちにたどり着くのは、ほんとに難しいです。
かたちの美しさ、安定感、おりがみとしての再現性、などなど、乗り越えなければならないことが幾つもあります。
つくり方の折り図
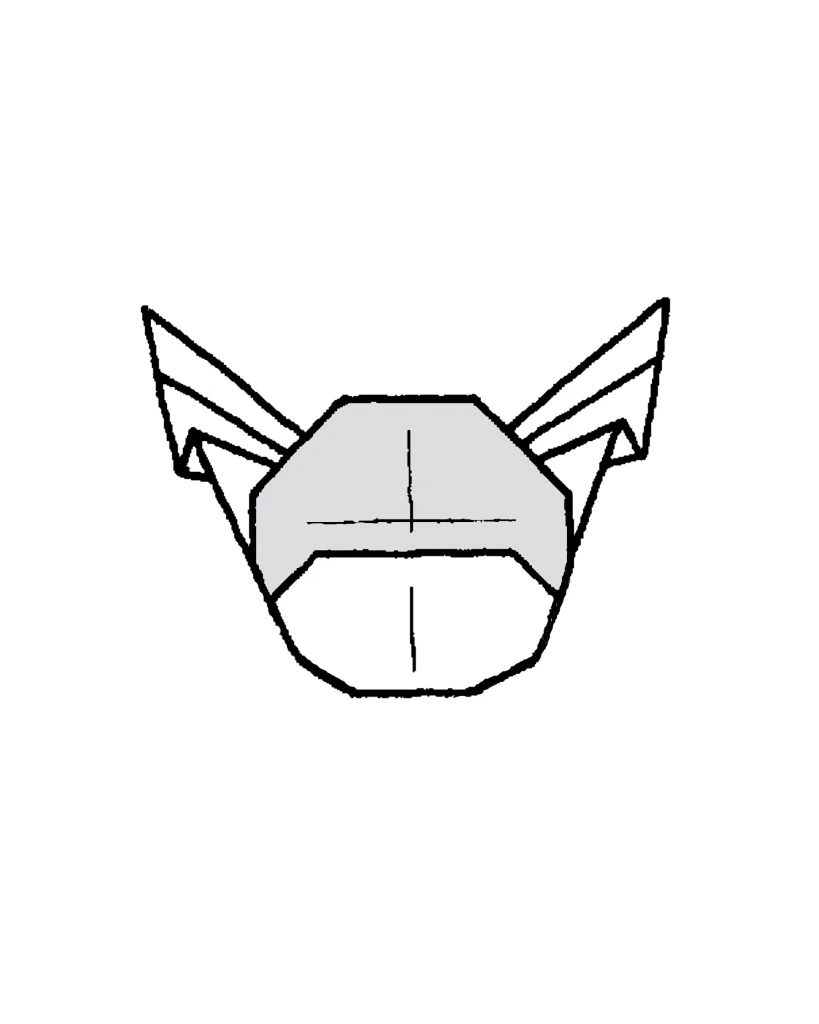
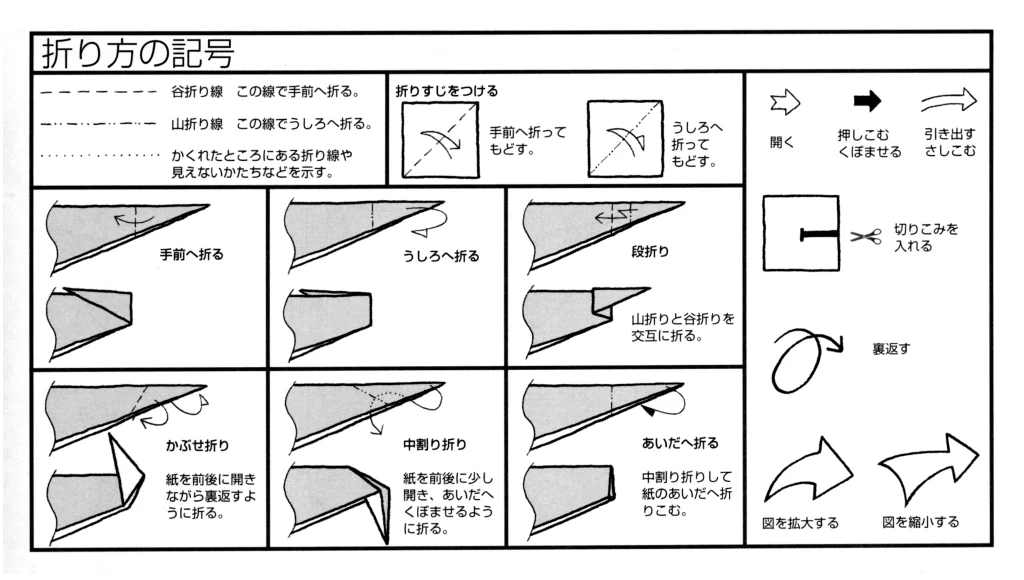
今回制作した折り図
◇折り図
1 基本折り
2 ミニリュウのあたま
■ミニリュウのあたまは、薄い水色の紙で、まず基本折りの図20まで折る。
1 基本折り
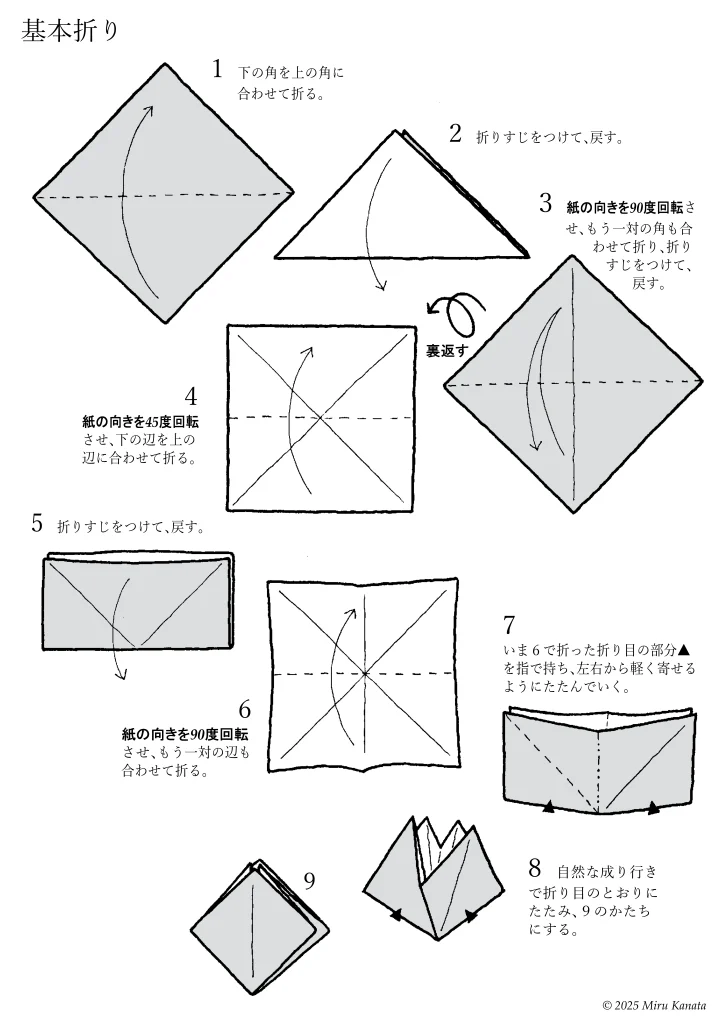
English Commentary
Basic Folding
1 Fold the bottom corner to meet the top corner.
2 Make a crease and return it to its original position.
3 Rotate the paper 90 degrees, fold the other pair of corners together, make a crease and return it to its original position.
{Flip}
4 Rotate the paper 45 degrees and fold the bottom edge to meet the top edge.
5 Make a crease and return it to its original position.
6 Rotate the paper 90 degrees and fold the other pair of edges together.
7 Hold the crease ▲ made in step 6 with your fingers and fold it gently from both sides.
8 Let it naturally fold along the creases to form the shape of 9.
9
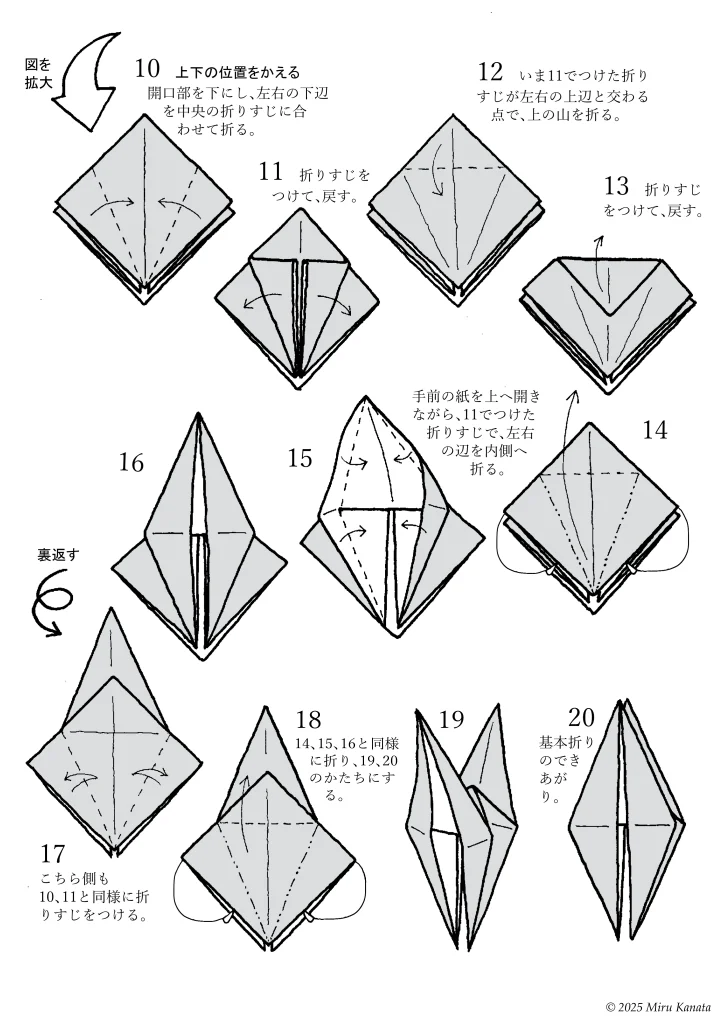
English Commentary
{Enlarge image}
10 Change the top and bottom positions.
With the opening facing downwards, fold the bottom left and right edges to meet the crease in the middle.
11 Make a crease and return.
12 Fold the top at the point where the crease made in 11 intersects with the top left and right edges.
13 Make a crease and return.
14 While opening the front paper upwards, fold the left and right edges inward along the crease made in 11.
15
16
{Flip}
17 Make creases on this side in the same way as 10 and 11.
18 Fold in the same way as 14, 15 and 16 to form 19 and 20.
19
20 The basic fold is complete.
2 ミニリュウのあたま
English Commentary
Dratini’s head
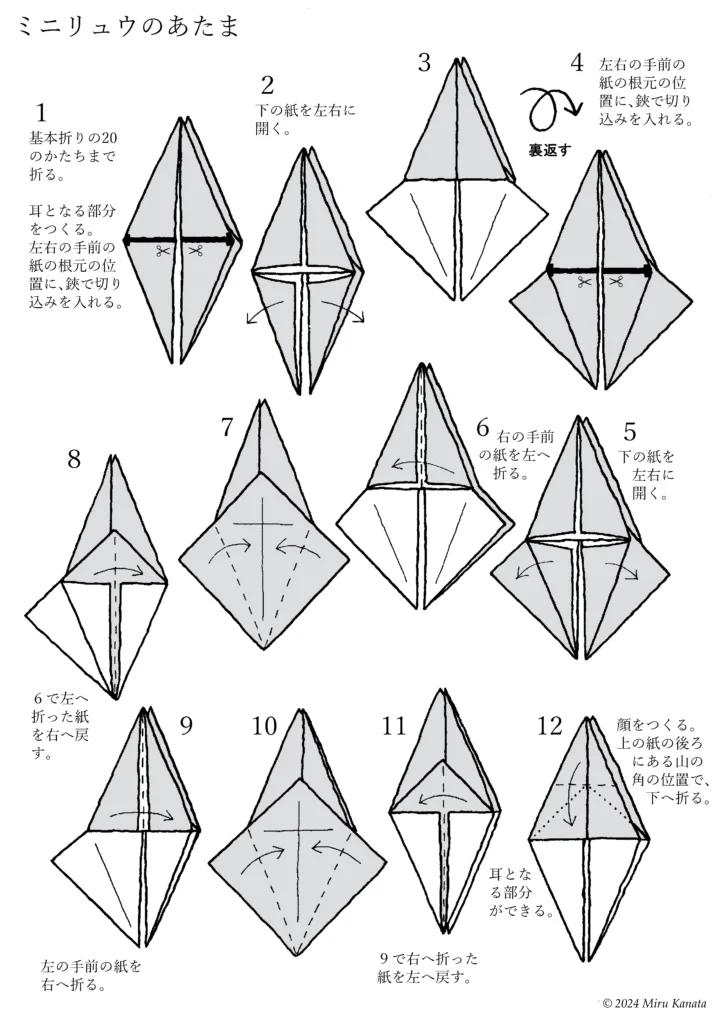
1. Fold up to the 20th basic fold. Make the ears. Make cuts with scissors at the base of the front left and right pieces of paper.
2. Open the bottom paper to the left and right.
3.
{Flip}
4. Make cuts with scissors at the base of the front left and right pieces of paper.
5. Open the bottom paper to the left and right.
6. Fold the front right piece of paper to the left.
7.
8. Return the paper that was folded to the left in step 6 to the right.
9. Fold the front left piece of paper to the right.
10.
11. Return the paper that was folded to the right in step 9 to the left. The ears are now formed.
12. Make the face. Fold down at the corner of the mountain in between.
English Commentary
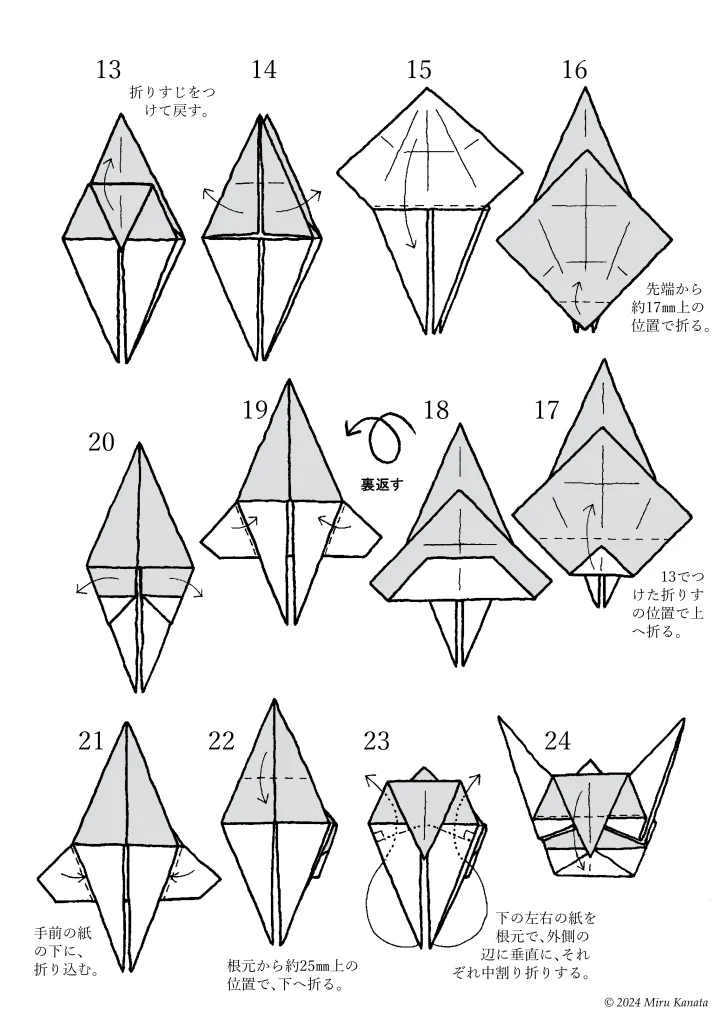
13 Make a crease and unfold.
14
15
16 Fold approximately 17 mm above the tip.
17 Fold upwards at the crease made in step 13.
18
{Flip}
19
20
21 Fold under the front paper.
22 Fold downwards approximately 25 mm above the base.
23 Fold the bottom left and right pieces of paper in a reverse fold at the base, perpendicular to the outer edge.
24
English Commentary
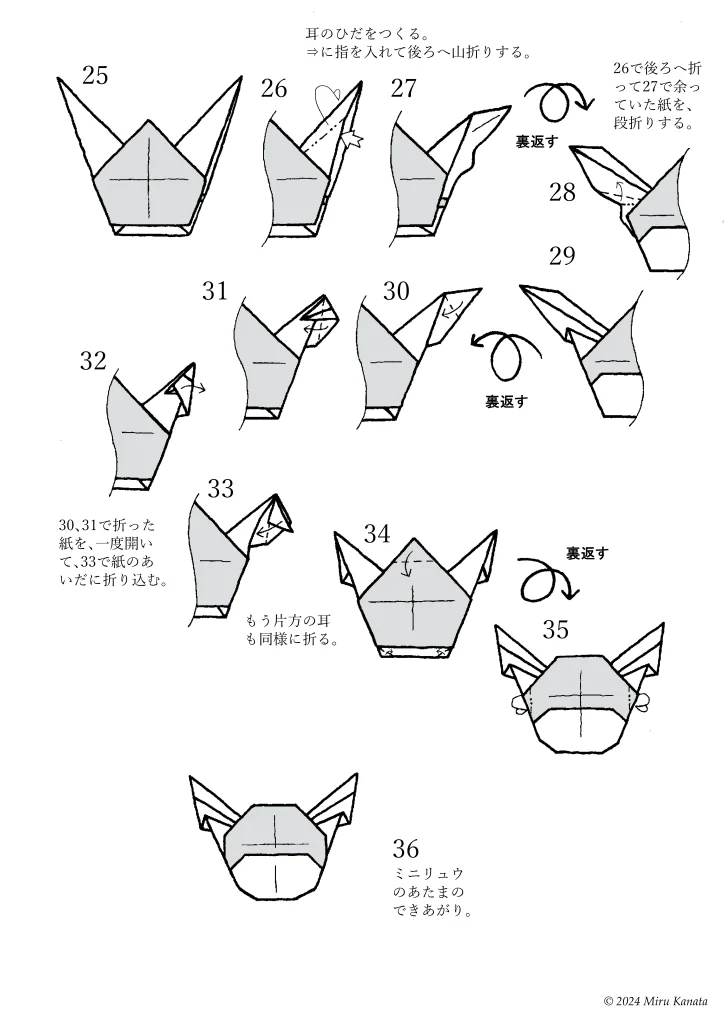
25
26 Make the ear folds. Insert your finger into the arrow and make a mountain fold backward.
27
{Flip}
28 Fold the excess paper that was folded backward in 26 and then folded in a step fold in 27.
29
{Flip}
30
31
32 Open the paper folded in 30 and 31 once, and fold it into the gap in the paper in 33.
33 Fold the other ear in the same way.
34
{Flip}
35
36 Dratini’s head is complete.
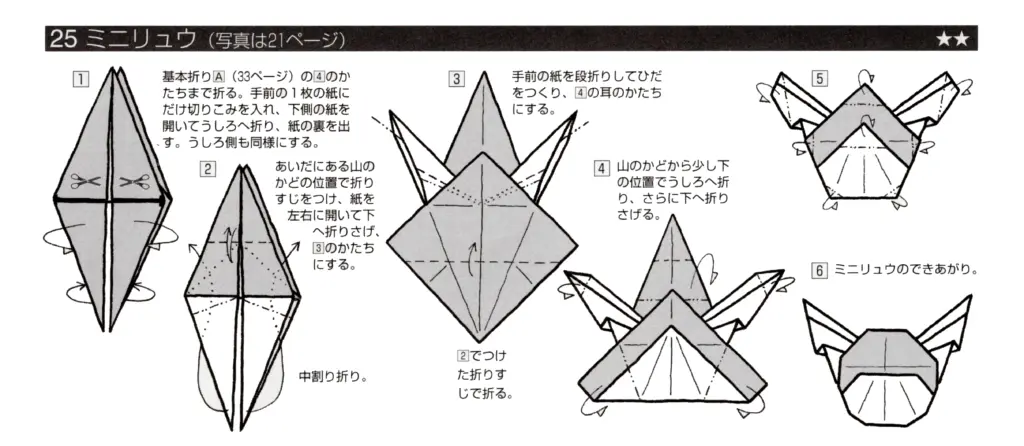
参考・2000年の本に掲載した折り図
みるかなた本棚>『ポケットモンスターおりがみコレクション』>ポケモンおりがみ一覧表>0147ミニリュウ

◇ ◇ ◇