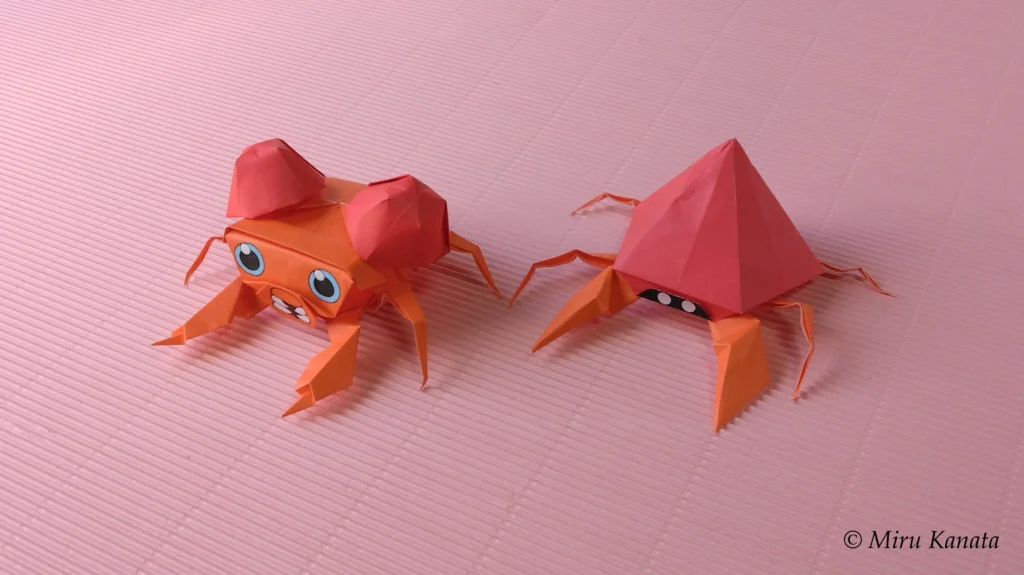
みるかなた本棚>『ポケットモンスターおりがみコレクション』>ポケモンおりがみ一覧表>0047 パラセクト
◆0046 パラス◆0047 パラセクト◆
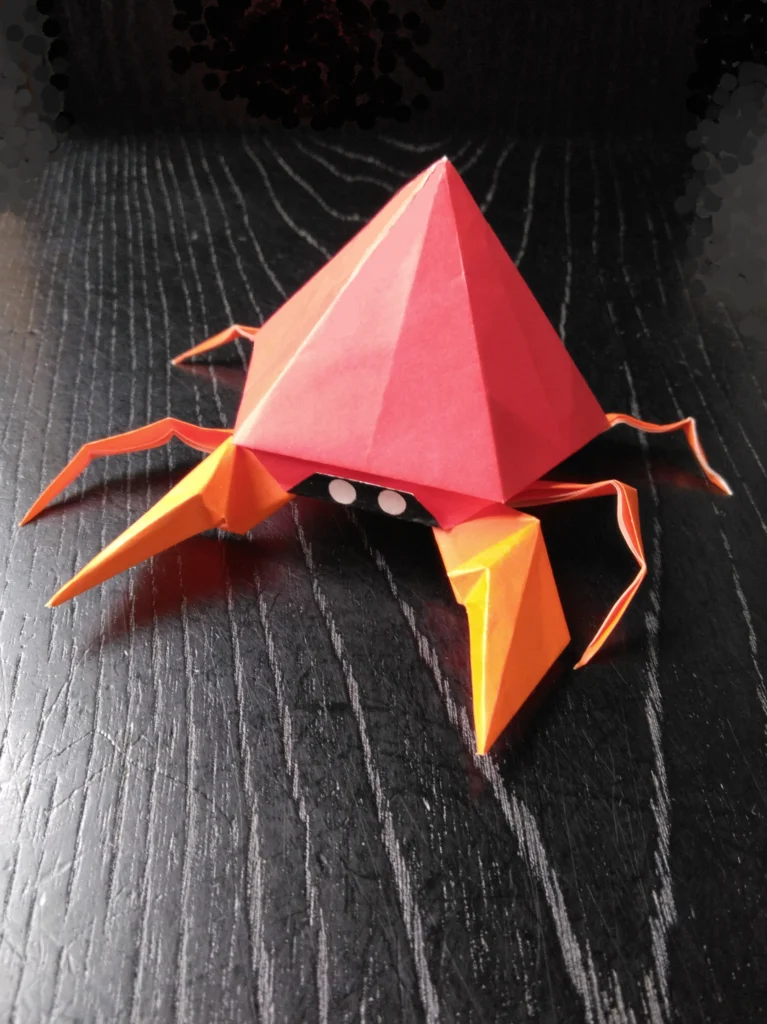
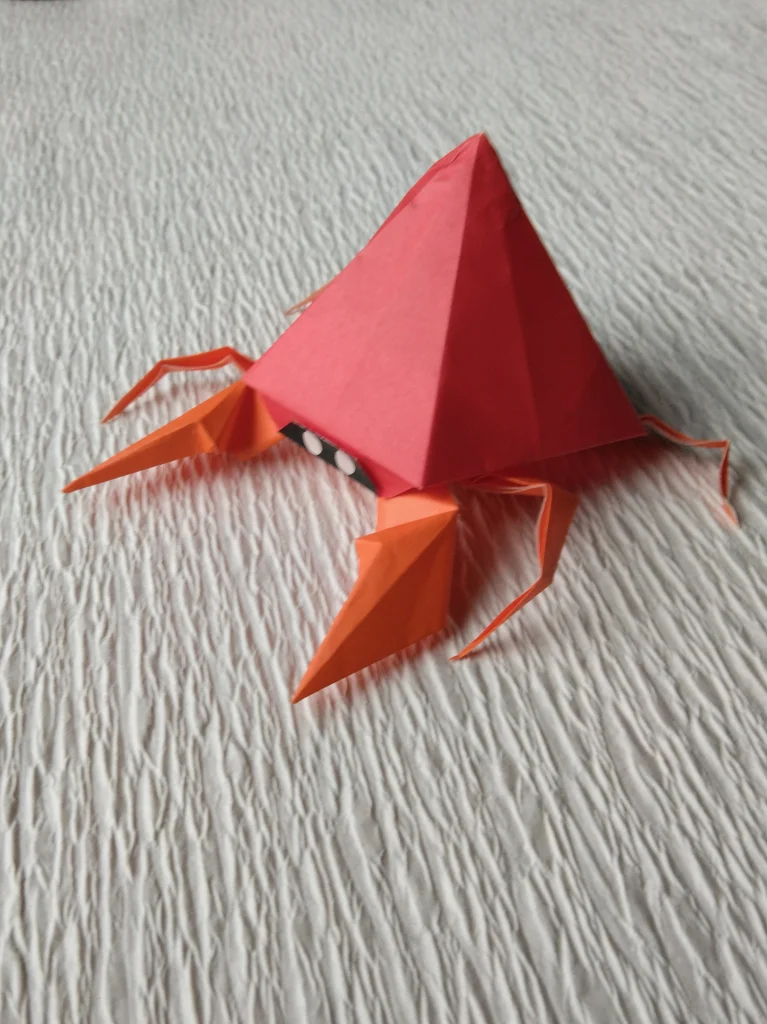
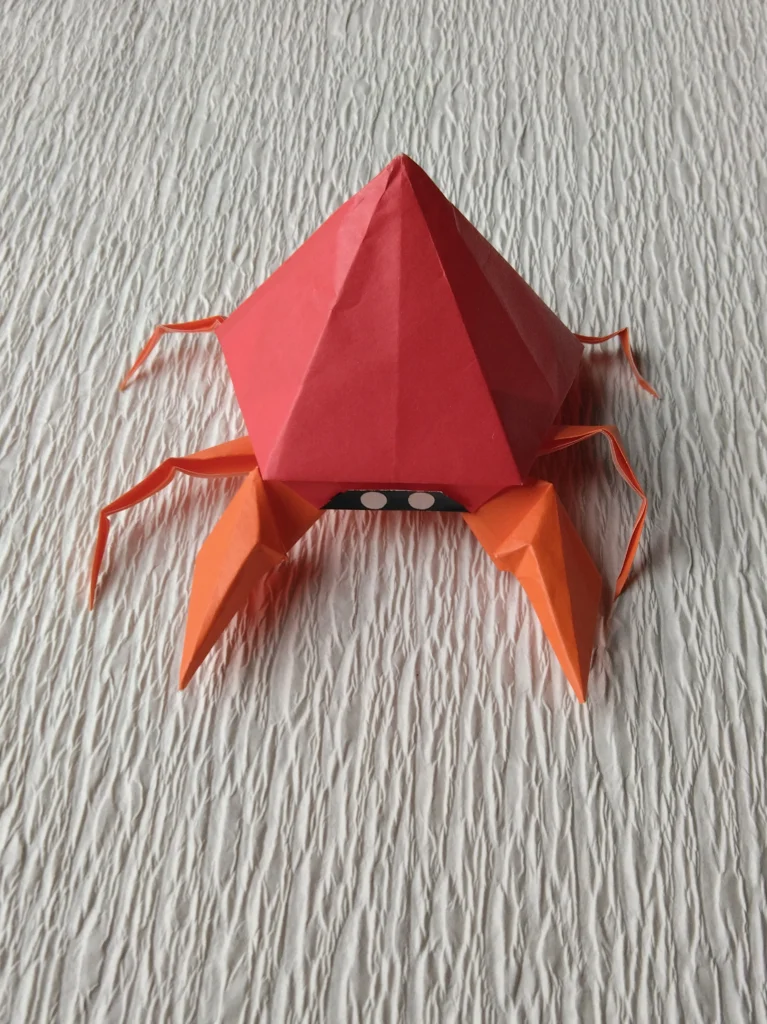
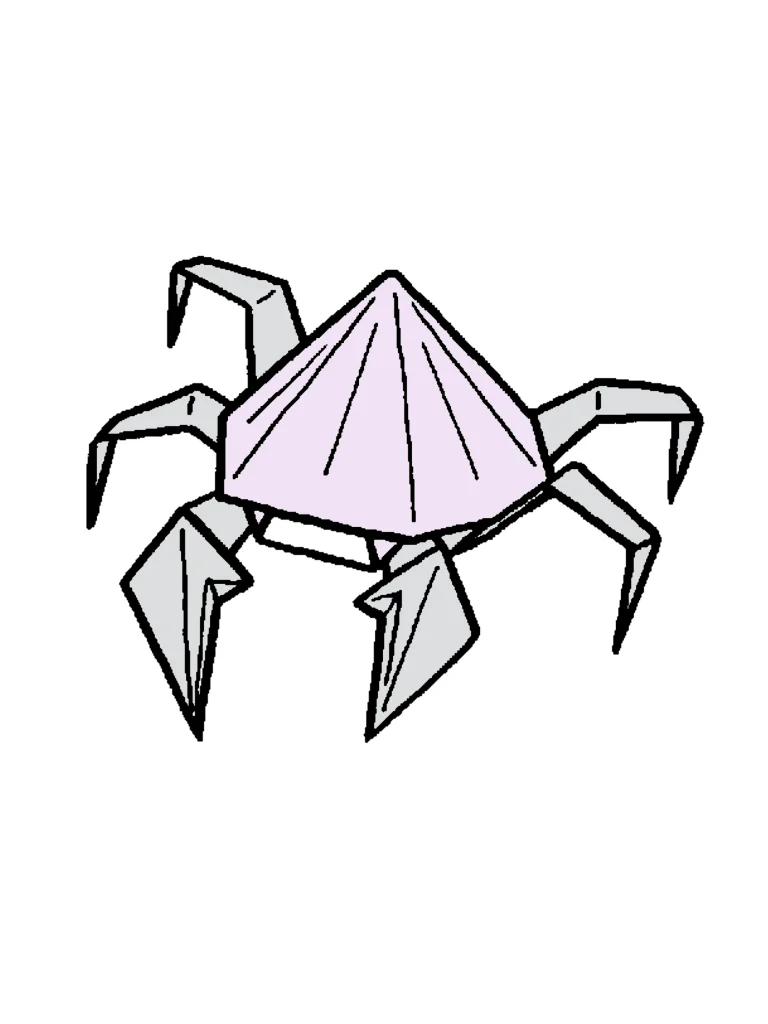
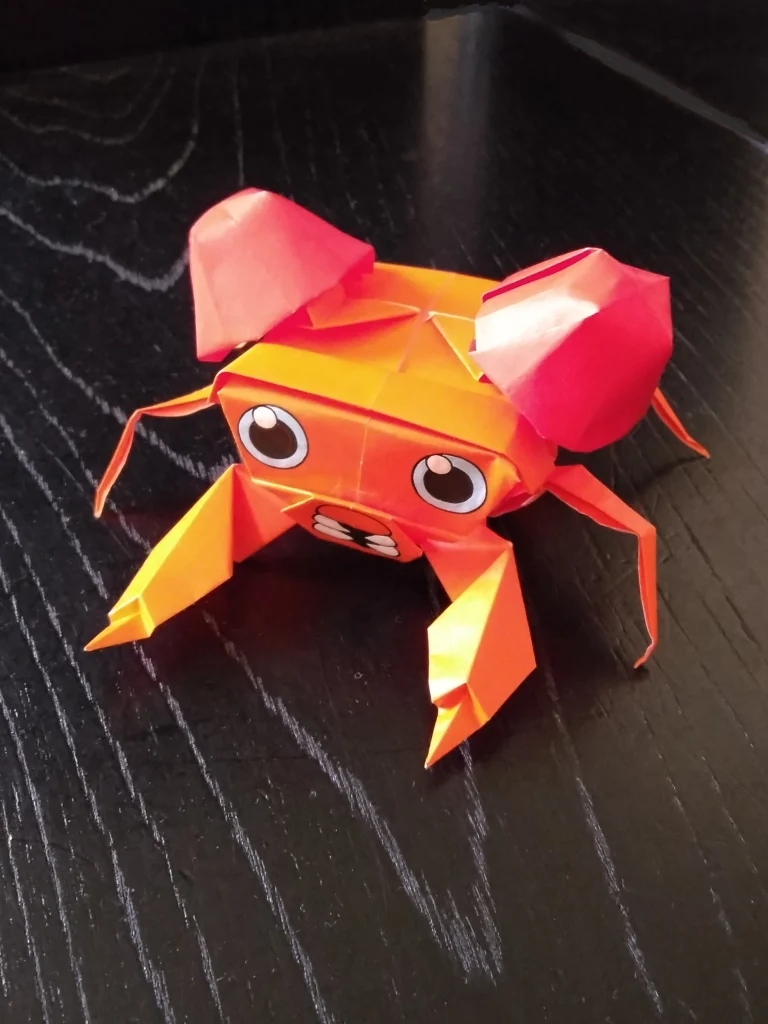
0047 パラセクト
パラスと同様、いろいろな角度からデッサンして検討したのですが、平面でうまく表現できそうなかたちをみつけることができませんでした。
それで、やむなく立体になりました。
まず、きのこの、この手足にちょうどいいサイズ感の紙の折り位置を見つけ出すことが第一の関門。
続いて、このフォルムをつくり出す構造のプランニンと、それを具体化する幾つかのテクニック。
じゅうぶん検討しつくして、このかたちができあがりました。

立体だと保管に場所をとるし、また破損の機会も増えます。
ですから、飾る場合以外は、たたんで、それぞれ透明袋に入れて、おりがみ専用の箱にしまっています。
必要になったら、箱から出して組み立てます。
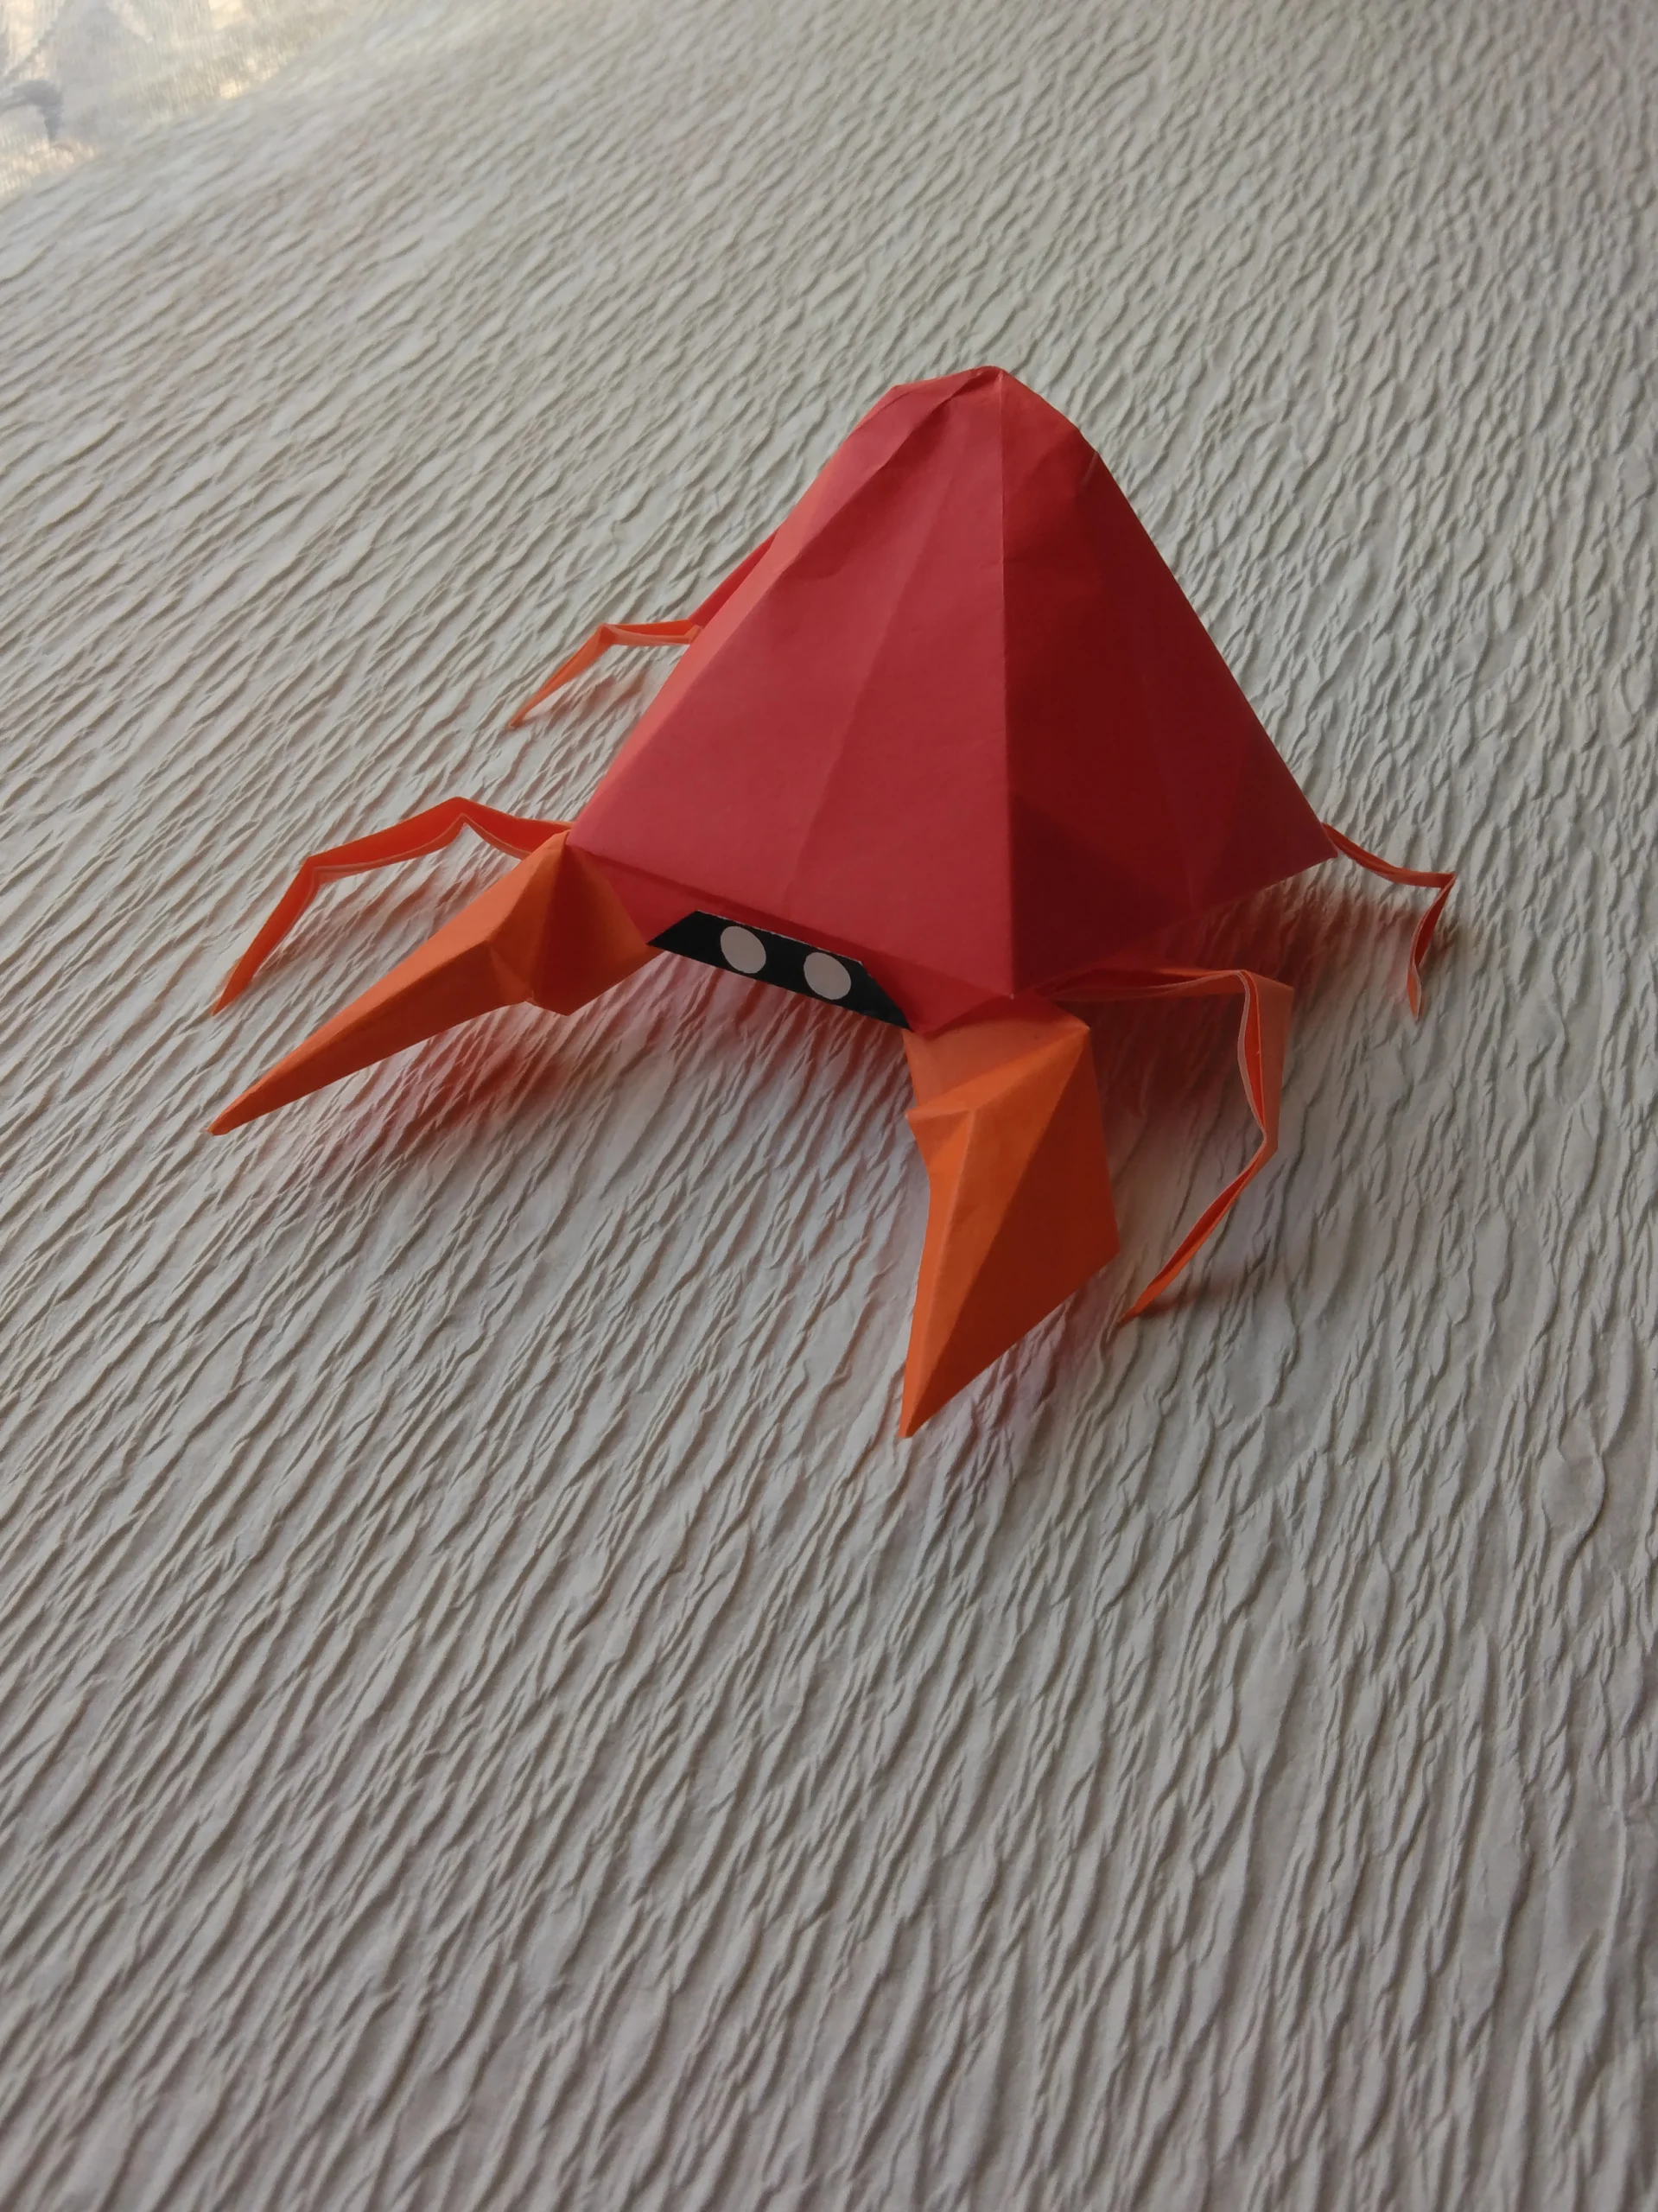
パラセクトの絵にあるように、きのこの頂上を丸くつぶしたものもつくりました。
しかし見た目美しさに欠け、また折りの確実性再現性が担保されていないことから、「これで完成」というレベルに達していないと感じ、個人的に没にしています。
★ゲームフリークのチェック
◆最初のチェックでOKをいただきました。
◆きのこのかたちについてですが、とんがったままのかたちでOKをいただきました。
Evolution
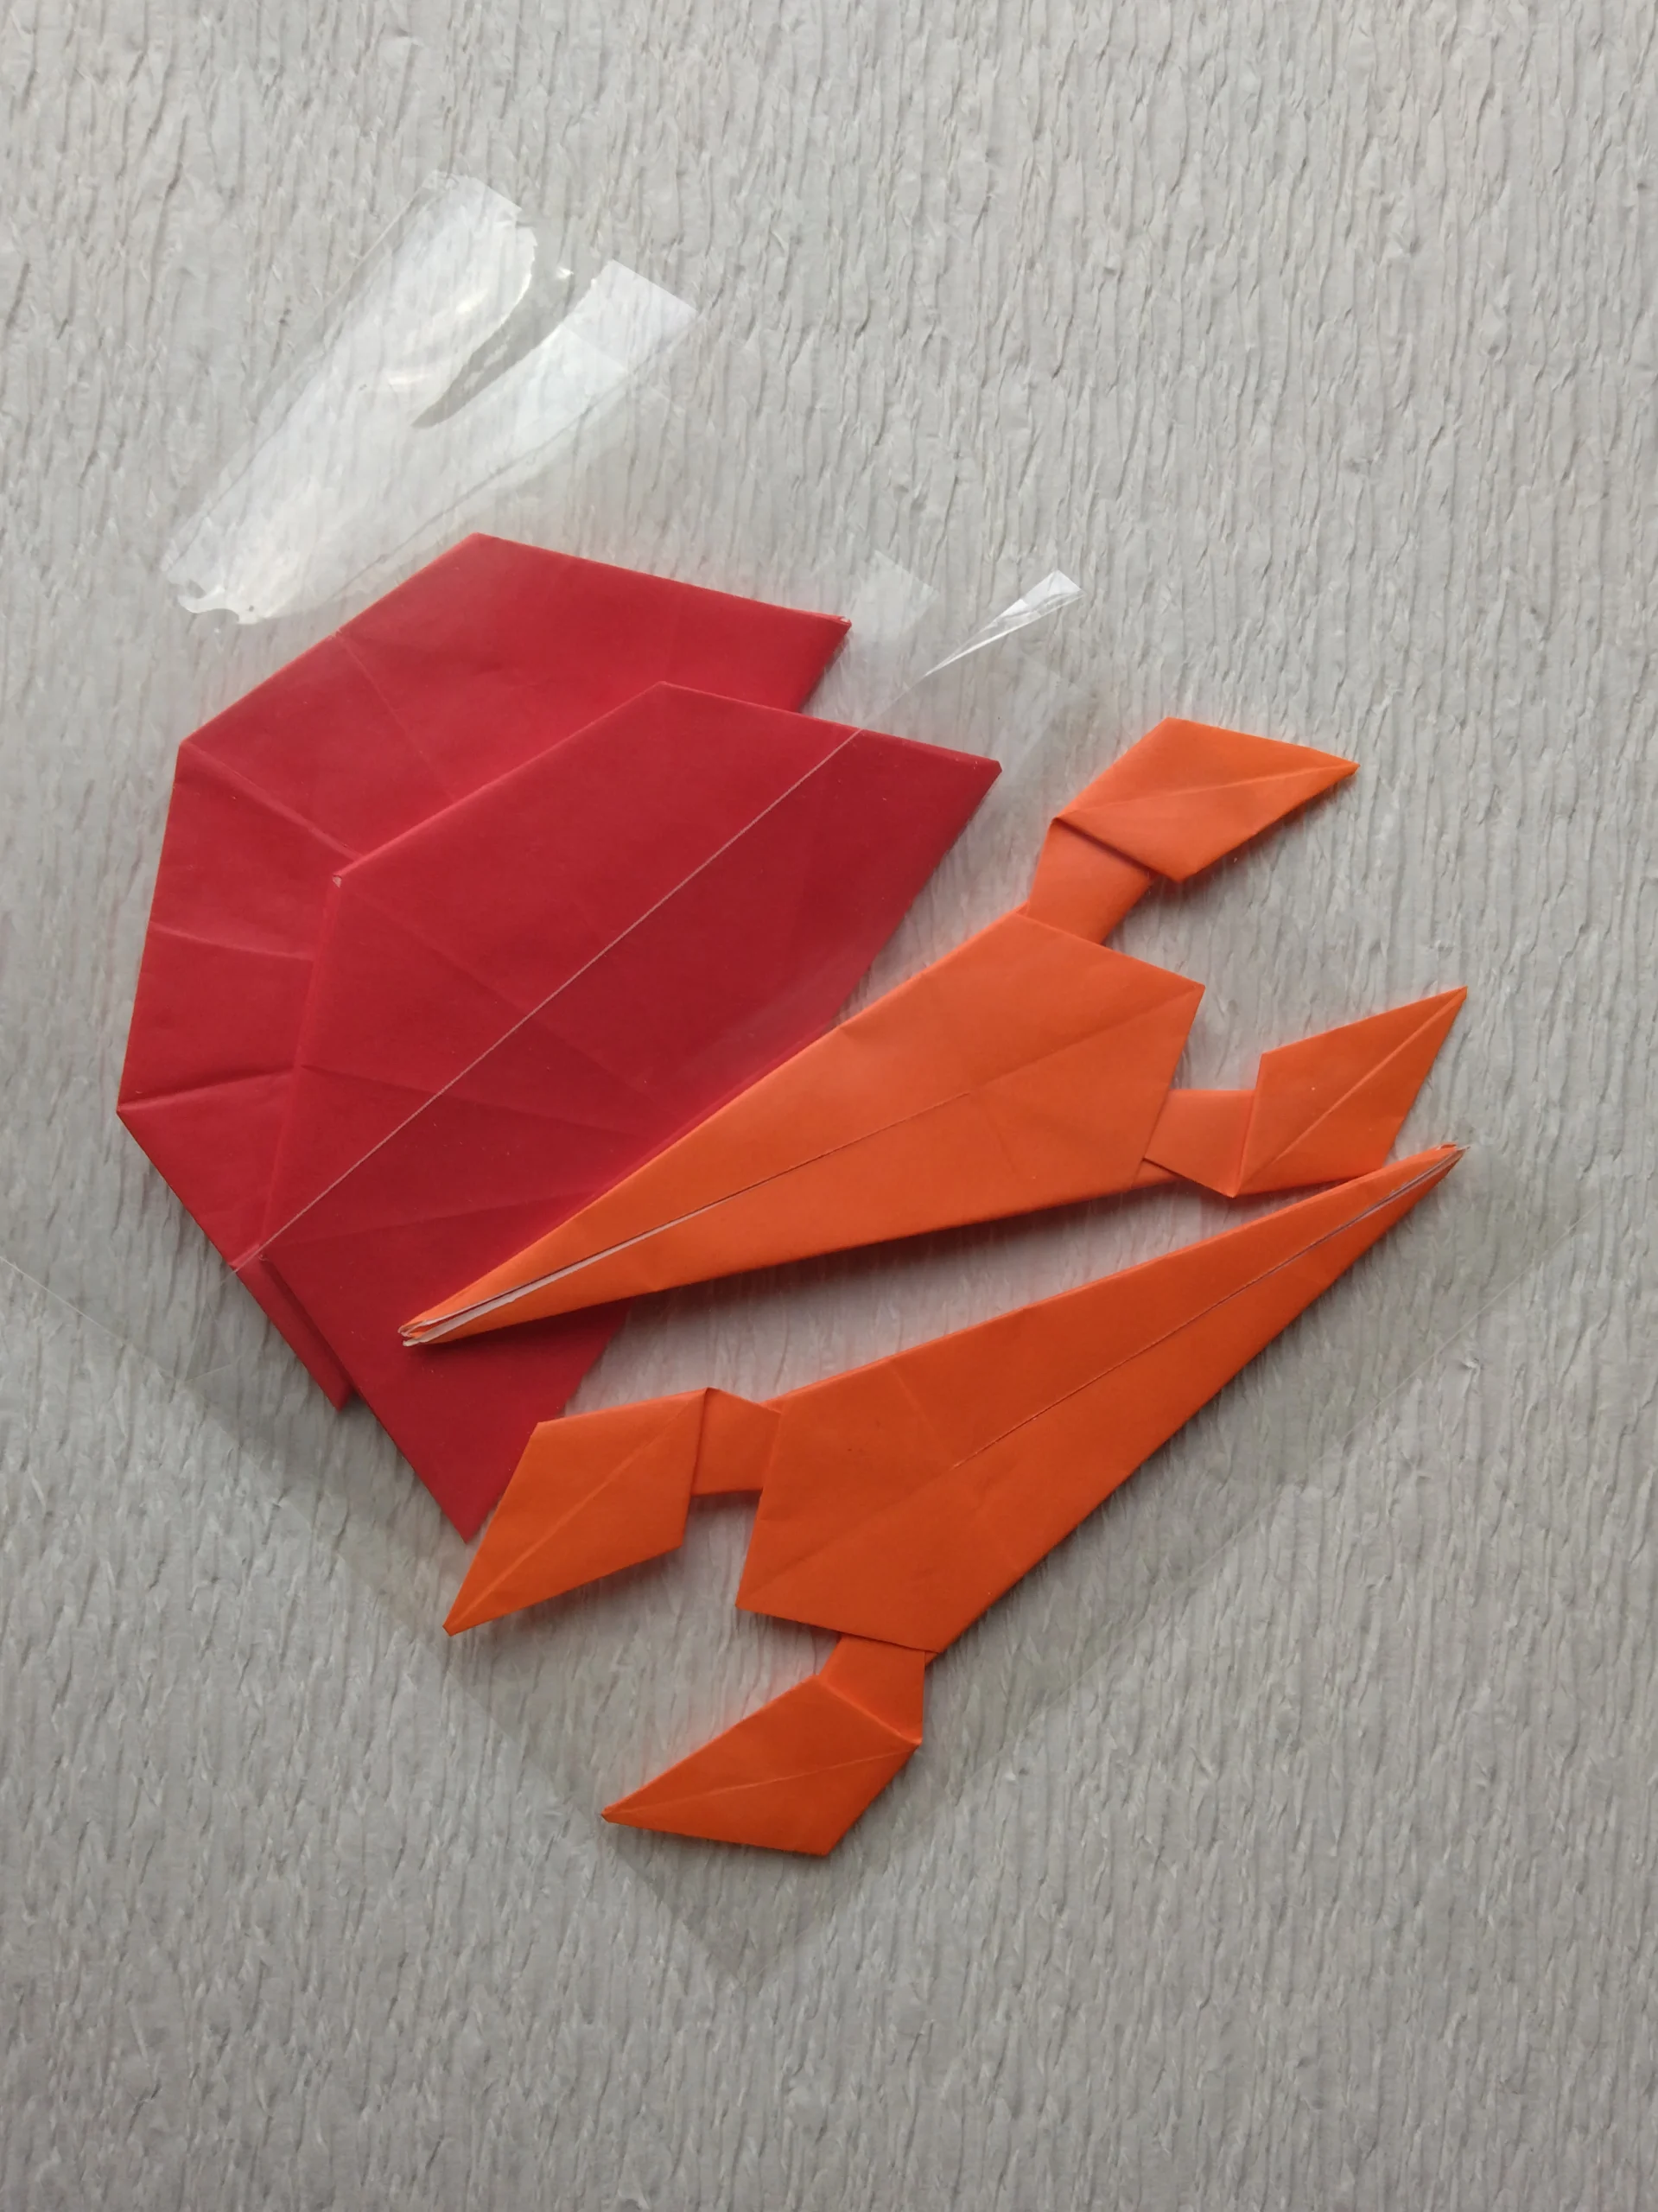
つくり方の折り図
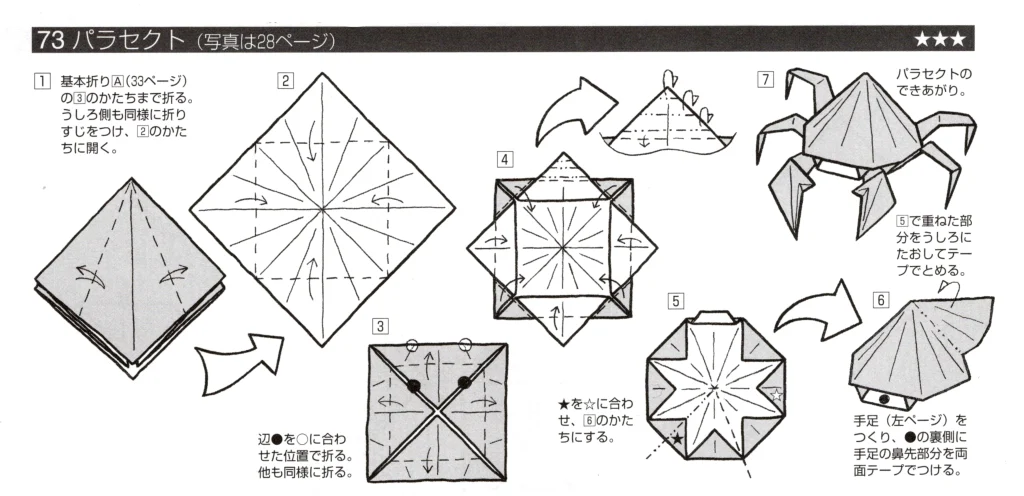
今回制作した折り図
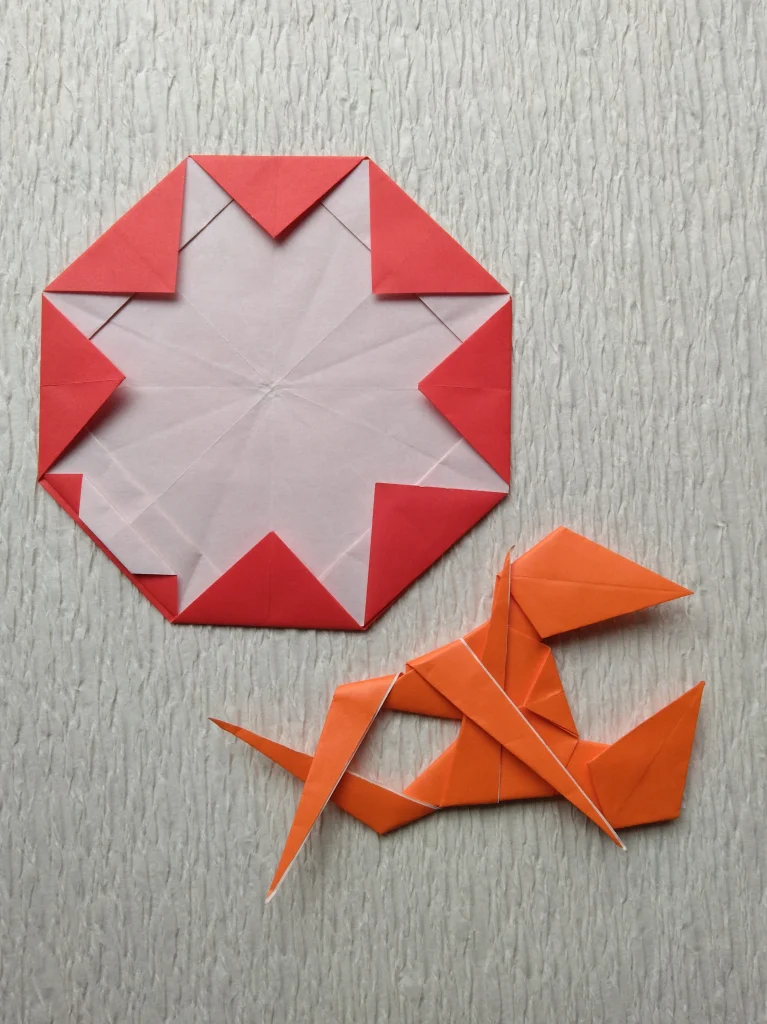
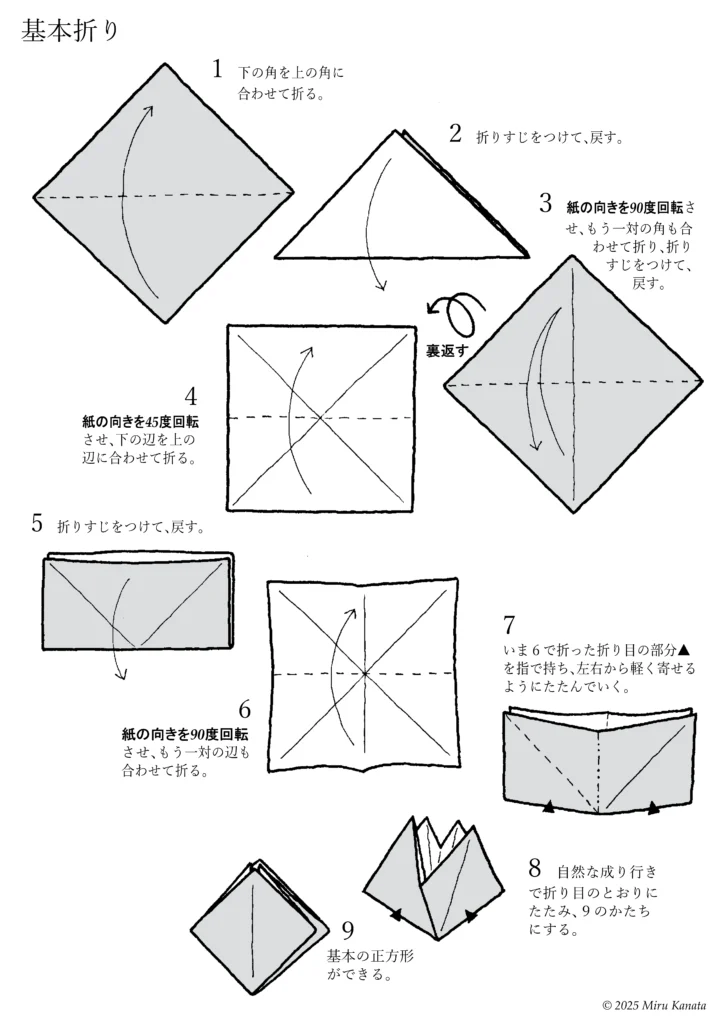
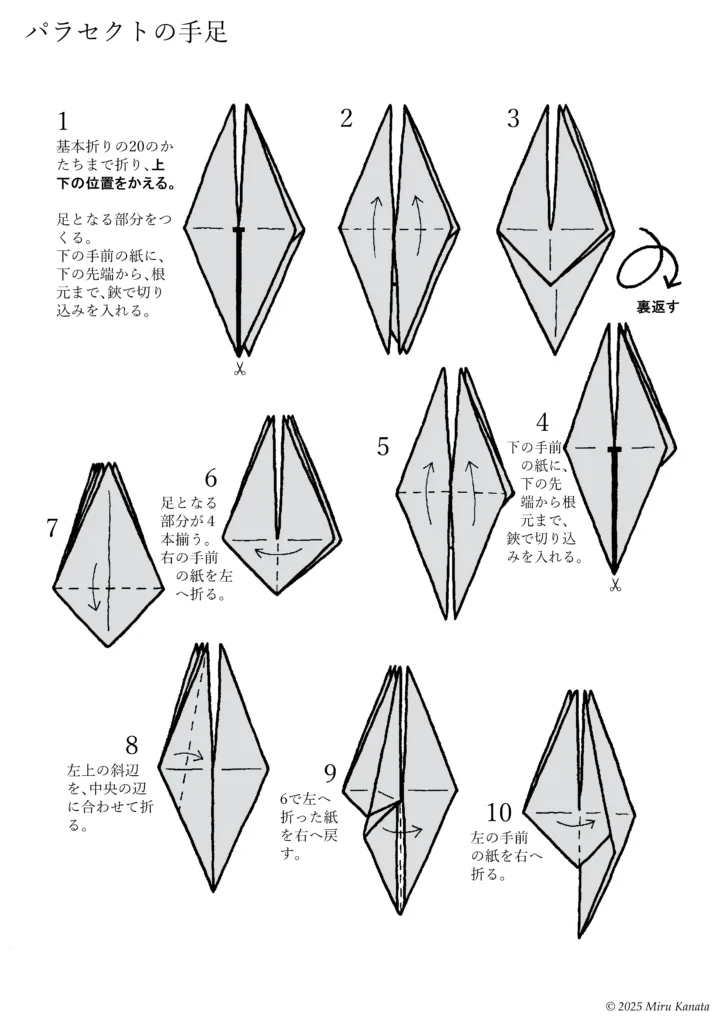
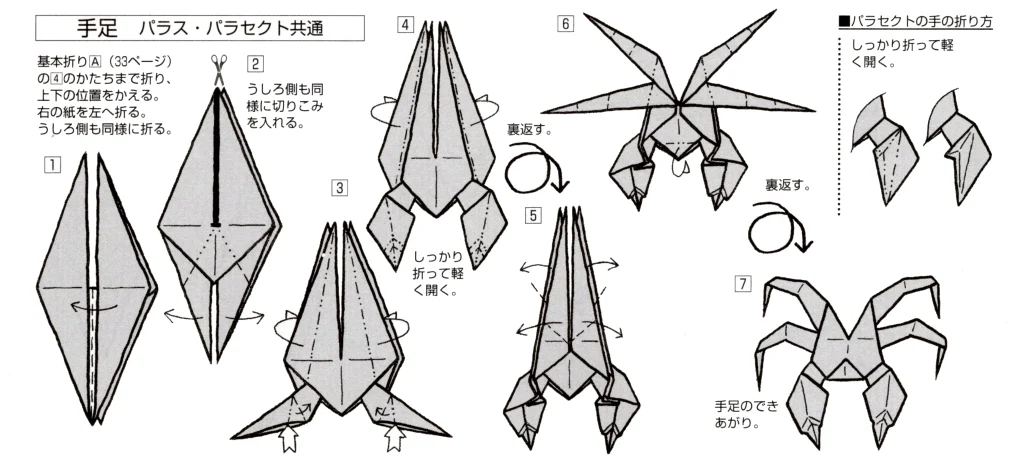
■1 パラセクトの手足は橙色の紙で、まず基本折りの図20まで折る。
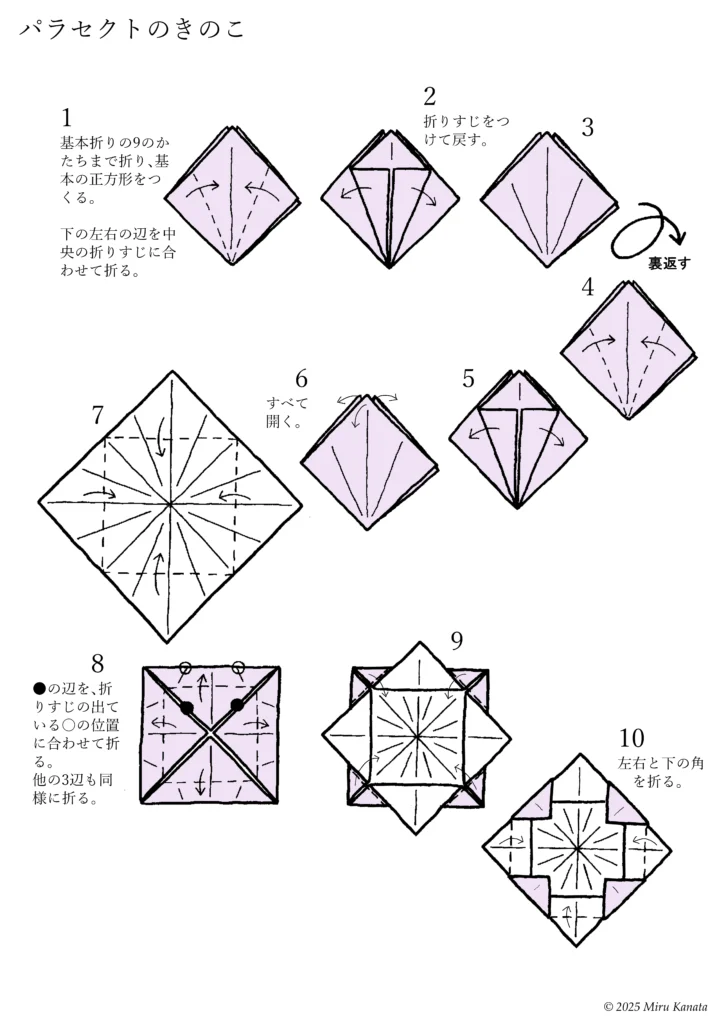
■2 パラセクトのきのこは赤色の紙で、まず基本折りの図9まで折る。
English Commentary
Basic Folding
1 Fold the bottom corner to meet the top corner.
2 Make a crease and return it to its original position.
3 Rotate the paper 90 degrees, fold the other pair of corners together, make a crease and return it to its original position.
{Flip}
4 Rotate the paper 45 degrees and fold the bottom edge to line up with the top edge.
5 Make a crease and return it to its original position.
6 Rotate the paper 90 degrees and fold the other pair of edges together.
7 Hold the crease ▲ made in step 6 with your fingers and fold gently from both sides together.
8 Let the paper naturally fold along the creases to form the shape of 9.
9 A basic square is created.
English Commentary
{Enlarge image}
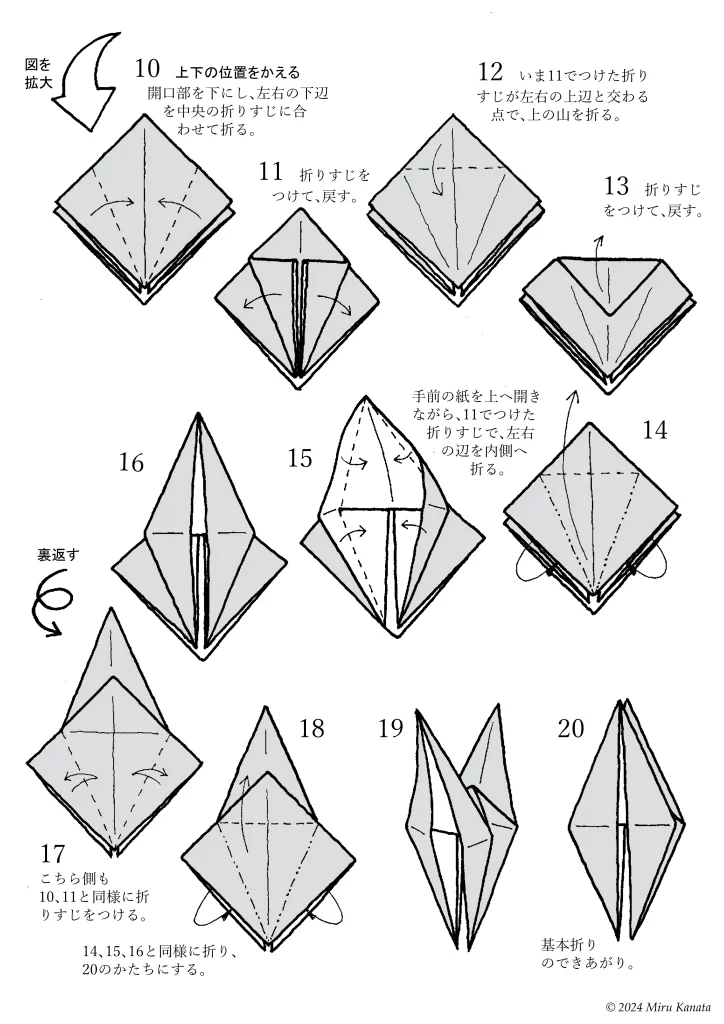
10 Change the top and bottom positions. With the opening facing downwards, fold the bottom left and right edges to meet the crease in the middle.
11 Make a crease and return.
12 Fold the top at the point where the crease made in 11 intersects with the top left and right edges.
13 Make a crease and return.
14 While opening the front paper upwards, fold the left and right edges inward along the crease made in 11.
15
16
{Flip}
17 Make creases on this side in the same way as 10 and 11.
18 Fold in the same way as 14, 15 and 16 to form 19 and 20.
19
20 The basic fold is complete.
English Commentary
Parasect’s limbs
1 Fold it up to the basic 20 shape and change the top and bottom positions. Make the legs. Make a cut with scissors in the bottom front piece of paper, from the bottom tip to the base.
2
3
{Flip}
4 Make a cut with scissors in the bottom front piece of paper, from the bottom tip to the base.
5
6 You will have four legs. Fold the right front piece of paper to the left.
7
8 Fold the upper left diagonal edge to line up with the center edge.
9 Turn the paper folded to the left in step 6 back to the right.
10 Fold the left front piece of paper to the right.
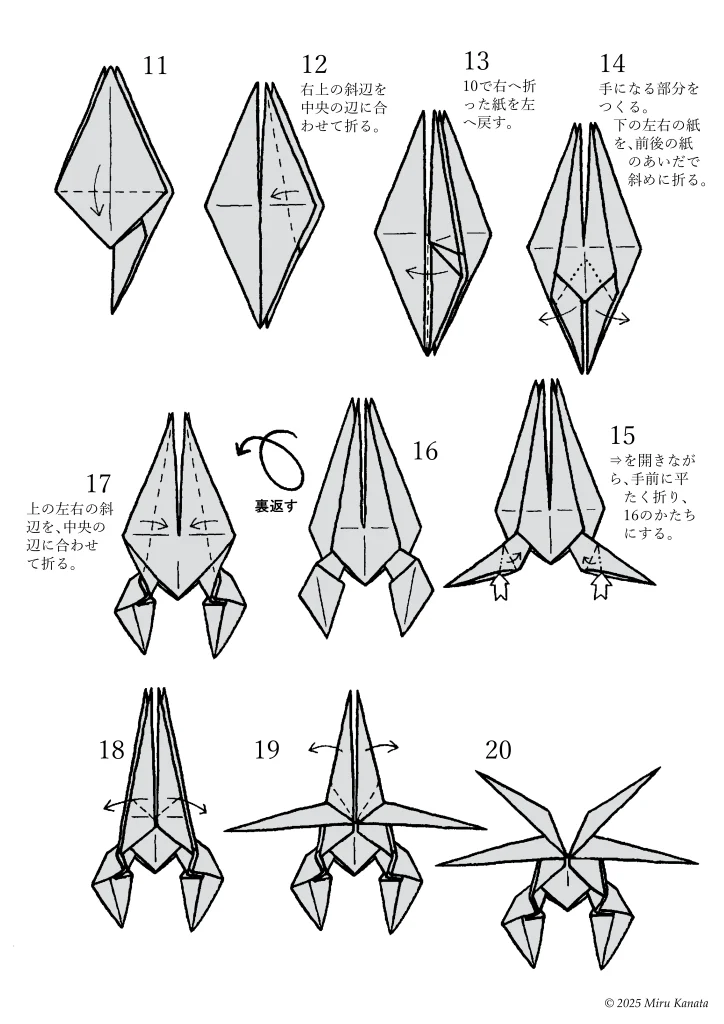
English Commentary
11
12 Fold the upper right diagonal edge to meet the center edge.
13 Turn the paper folded to the right in step 10 back to the left.
14 Make the parts that will become the hands. Fold the bottom left and right pieces of paper diagonally between the front and back pieces of paper.
15 While opening the arrow, fold it flat towards you to form the shape of 16.
16
{Flip}
17 Make the legs. Fold the top left and right diagonal edges to meet the center edge.
18
19
20
English Commentary
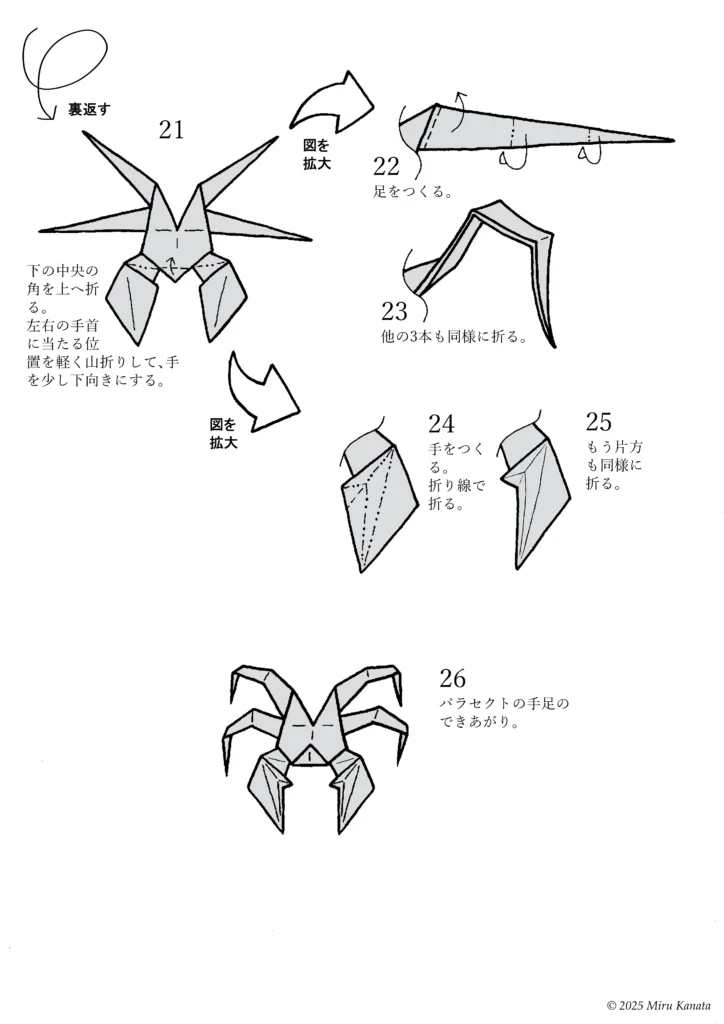
{Flip}
21 Fold the bottom center corner up. Fold the points on both sides that will touch your wrists slightly in a mountain fold, so that your hands are pointing slightly downwards.
{Enlarge image}
22 Make the legs.
23 Fold the other three in the same way.
{Enlarge image}
24 Make the hands. Fold along the crease.
25 Fold the other side in the same way.
26 Parasect’s limbs are complete.
English Commentary
Parasect’s Mushroom
1 Fold up to the basic fold number 9 to create a basic square. Fold the bottom left and right edges to match the crease in the center.
2 Add a crease and turn it back.
3
{Flip it over}
4
5
6 Open it all up.
7
8 Fold the ● edge to match the ○ where the crease appears. Fold the other three edges in the same way.
9
10 Fold the left and right corners and the bottom corner.
English Commentary
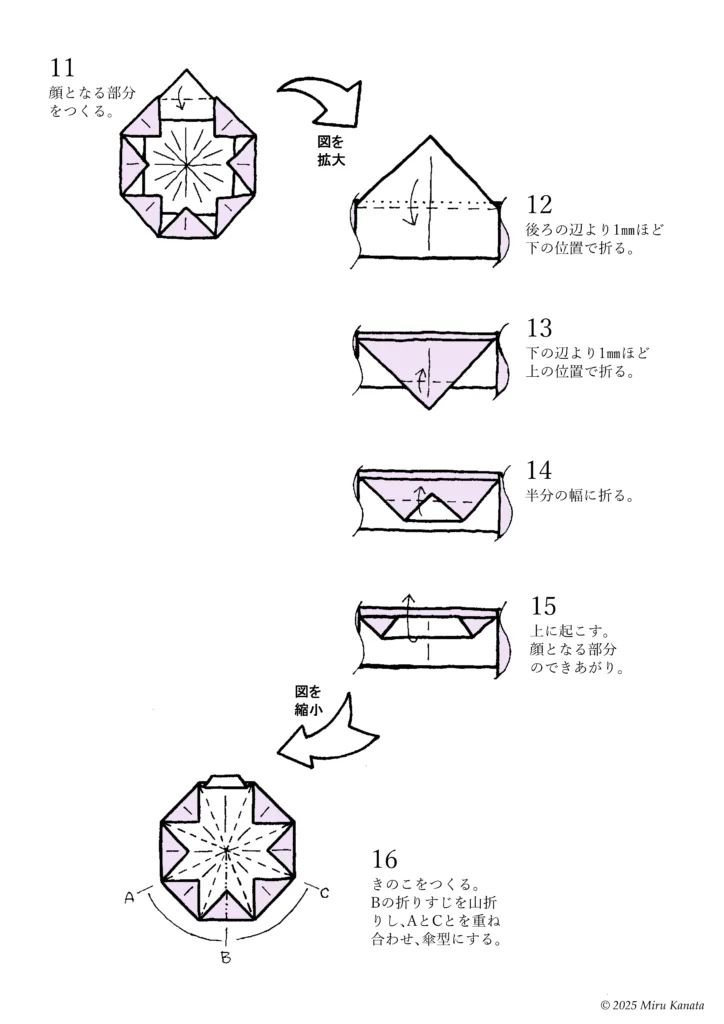
11 Make the part that will become the face.
(Enlarge image)
12 Fold it about 1mm below the back edge.
13 Fold it about 1mm above the bottom edge.
14 Fold it in half.
15 Turn it up. The part that will become the face is finished.
(Reduced image)
16 Make the mushroom. Fold the crease of B in half and overlap A and C to make an umbrella shape.
English Commentary
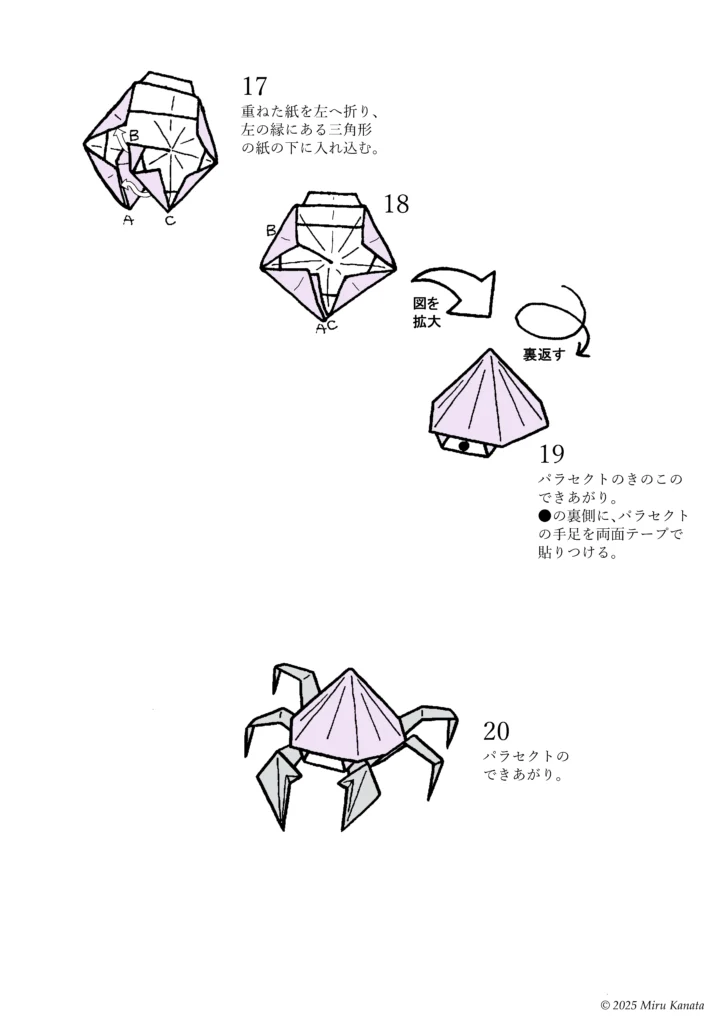
17 Fold the stacked paper to the left and tuck it under the triangular piece of paper on the left edge.
18
{Enlarge}
{Flip}
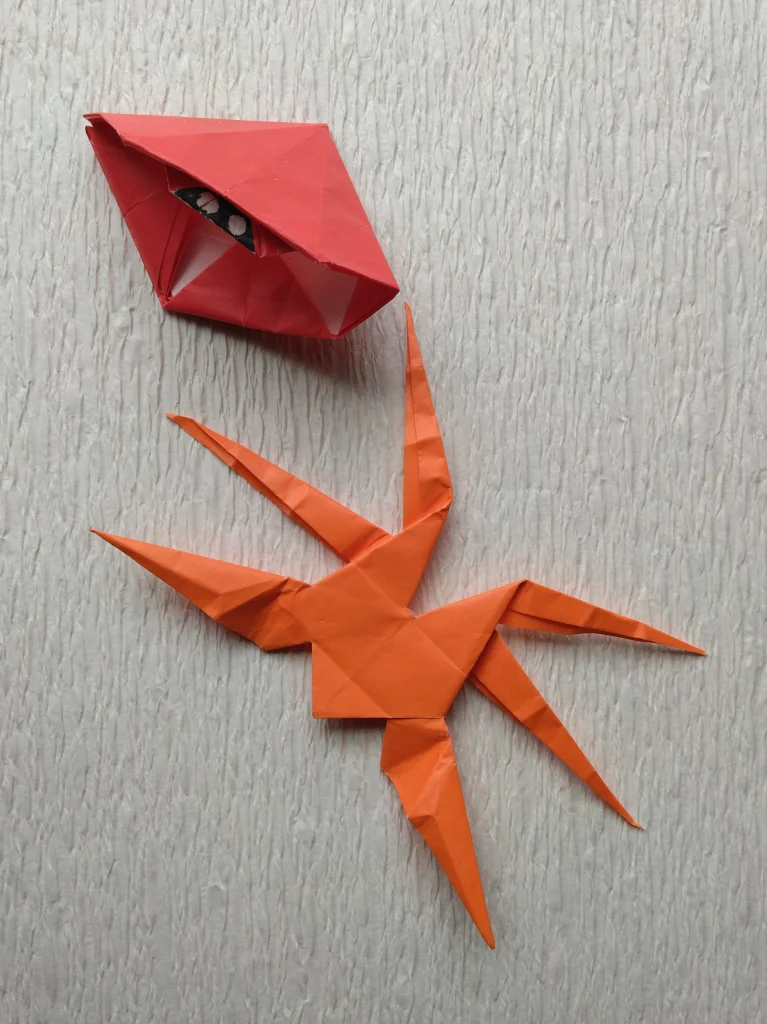
19 Parasect’s mushroom is complete. Attach Parasect’s arms and legs to the back of the ● with double-sided tape.
20 Parasect is complete.
参考・2000年の本に掲載した折り図
みるかなた本棚>『ポケットモンスターおりがみコレクション』>ポケモンおりがみ一覧表>0047 パラセクト
◇ ◇ ◇