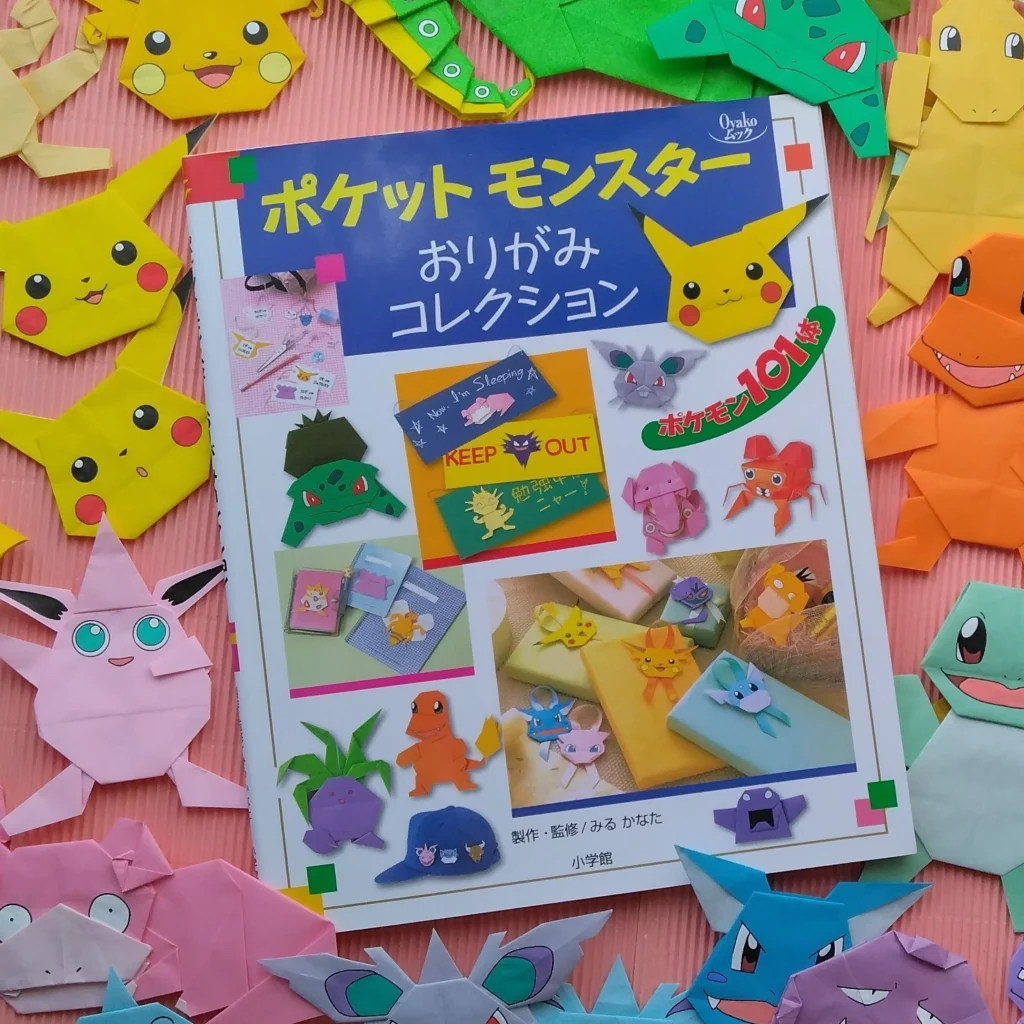
みるかなた本棚>『ポケットモンスターおりがみコレクション』>ポケモンおりがみ一覧表>0046 パラス
◆0046 パラス◆0047 パラセクト◆
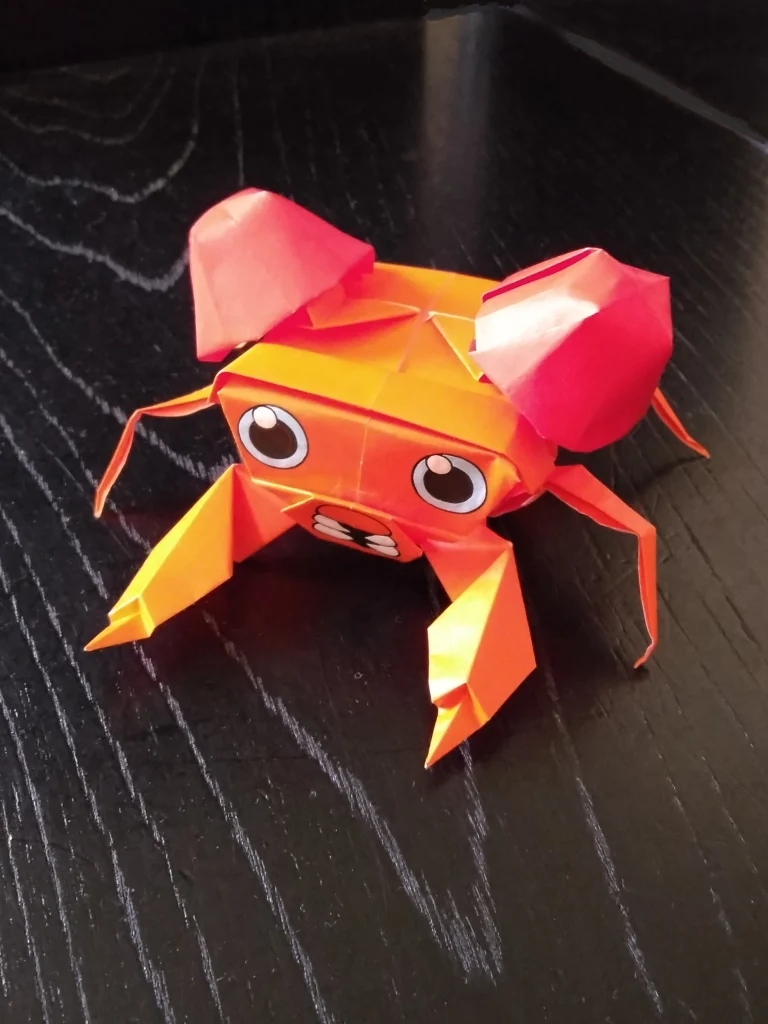
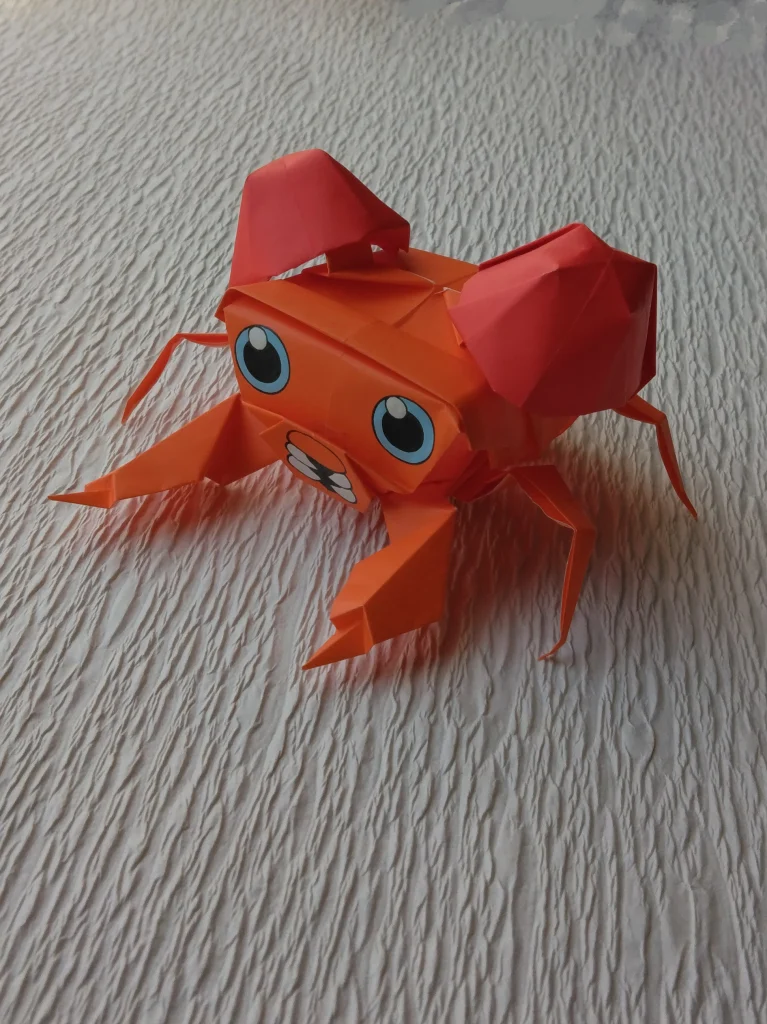
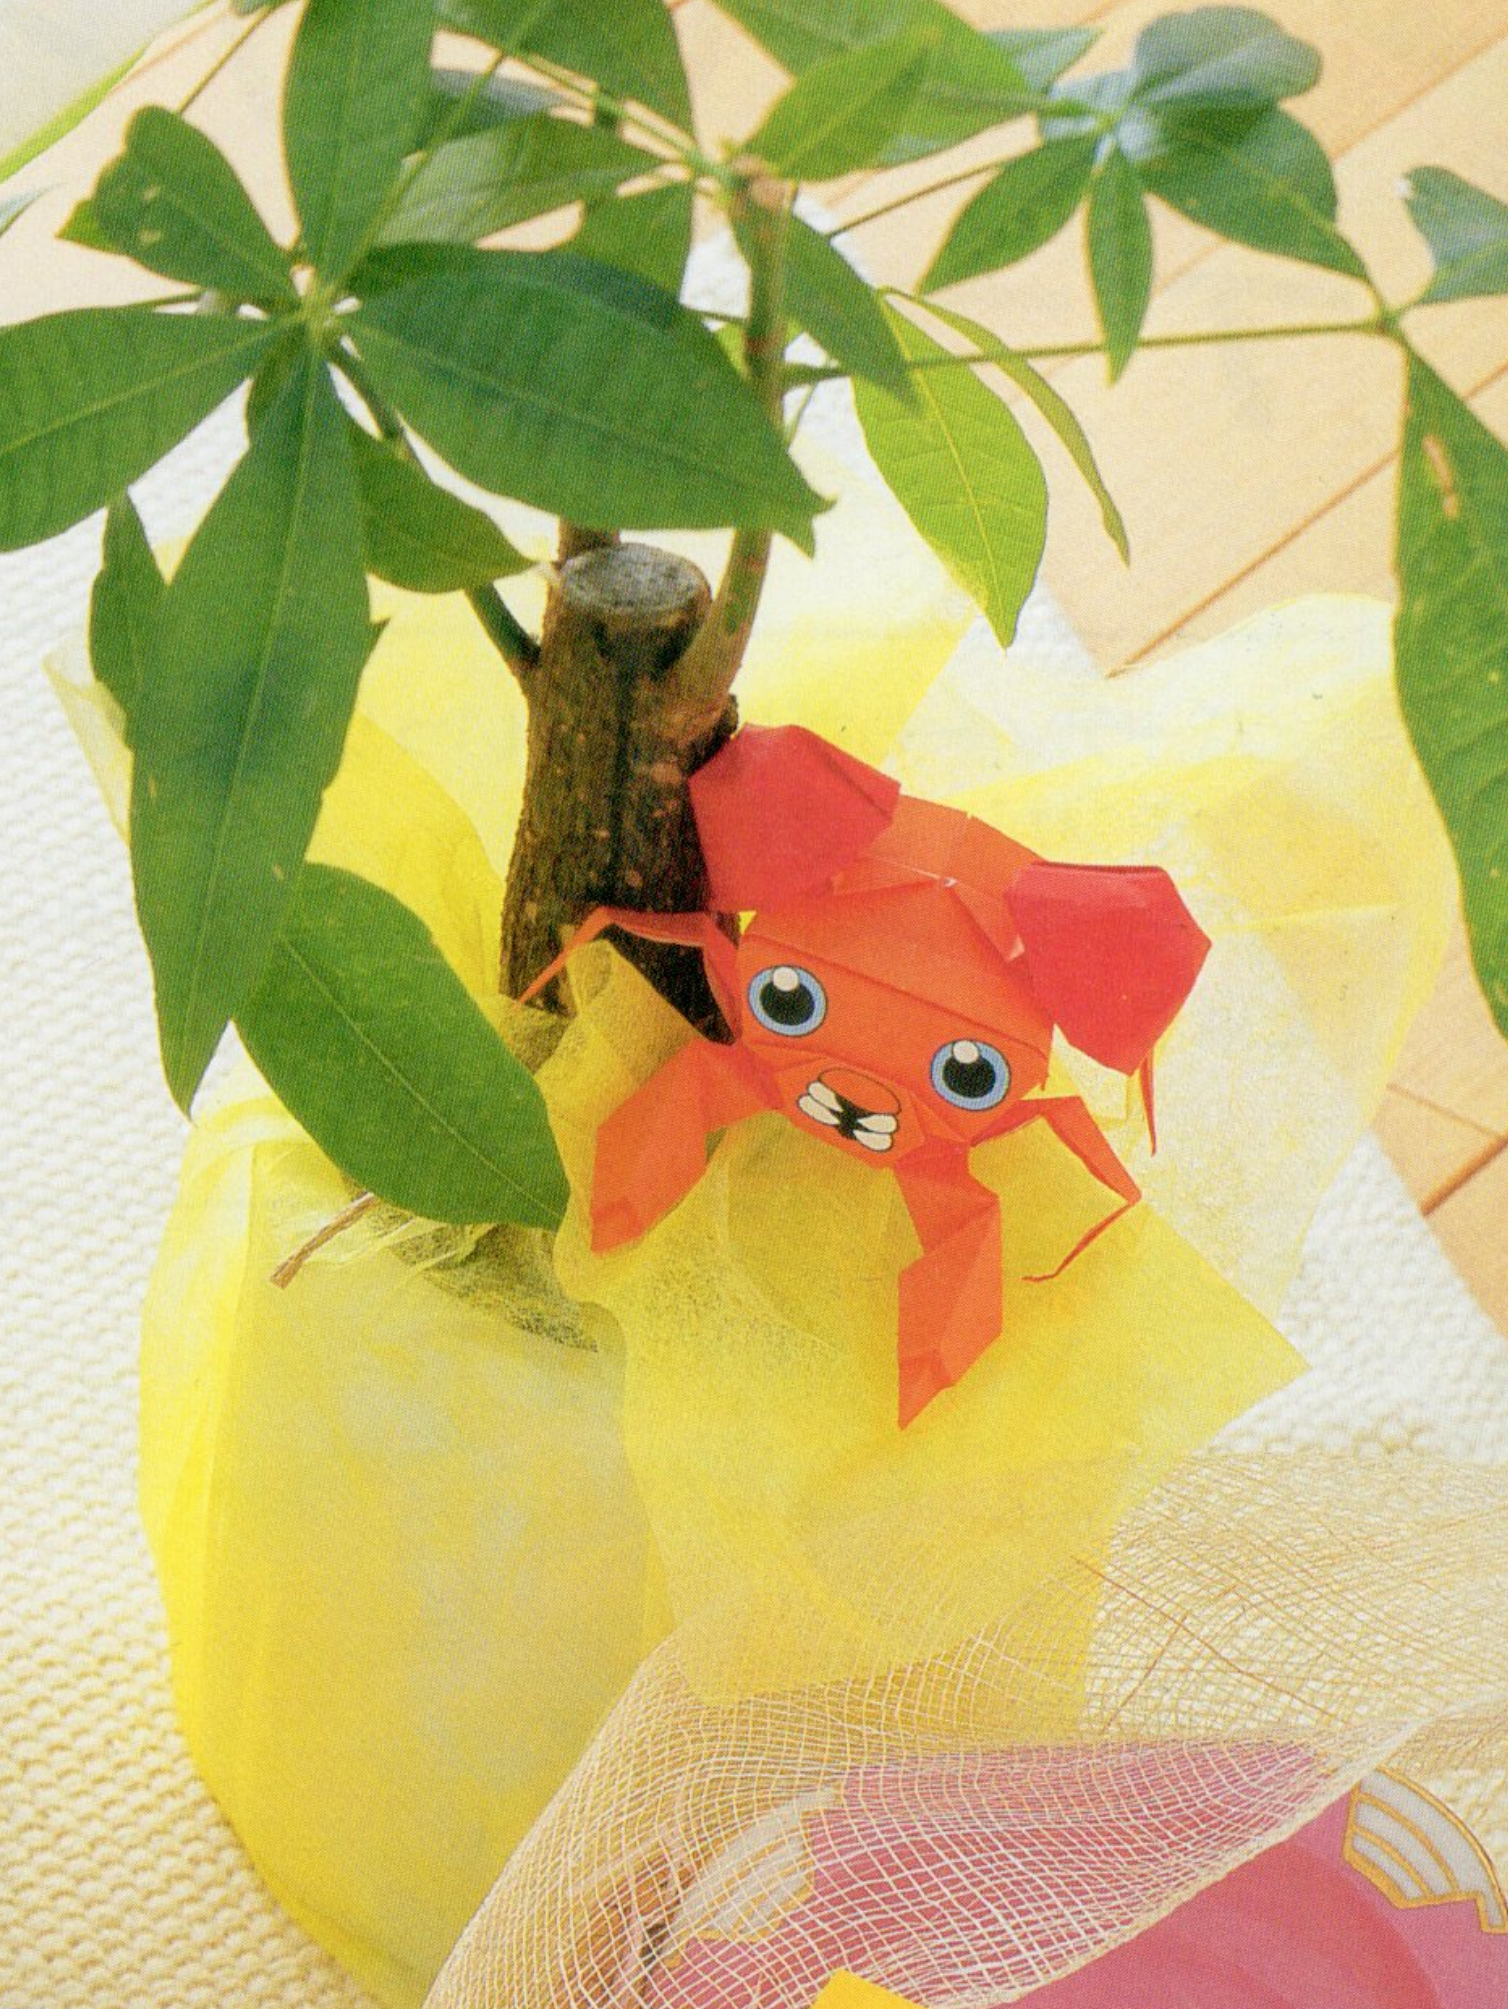
0046 パラス
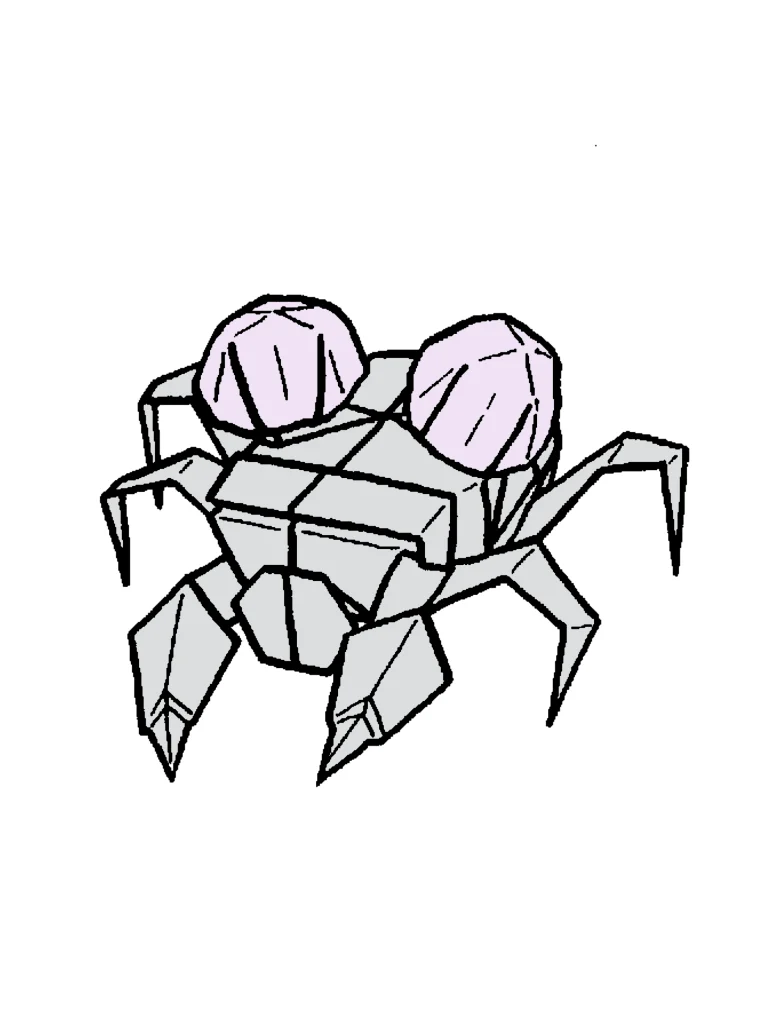
いろいろな角度からデッサンして検討したのですが、平面でうまく表現できそうなかたちをみつけることができませんでした。
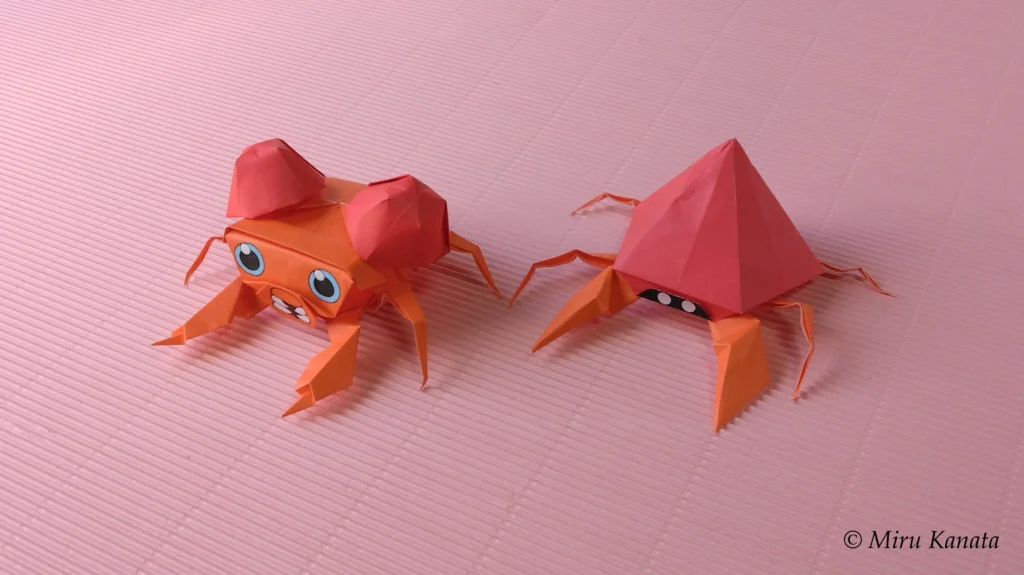
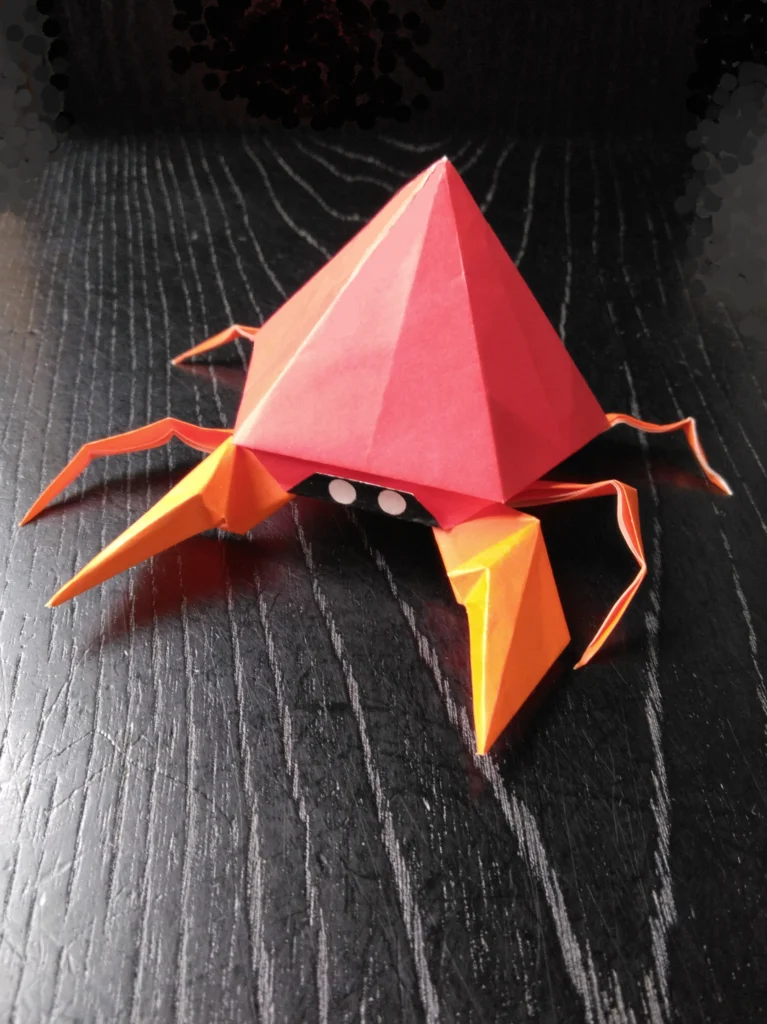
そんなわけで、やむなく立体になりました。
ゲームフリークの初回のチェックで
「きのこ部分が、足部分より目立つように」
というご指摘がありました。
それで、きのこを別仕立てにして、組み合わせるかたちにつくり、OKをいただきました。
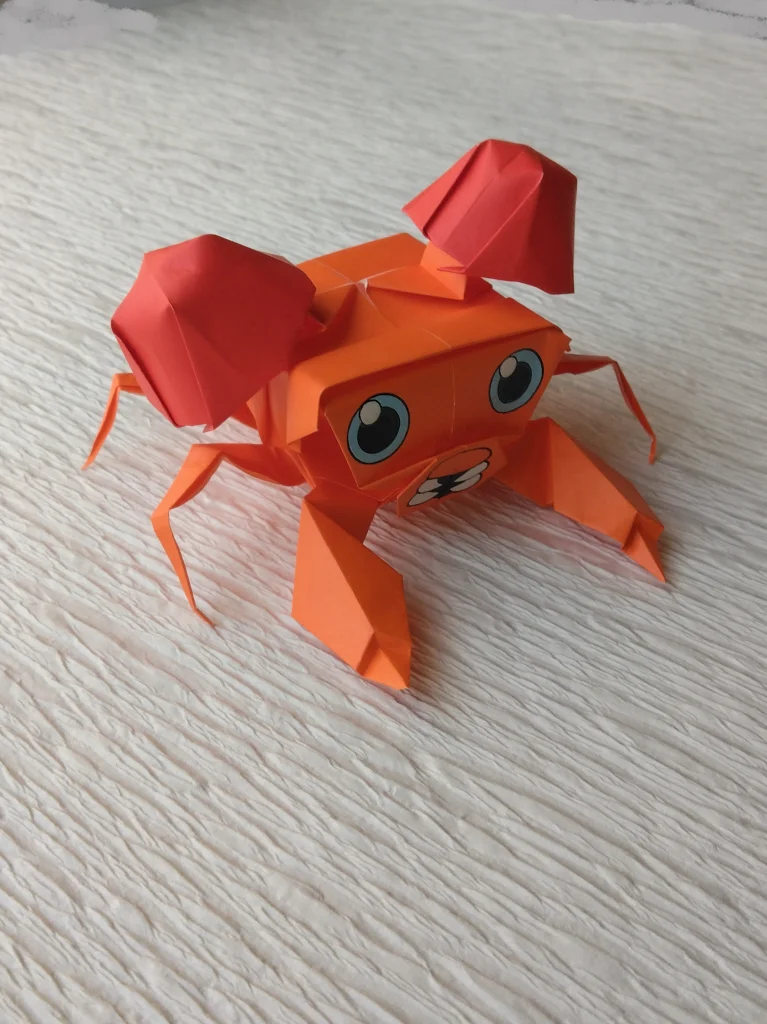
立体ですけれど、特に難しいことはありません。
ピカチュウと同じように素直に折っていけばできあがります。
ぜひ楽しんでください。
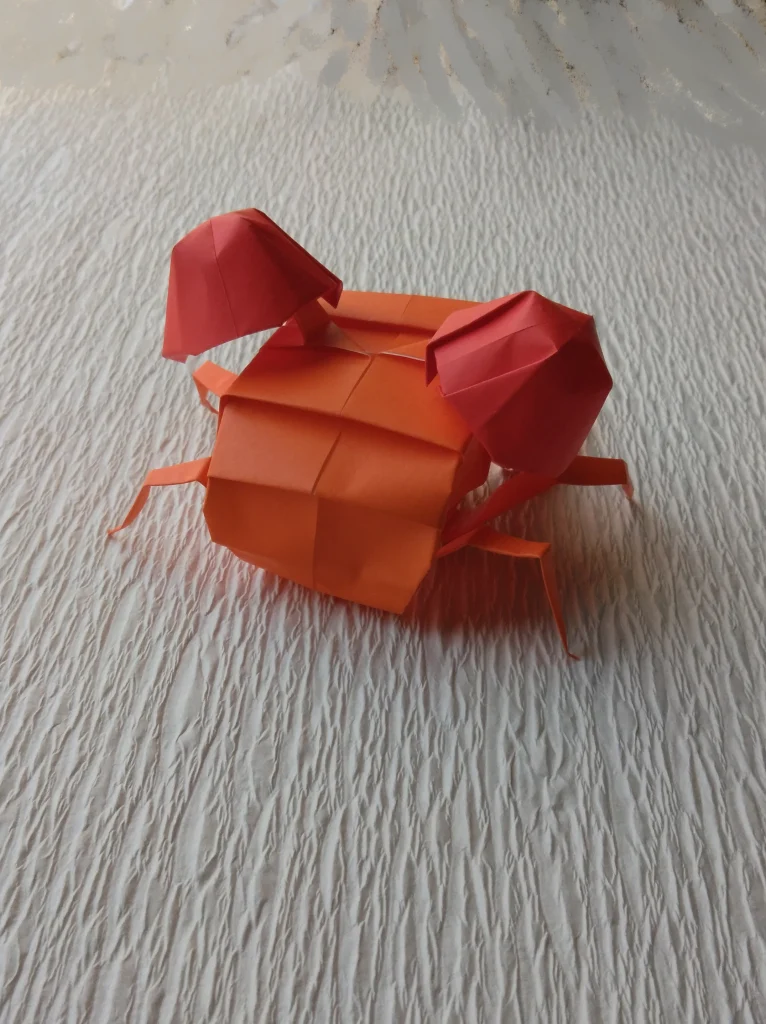
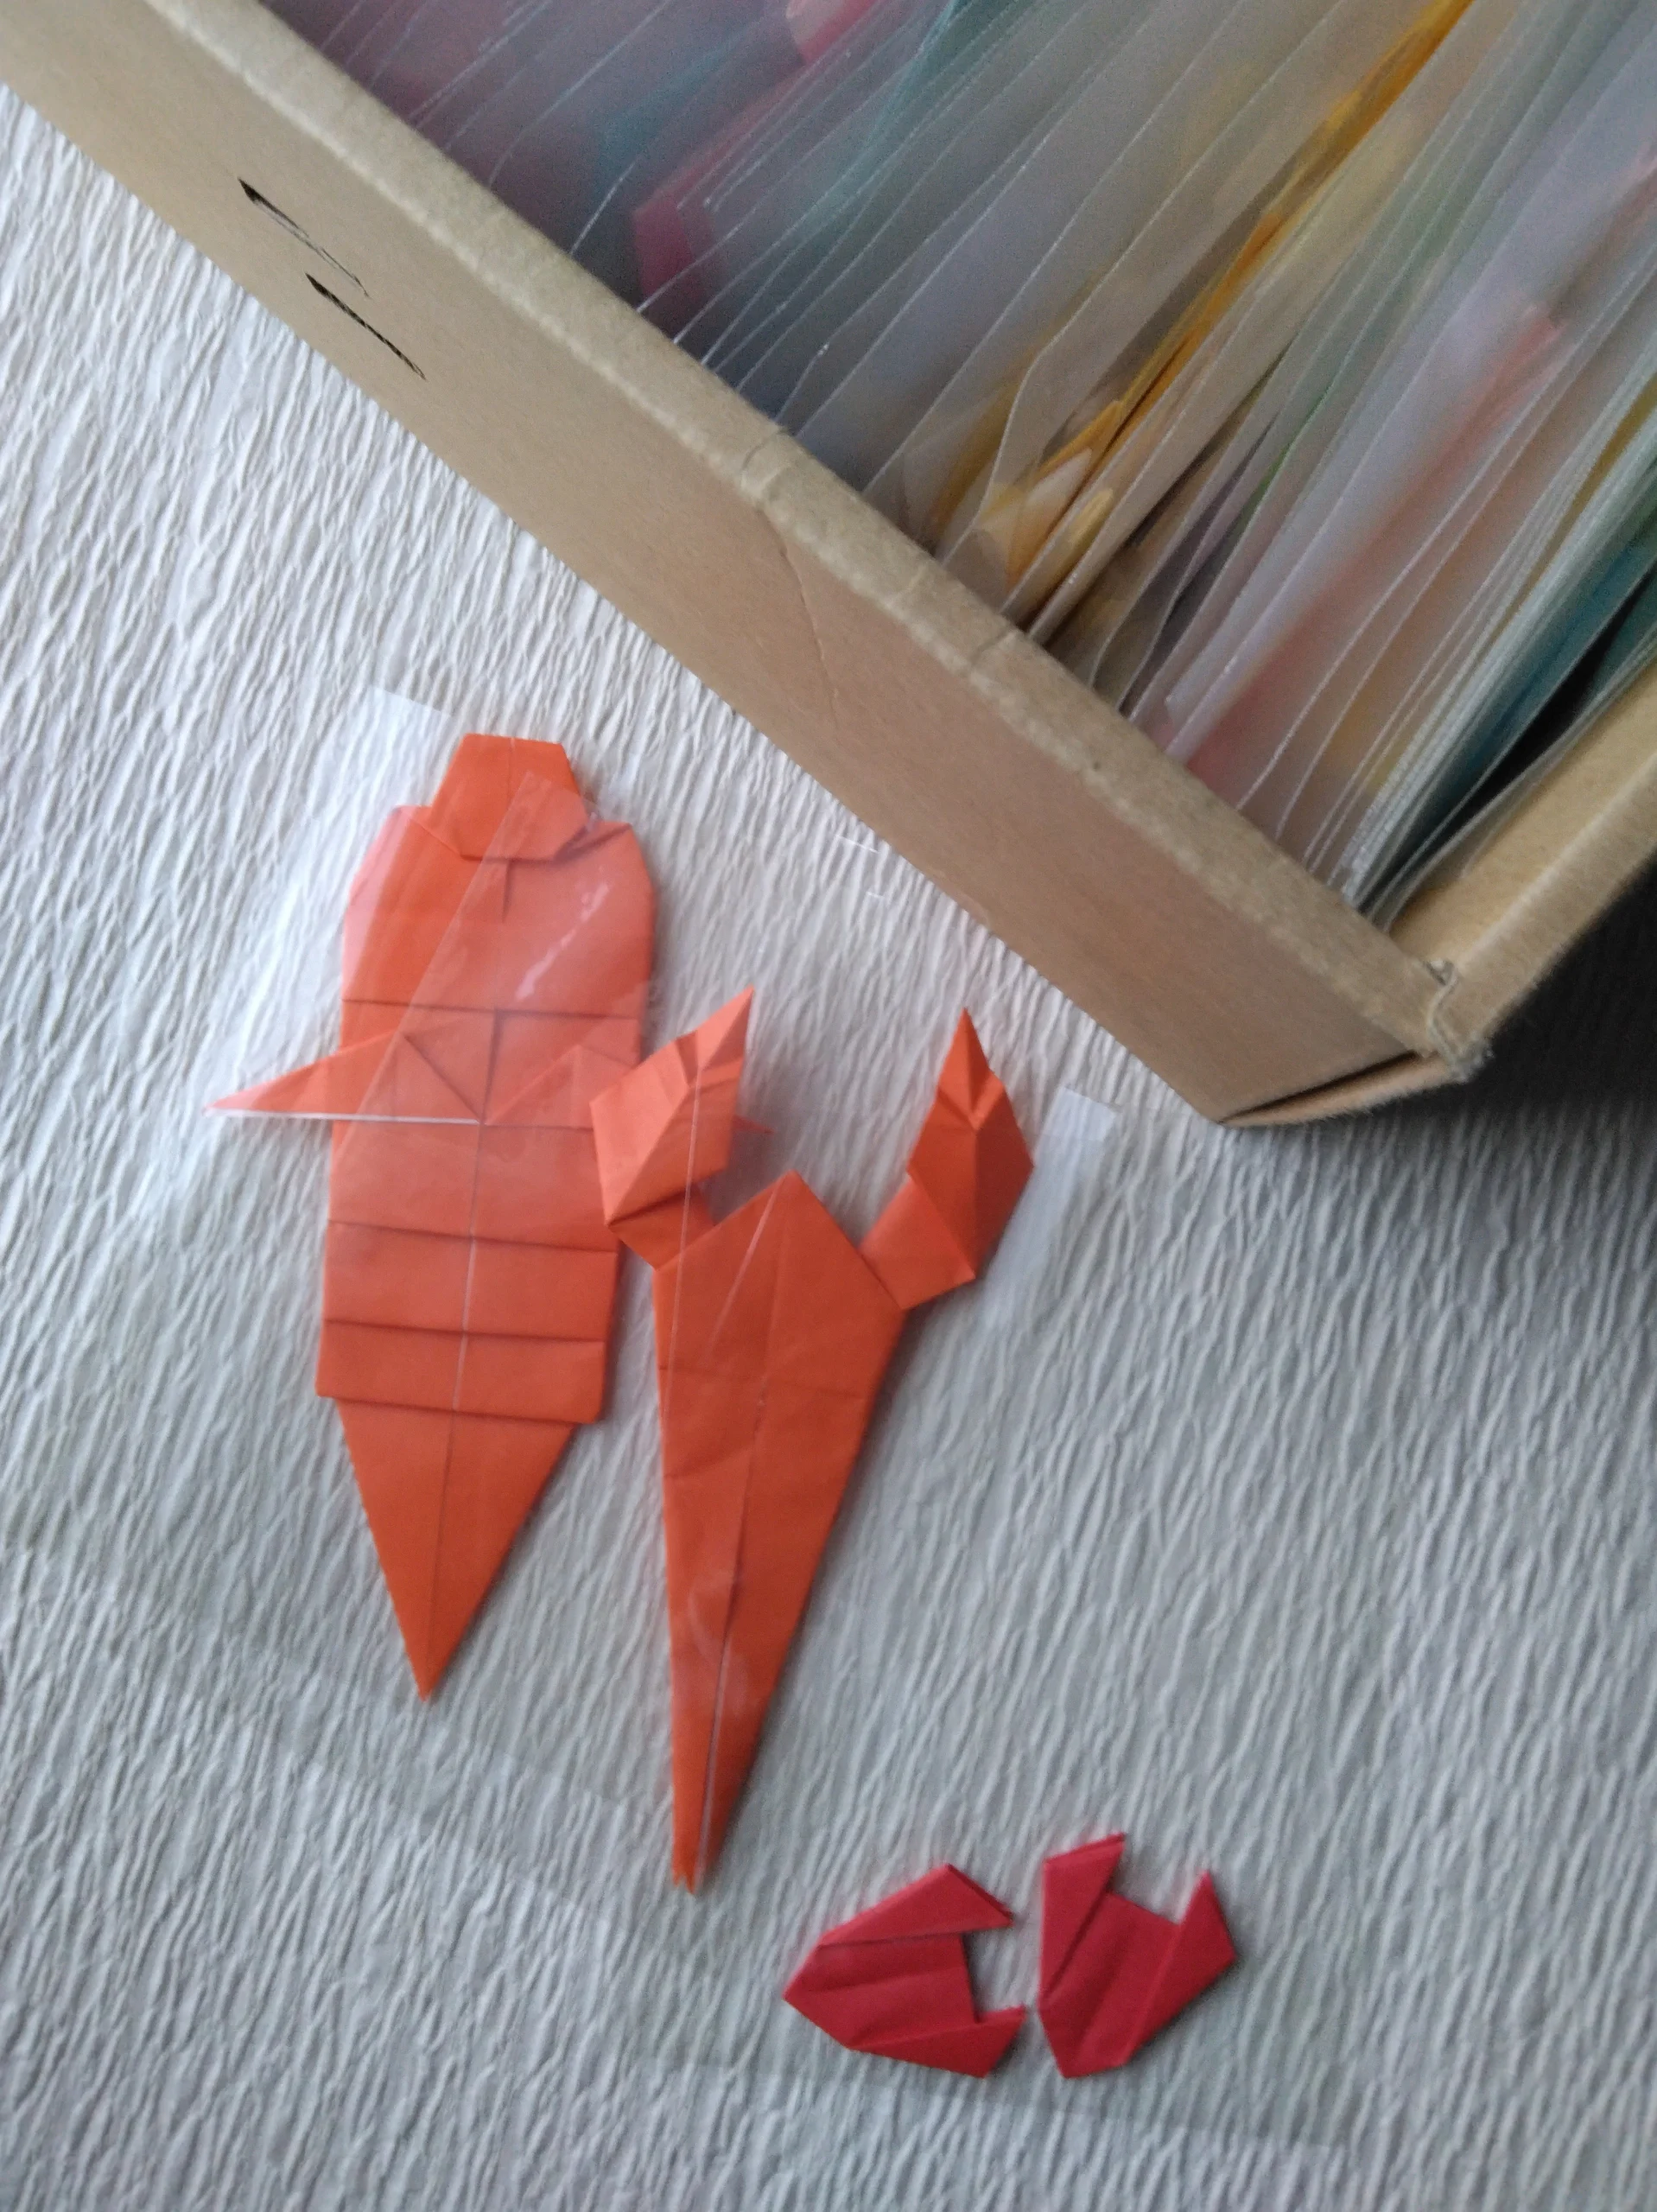
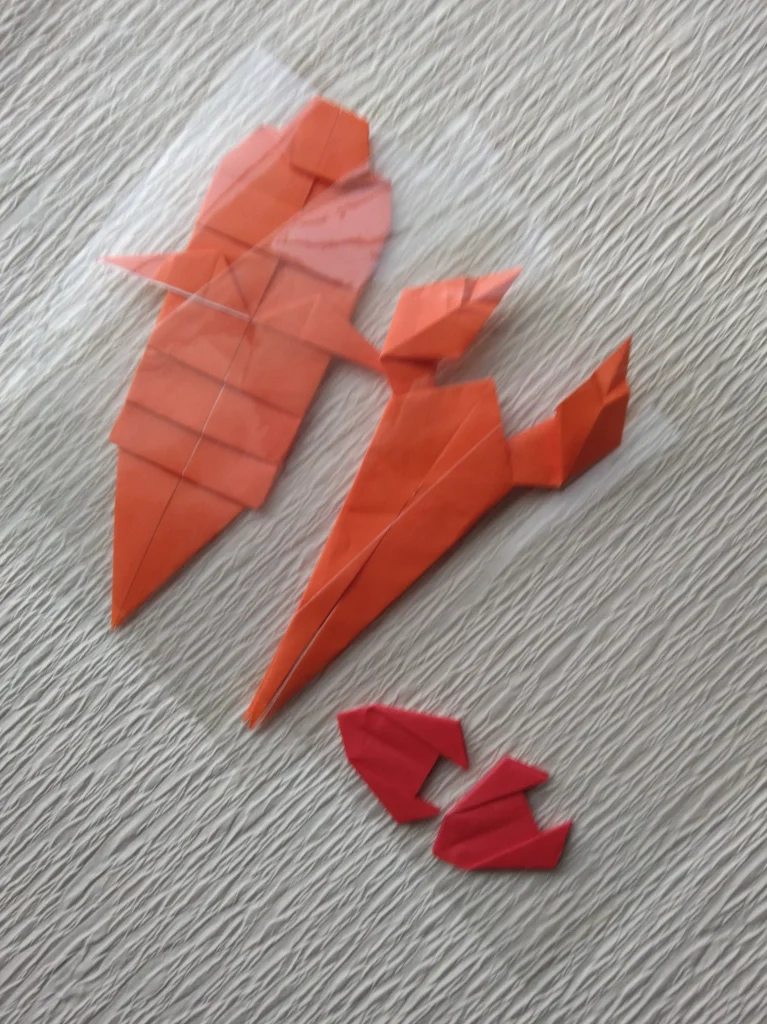
立体だと保管に場所をとるし、また破損の機会も増えます。
ですから、飾る場合以外は、たたんで、それぞれ透明袋に入れて、おりがみ専用の箱にしまっています。
必要になったら、箱から出して組み立てます。
★ゲームフリークのチェック
◆「きのこ部分が、足部分より目立つように」というご指摘がありました。
それで、きのこを別仕立てにして、組み合わせるかたちにつくり、次の回にOKをいただきました。
◆きのこも何種類かつくりました。
「きのこは、丸タイプで」
ということで、このかたちを選んでいただきました。
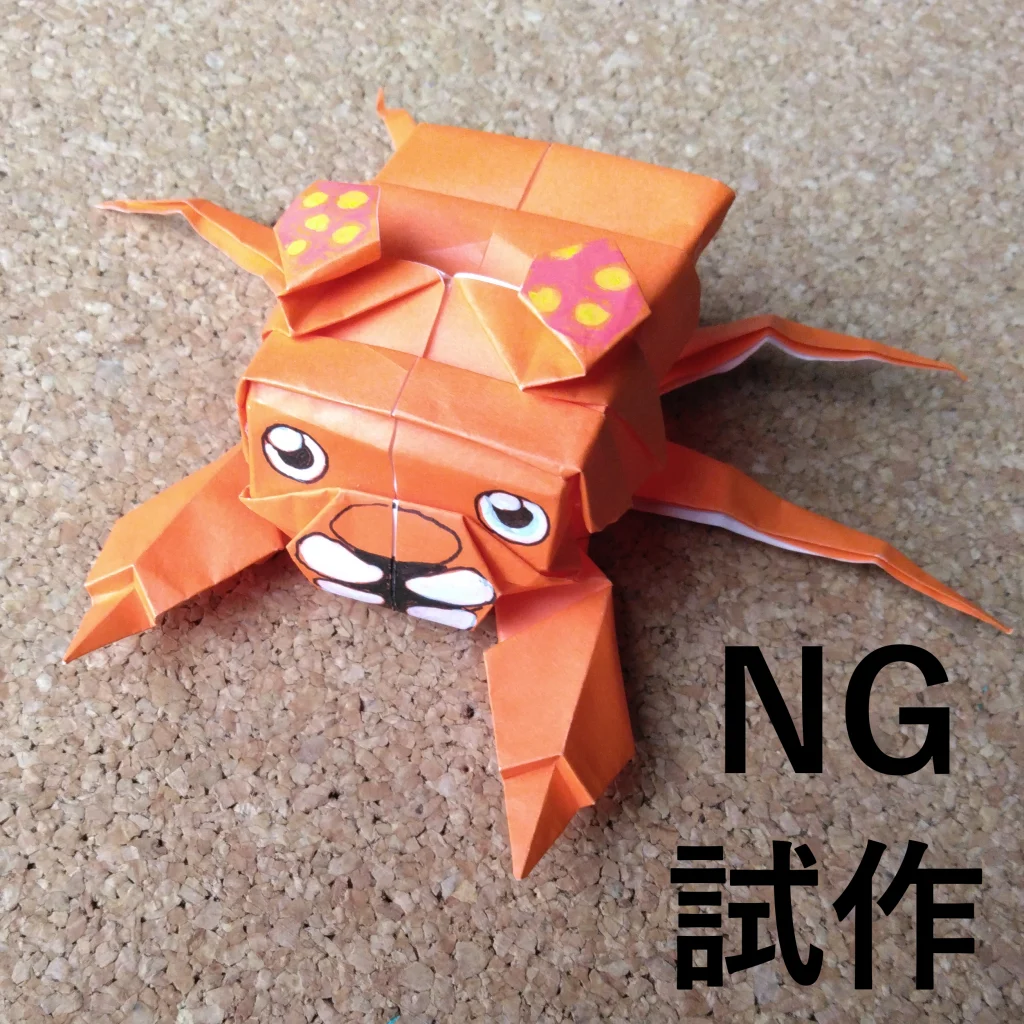
背中のきのこが小さかったために、N.G.となった試作。
Evolution
つくり方の折り図
今回制作した折り図
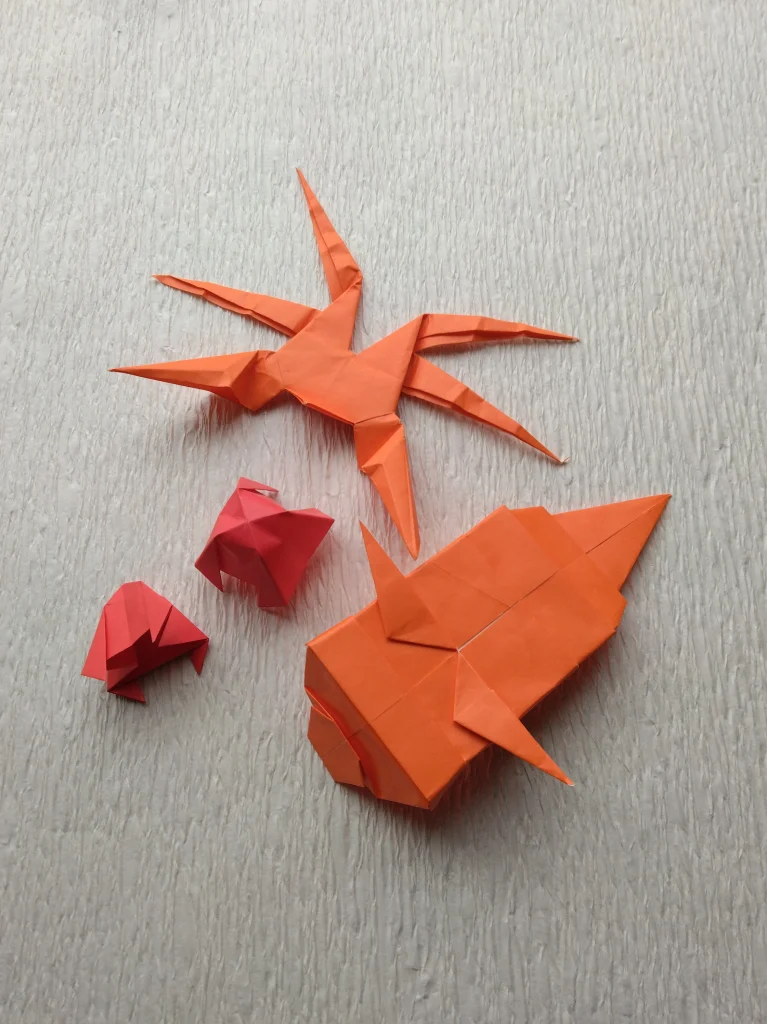
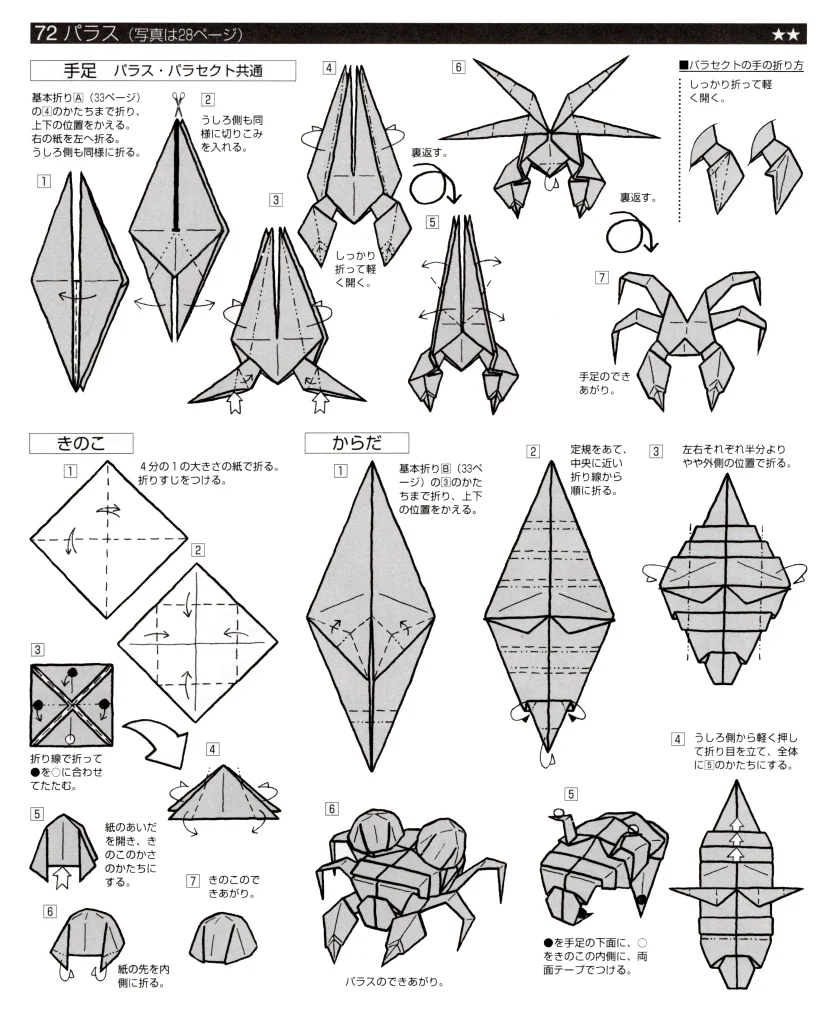
■1 パラスの手足は橙色の紙で、まず基本折りの図20まで折る。
■2 パラスのからだは、橙色の紙で折る。
■3 パラスのきのこは4分の1のサイズの赤色の紙を2枚用意し、折る。
English Commentary
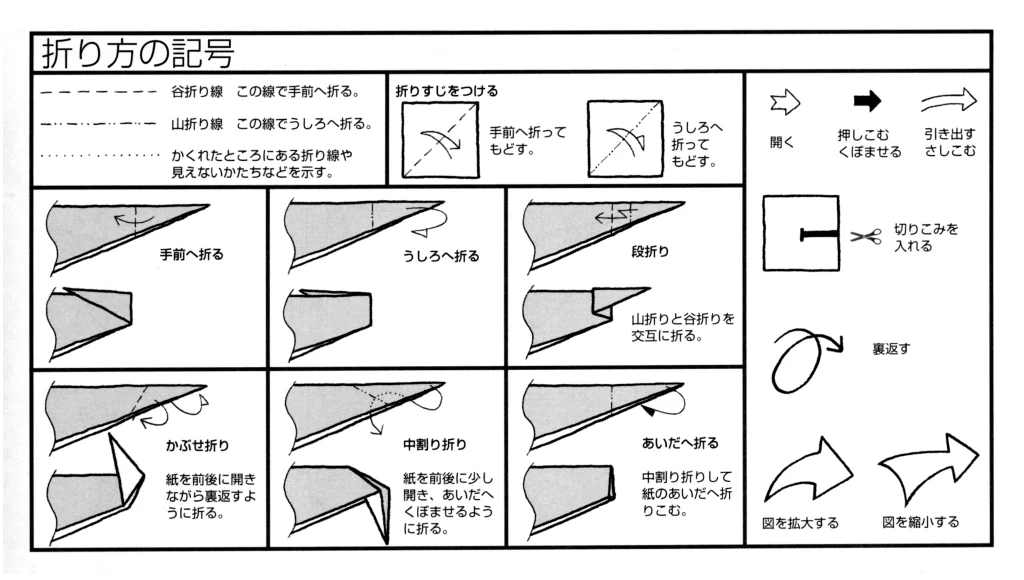
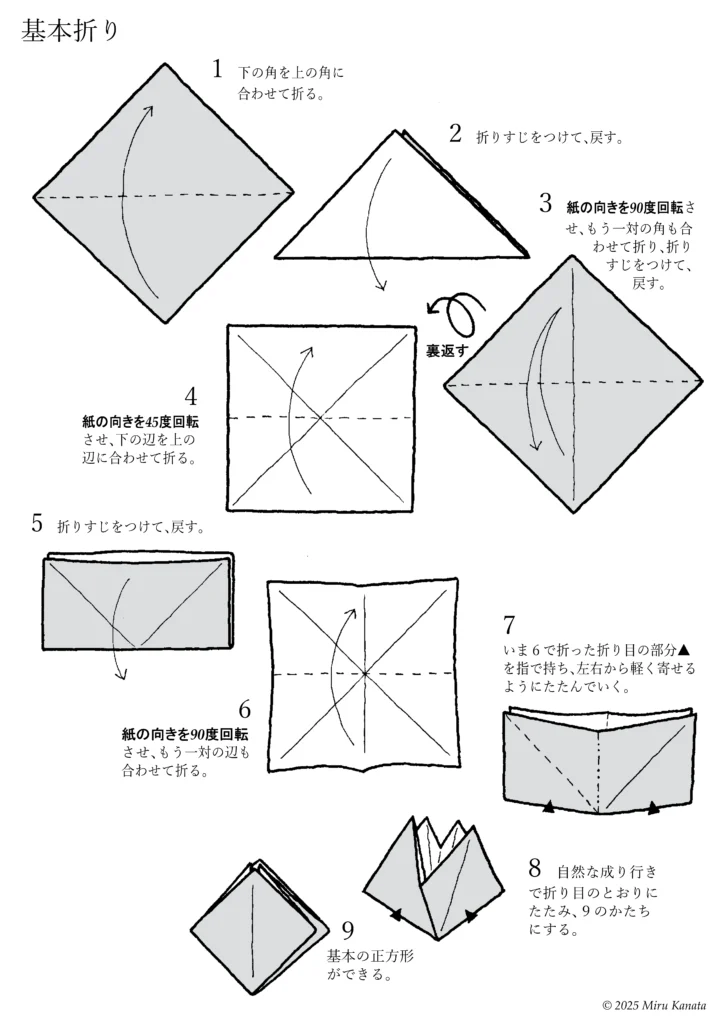
Basic Folding
1 Fold the bottom corner to meet the top corner.
2 Make a crease and return it to its original position.
3 Rotate the paper 90 degrees, fold the other pair of corners together, make a crease and return it to its original position.
{Flip}
4 Rotate the paper 45 degrees and fold the bottom edge to line up with the top edge.
5 Make a crease and return it to its original position.
6 Rotate the paper 90 degrees and fold the other pair of edges together.
7 Hold the crease ▲ made in step 6 with your fingers and fold gently from both sides together.
8 Let the paper naturally fold along the creases to form the shape of 9.
9 A basic square is created.
English Commentary
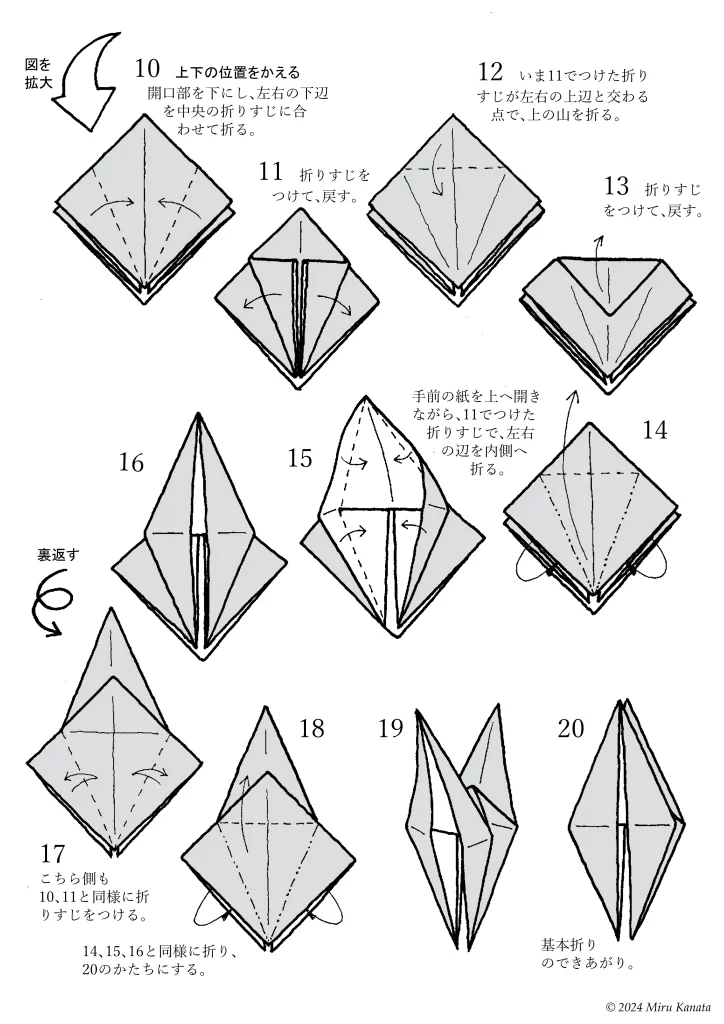
{Enlarge image}
10 Change the top and bottom positions. With the opening facing downwards, fold the bottom left and right edges to meet the crease in the middle.
11 Make a crease and return.
12 Fold the top at the point where the crease made in 11 intersects with the top left and right edges.
13 Make a crease and return.
14 While opening the front paper upwards, fold the left and right edges inward along the crease made in 11.
15
16
{Flip}
17 Make creases on this side in the same way as 10 and 11.
18 Fold in the same way as 14, 15 and 16 to form 19 and 20.
19
20 The basic fold is complete.

English Commentary
Paras’s Limbs
1 Fold it up to the basic 20 shape and change the top and bottom positions. Make the legs. Make a cut with scissors in the bottom front piece of paper, from the bottom tip to the base.
2
3
{Flip}
4 Make a cut with scissors in the bottom front piece of paper, from the bottom tip to the base.
5
6 You will have four legs. Fold the right front piece of paper to the left.
7
8 Fold the upper left diagonal edge to line up with the center edge.
9 Turn the paper folded to the left in step 6 back to the right.
10 Fold the left front piece of paper to the right.
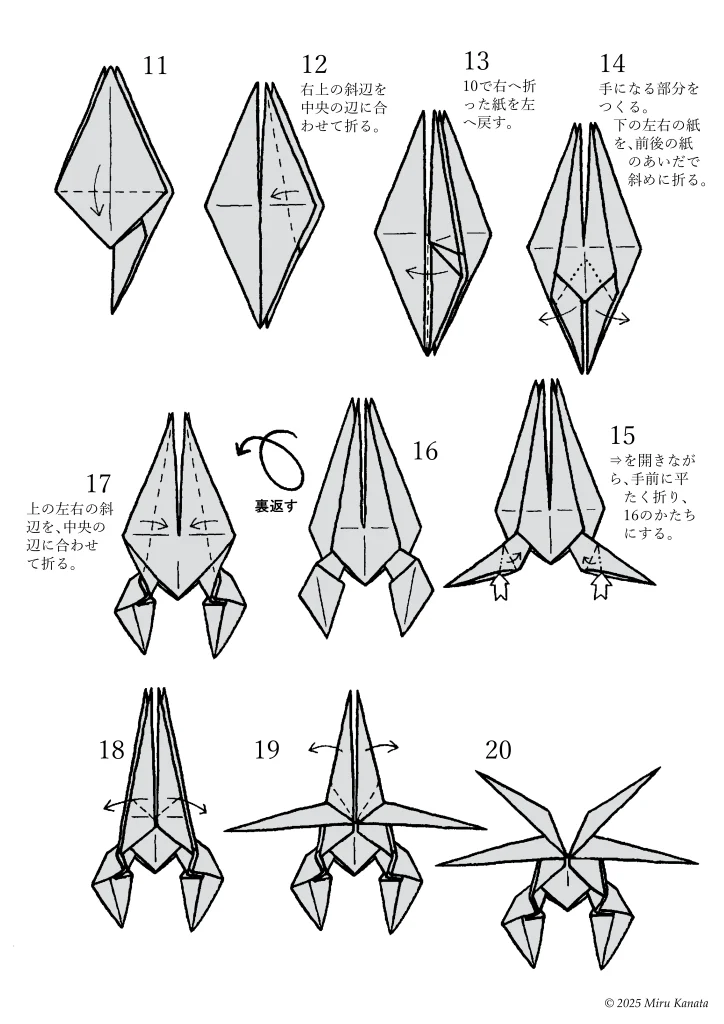
English Commentary
11
12 Fold the upper right diagonal edge to meet the center edge.
13 Turn the paper folded to the right in step 10 back to the left.
14 Make the parts that will become the hands. Fold the bottom left and right pieces of paper diagonally between the front and back pieces of paper.
15 While opening the arrow, fold it flat towards you to form the shape of 16.
16
{Flip}
17 Make the legs. Fold the top left and right diagonal edges to meet the center edge.
18
19
20
English Commentary
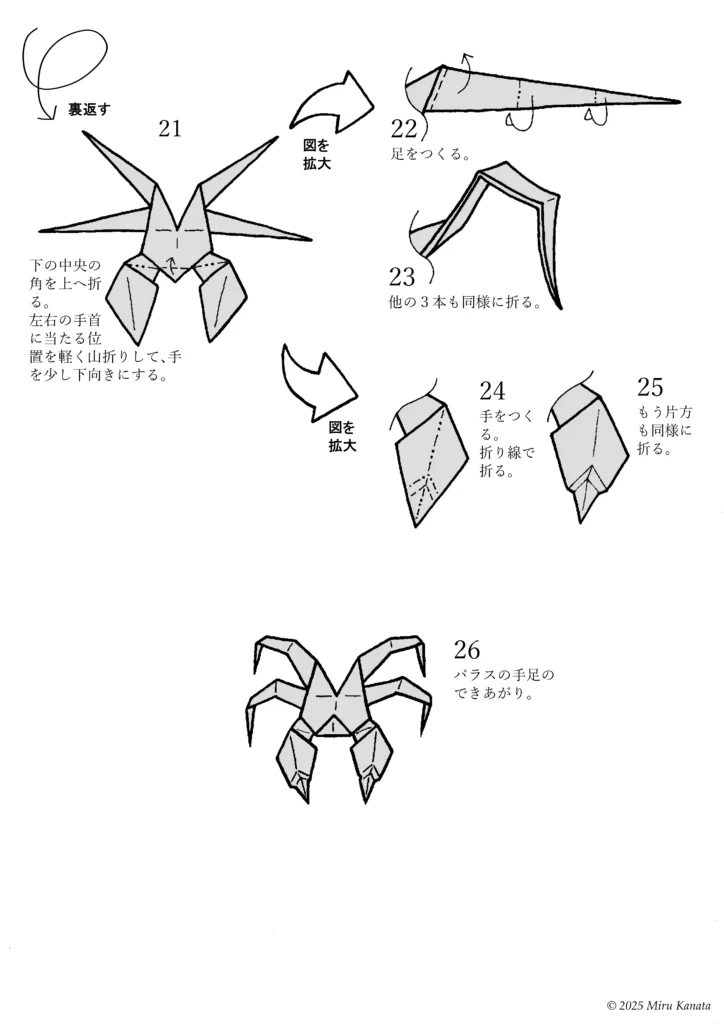
{Flip}
21 Fold the bottom center corner up. Fold the points on both sides that will touch your wrists slightly in a mountain fold, so that your hands are pointing slightly downwards.
{Enlarge image}
22 Make the legs.
23 Fold the other three in the same way.
{Enlarge image}
24 Make the hands. Fold along the crease.
25 Fold the other side in the same way.
26 Paras’s limbs are complete.

English Commentary
Paras’s Body
1 Fold the bottom corner to match the top corner.
2 Make a crease and return.
3 Fold the right corner to match the left corner.
4 Make a crease and return.
5 Fold the top left and right diagonal sides to match the center crease.
6 Fold the bottom left and right diagonal sides to match the center crease.
7 Make a crease and return.
8 Fold the left and right corners in half and fold them between the sheets of paper.
English Commentary
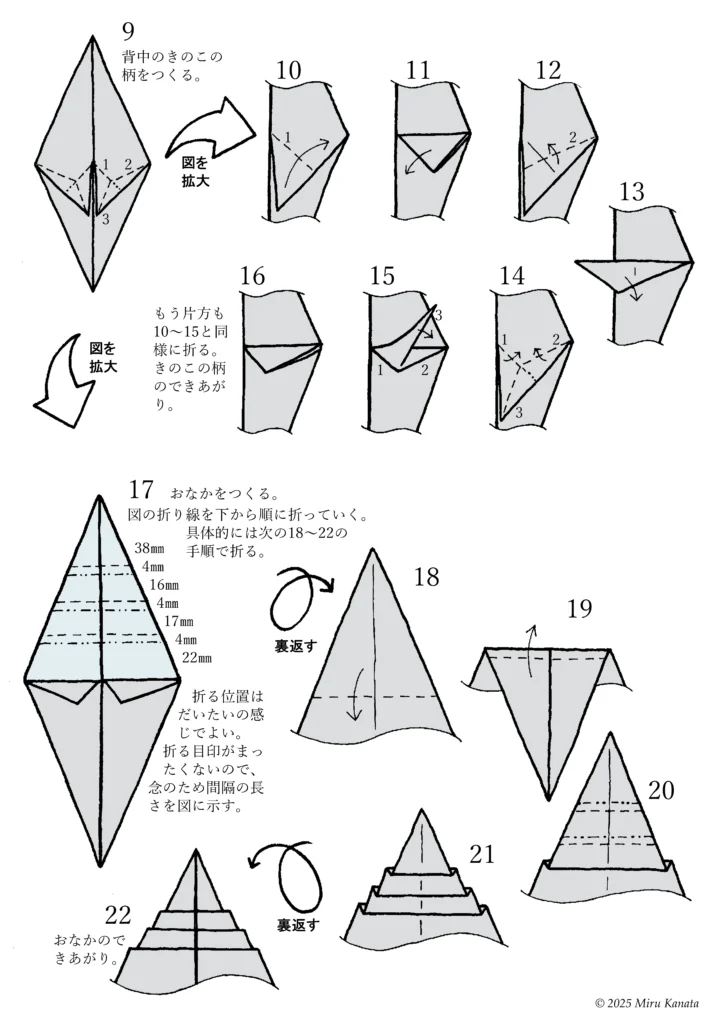
9 Make the mushroom stem on the back.
(Enlarge image)
10
11
12
13
14
15
16 Fold the other side in the same way as steps 10 to 15. The mushroom stem is finished.
(Enlarge image)
17 Make the belly. Fold along the fold lines in the image starting from the bottom. Specifically, fold in steps 18 to 22 below. You can roughly determine where to fold, but as there are no marks to guide you, the interval lengths are shown in the image just to be sure.
(Flip)
18
19
20
21
(Flip)
22 The belly is finished.
English Commentary
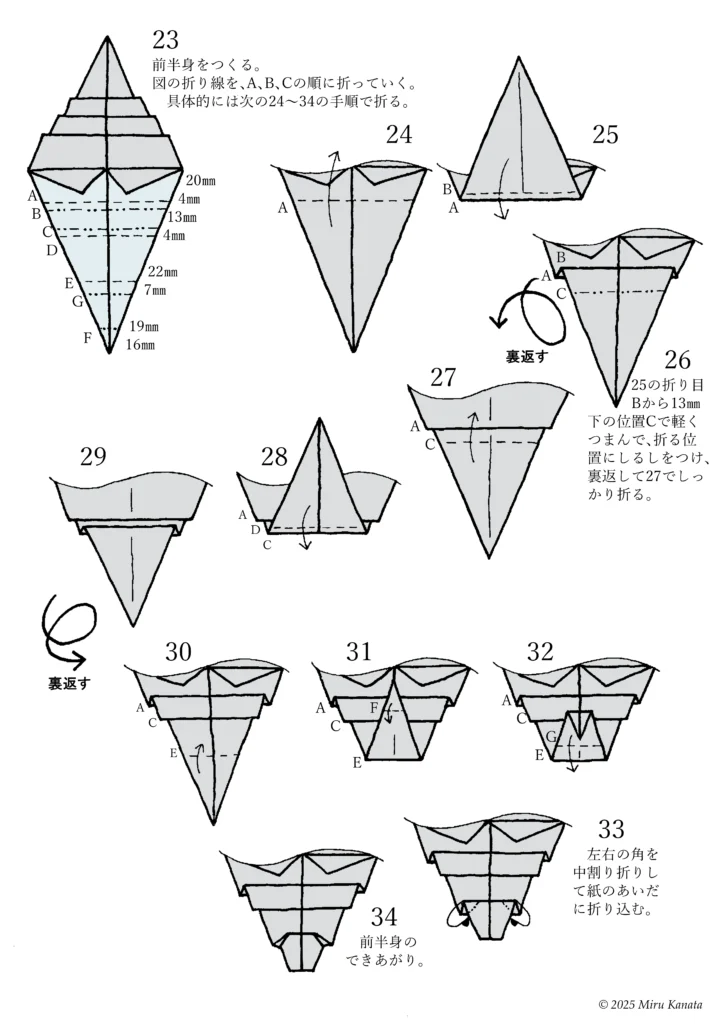
23 Make the front half. Fold along the fold lines in the diagram in the order A, B, C. Specifically, follow steps 24 to 34 below.
24
25
26 At position C, 13 mm below fold B in step 25, lightly pinch and mark the fold position, then turn it over and fold firmly at 27.
{Flip}
27
28
29
{Flip}
30
31
32
33 Fold the left and right corners in half and fold them between the pieces of paper.
34 The front half is complete.
English Commentary
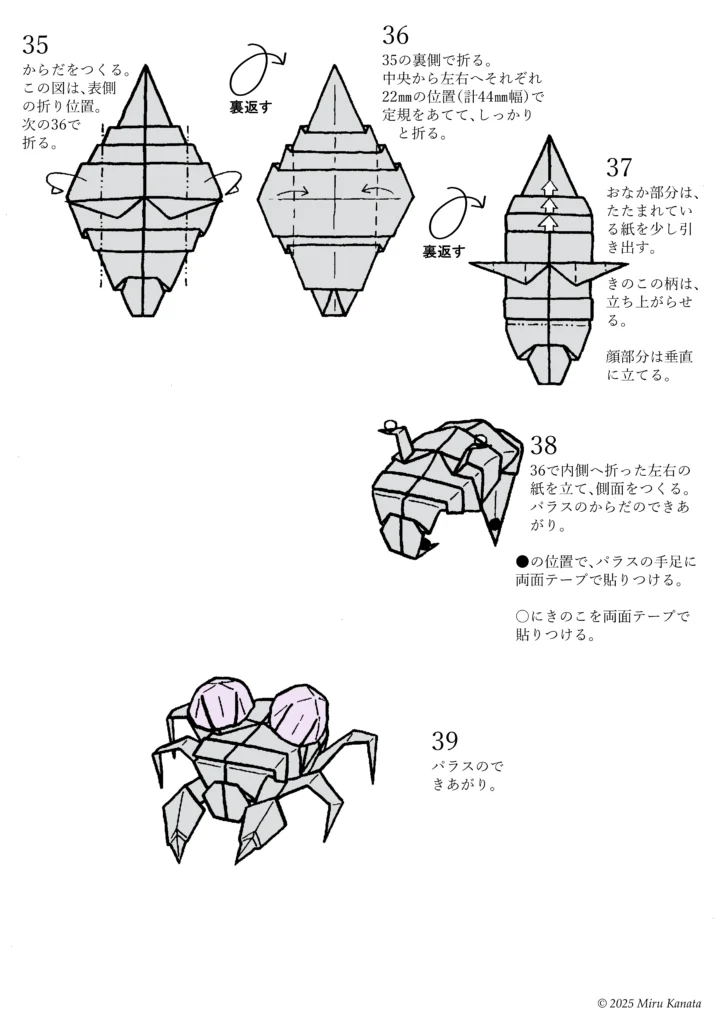
35 Make the body. This diagram shows the folding position for the front side. Fold at 36 next.
{Flip}
36 Fold on the back of 35. Use a ruler to fold firmly at positions 22 mm from the center to the left and right (44 mm width in total).
{Flip}
37 For the stomach part, pull out the folded paper a little.
Make the mushroom stem stand up.
Stand the face part vertically.
38 Stand the left and right pieces of paper folded inward in step 36 to create the sides. The body of Paras is finished. Attach the arms and legs of Paras at the ● positions with double-sided tape. Attach the mushrooms at the ○ positions with double-sided tape.
39 Paras is finished.
English Commentary
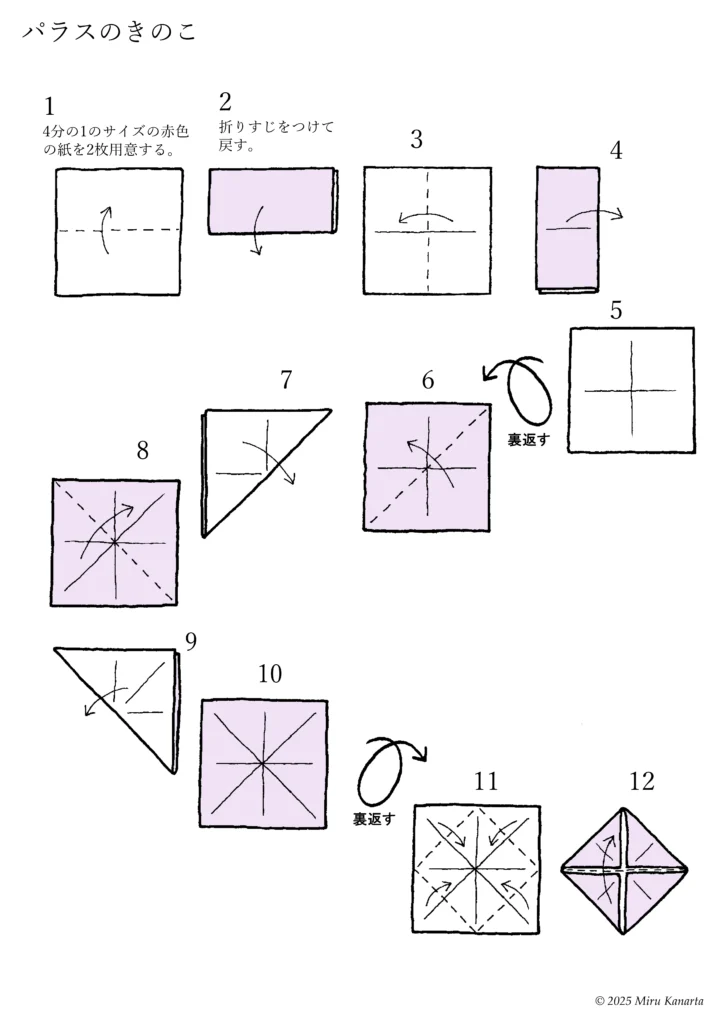
Pallas’s Mushroom
1 Prepare two quarter-sized pieces of red paper.
2 Make creases and turn it back.
3
4
5
{Flip}
6
7
8
9
10
{Flip}
11
12
English Commentary
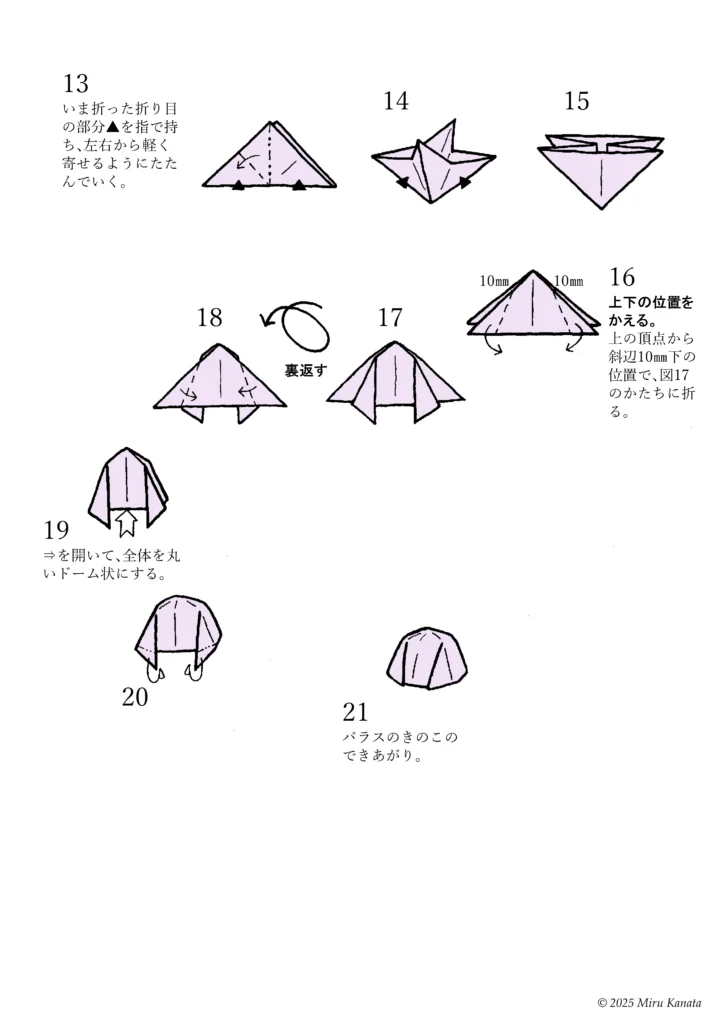
13 Hold the crease you just made with your fingers ▲ and fold it gently from the left and right.
14
15
16 Change the top and bottom positions. Fold it 10mm below the diagonal side from the top vertex, creating the shape shown in Figure 17.
17
{Flip}
19 Open the arrows and make the whole thing into a round dome shape.
20
21 Your Paras mushroom is finished.
参考・2000年の本に掲載した折り図
みるかなた本棚>『ポケットモンスターおりがみコレクション』>ポケモンおりがみ一覧表>0046 パラス
◇ ◇ ◇