
みるかなた本棚>『ポケットモンスターおりがみコレクション』>ポケモンおりがみ一覧表>0026ライチュウ
◆0025ピカチュウ◆0026ライチュウ◆
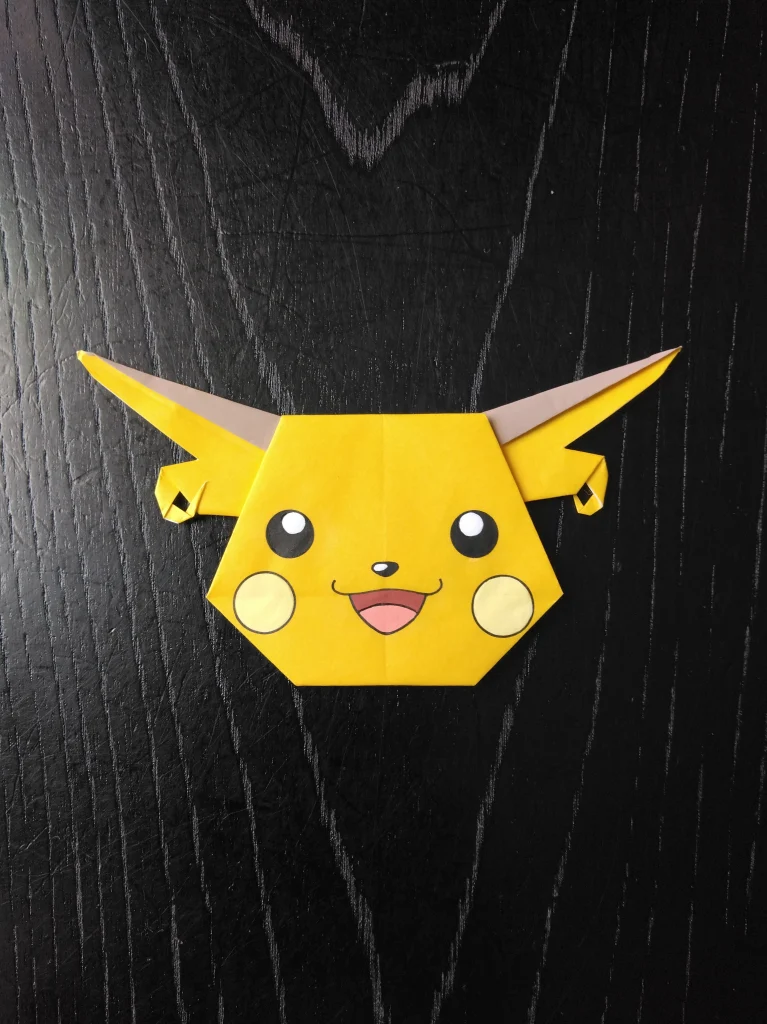
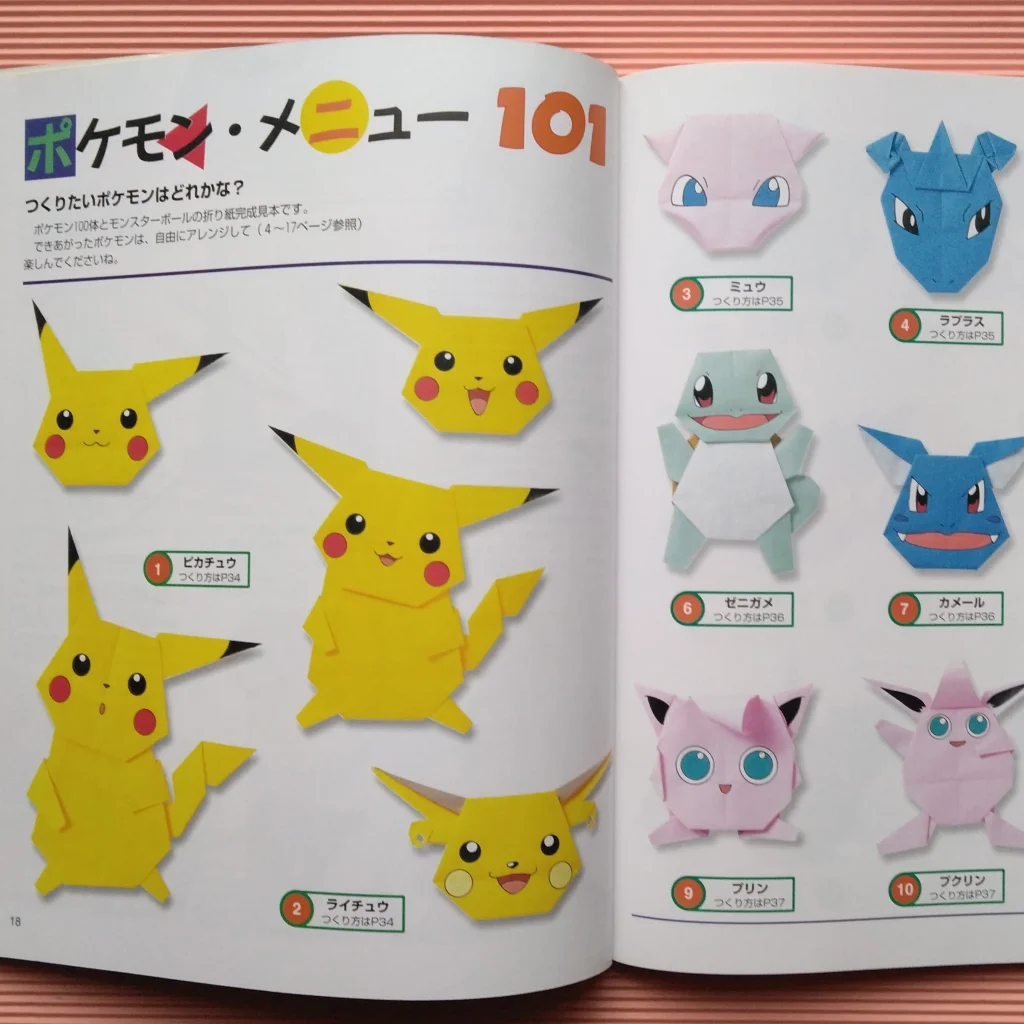
0026 ライチュウ
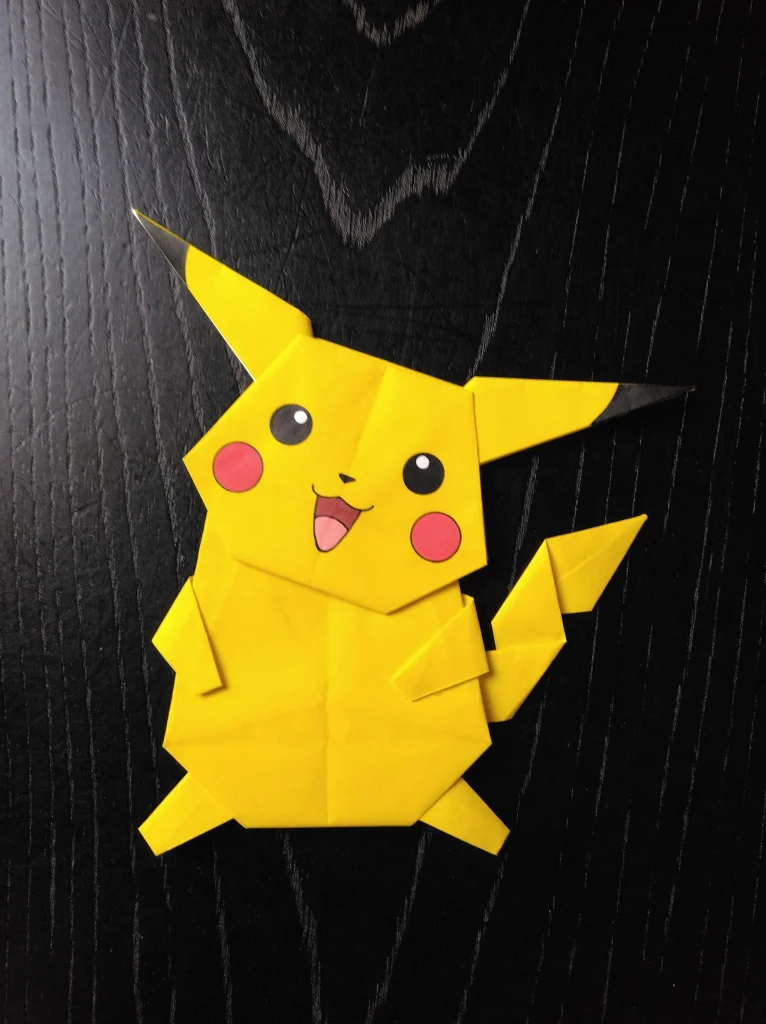
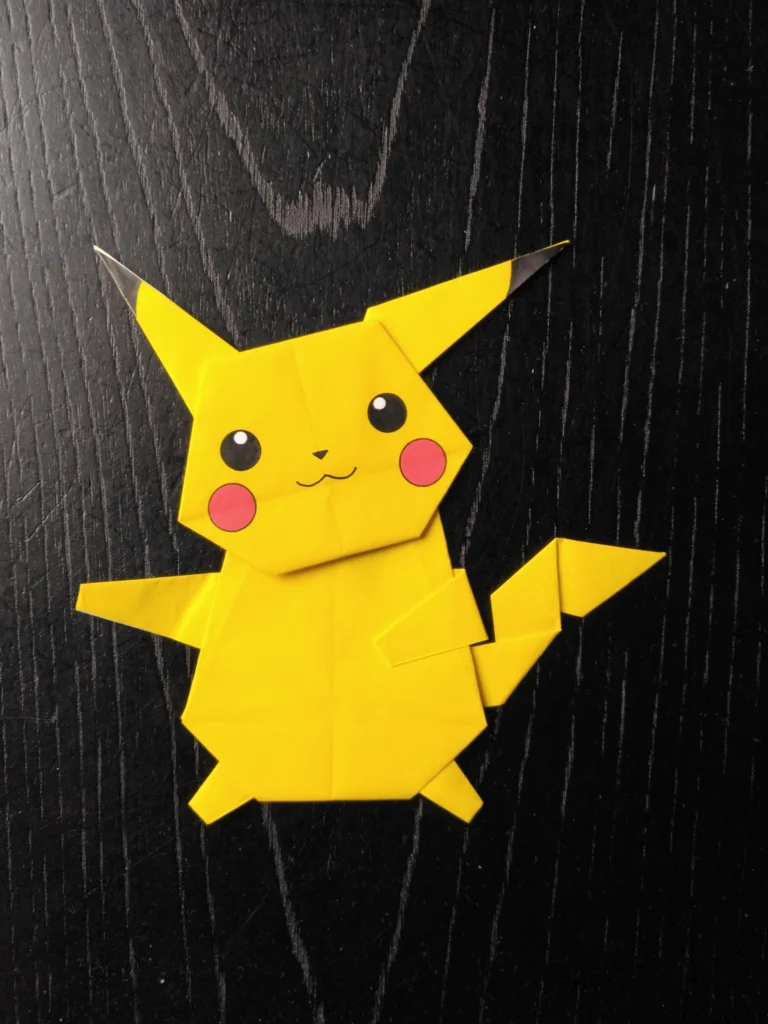
シンプルで無駄がなくて、とてもかわいい。
バランスの良い、すっきりとした素敵なフォルムにつくることができたと思います。
耳の飾り毛がポイントです。
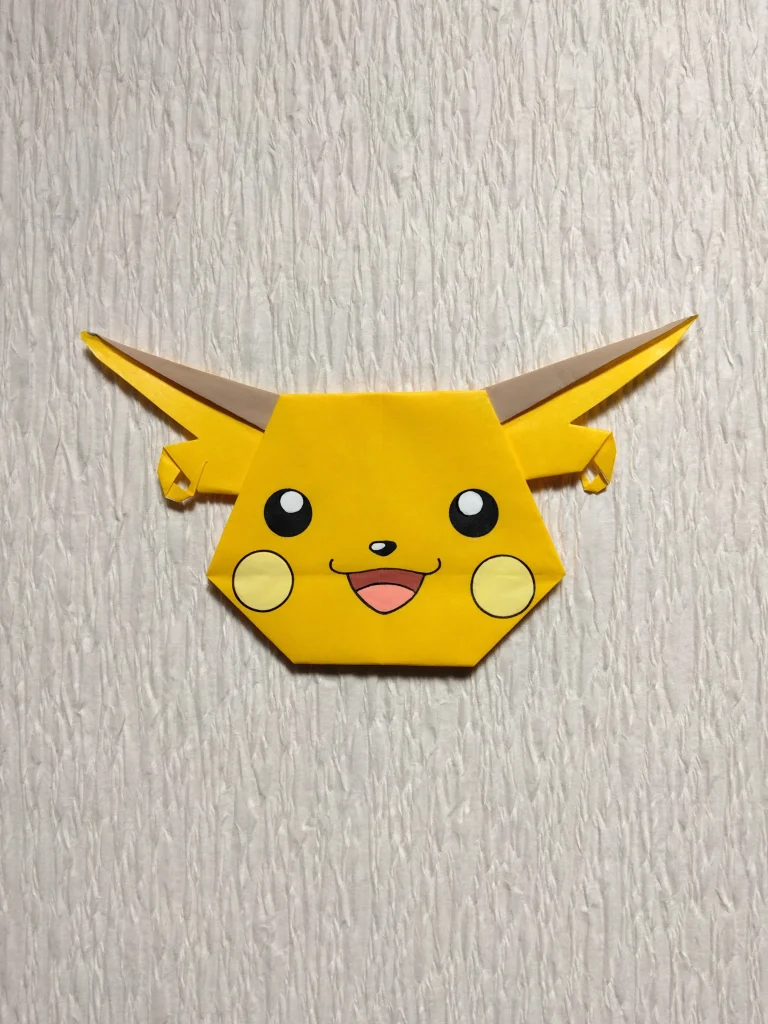
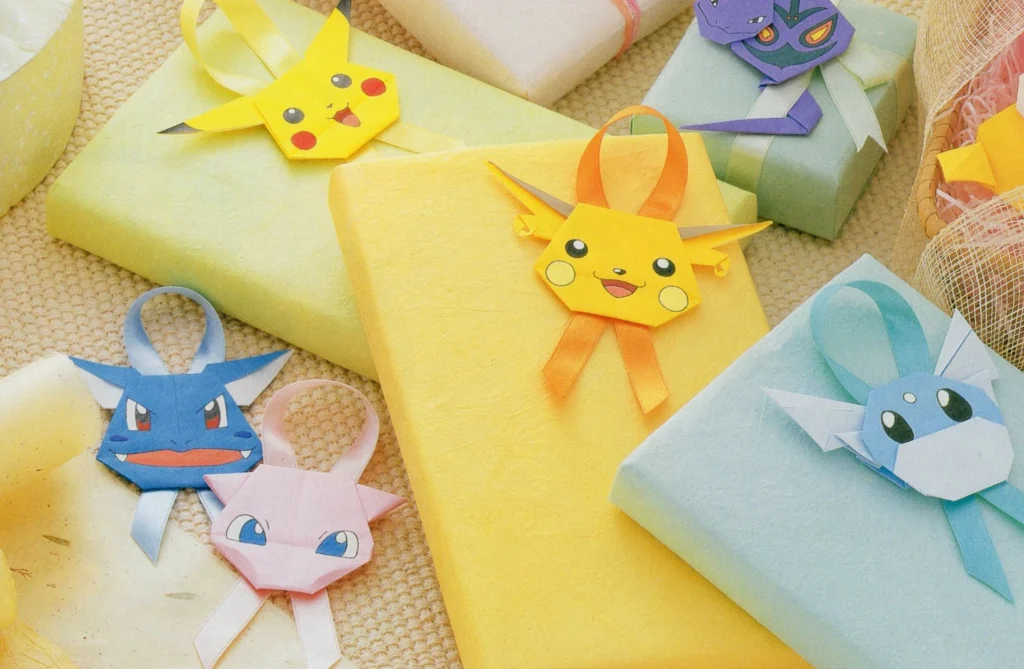
この作品は1999年に著作権者の監修を受け正式に許諾を得たものです。
★ゲームフリークのチェック
◆姿かたちは、最初のチェックでOKをいただきました。
◆クリーム色の紙でつくっていたところ、濃い黄色の山吹色に変更するよう、ご指示がありました。
つくり方の折り図
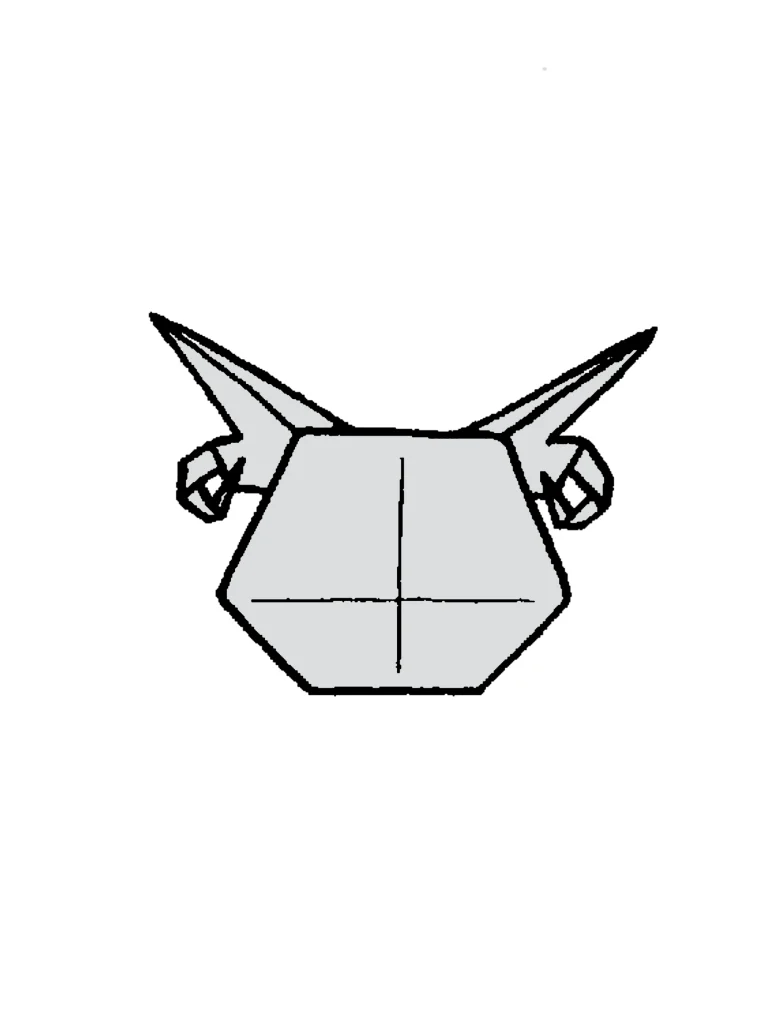
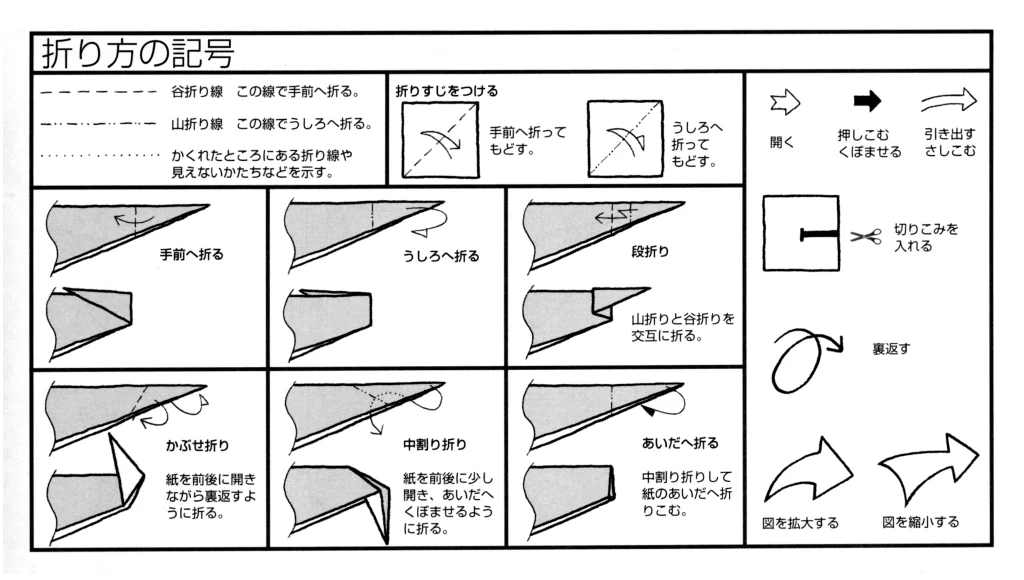
今回制作した折り図
◇折り図
1 基本折り
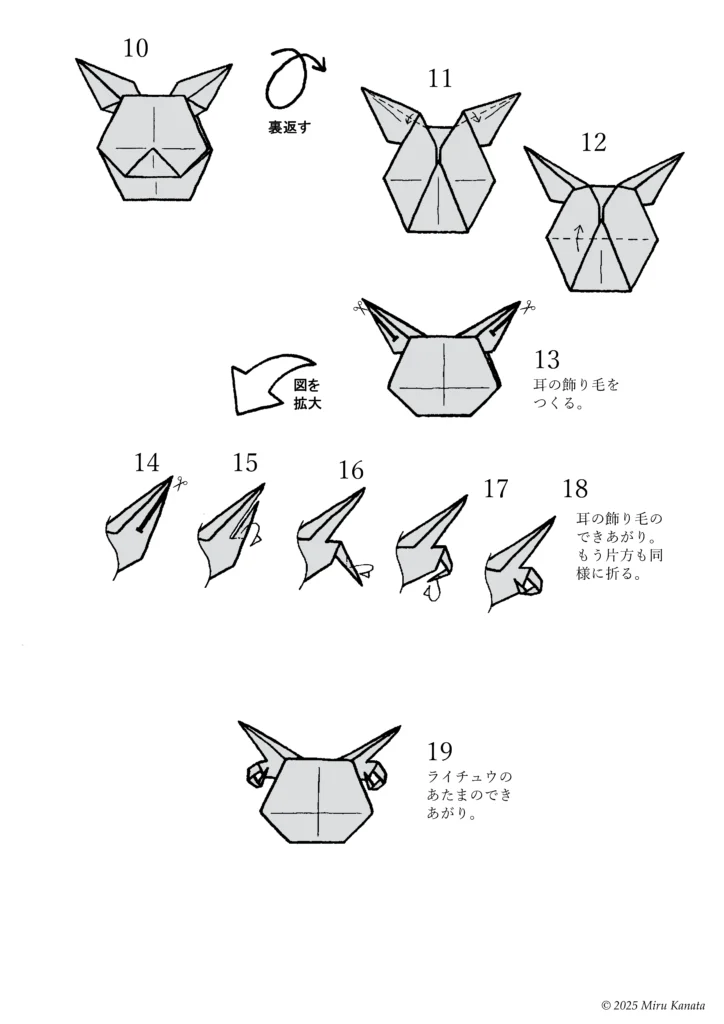
2 ライチュウのあたま
■濃い黄色の山吹色の紙で、まず基本折りの図20まで折る。
1 基本折り
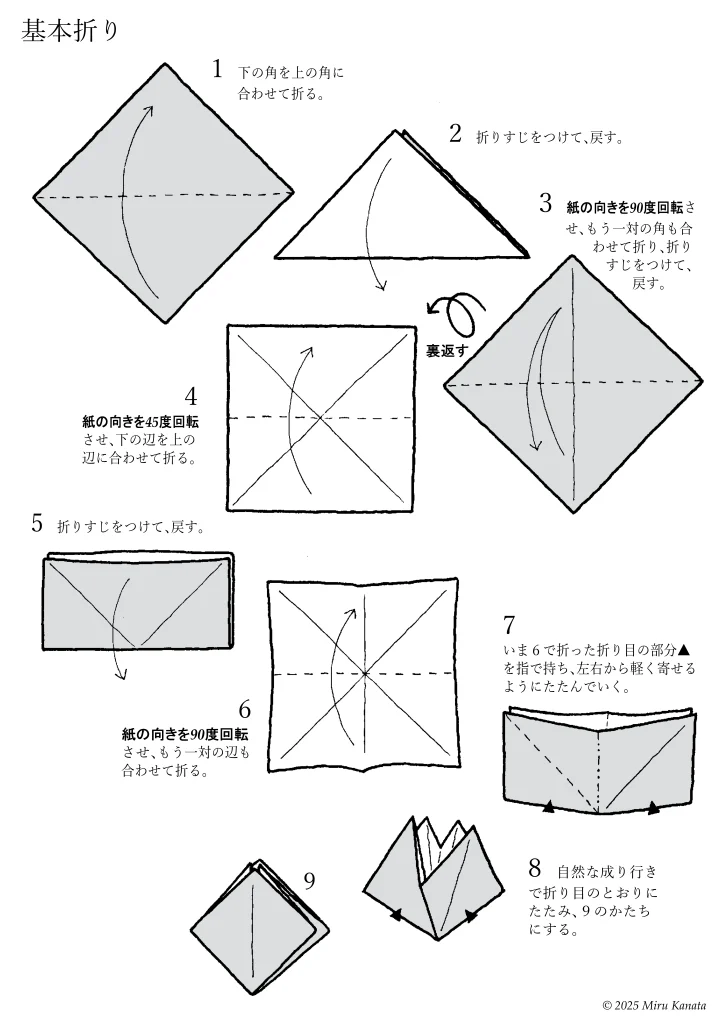
English Commentary
Basic Folding
1 Fold the bottom corner to meet the top corner.
2 Make a crease and return it to its original position.
3 Rotate the paper 90 degrees, fold the other pair of corners together, make a crease and return it to its original position.
{Flip}
4 Rotate the paper 45 degrees and fold the bottom edge to meet the top edge.
5 Make a crease and return it to its original position.
6 Rotate the paper 90 degrees and fold the other pair of edges together.
7 Hold the crease ▲ made in step 6 with your fingers and fold it gently from both sides.
8 Let it naturally fold along the creases to form the shape of 9.
9
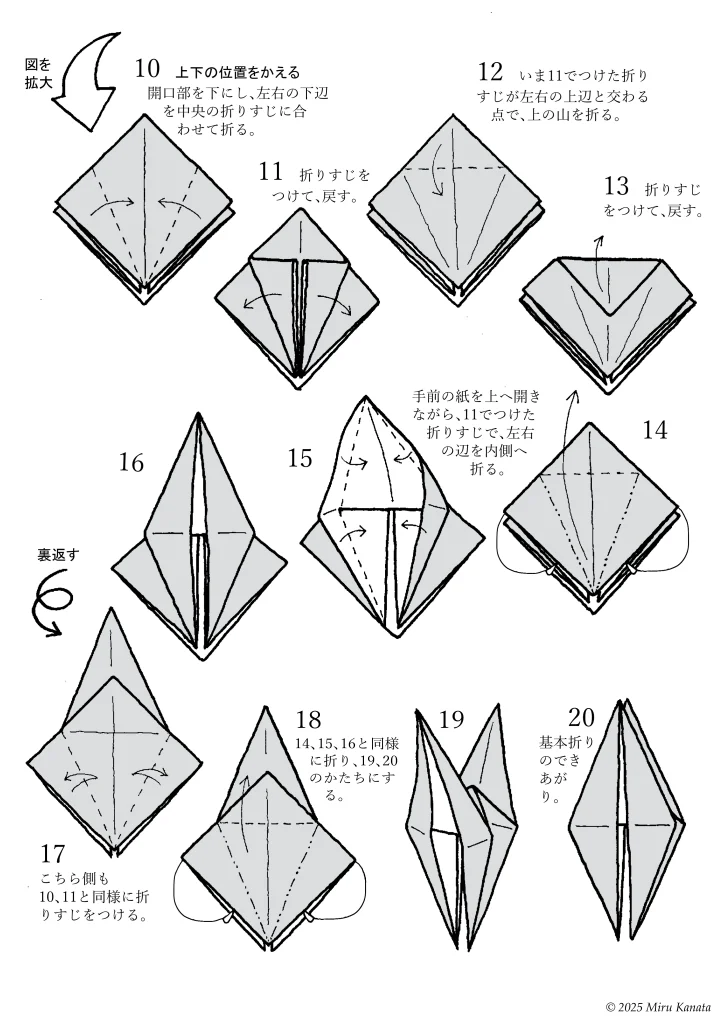
English Commentary
{Enlarge image}
10 Change the top and bottom positions.
With the opening facing downwards, fold the bottom left and right edges to meet the crease in the middle.
11 Make a crease and return.
12 Fold the top at the point where the crease made in 11 intersects with the top left and right edges.
13 Make a crease and return.
14 While opening the front paper upwards, fold the left and right edges inward along the crease made in 11.
15
16
{Flip}
17 Make creases on this side in the same way as 10 and 11.
18 Fold in the same way as 14, 15 and 16 to form 19 and 20.
19
20 The basic fold is complete.
2 ライチュウのあたま
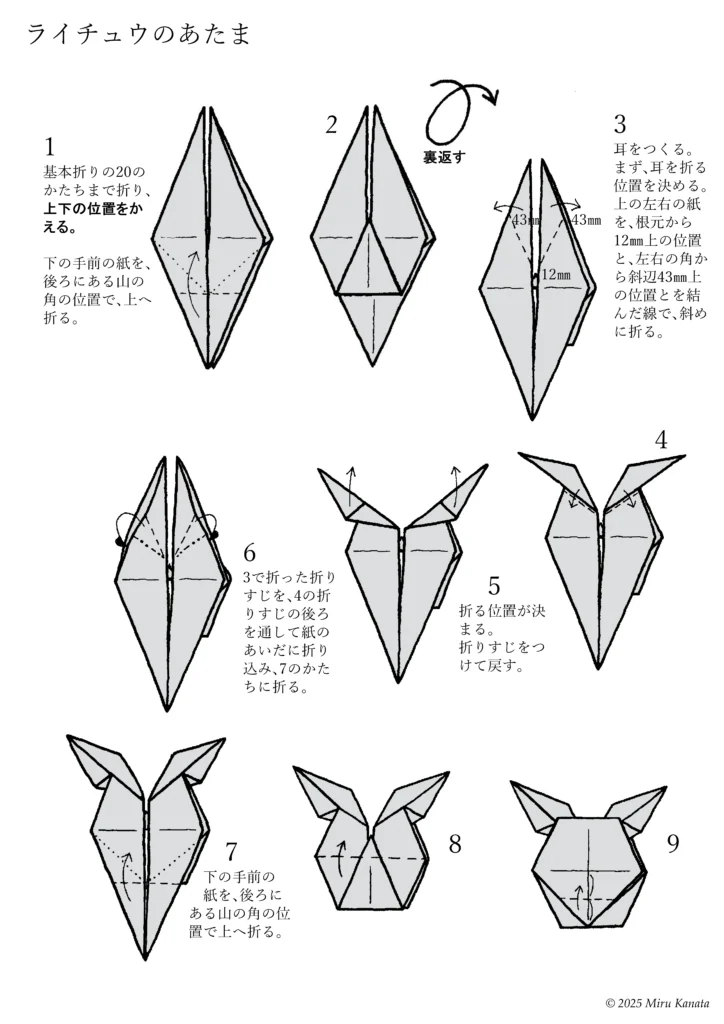
English Commentary
Raichu’s head
1. Fold up to the basic fold shape 20, then change the top and bottom positions. Fold the bottom front piece of paper upwards at the position of the mountain corner at the back.
2.
{Flip}
3. Make the ears. First, decide where to fold the ears. Fold the top left and right pieces of paper diagonally along the lines connecting a point 12 mm above the base and a point 43 mm above the left and right corners.
4.
5. The folding positions are determined. Make a crease and unfold.
6. Fold the crease made in step 3 through the back of the crease made in step 4 and tuck it between the pieces of paper to make the shape of step 7.
7. Fold the bottom front piece of paper upwards at the position of the mountain corner at the back.
8.
9.
English Commentary
10.
{Flip}
11.
12.
13. Make the ear tufts.
{Enlarge diagram}
14.
15.
16.
17.
18. The ear tufts are finished. Fold the other side in the same way.
19. Raichu’s head is finished.
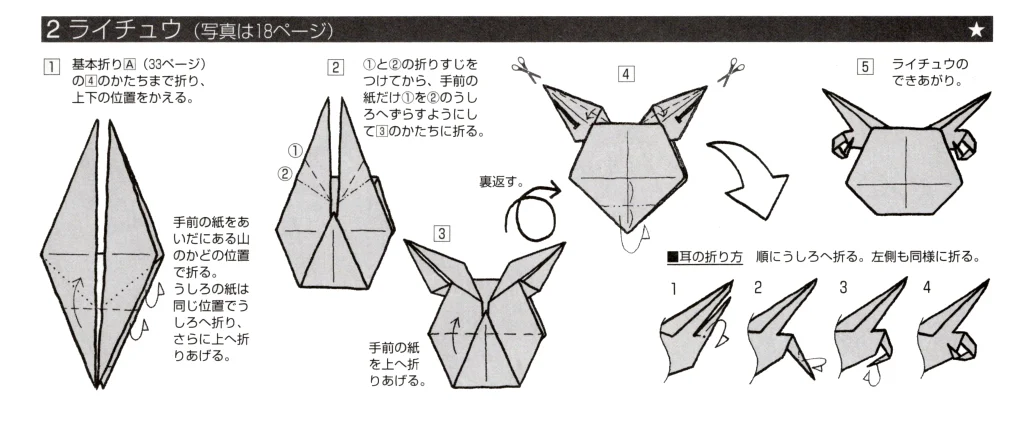
参考・2000年の本に掲載した折り図
みるかなた本棚>『ポケットモンスターおりがみコレクション』>ポケモンおりがみ一覧表>0026ライチュウ
◇ ◇ ◇