
みるかなた本棚>Nice Origami素敵折紙>p138オムナイト03
◆0138オムナイト02◆0138オムナイト03◆
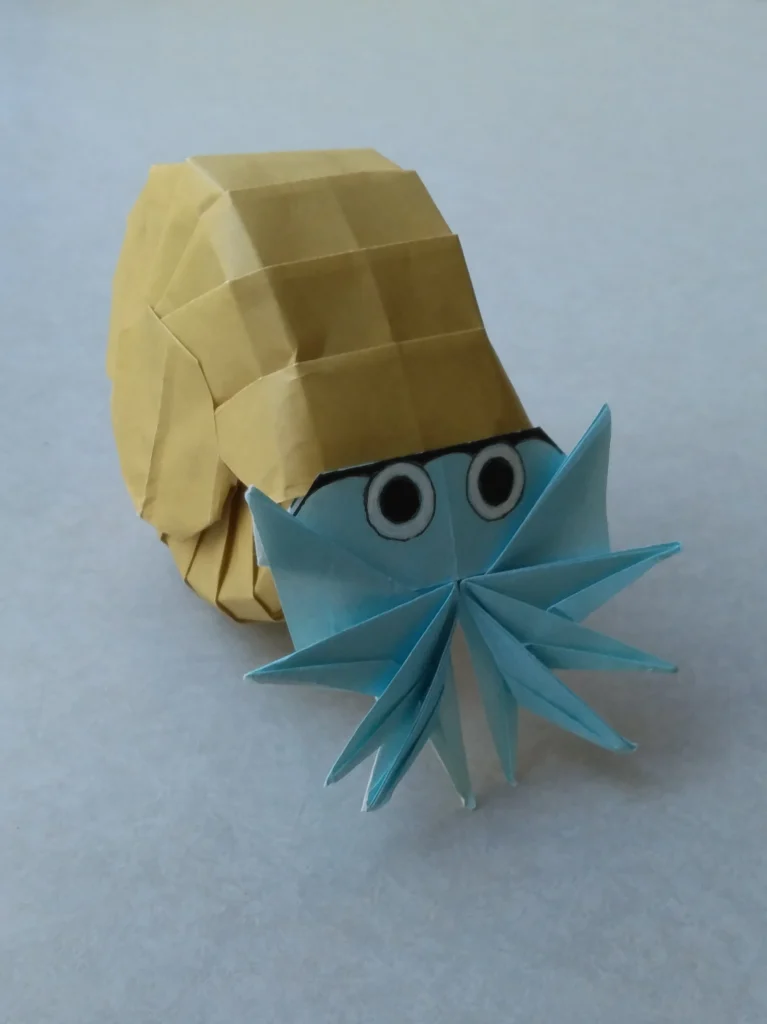
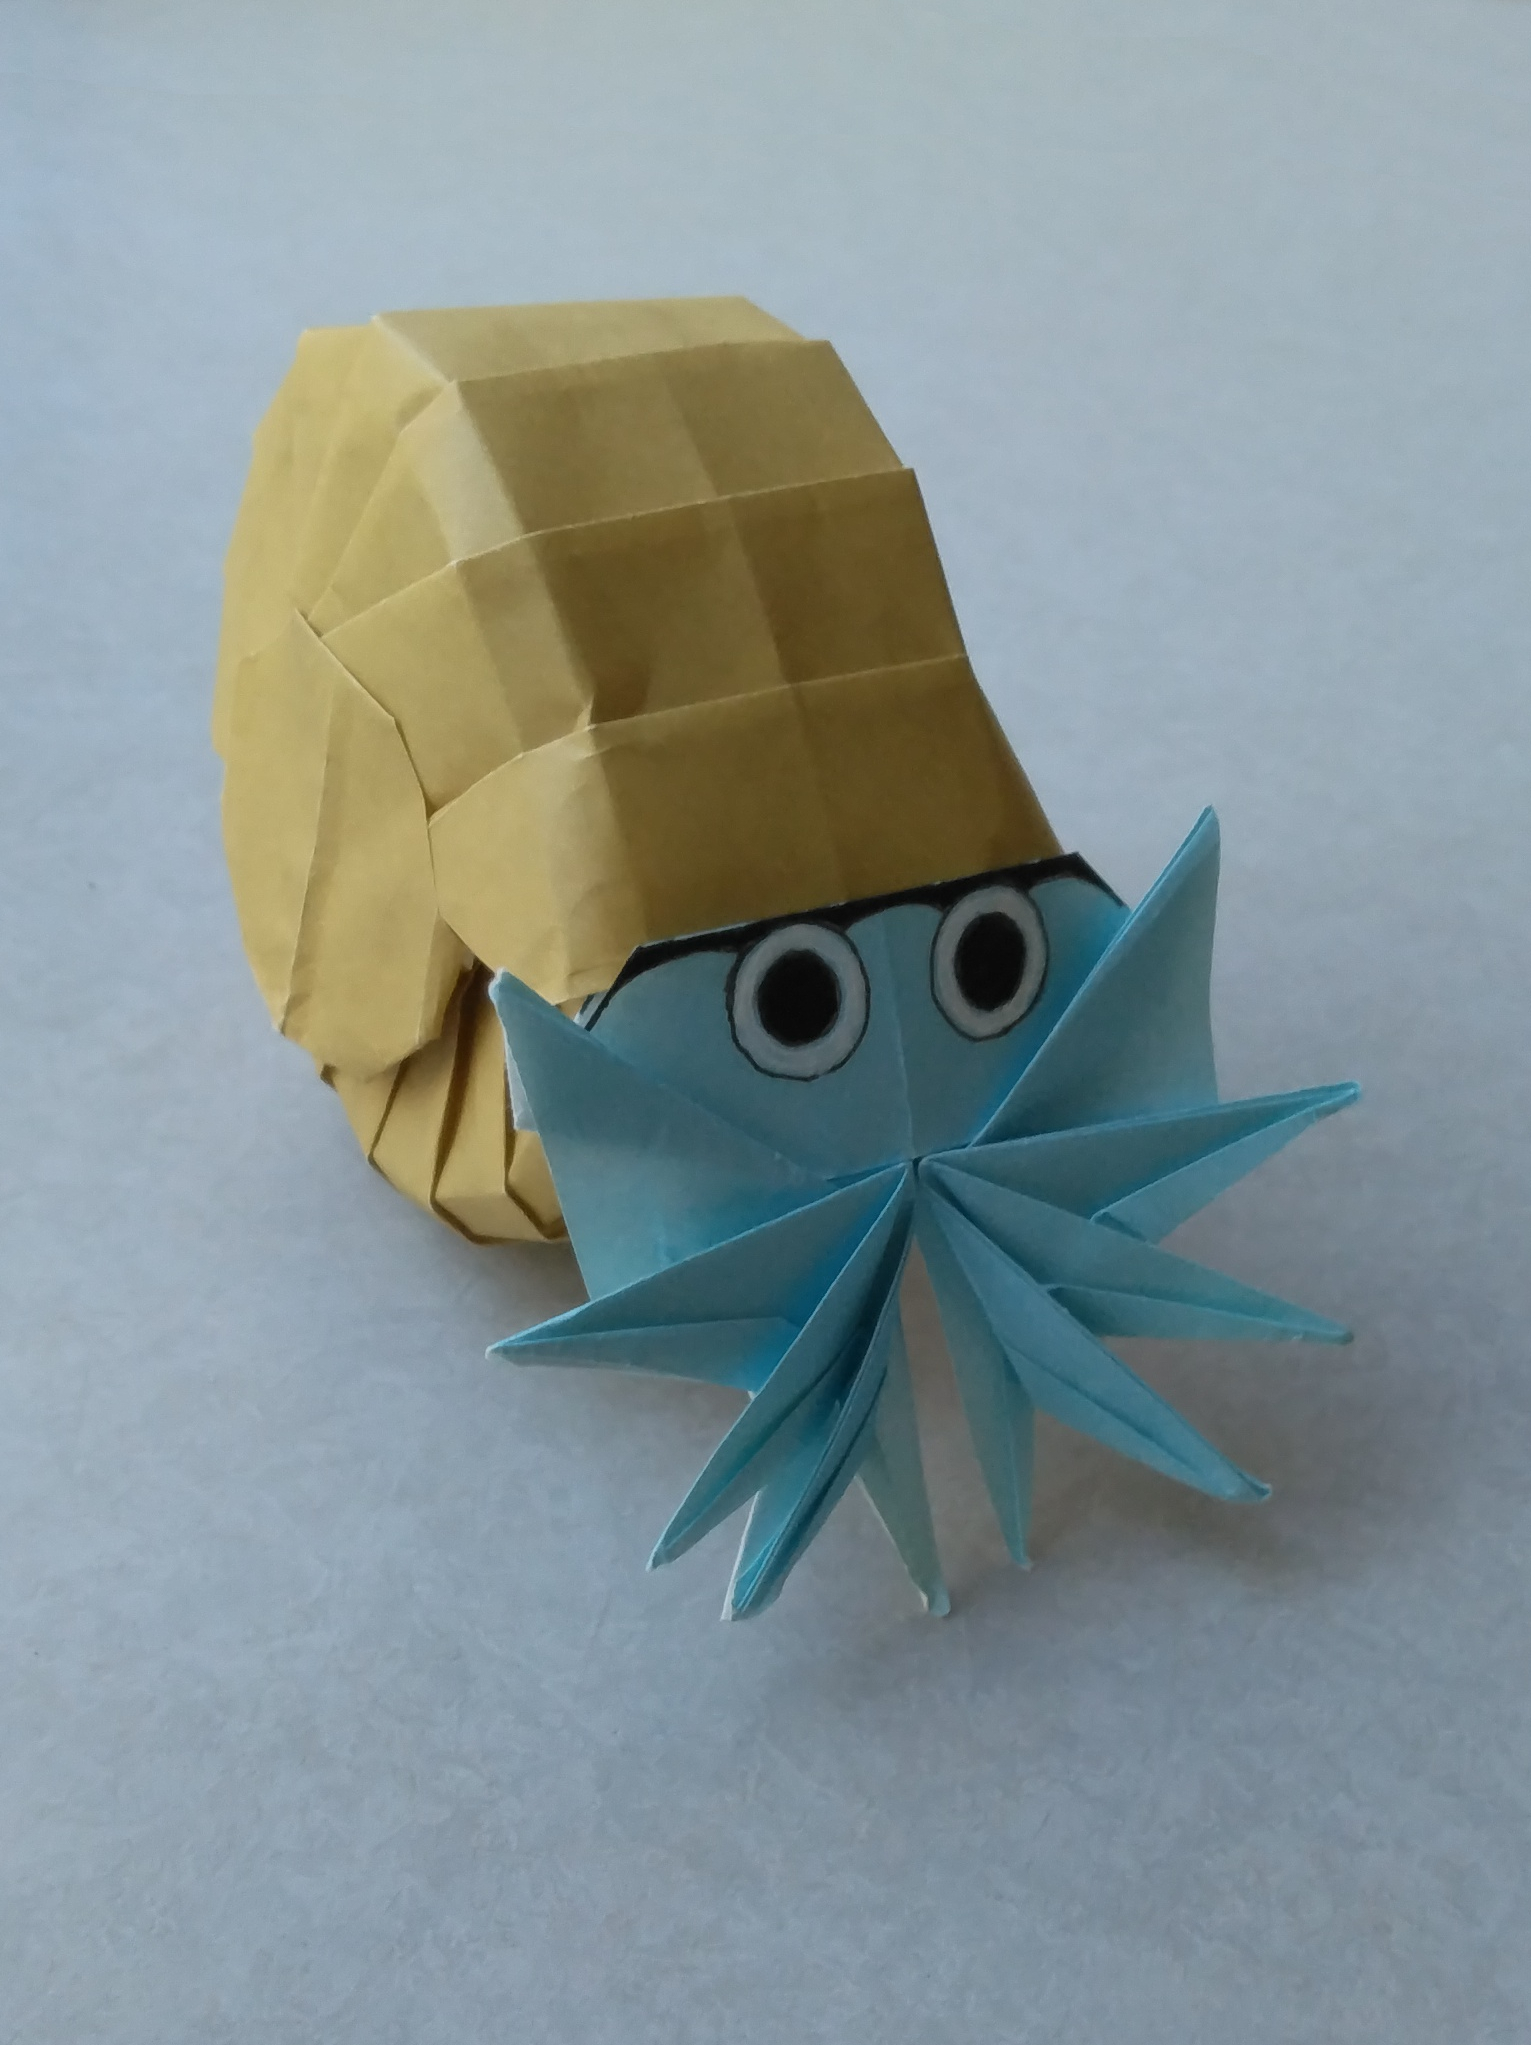
0138 オムナイト 3号
2026年3月制作の、新作です。
貝殻を、いろいろな折り方で10種類ほどつくってみました。
それらの中で、これならいけそうだ、というかたちができました。
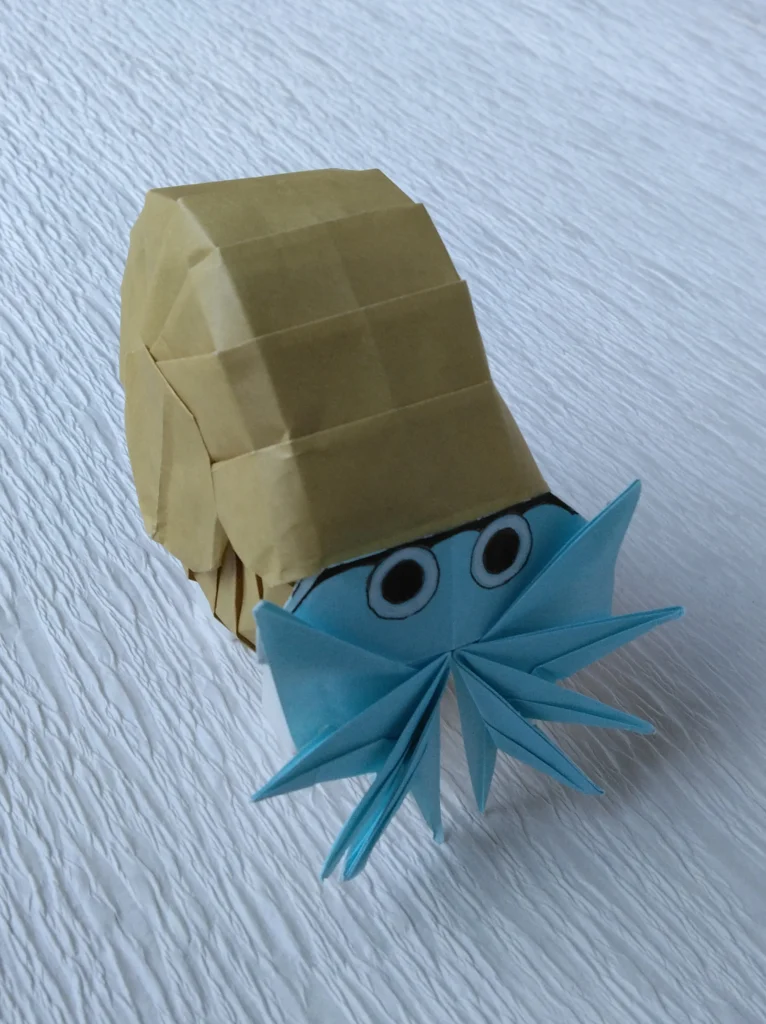
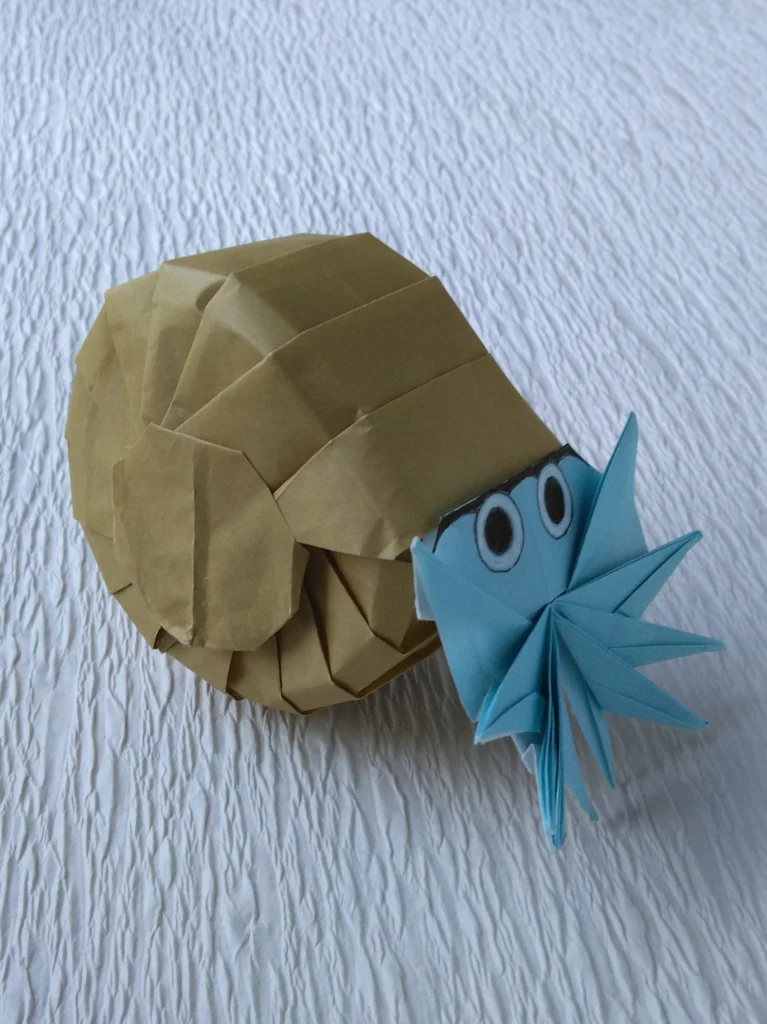
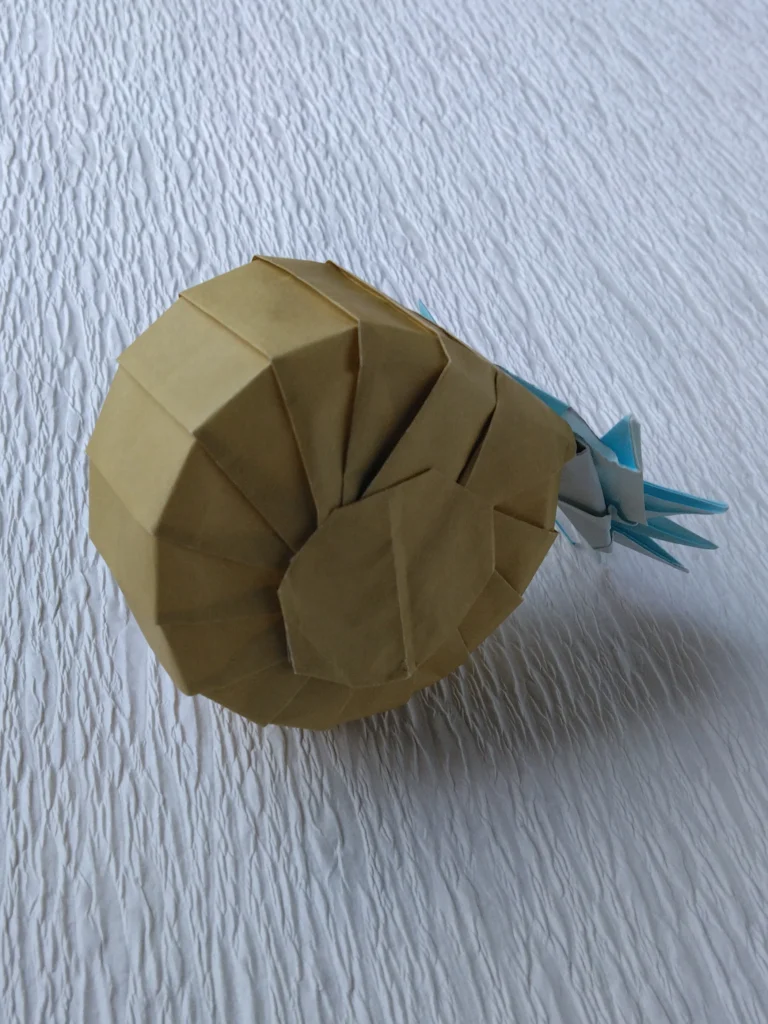
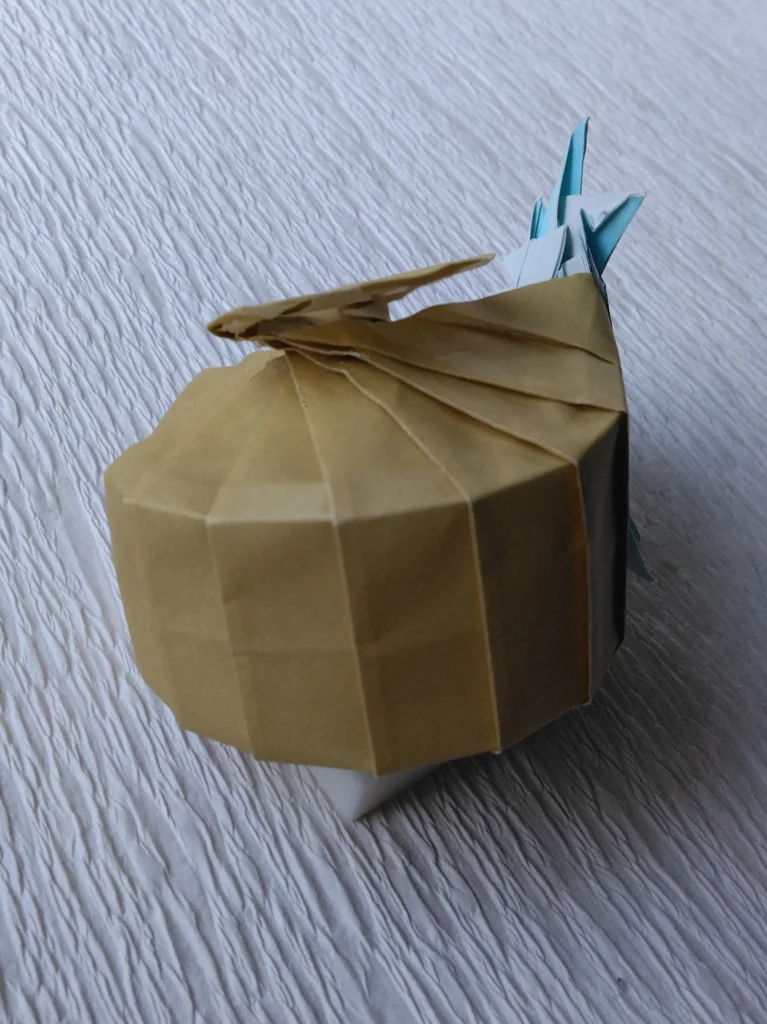
つくり方の折り図
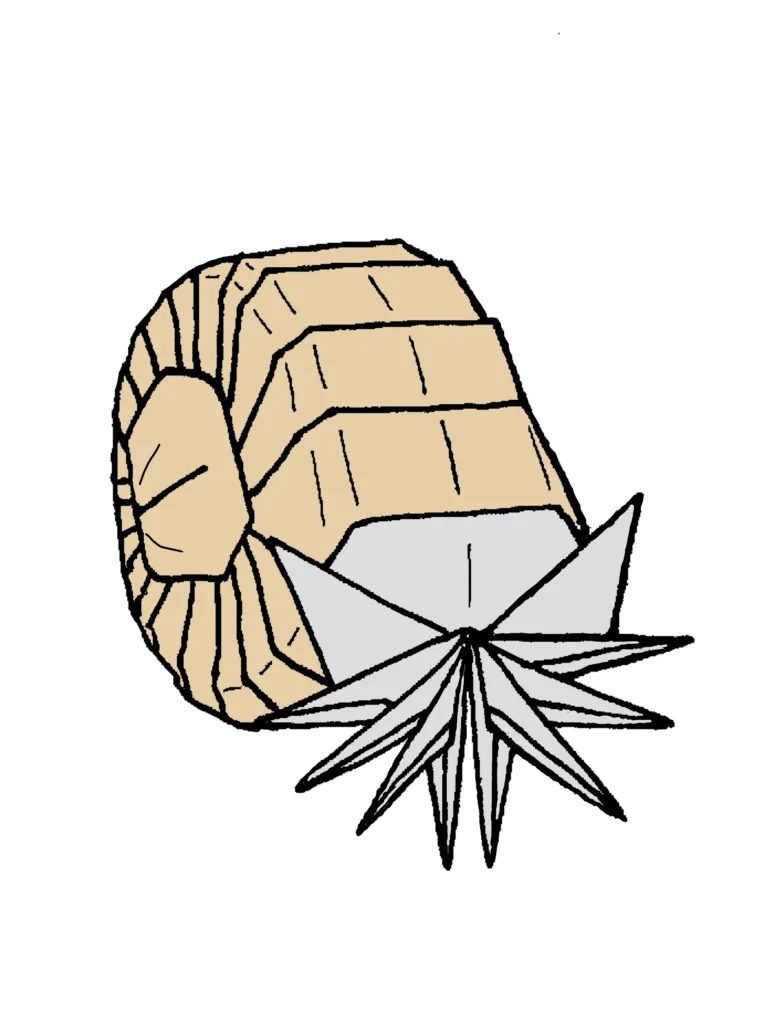
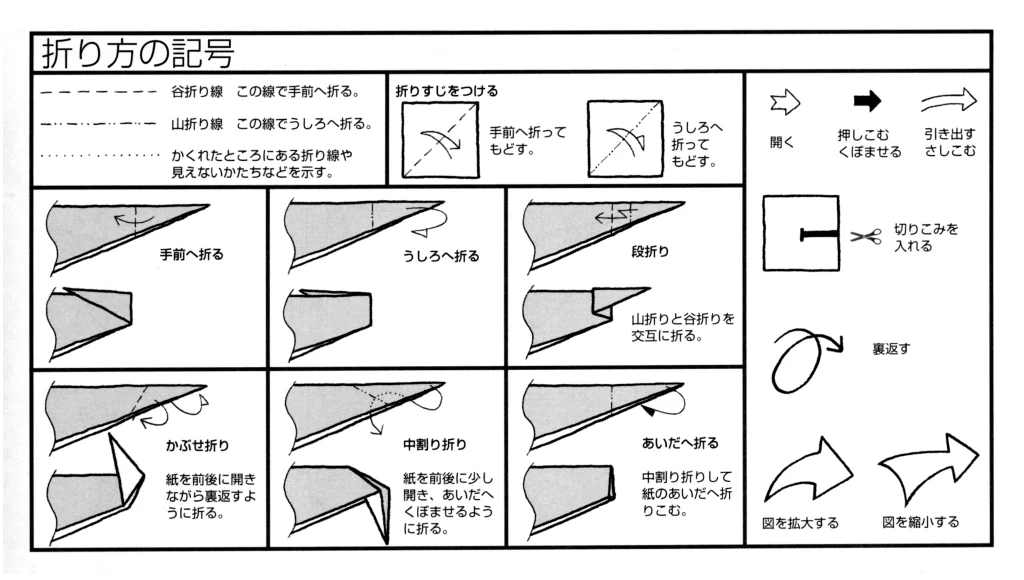
今回制作した折り図
◇折り図
1 オムナイトのからだ
2 オムナイトの貝殻 3号
■オムナイトのからだは、水色の紙で折る。
■オムナイトの貝殻は、アイボリー色の紙で折る。
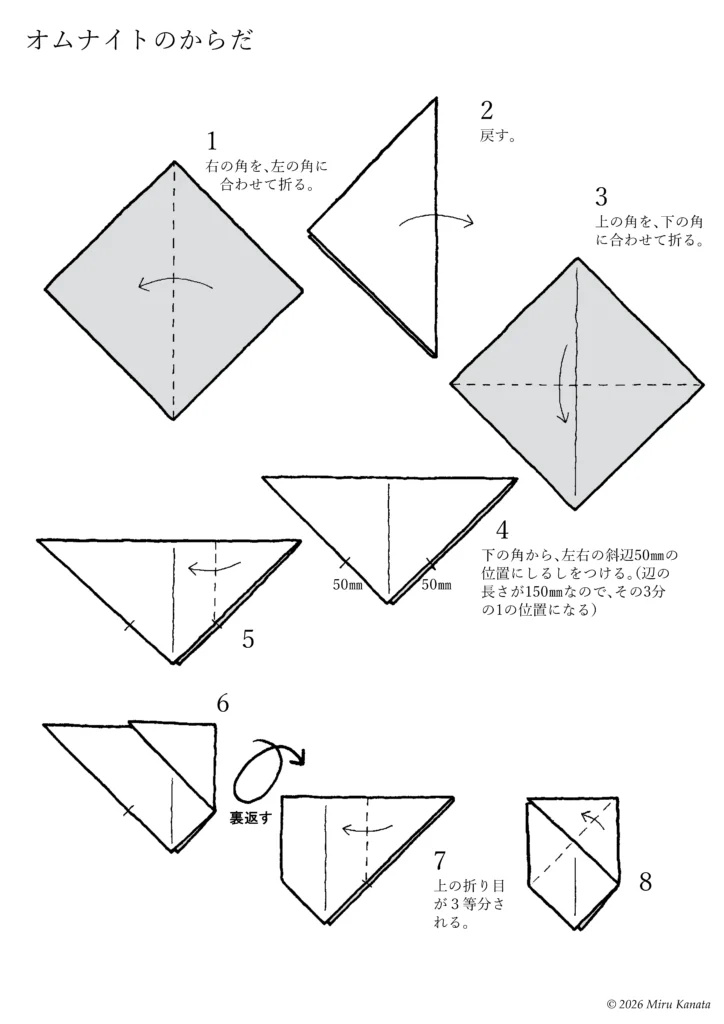
1 オムナイトのからだ
English Commentary
Omanyte’s Body
1 Fold the right corner to meet the left corner.
2 Turn it back.
3 Fold the top corner to meet the bottom corner.
4 Mark the left and right diagonal sides 50 mm from the bottom corner. Since the length of the sides is 150 mm, it will be one-third of that.
5
6
{Flip}
7 The top fold is divided into thirds.
8
English Commentary
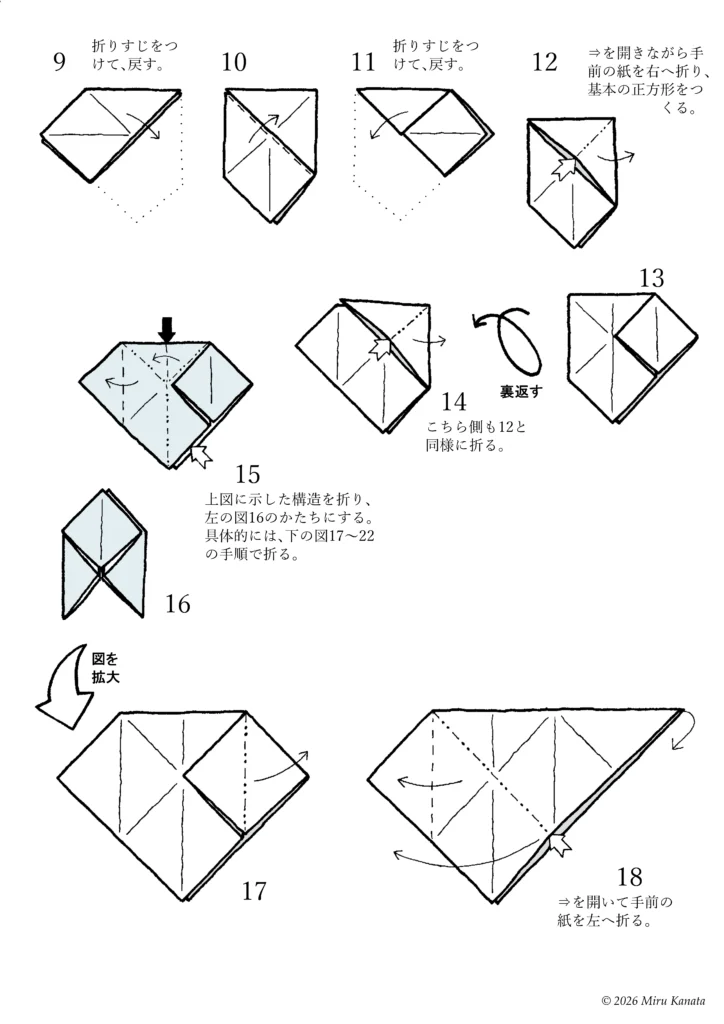
9 Make a crease and return it to its original position.
10
11 Make a crease and return it to its original position.
12 Open the arrow and fold the paper in front to the right to create a basic square.
13
{Flip}
14 Fold this side in the same way as step 12.
15 Fold the structure shown in the diagram above to form the shape shown in Figure 16 on the left. Specifically, fold it in the steps shown in Figures 17 to 22 below.
{Enlarge diagram}
17
18 Open the arrow and fold the paper in front to the left.
English Commentary
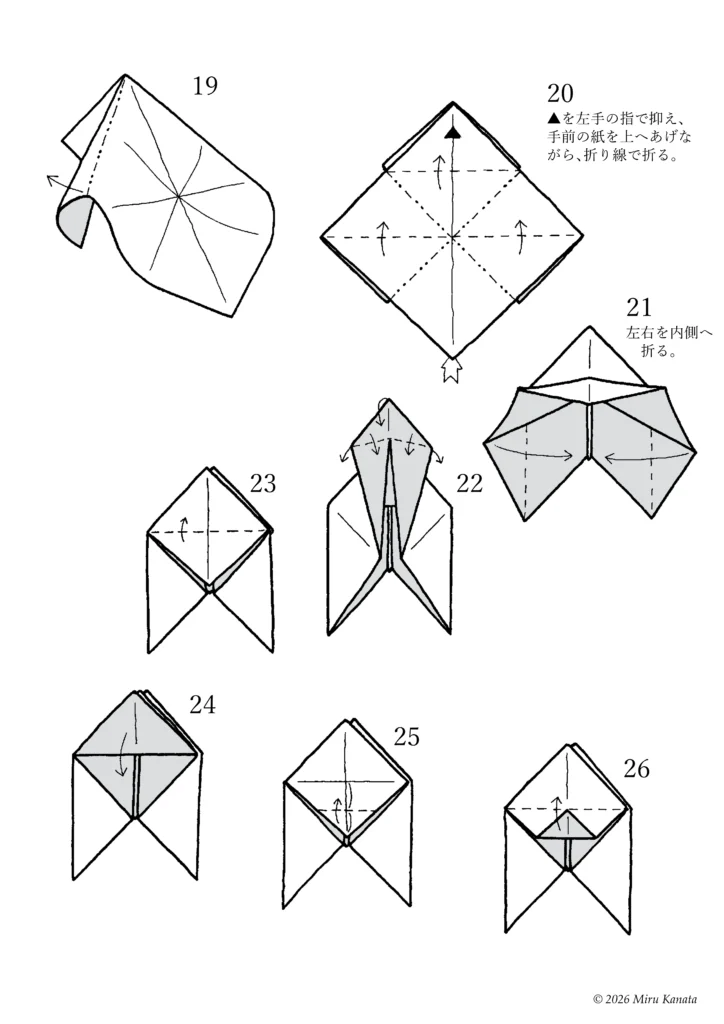
19
20 Hold the ▲ with the fingers of your left hand, lift the paper in front of you, and fold it along the crease.
21 Fold the left and right sides inward.
22
23
24
25
26
English Commentary
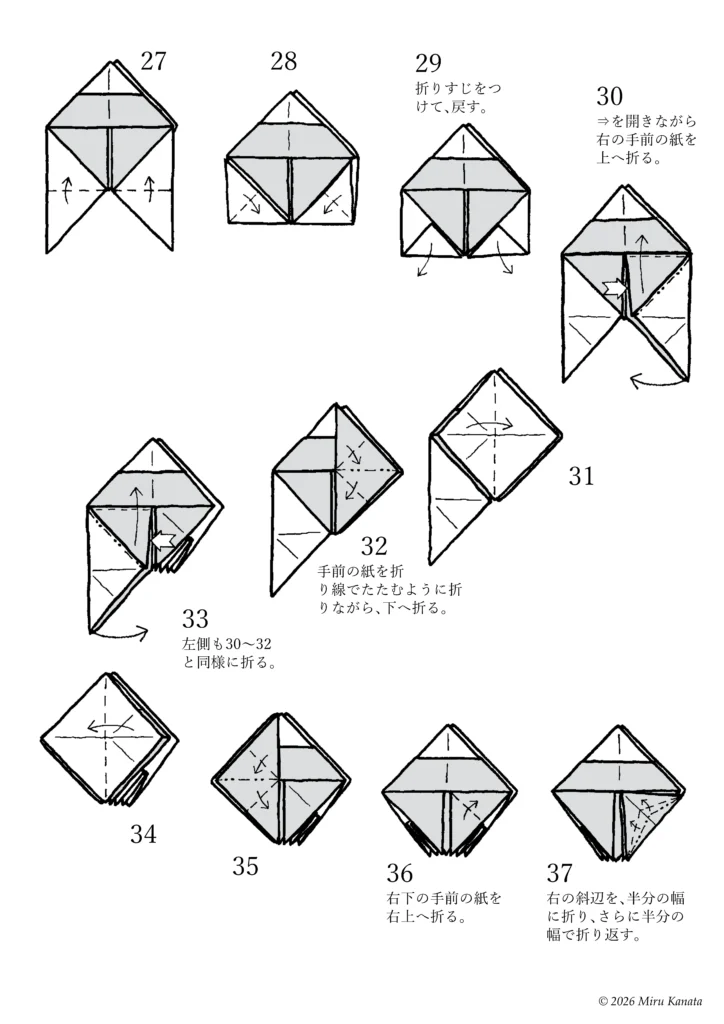
27
28
29 Make a crease and return it to its original position.
30 While opening the arrow, fold the paper in front of you on the right upwards.
31
32 Fold the paper in front along the crease and fold it downwards.
33 Repeat steps 30-32 for the left side.
34
35
36 Fold the paper in front of you on the bottom right towards the top right.
37 Fold the right diagonal side in half, and then fold it in half again.
English Commentary
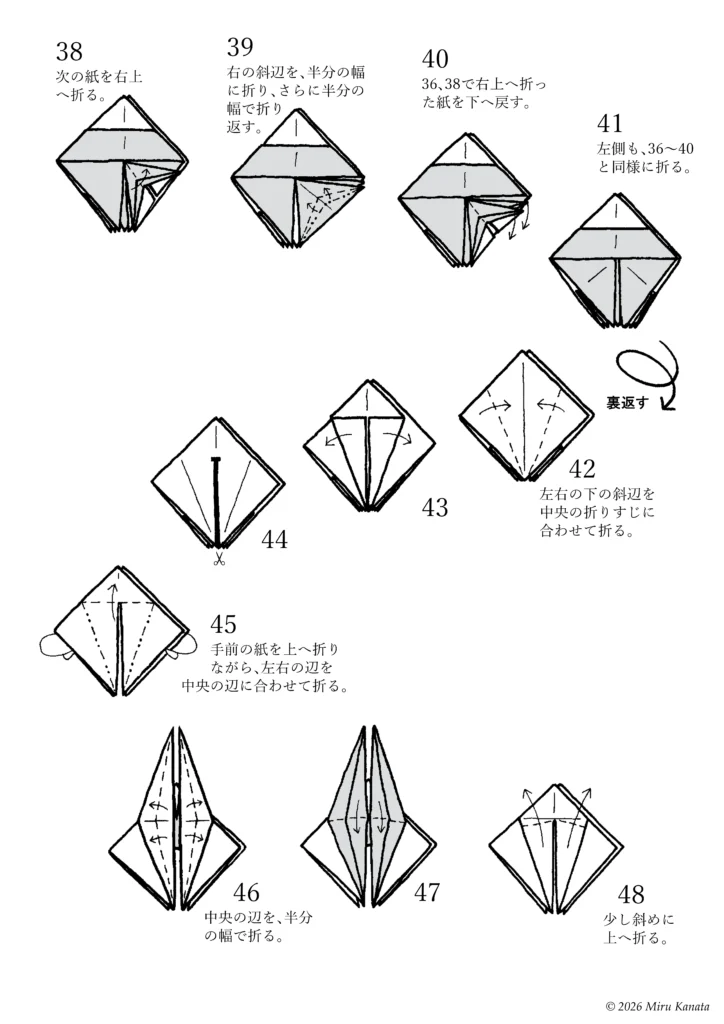
38 Fold the next piece of paper to the top right.
39 Fold the right diagonal edge in half, and fold it back in half again.
40 Turn the paper folded to the top right in 36 and 38 back down.
41 Fold the left side in the same way as 36 to 40.
{Flip}
42 Fold the bottom diagonal edges on both sides to align with the center crease.
43
44
45 While folding the paper in front up, fold the left and right edges to align with the center edge.
46 Fold the center edge in half.
47
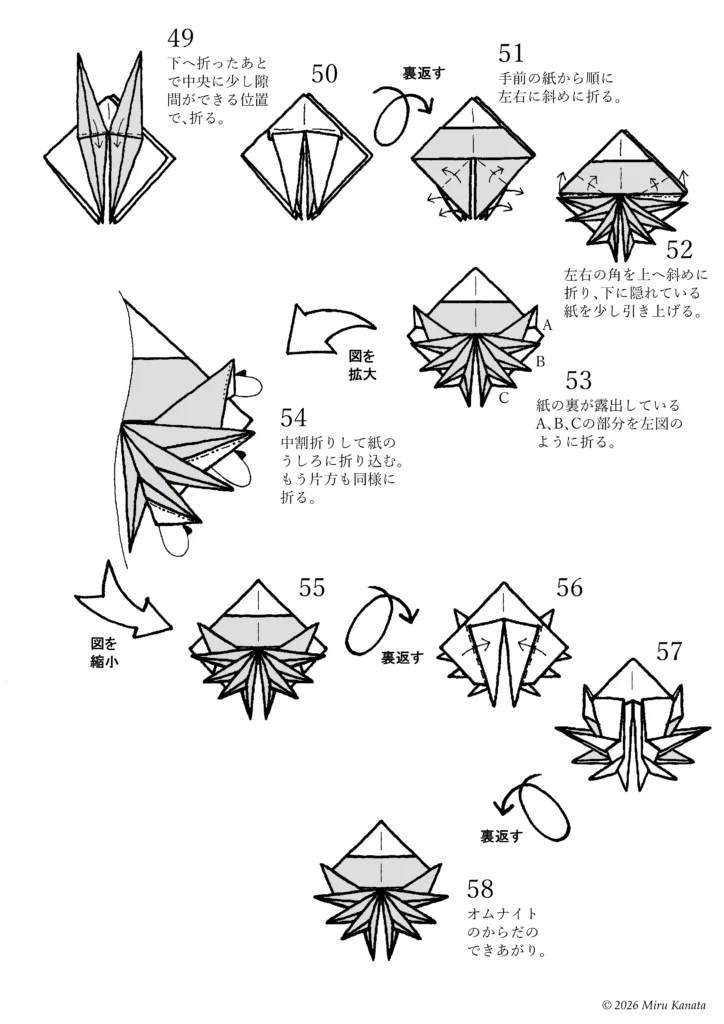
48 Fold it slightly diagonally up.
English Commentary
49 Fold it down, then fold it again so that there is a small gap in the center.
50
{Flip}
51 Fold the paper diagonally to the left and right, starting from the paper closest to you.
52 Fold the left and right corners diagonally upwards, and pull up the paper that is hidden underneath slightly.
53 Fold parts A, B, and C where the back of the paper is exposed as shown in the diagram on the left.
{Enlarge diagram}
54 Fold the inside in a reverse fold and tuck it behind the paper. Fold the other side in the same way.
{Reduce diagram}
55
{Flip}
56
57
{Flip}
58 Omanyte’s body is complete.
2 オムナイトの貝殻 3号
English Commentary
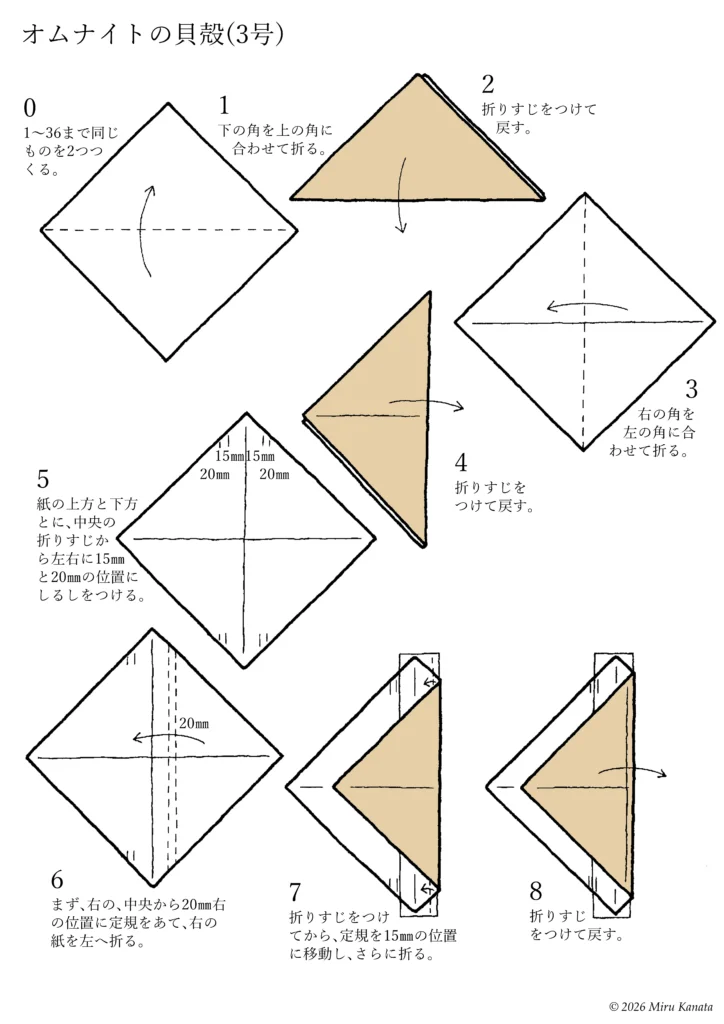
Omanyte Shell No. 3
0 Make two identical pieces from 1 to 36.
1 Fold the bottom corner to meet the top corner.
2 Make a crease and unfold.
3 Fold the right corner to meet the left corner.
4 Make a crease and unfold.
5 Mark the top and bottom of the paper at 15mm and 20mm to the left and right of the center crease.
6 First, place the ruler 20mm to the right of the center on the right side, and fold the right side of the paper to the left.
7 Make a crease, then move the ruler to the 15mm position and fold again.
8 Make a crease and unfold.
English Commentary
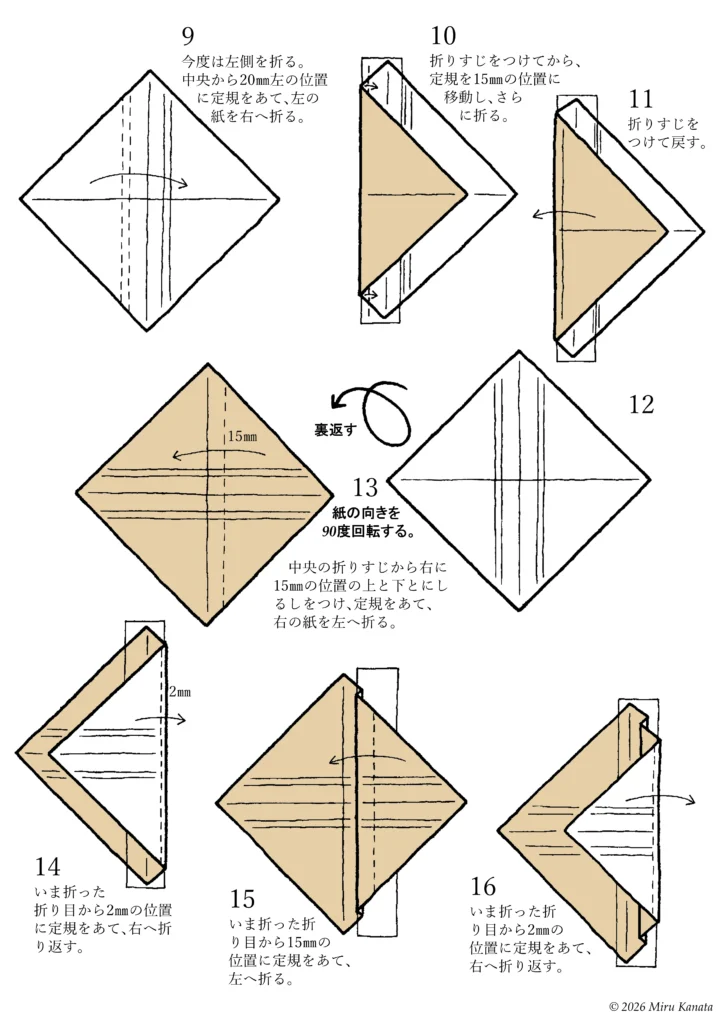
9 Now fold the left side. Place a ruler 20 mm to the left of the center and fold the left side of the paper to the right.
10 Make a crease, then move the ruler to 15 mm and fold again.
11 Make a crease and unfold.
12
{Flip}
13 Rotate the paper 90 degrees. Mark the top and bottom 15 mm to the right of the center crease, place a ruler, and fold the right side of the paper to the left.
14 Place a ruler 2 mm from the crease you just made and fold back to the right.
15 Place a ruler 15 mm from the crease you just made and fold to the left.
16 Place a ruler 2 mm from the crease you just made and fold back to the right.
English Commentary
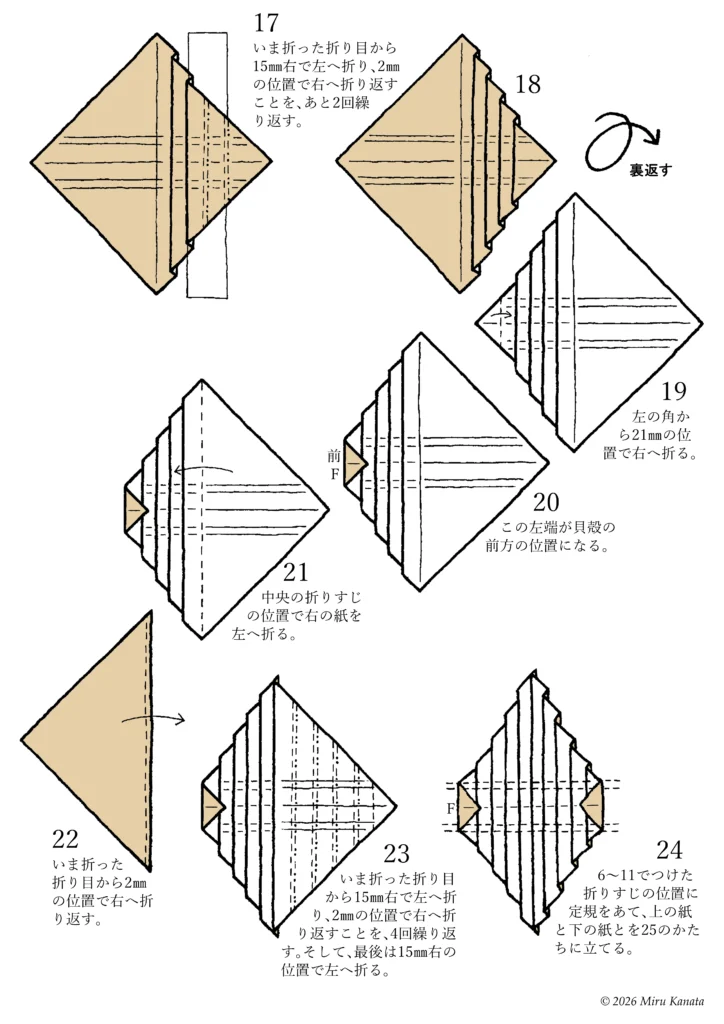
17 Fold left 15 mm to the right of the crease you just made, then fold back to the right at a position 2 mm from the crease, and repeat this two more times.
18
{Flip}
19 Fold to the right 21 mm from the left corner.
20 This left edge will be the front of the seashell.
21 Fold the right piece of paper to the left at the position of the center crease.
22 Fold back to the right 2 mm from the crease you just made.
23 Fold left 15 mm to the right of the crease you just made, then fold back to the right at a position 2 mm from the crease, and repeat this four times. Finally, fold left 15 mm to the right.
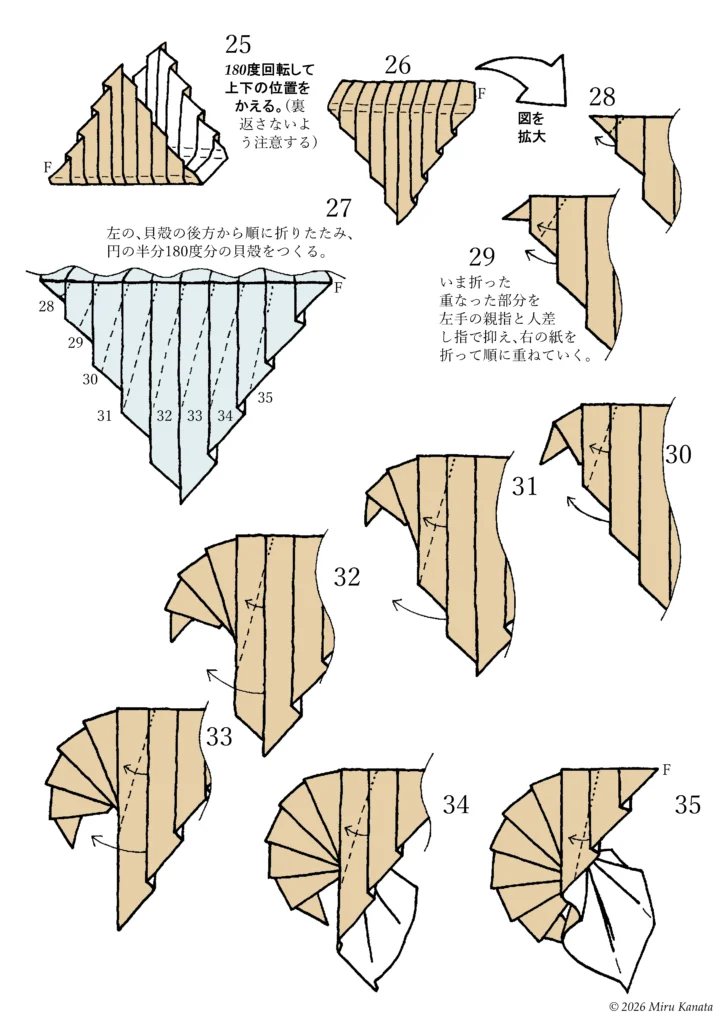
24 Place a ruler at the positions of the creases made in steps 6-11, and stand the top and bottom pieces of paper upright in the shape of step 25.
English Commentary
25 Rotate 180 degrees to change the top and bottom positions. (Be careful not to flip it over.)
26
27 Fold the left side, starting from the back of the shell, to create a shell that is half the circle, 180 degrees.
{Enlarge the diagram}
28
29 Hold down the overlapping part you just folded with your left thumb and index finger, and fold the paper on the right, overlapping them in order.
30
31
32
33
34
35
English Commentary
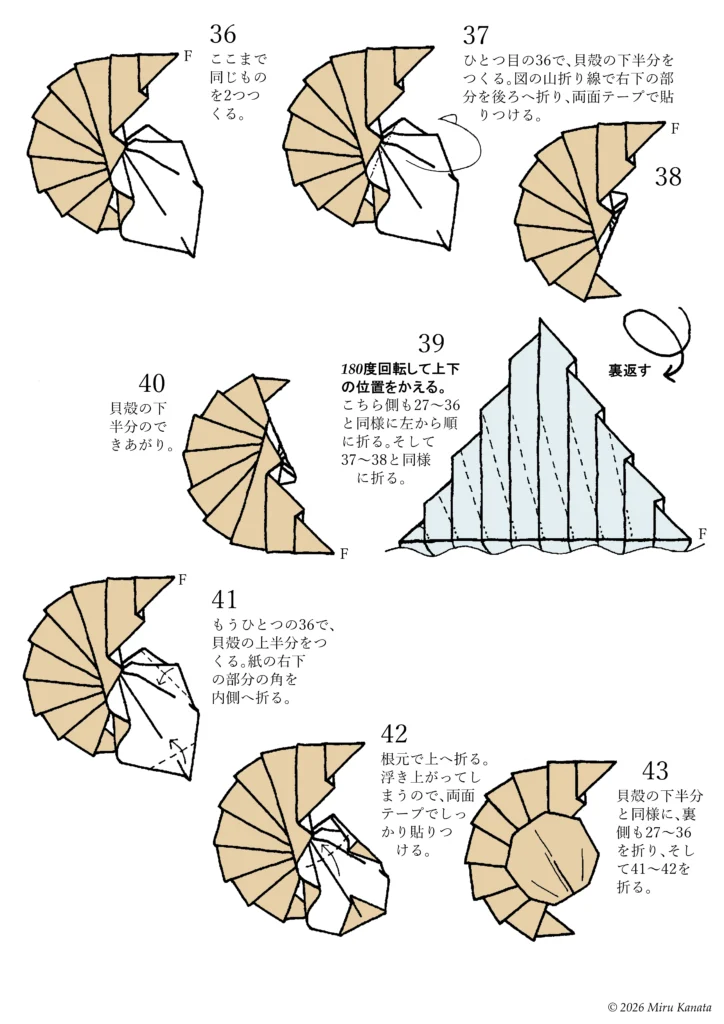
36 Make two of these.
37 With the first 36, make the lower half of the seashell. Fold the bottom right part to the back along the mountain fold line in the diagram and attach it with double-sided tape.
38
{Flip}
39 Rotate it 180 degrees to change the top and bottom positions. Fold this side from left to right in the same way as 27-36. Then fold it in the same way as 37-38.
40 The lower half of the seashell is complete.
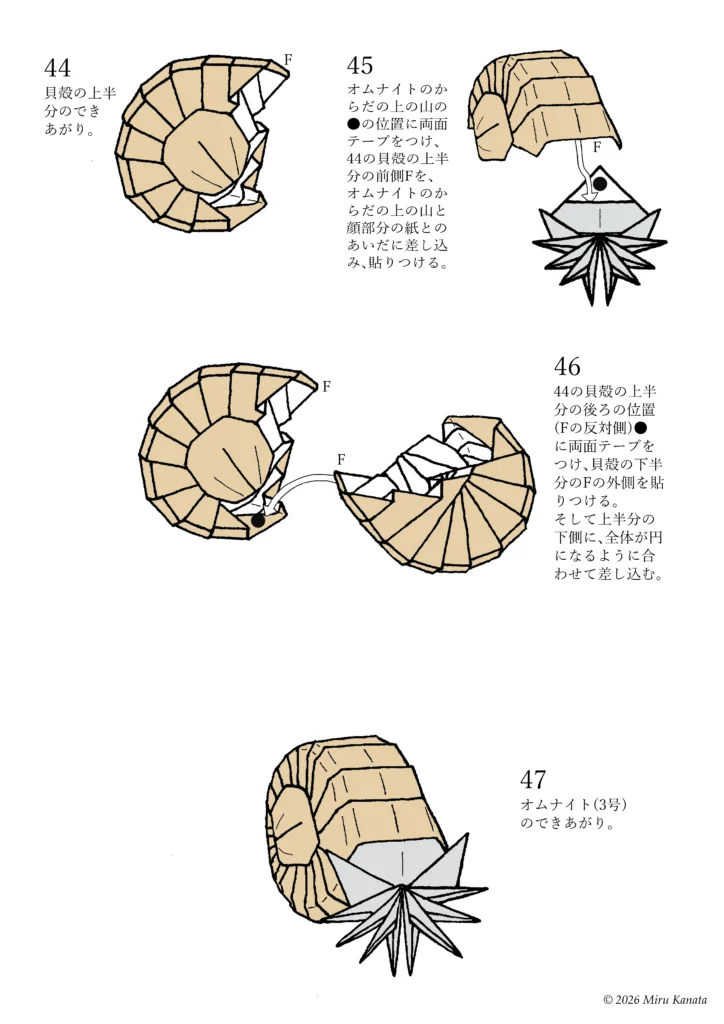
41 With the other 36, make the upper half of the seashell. Fold the corner of the bottom right part of the paper inward.
42 Fold it upward at the base. It will lift up, so attach it firmly with double-sided tape.
43 Just like the lower half of the seashell, fold 27-36 on the back side, and then fold 41-42.
English Commentary
44 The upper half of the seashell is complete.
45 Attach double-sided tape to the ● position on the mountain on top of Omanyte’s body, and insert the front part F of the upper half of the seashell from 44 between the mountain on top of Omanyte’s body and the paper for the face, and stick it in place.
46 Attach double-sided tape to the ● position on the back of the upper half of the seashell from 44 (opposite side of F), and stick the outside of F of the lower half of the seashell. Then, insert it into the bottom of the upper half, aligning it so that the whole thing forms a circle.
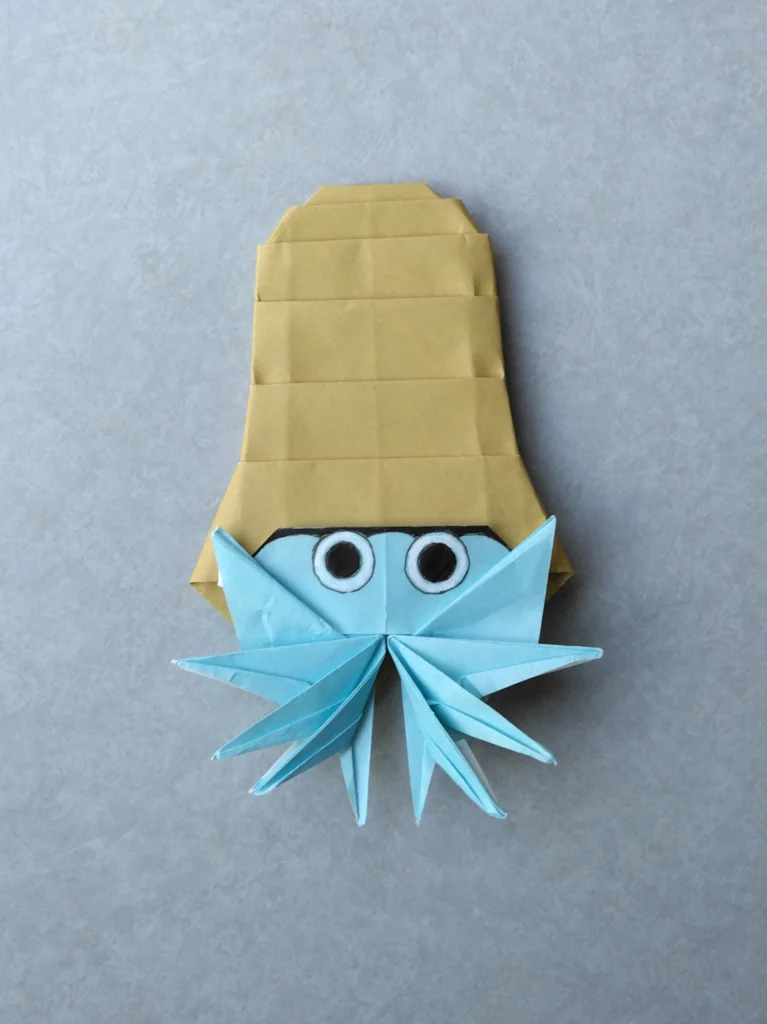
47 Omanyte (No. 3) is complete.
ORIGAMI Topics
■折る途中で登場する「基本の正方形をつくる」は、おりがみでは最も基本のテーマのひとつです。
いろいろなケースで使われますので、それらのサイズや構造のヴァリエーションをまとめました。
次のリンクから、正方形の多彩な姿をお楽しみください。
みるかなた本棚>Nice Origami素敵折紙>p038オムナイト3
◇ ◇ ◇