
みるかなた本棚>Nice Origami素敵折紙>p012バタフリー
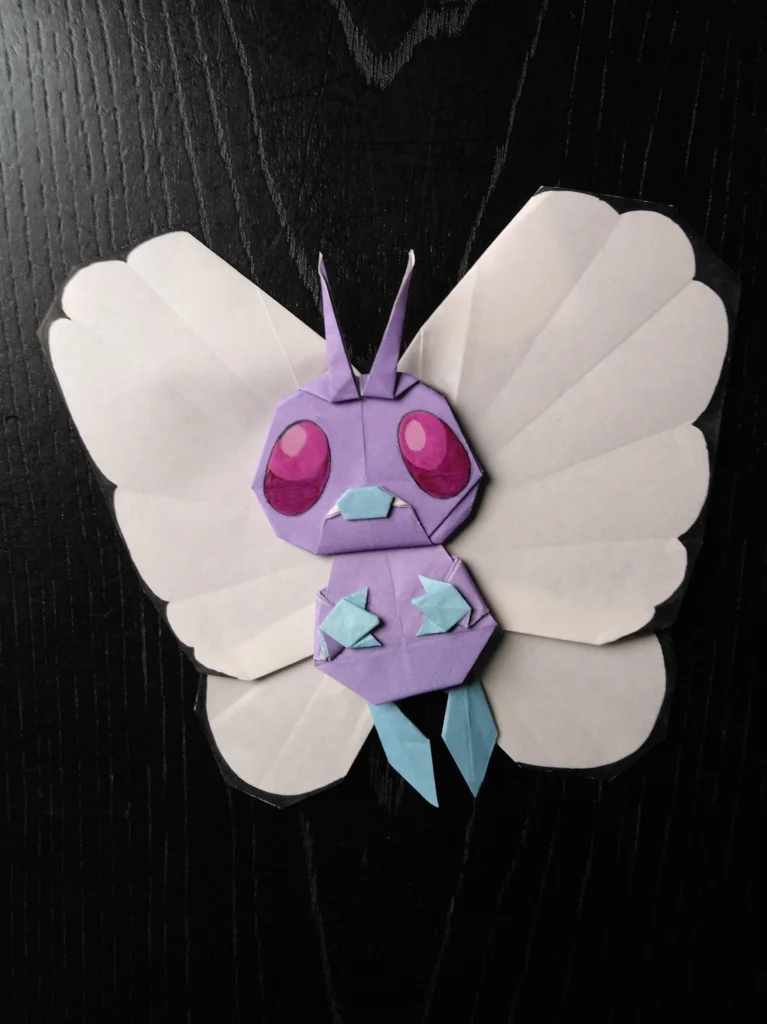
p012 バタフリー 2号
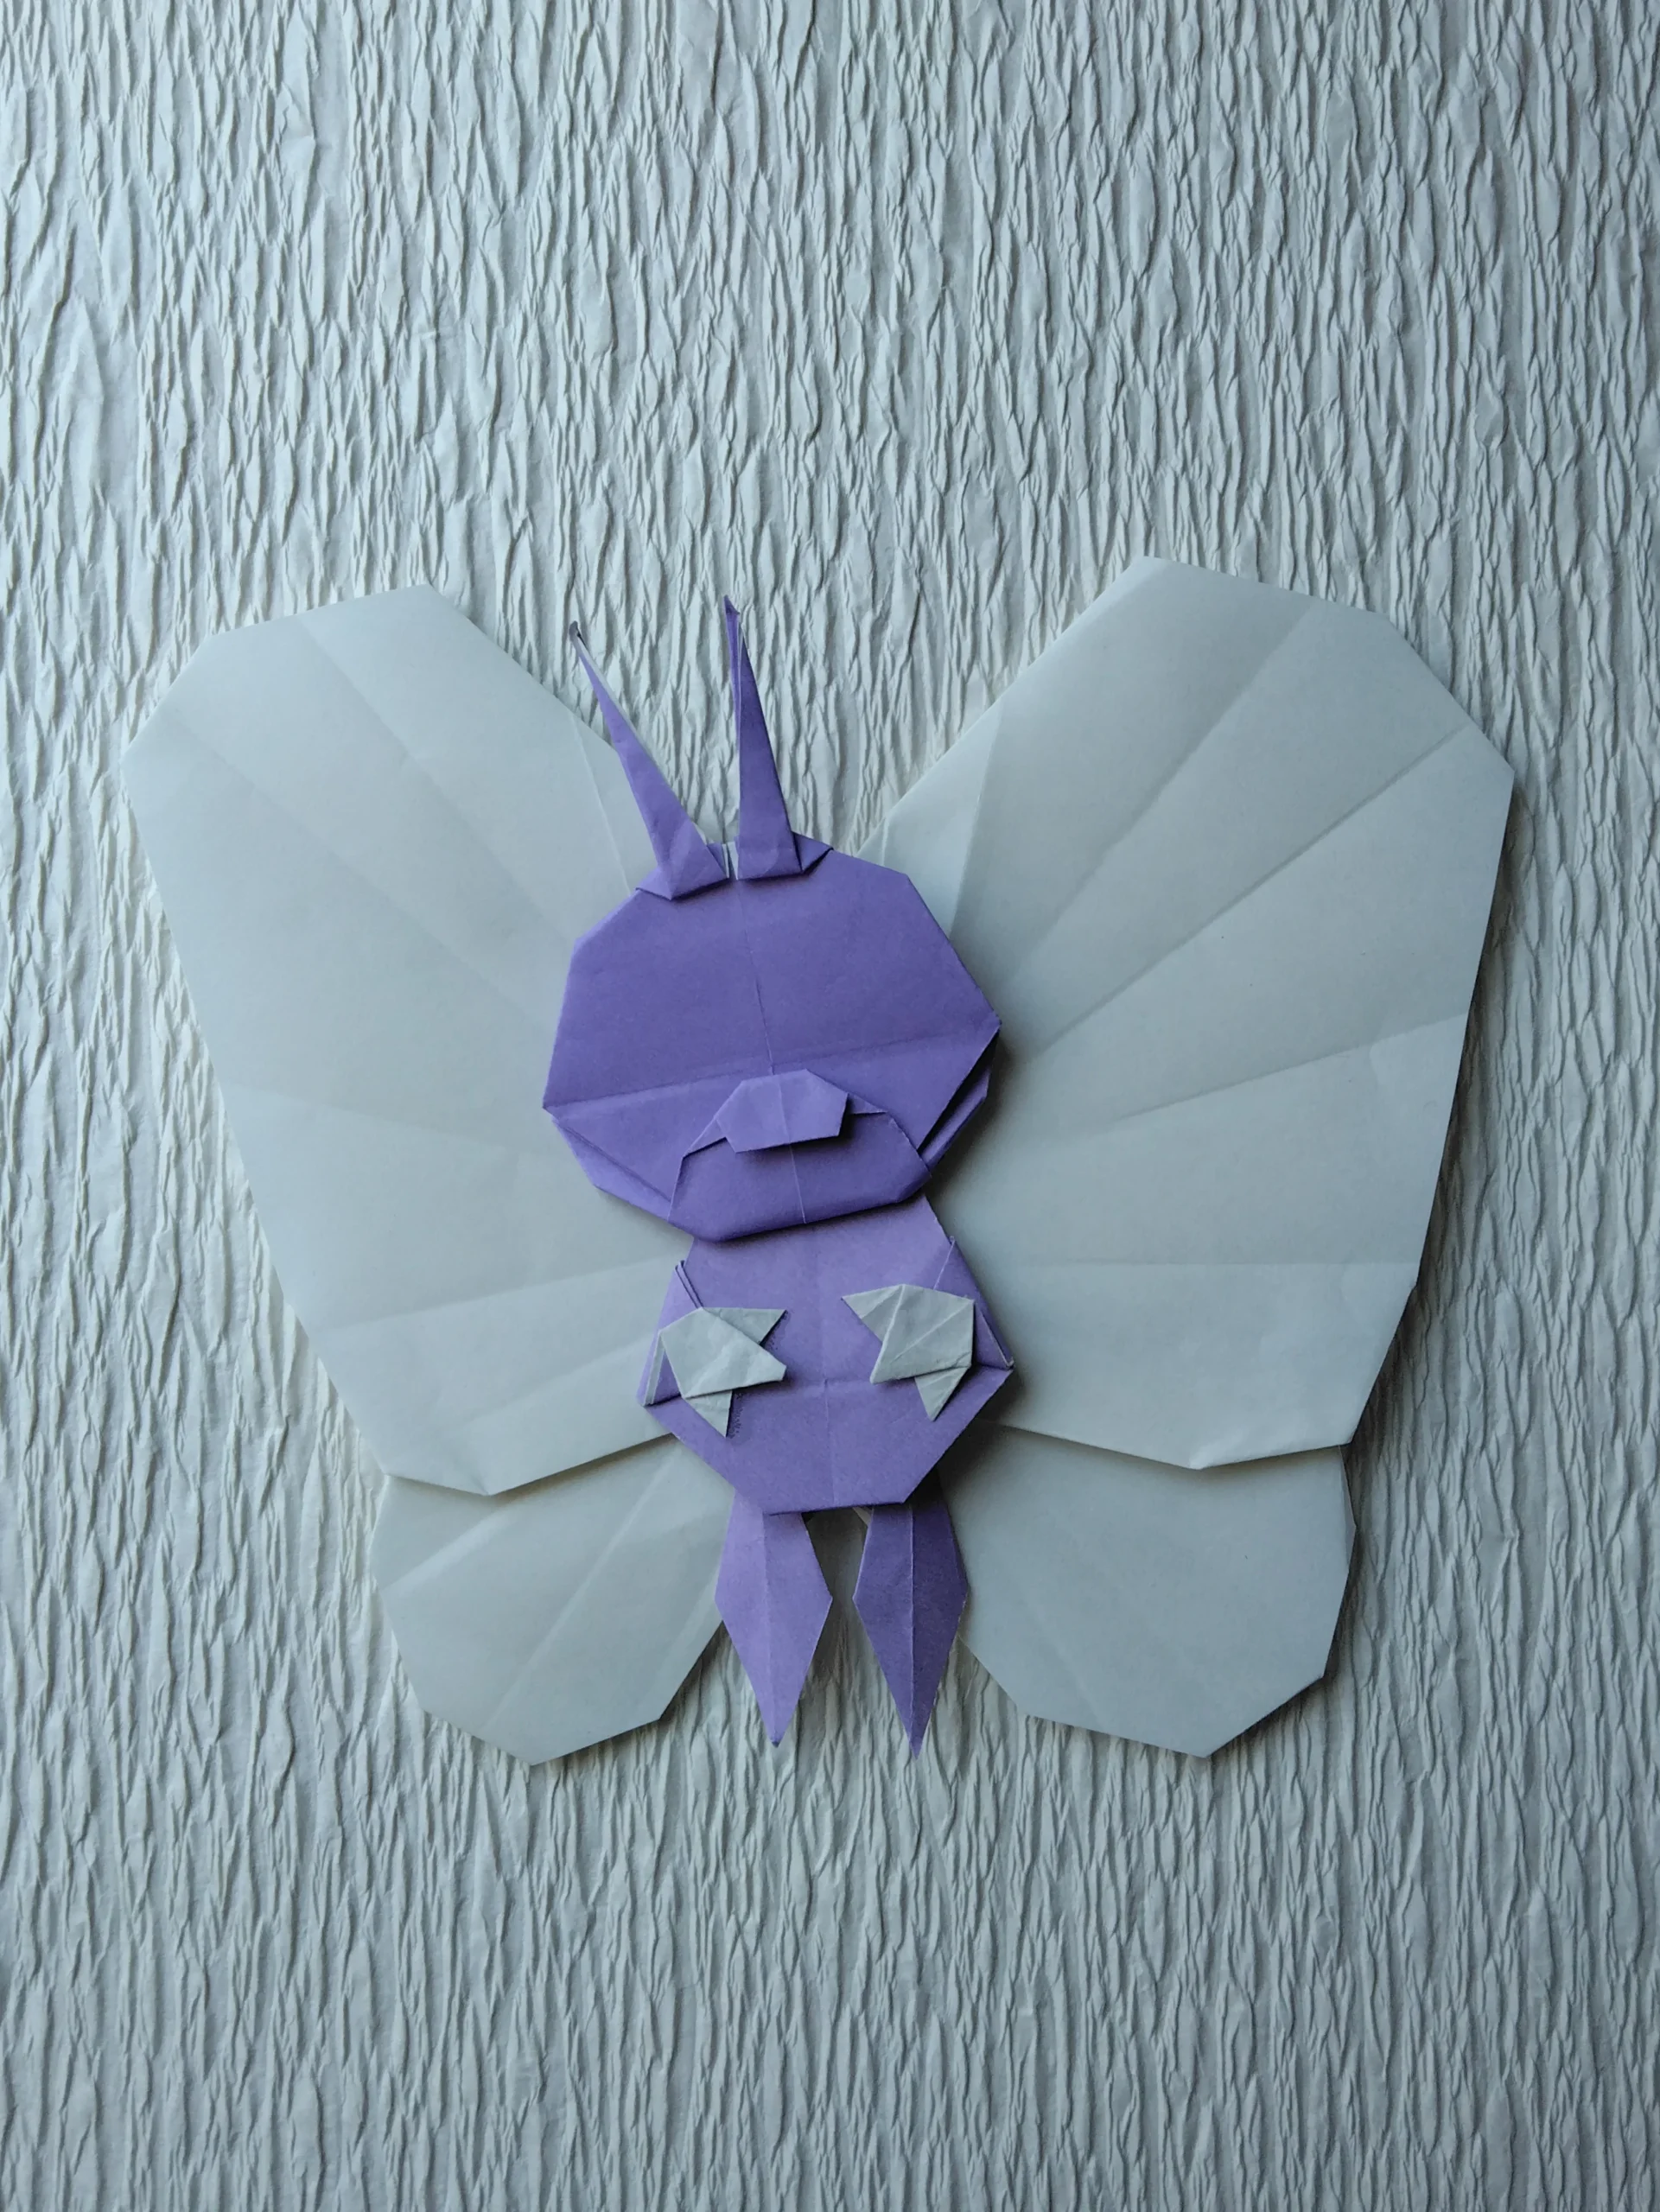
新作です。
すばらしく素敵にできました。
とてもかわいい感じです
以前のバタフリーのフォルムがぎこちないので、もうちょっとどうにかできるかな、と、いろいろ試作しました。
その中でひとつ、あたまとからだを別々につくるものを、ご紹介します。
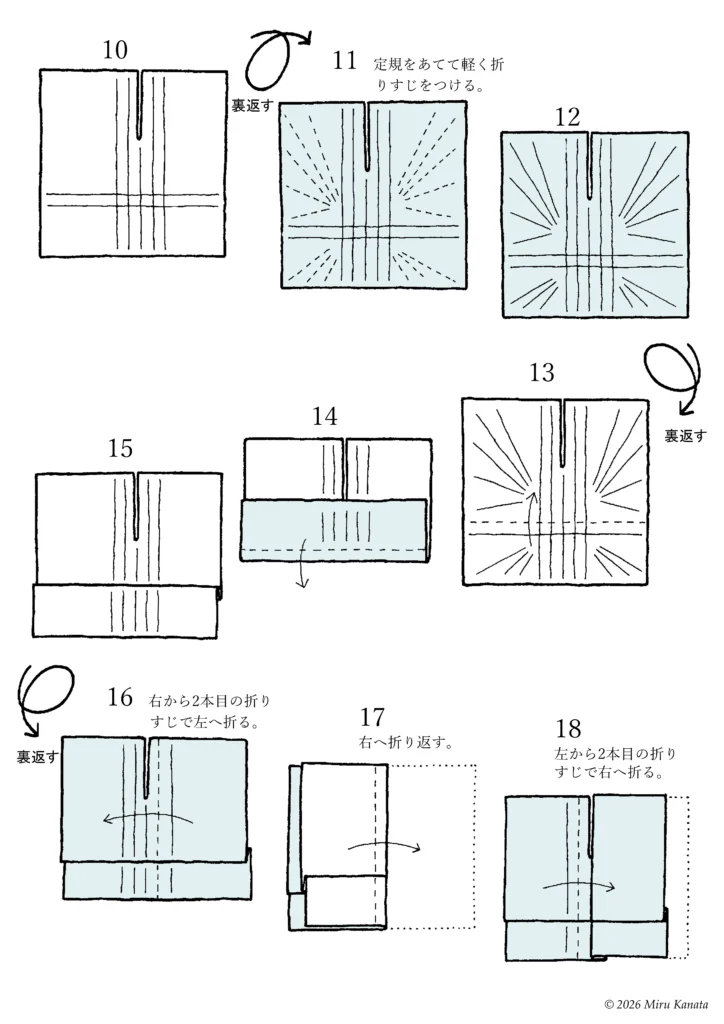
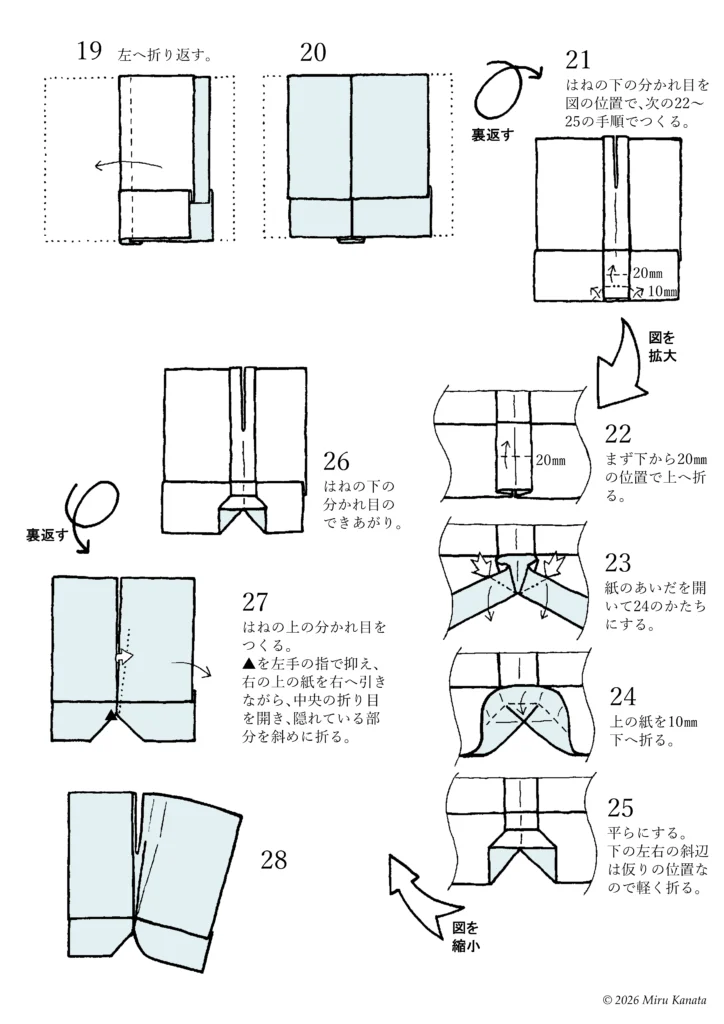
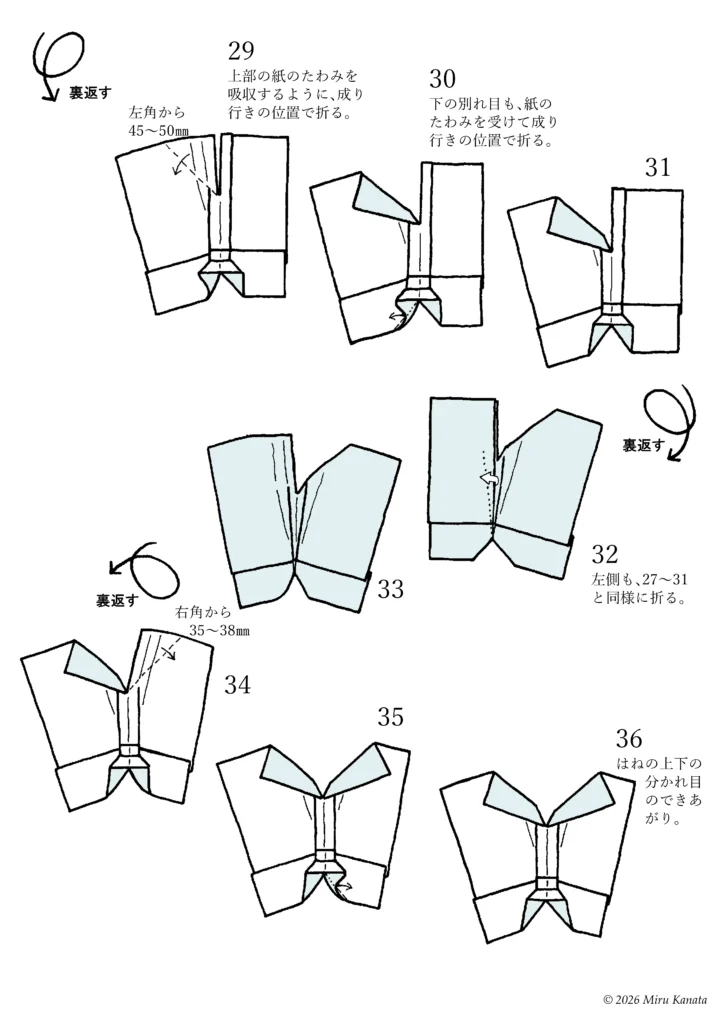
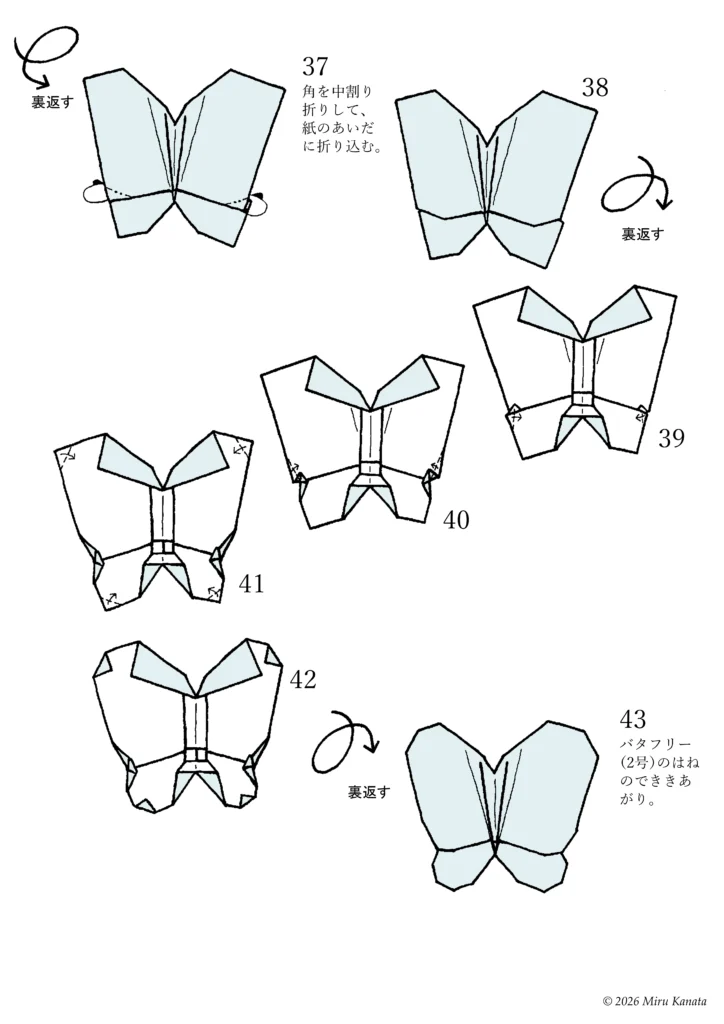
鼻と、手、足、は、別色の紙を差し加えて折っています。
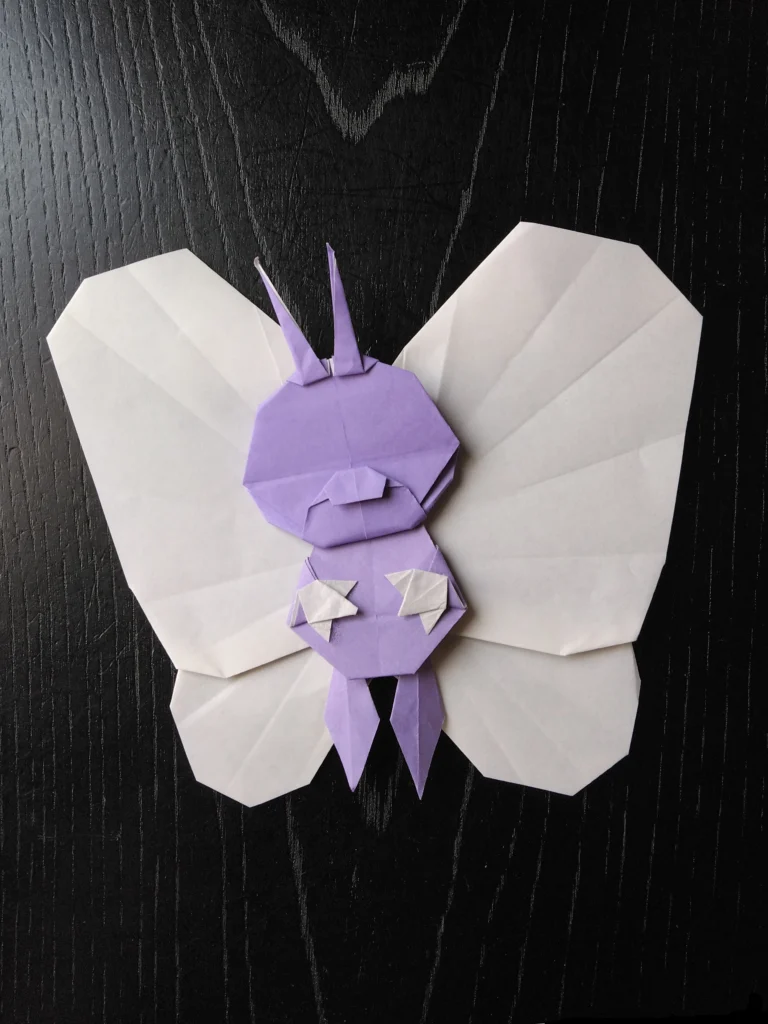
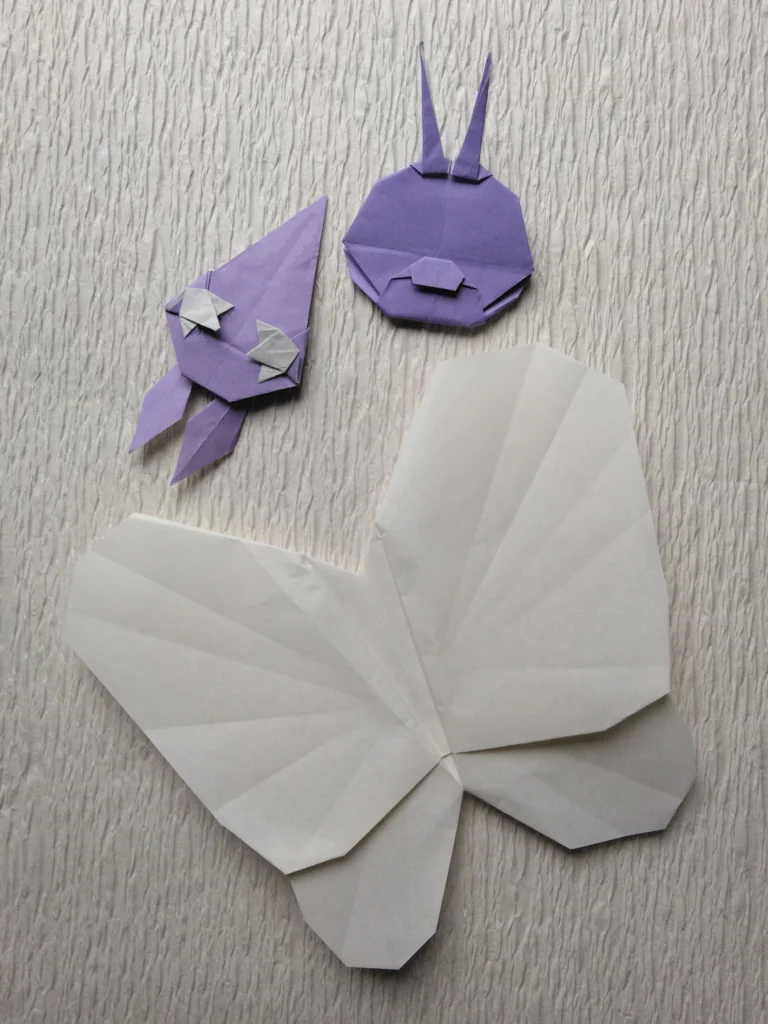
p012 バタフリー 2号素体
上の2号の、おりがみのベースの姿です。
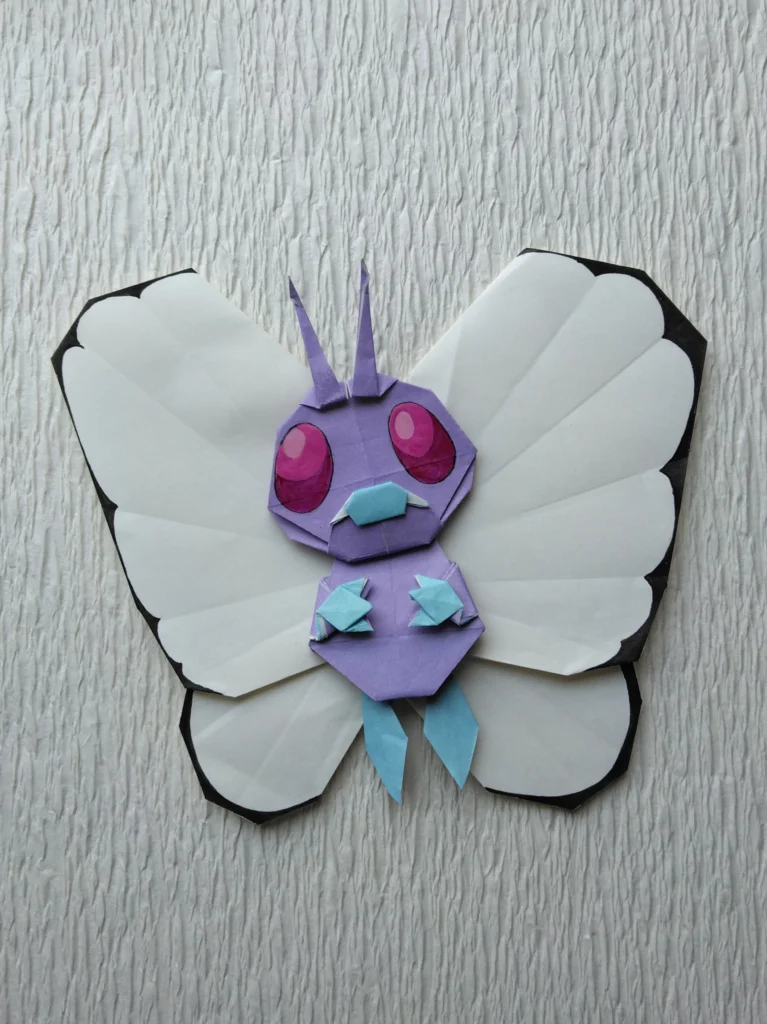
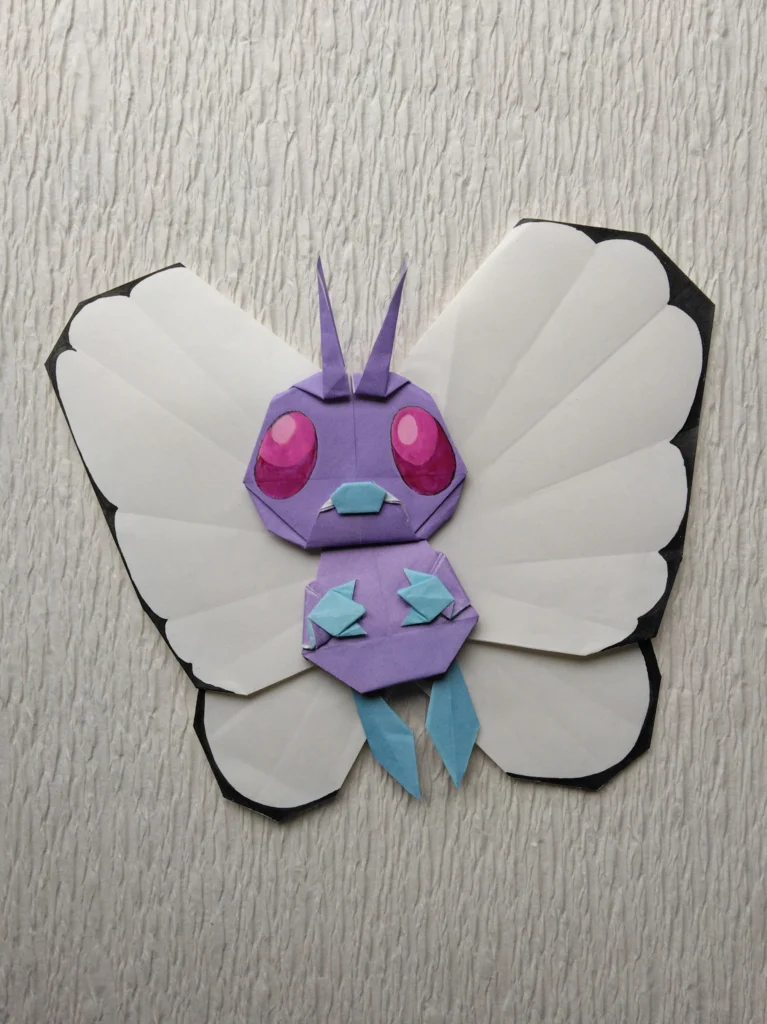
折る位置が少し異なると、雰囲気が変わります。
ポージングにも左右されます。
気に入ったフォルムを見つけてください。
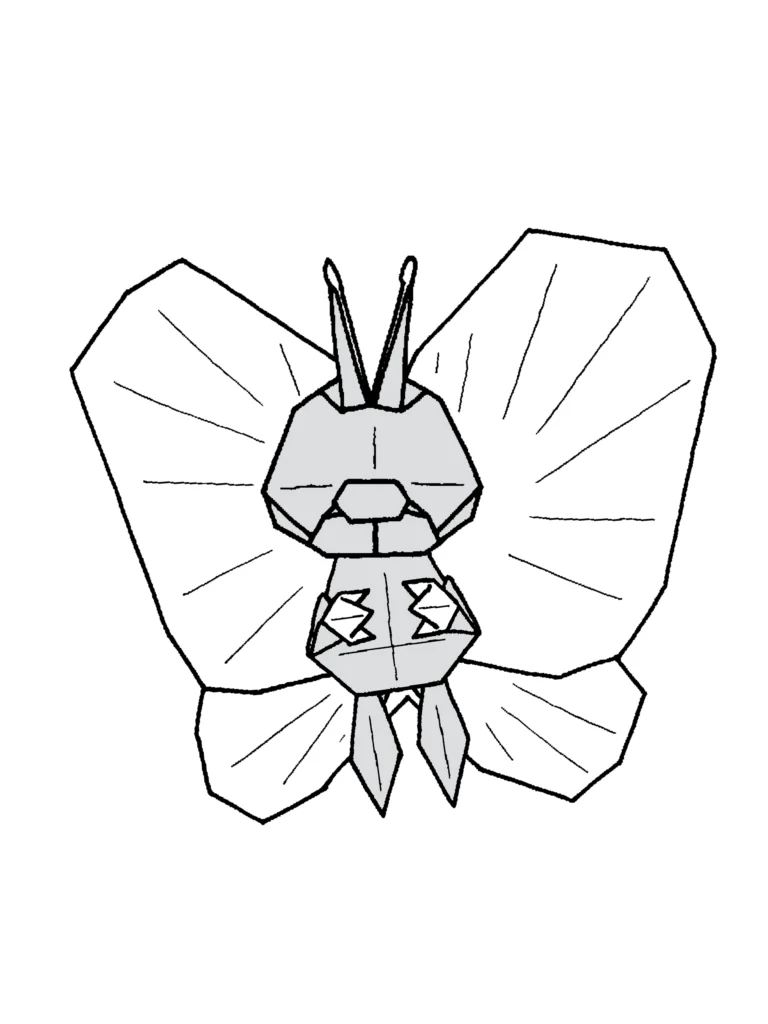
つくり方の折り図
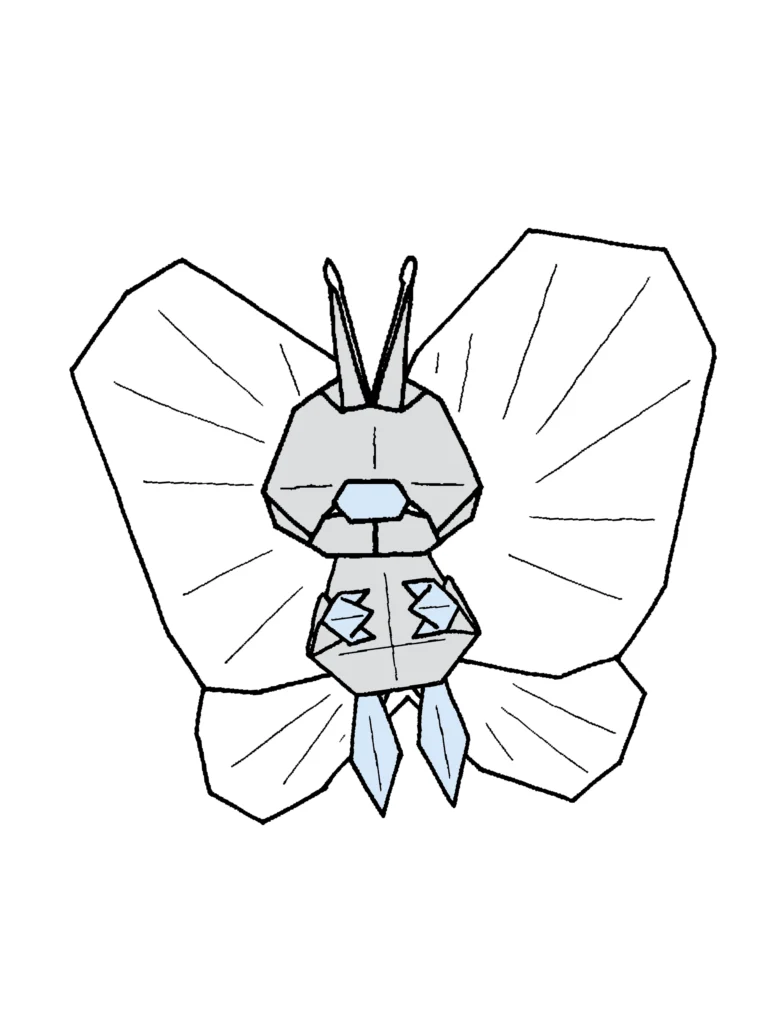
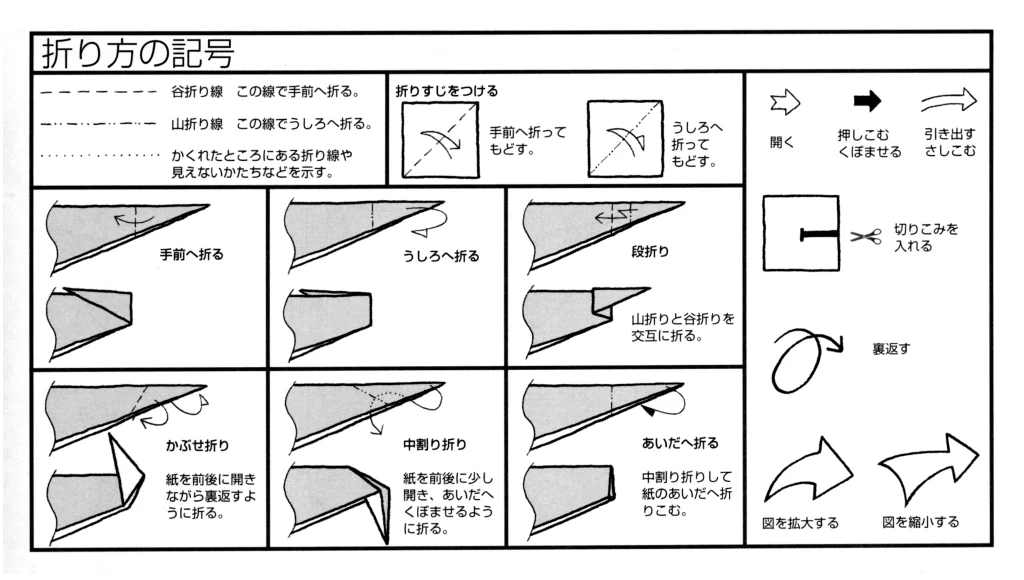
今回制作した折り図
◇折り図
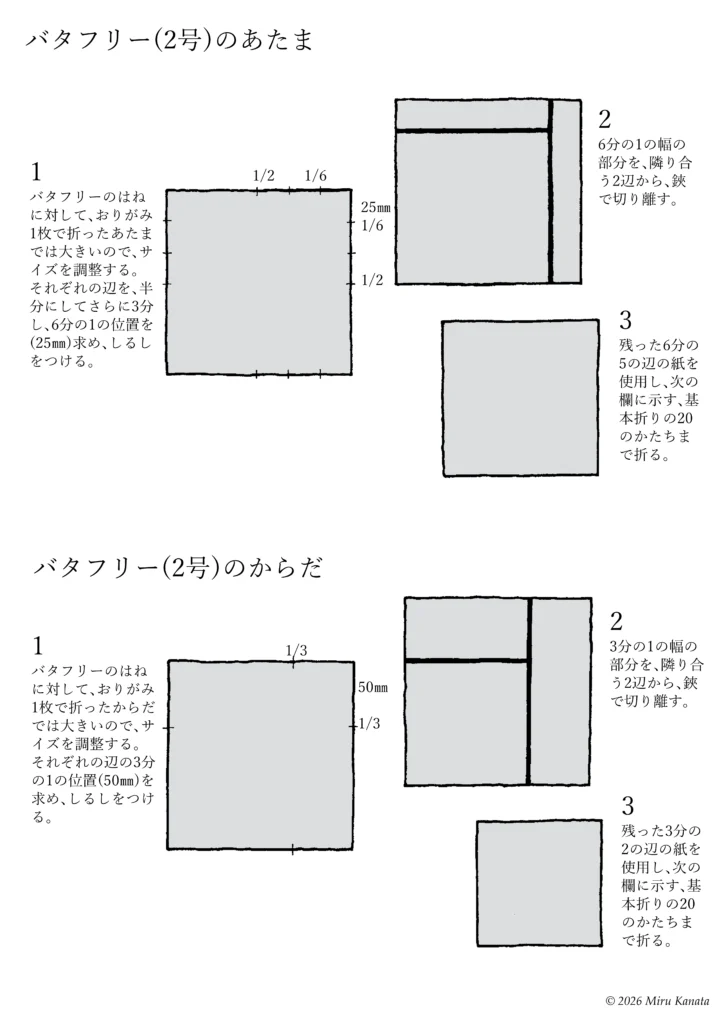
1 バタフリーのあたま 2号、バタフリーのからだ 2号
2 基本折り
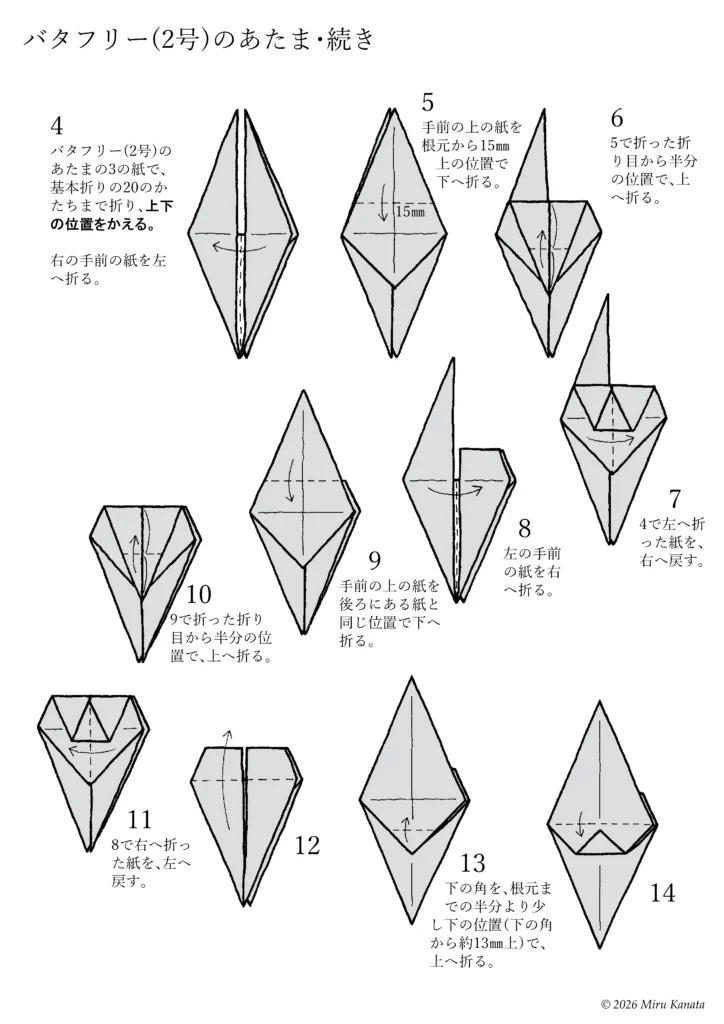
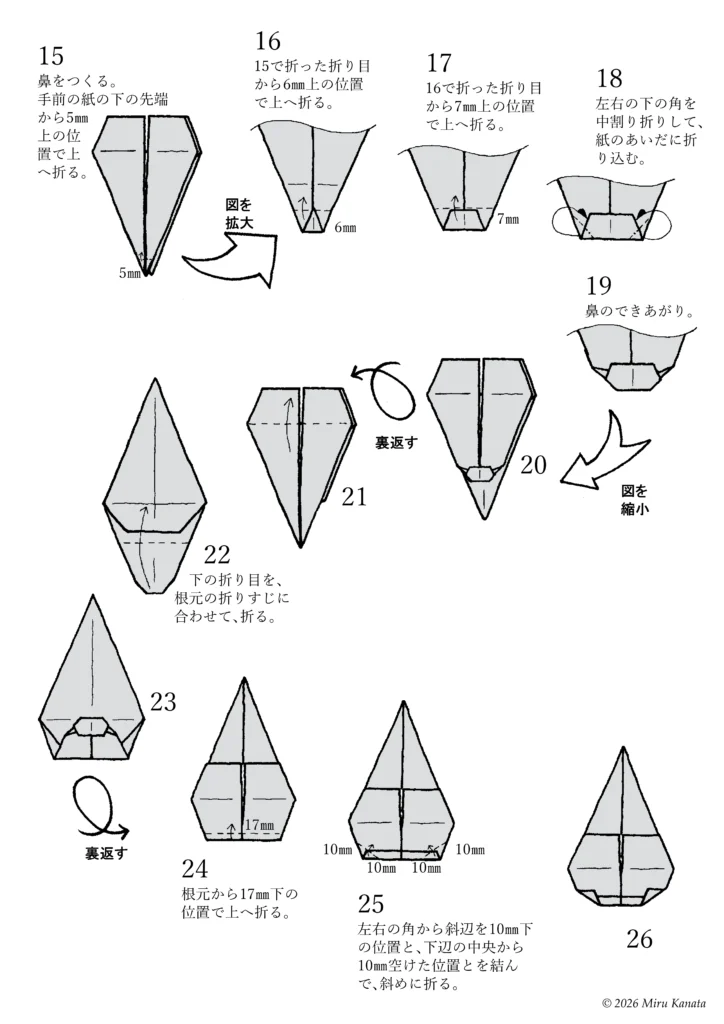
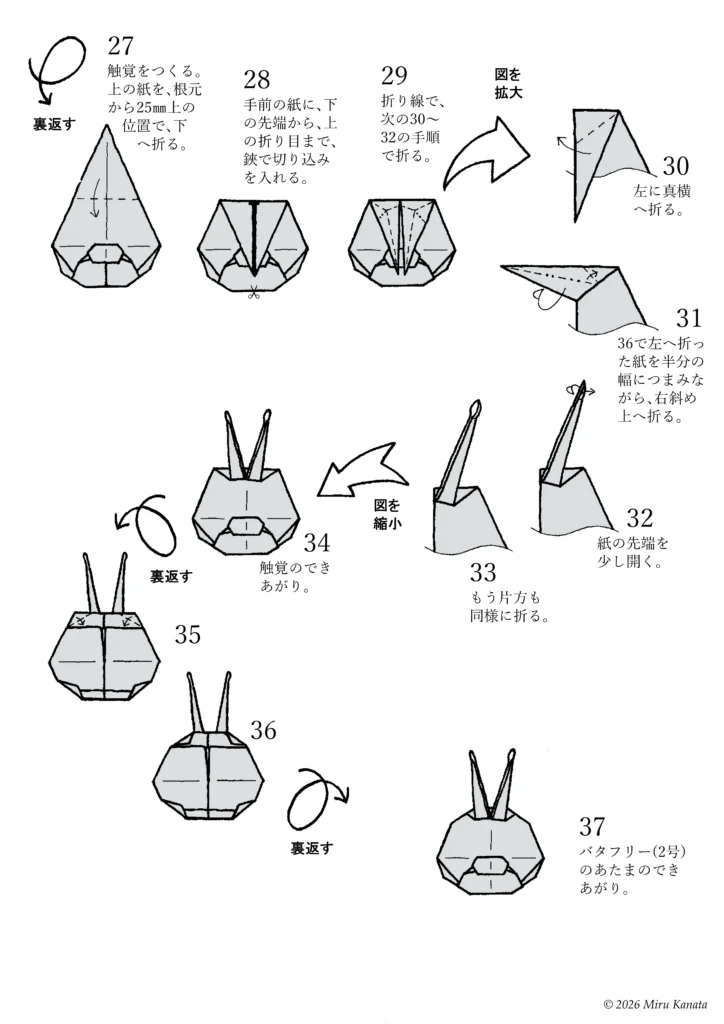
3 バタフリーのあたま 2号・続き
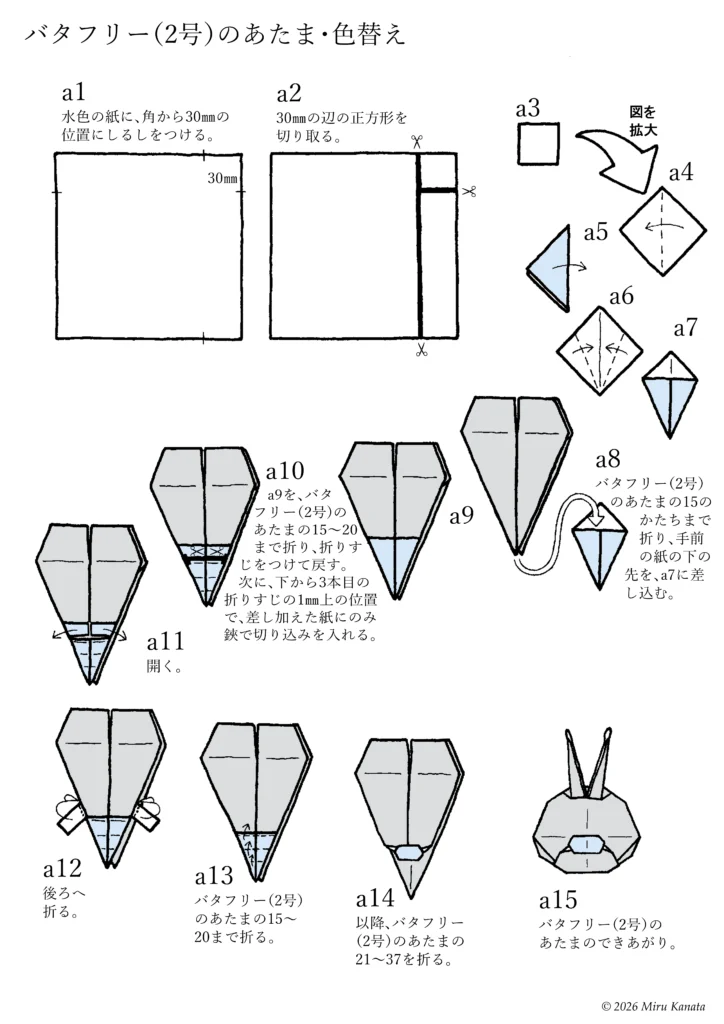
4 バタフリーのあたま 2号・色替え
5 バタフリーのからだ 2号・続き
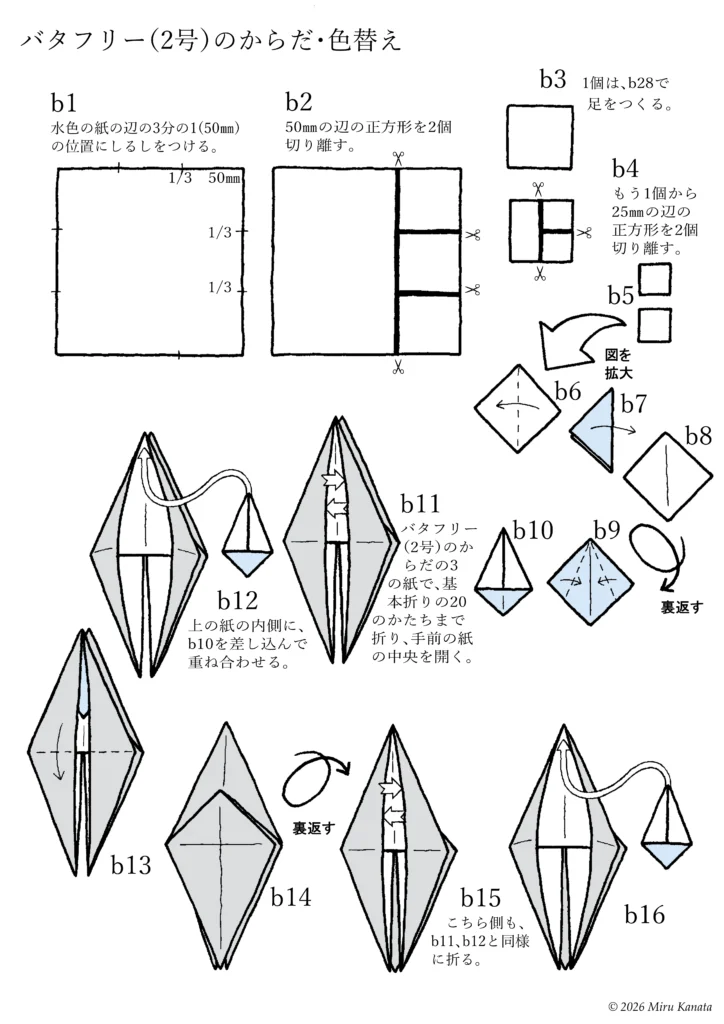
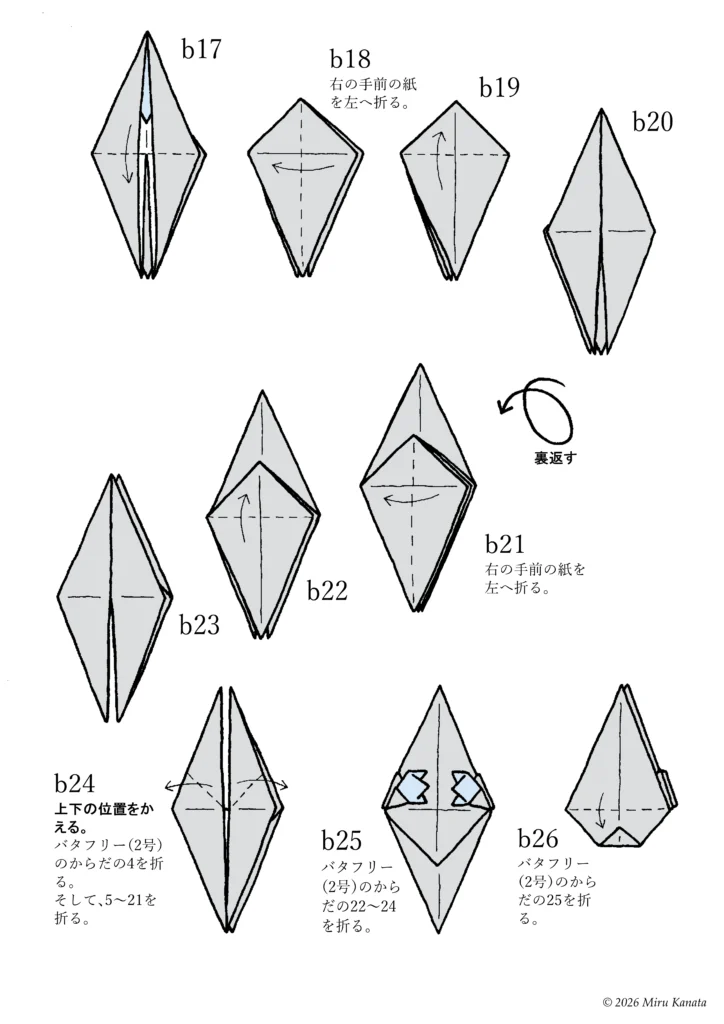
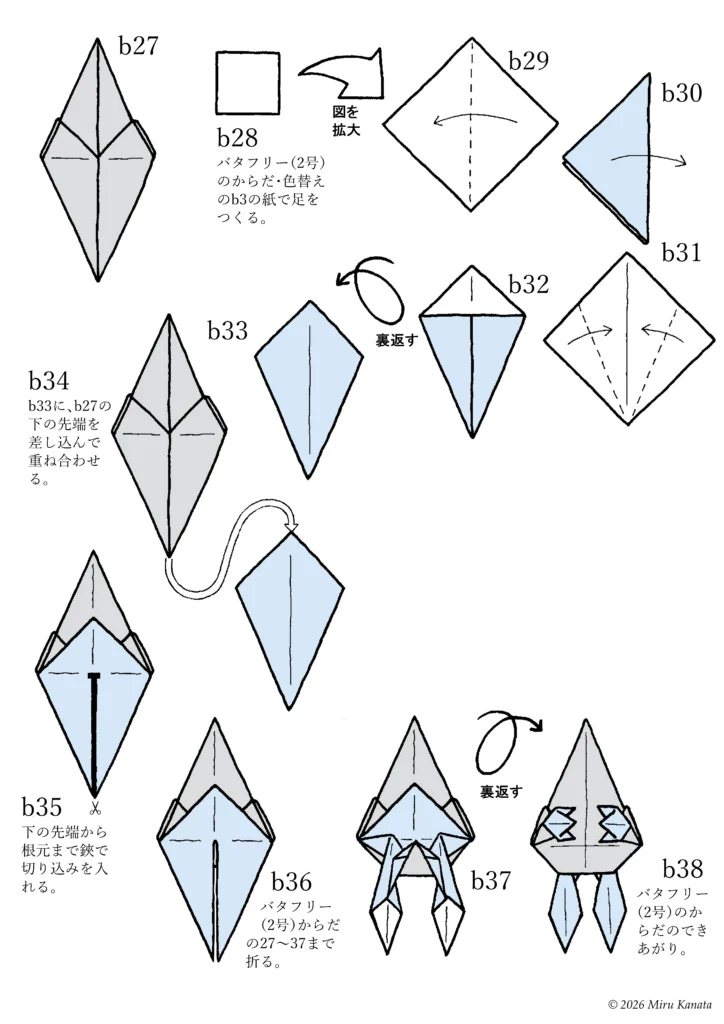
6 バタフリーのからだ 2号・色替え
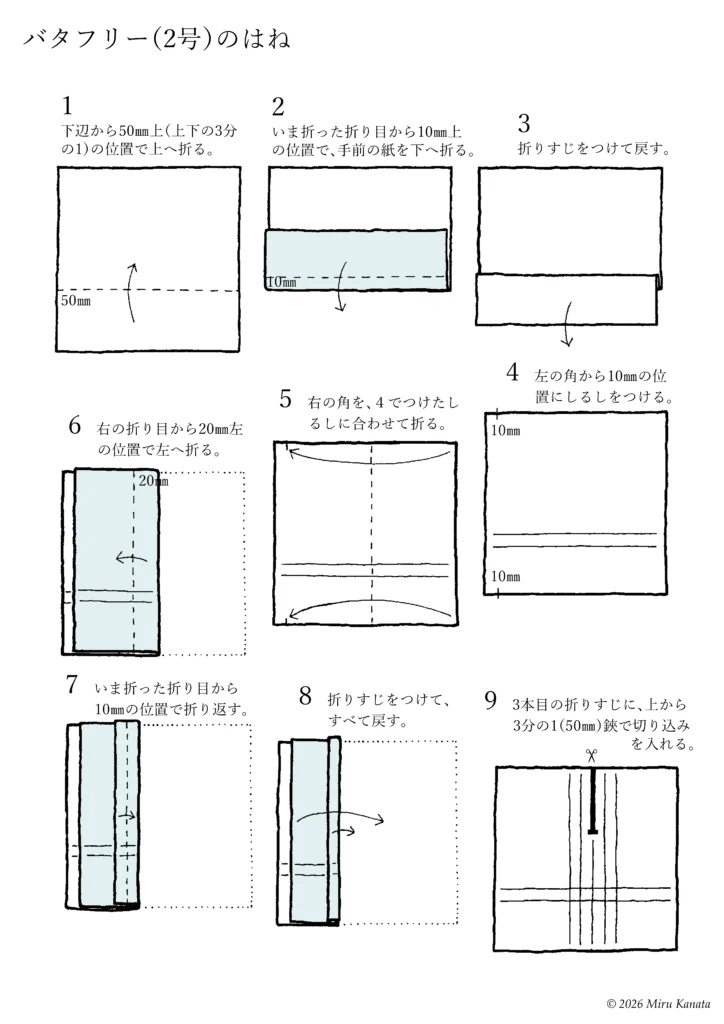
7 バタフリーのはね 2号
■バタフリーのあたまは、藤色の紙で折る。
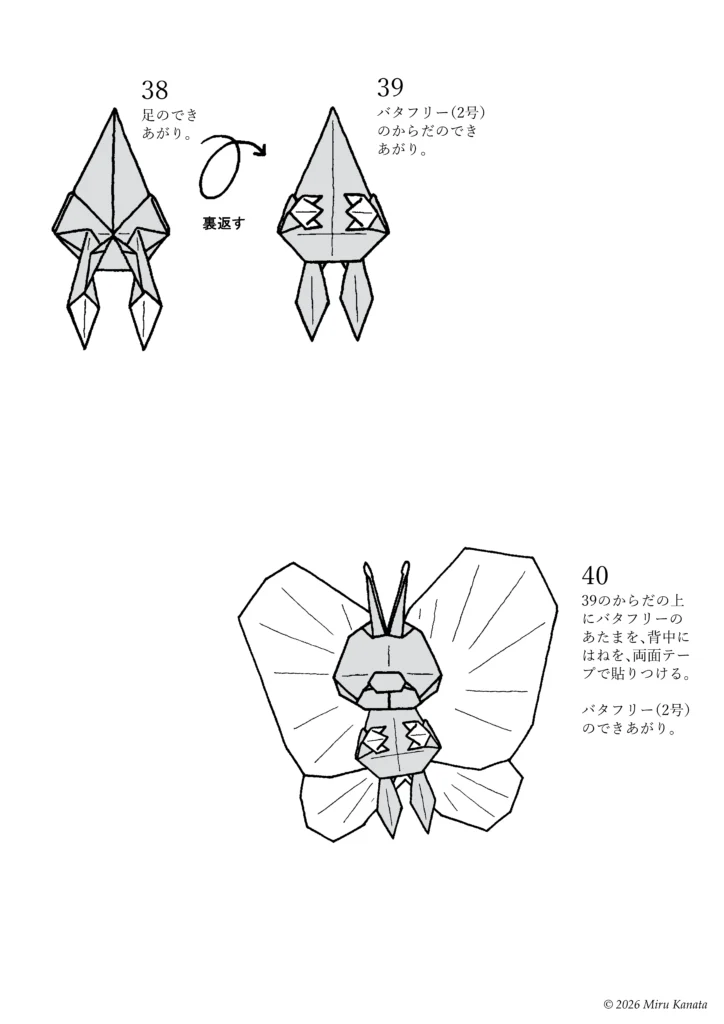
■バタフリーのからだは、藤色の紙で折る。
■バタフリーの鼻・手・足は、サイズを調整した水色の紙を差し加えて折る。
■バタフリーのはねは白色の紙で折る。
1 バタフリーのあたま 2号、バタフリーのからだ 2号
2 基本折り
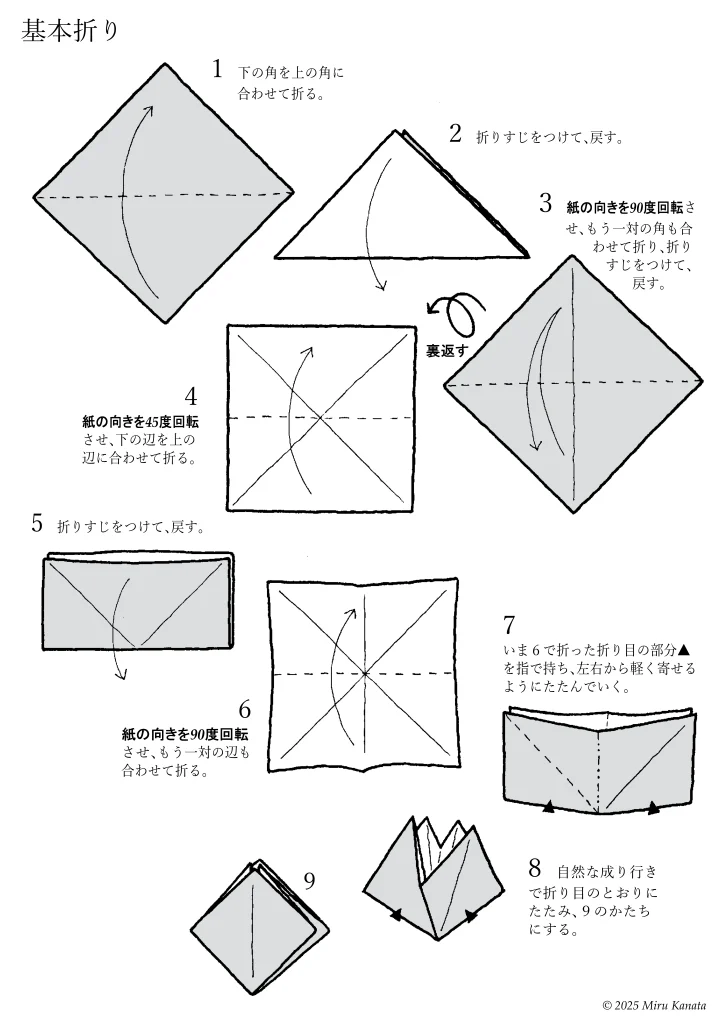
English Commentary
Basic Folding
1 Fold the bottom corner to meet the top corner.
2 Make a crease and return it to its original position.
3 Rotate the paper 90 degrees, fold the other pair of corners together, make a crease and return it to its original position.
{Flip}
4 Rotate the paper 45 degrees and fold the bottom edge to meet the top edge.
5 Make a crease and return it to its original position.
6 Rotate the paper 90 degrees and fold the other pair of edges together.
7 Hold the crease ▲ made in step 6 with your fingers and fold it gently from both sides.
8 Let it naturally fold along the creases to form the shape of 9.
9
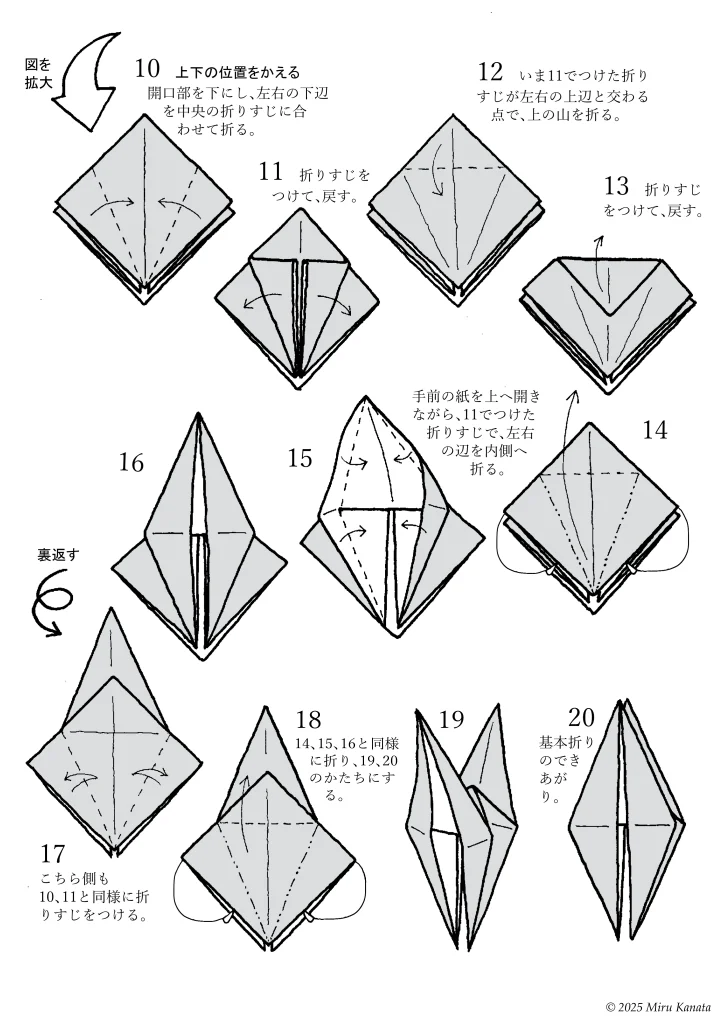
English Commentary
{Enlarge image}
10 Change the top and bottom positions.
With the opening facing downwards, fold the bottom left and right edges to meet the crease in the middle.
11 Make a crease and return.
12 Fold the top at the point where the crease made in 11 intersects with the top left and right edges.
13 Make a crease and return.
14 While opening the front paper upwards, fold the left and right edges inward along the crease made in 11.
15
16
{Flip}
17 Make creases on this side in the same way as 10 and 11.
18 Fold in the same way as 14, 15 and 16 to form 19 and 20.
19
20 The basic fold is complete.
3 バタフリーのあたま 2号・続き
4 バタフリーのあたま 2号・色替え
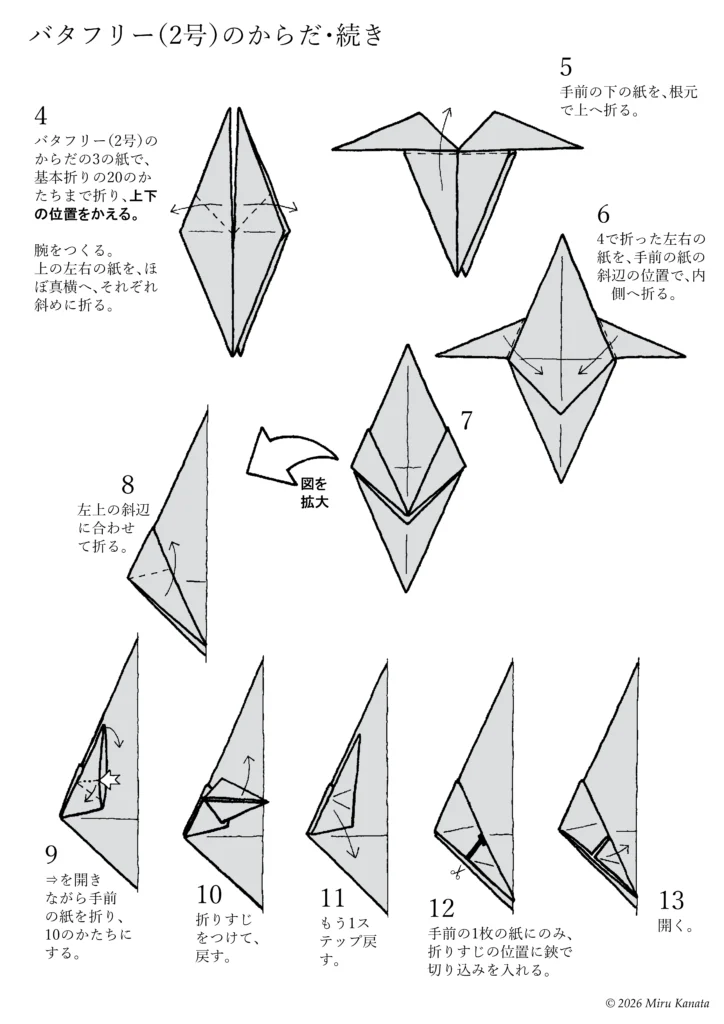
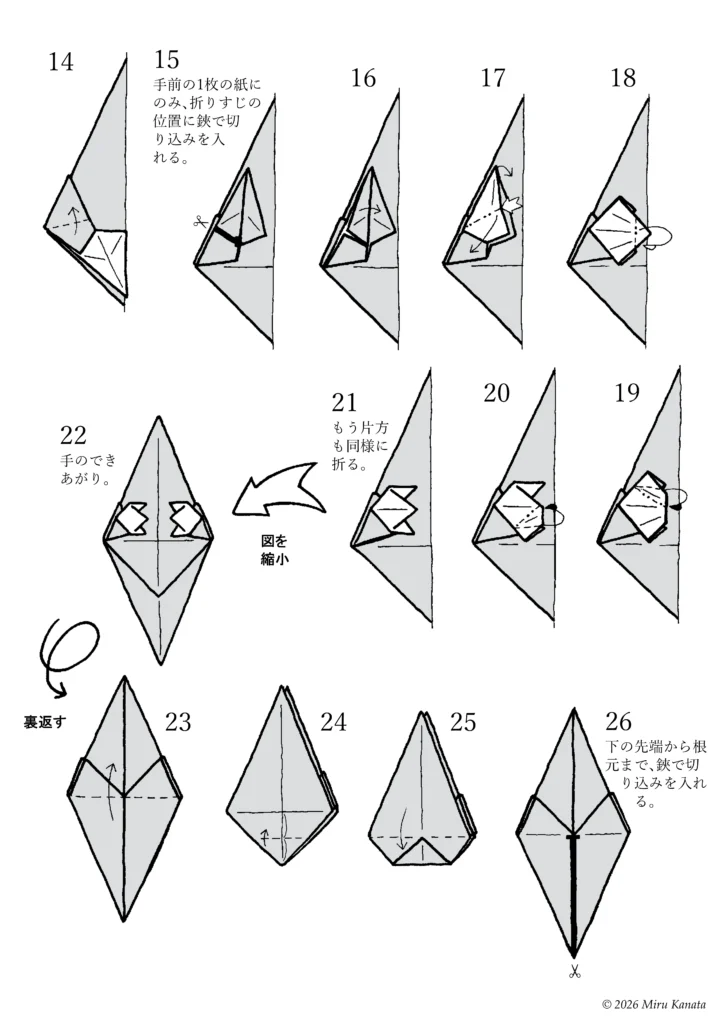
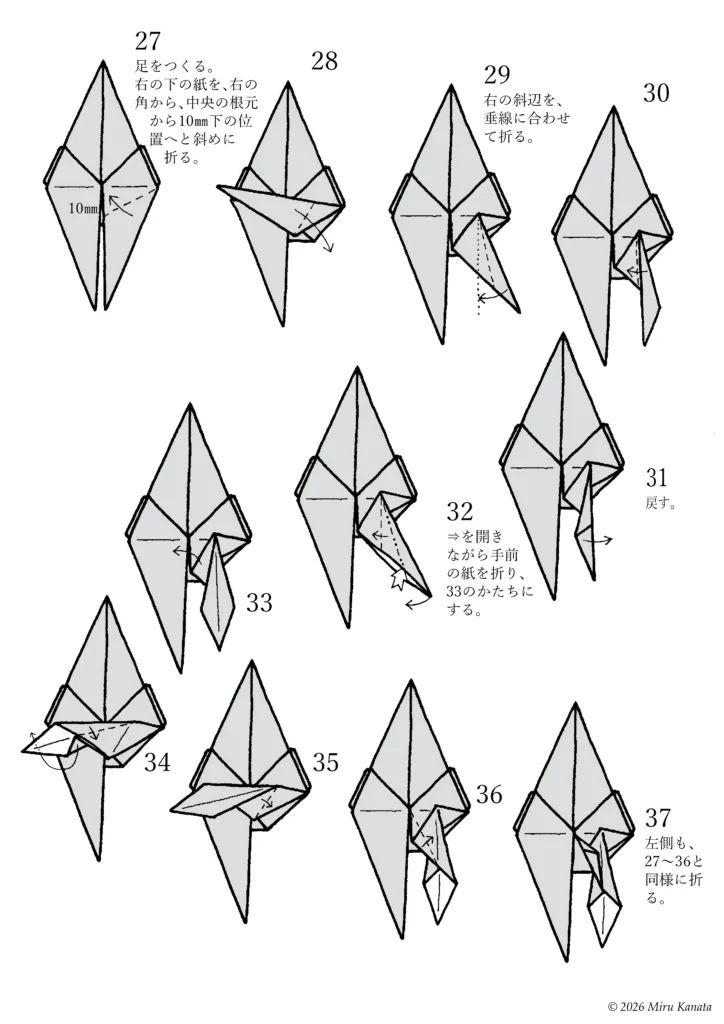
5 バタフリーのからだ 2号・続き
6 バタフリーのからだ 2号・色替え
7 バタフリーのはね 2号
みるかなた本棚>Nice Origami素敵折紙>p012バタフリー
◇ ◇ ◇