
みるかなた本棚>Nice Origami素敵折紙>p004ヒトカゲ
◆p004 ヒトカゲ◆p005 リザード◆p006 リザードン02◆p006 リザードン03◆
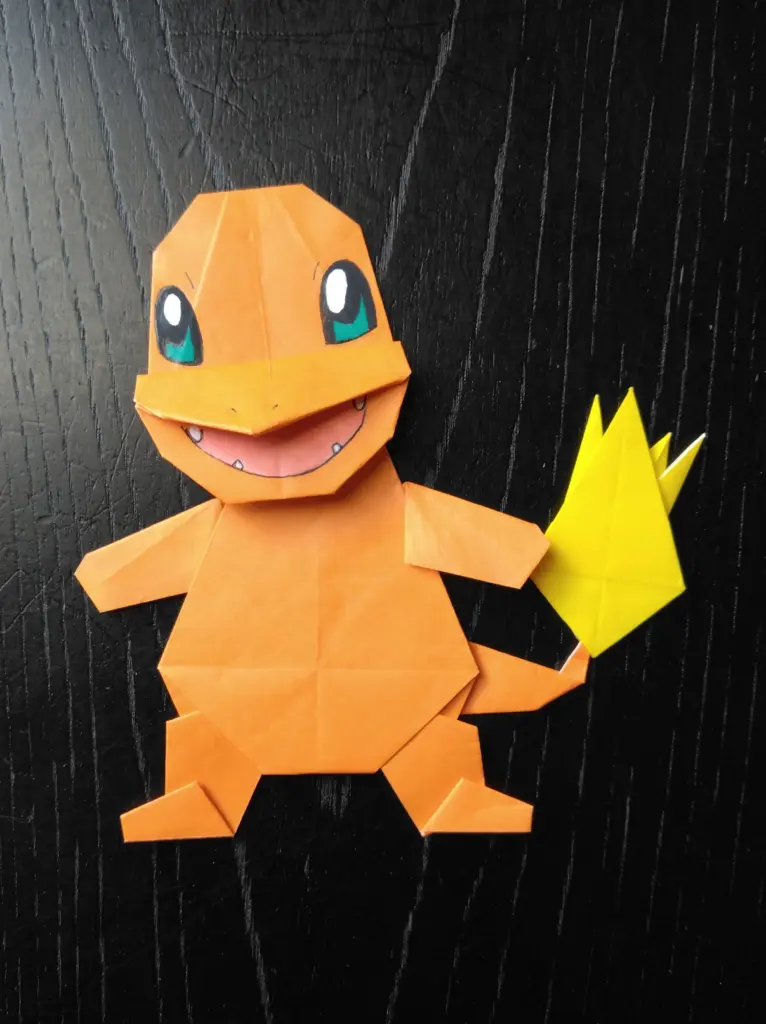
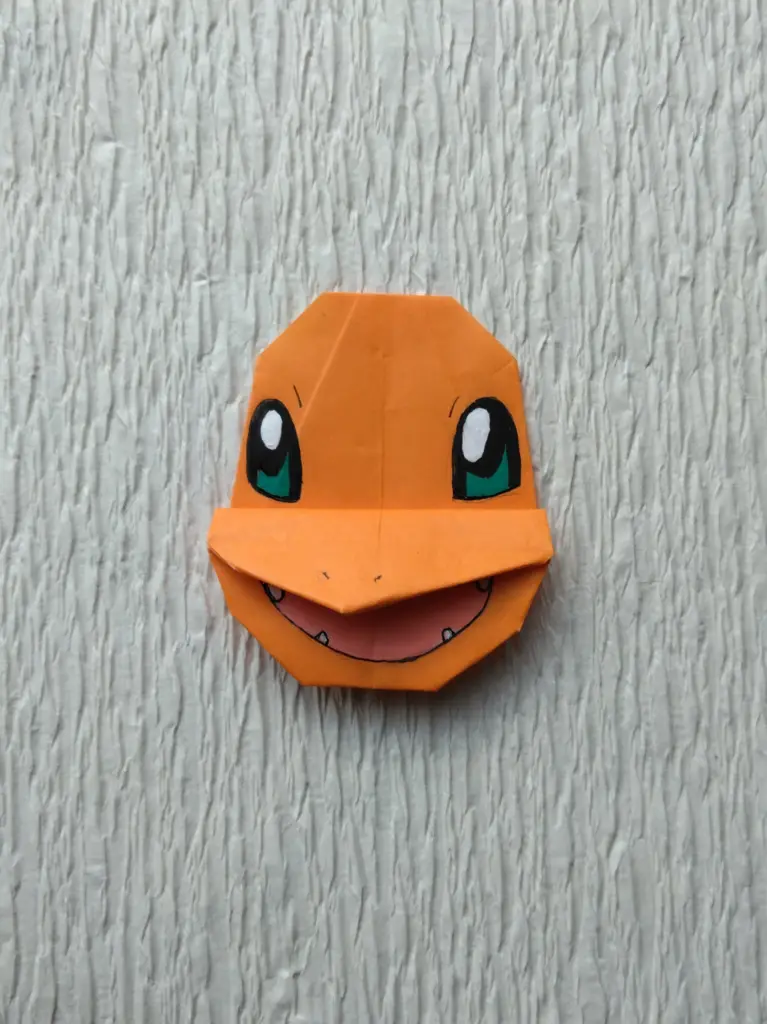
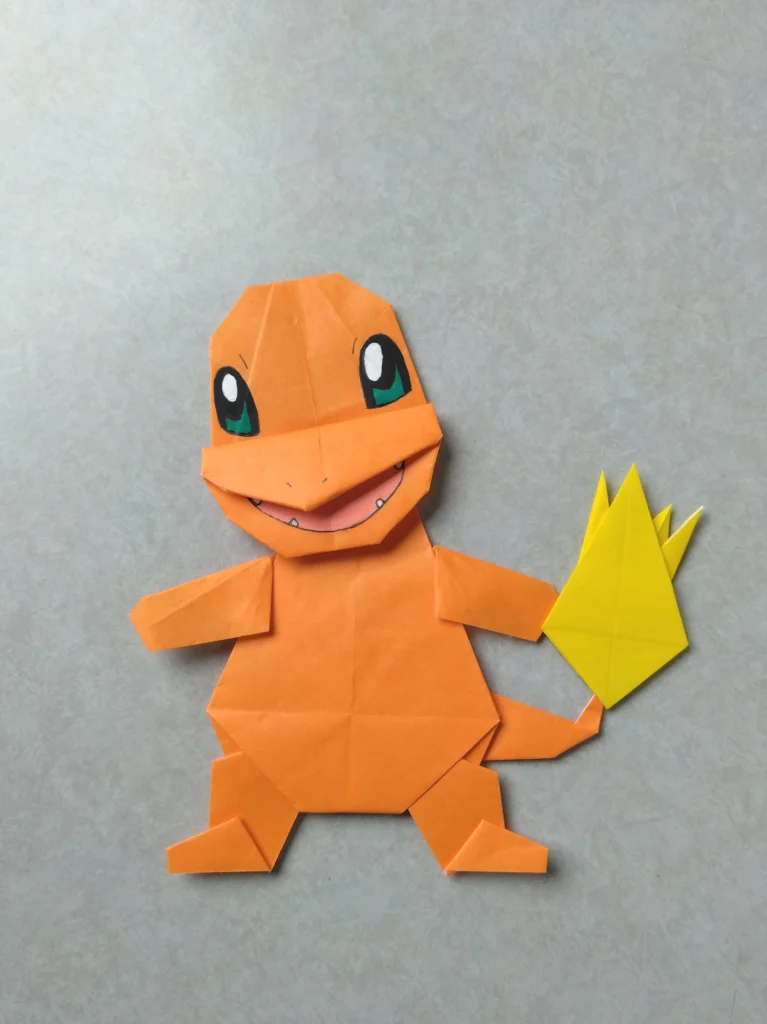
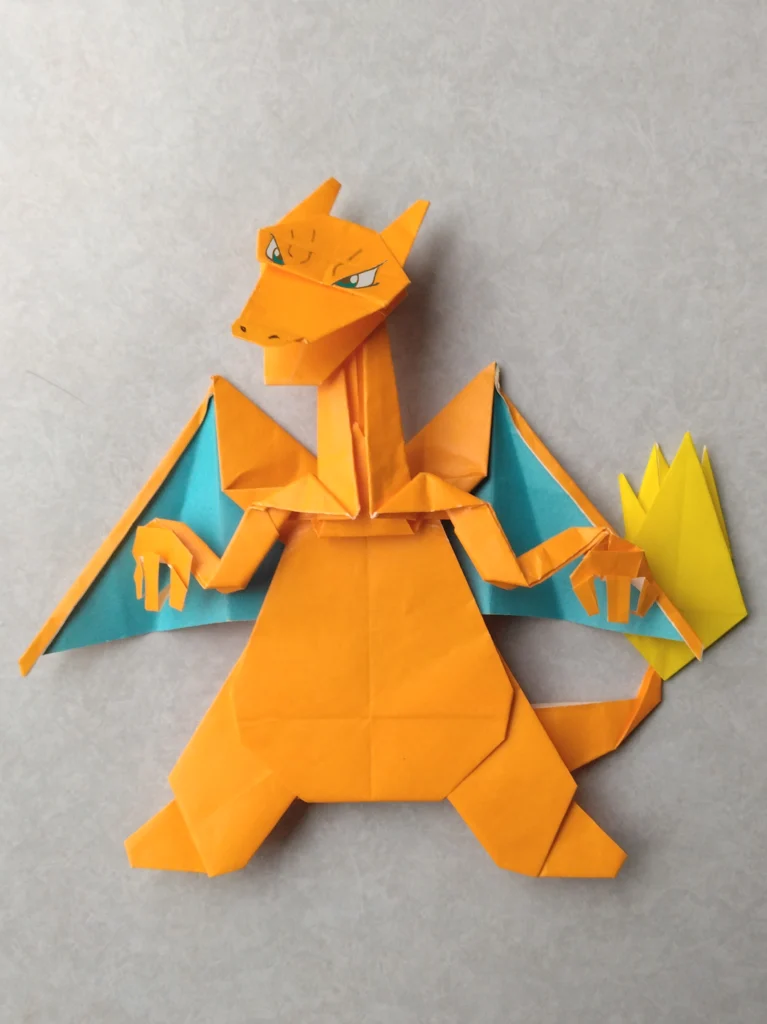
p004 ヒトカゲ 2号
このヒトカゲ2号のあたまは、2025年12月、新たに制作したものです。
なんか素敵にできあがりました。ヒトカゲの声が聞こえてきそうです。
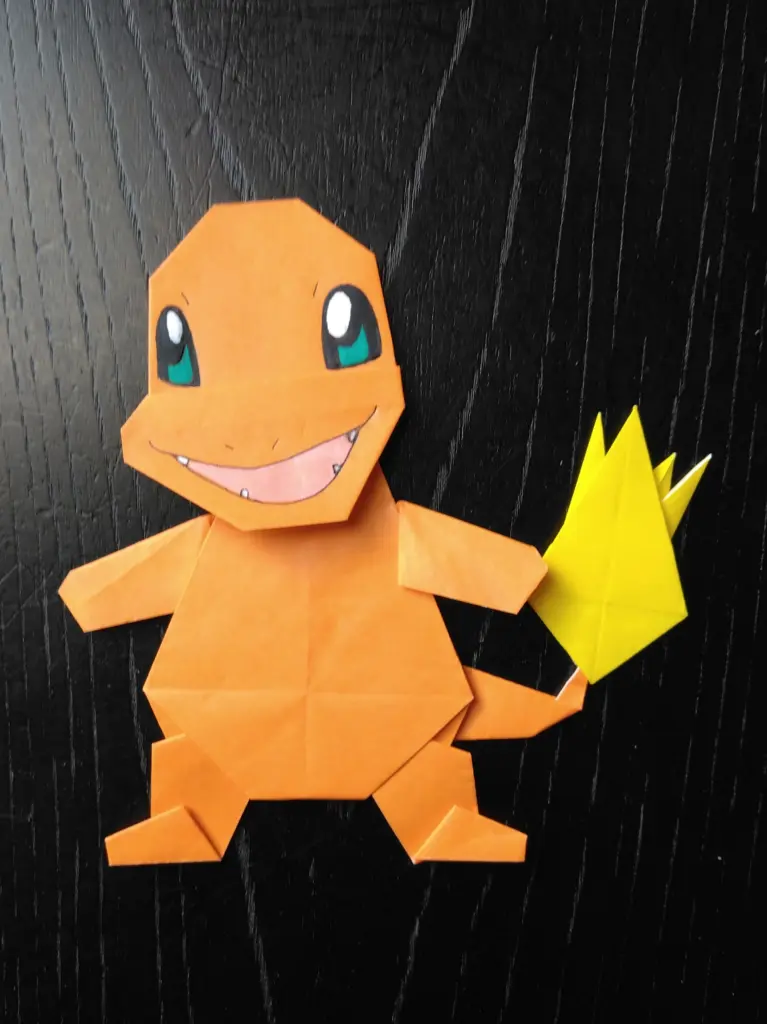
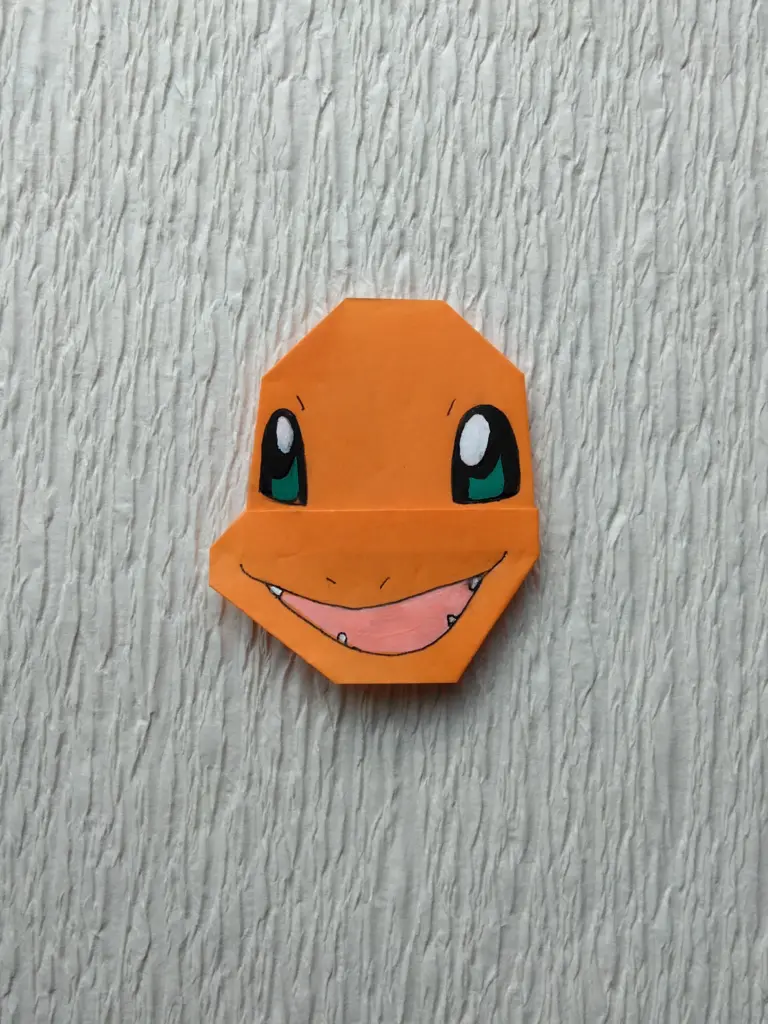
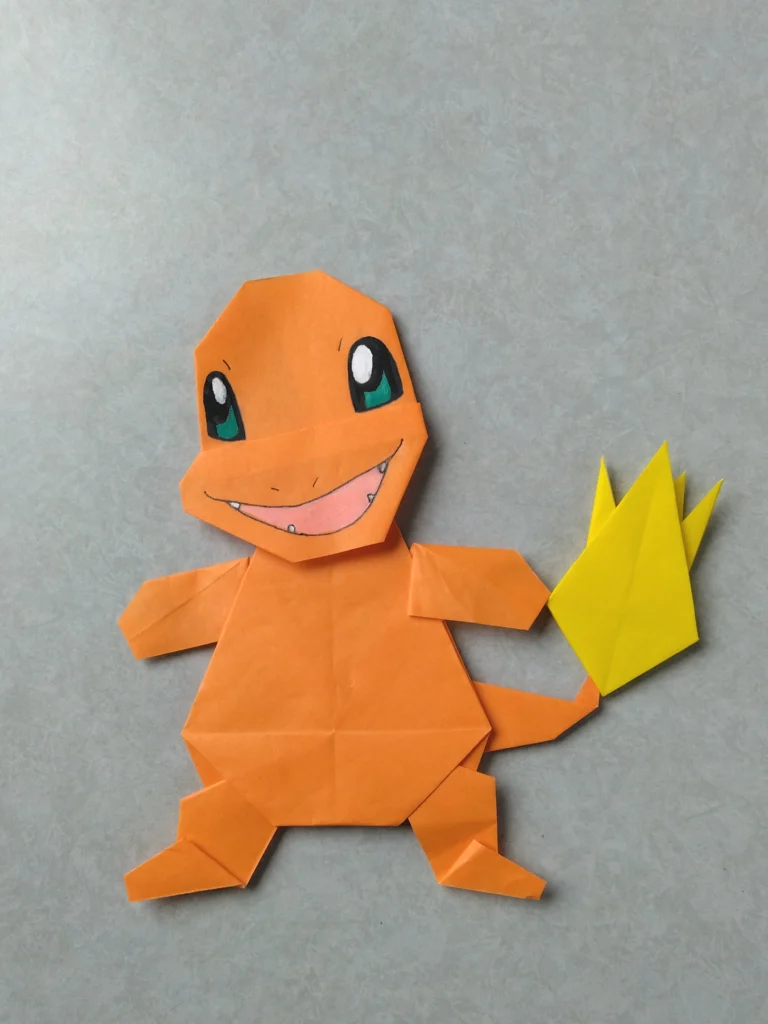
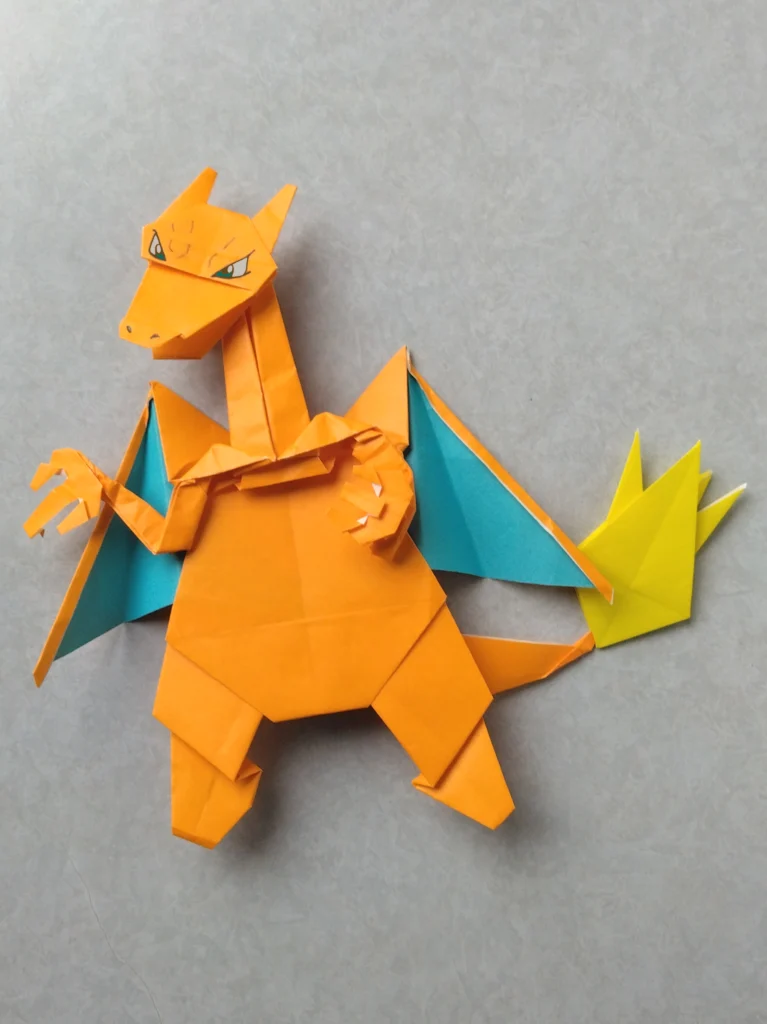
p004 ヒトカゲ 3号
こちらのヒトカゲ3号のあたまも、2025年12月、新たに制作したものです。
これくらいの分量で、こんな感じに折ったら、ヒトカゲのあたまになるかな、と、なんとなく浮かんだ感じで折っていったら、できあがったのでした。
基本となるおりがみの型や、よくあるパターンはありません。
でも、いちばんわかりやすいかもしれないと思います。
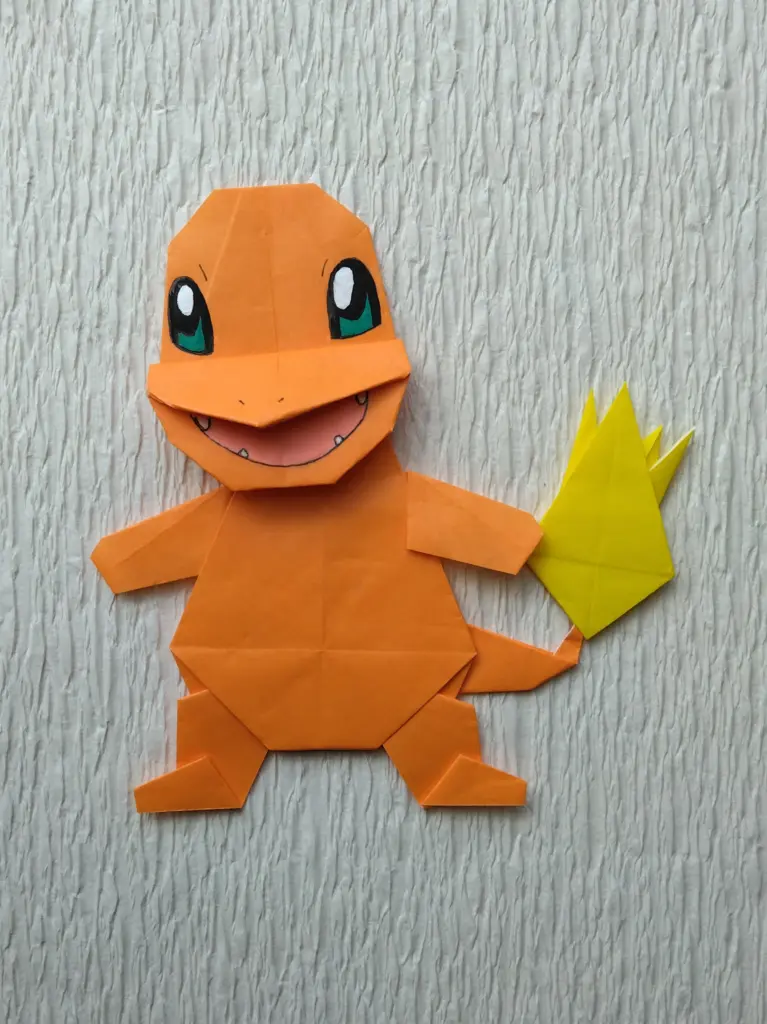
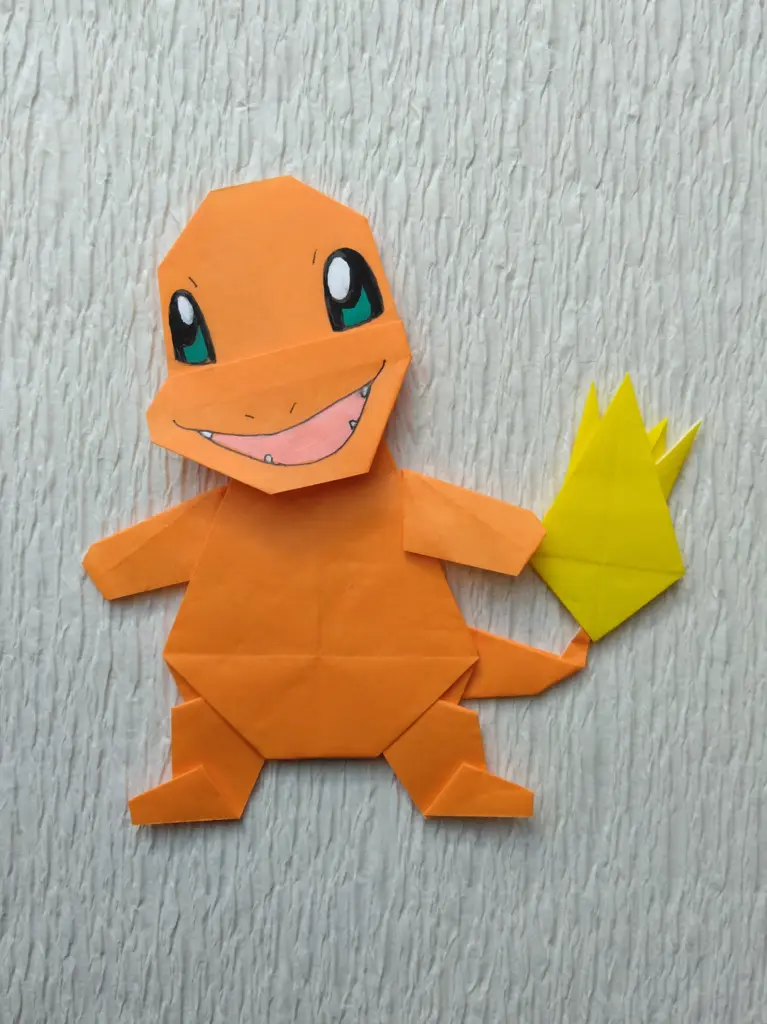
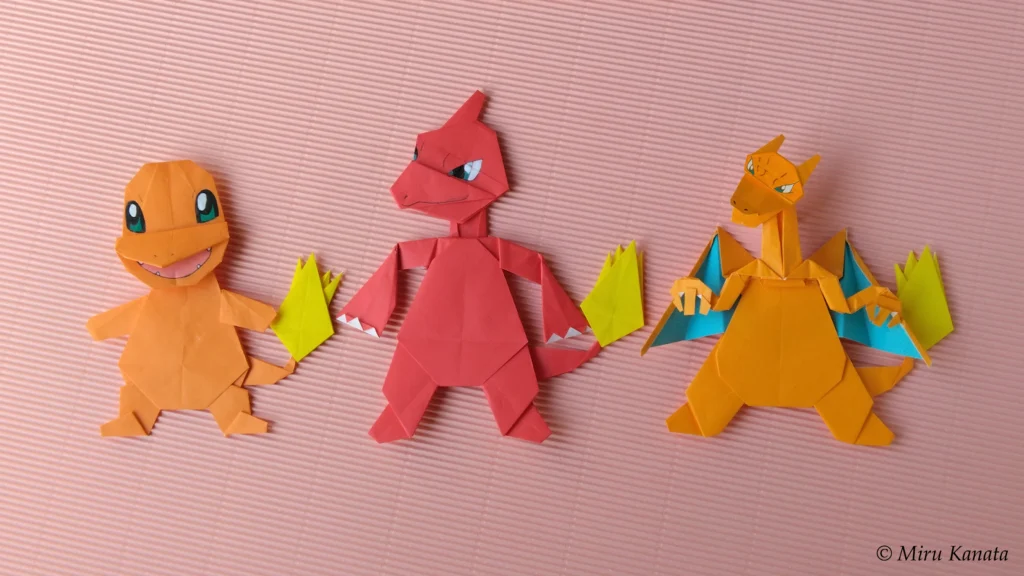
Evolution
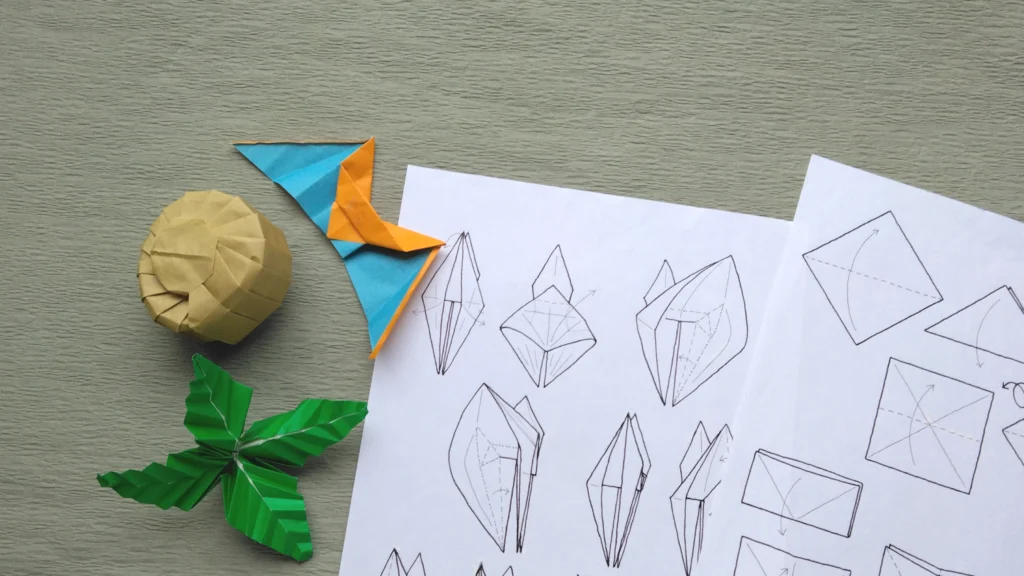
つくり方の折り図
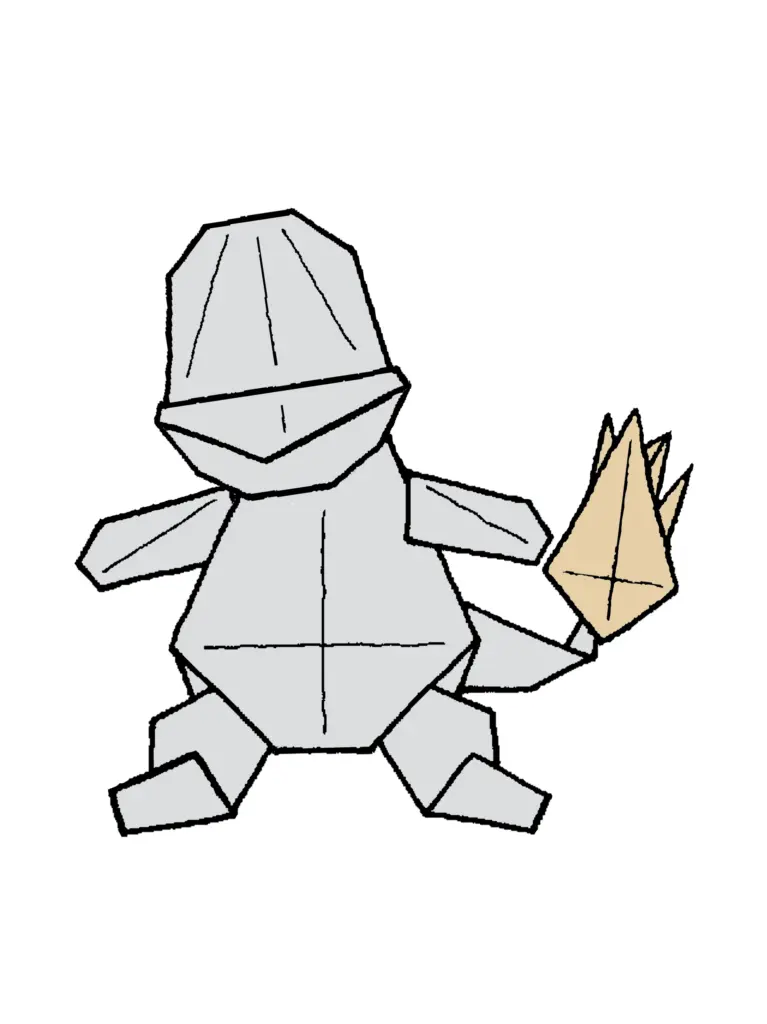
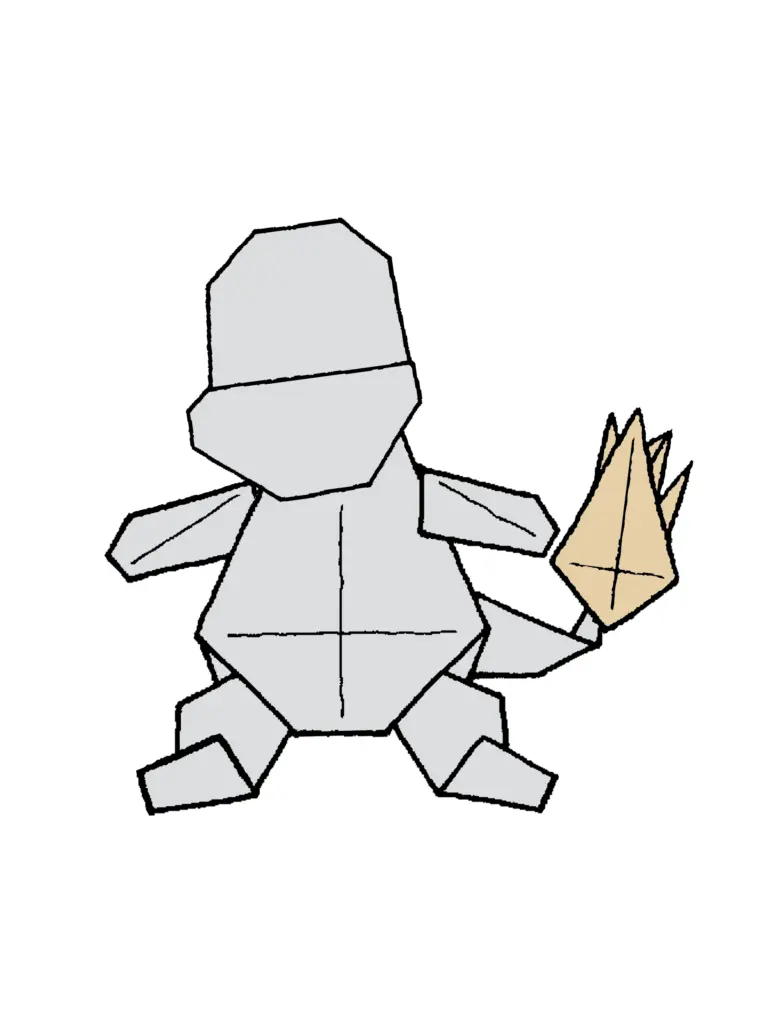
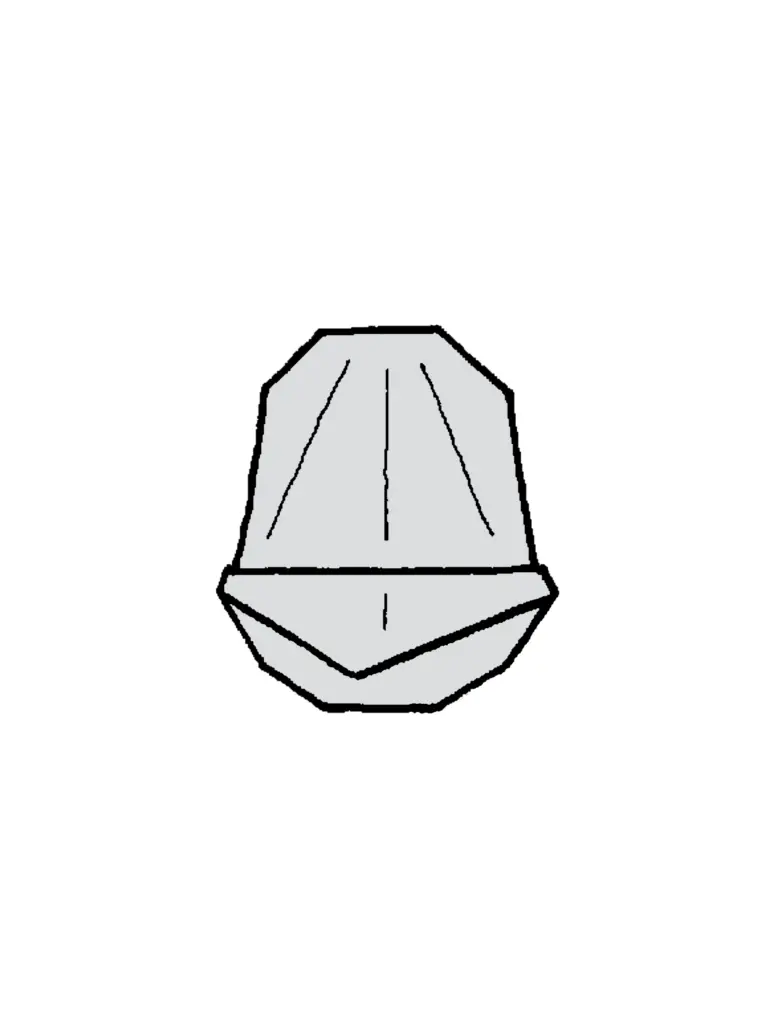
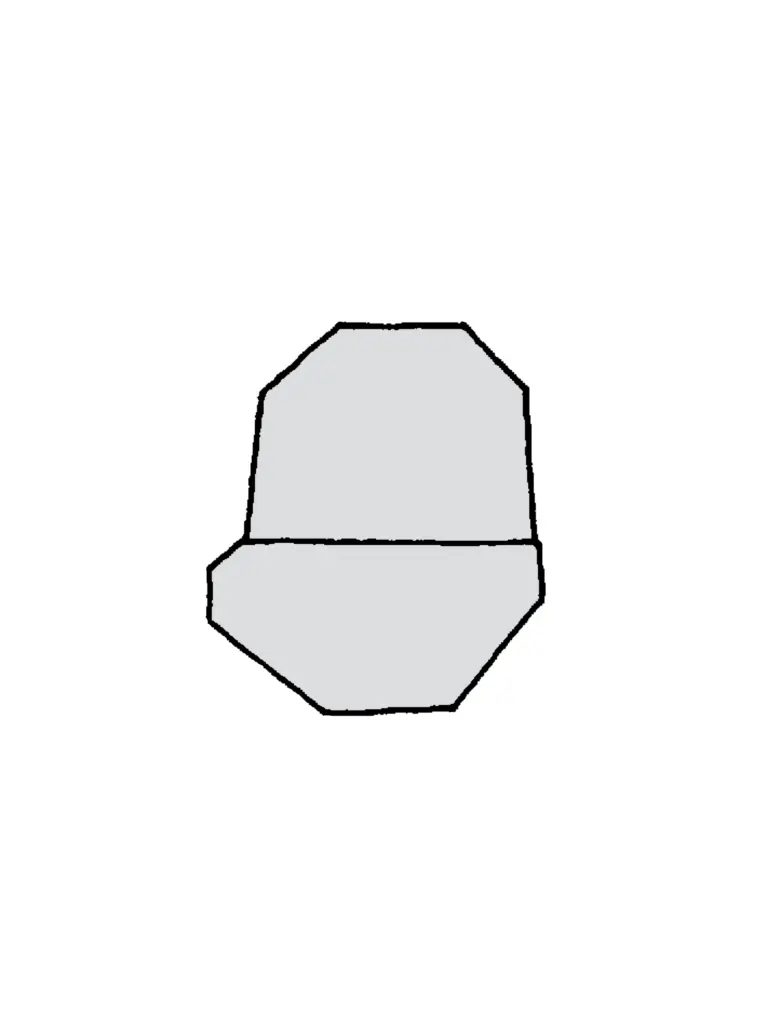
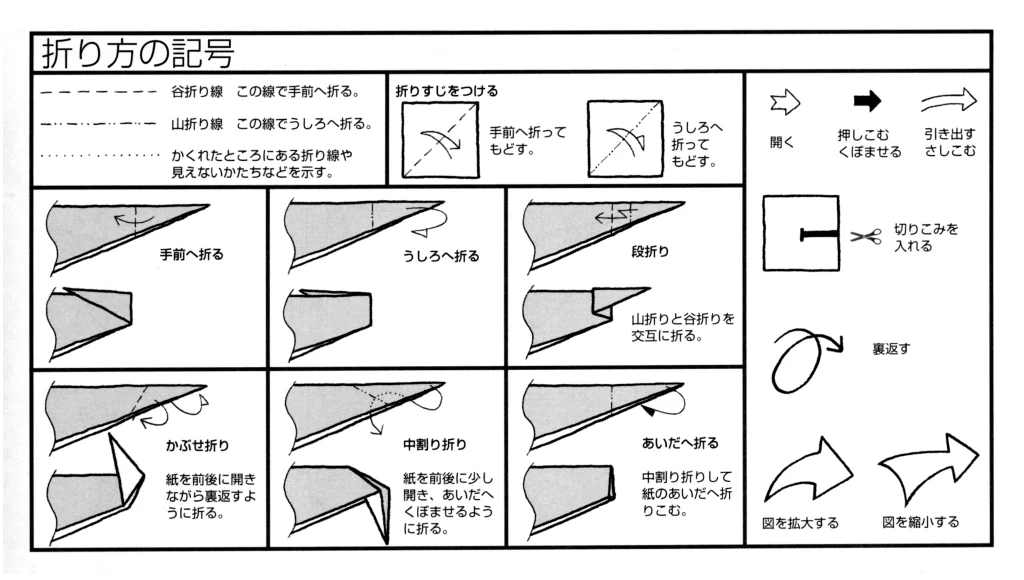
今回制作した折り図
◇折り図
1 基本折り
2 ヒトカゲのあたま 2号
3 ヒトカゲのあたま 3号
4 ヒトカゲのからだ
5 しっぽの先の炎
■1 ヒトカゲのあたま 2号は、オレンジ色の紙で、まず基本折りの図20まで折る。
■2 ヒトカゲのあたま 3号は、オレンジ色の紙で折る。
■3 ヒトカゲのからだは、オレンジ色の紙で、まず基本折りの図20まで折る。
■4 しっぽの先の炎は、4分の1のサイズに切った黄色の紙で、こちらもまず基本折りの図20まで折る。
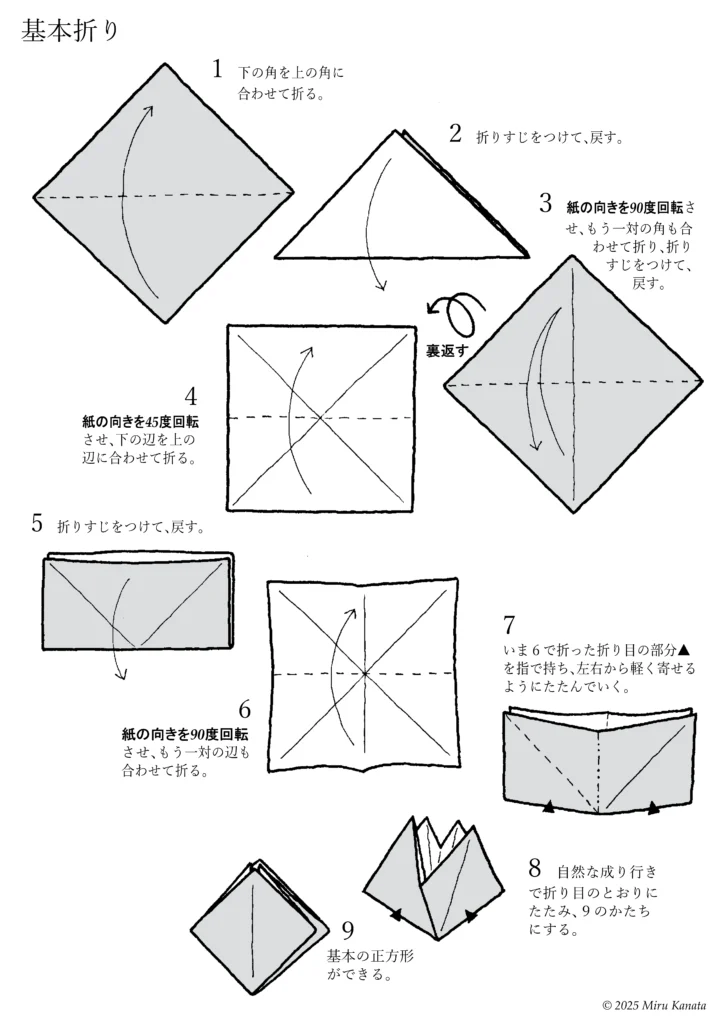
1 基本折り
English Commentary
Basic Folding
1 Fold the bottom corner to meet the top corner.
2 Make a crease and return it to its original position.
3 Rotate the paper 90 degrees, fold the other pair of corners together, make a crease and return it to its original position.
{Flip}
4 Rotate the paper 45 degrees and fold the bottom edge to line up with the top edge.
5 Make a crease and return it to its original position.
6 Rotate the paper 90 degrees and fold the other pair of edges together.
7 Hold the crease ▲ made in step 6 with your fingers and fold gently from both sides together.
8 Let the paper naturally fold along the creases to form the shape of 9.
9 A basic square is created.
English Commentary
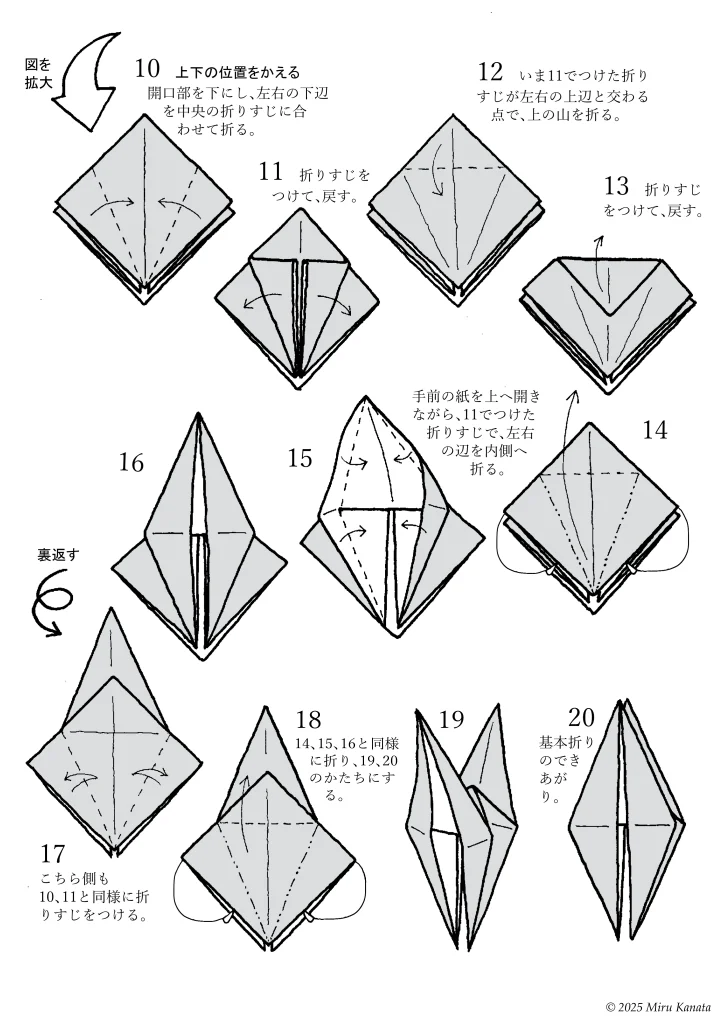
{Enlarge image}
10 Change the top and bottom positions.
With the opening facing downwards, fold the bottom left and right edges to meet the crease in the middle.
11 Make a crease and return.
12 Fold the top at the point where the crease made in 11 intersects with the top left and right edges.
13 Make a crease and return.
14 While opening the front paper upwards, fold the left and right edges inward along the crease made in 11.
15
16
{Flip}
17 Make creases on this side in the same way as 10 and 11.
18 Fold in the same way as 14, 15 and 16 to form 19 and 20.
19
20 The basic fold is complete.
ヒトカゲのあたま 2号
English Commentary
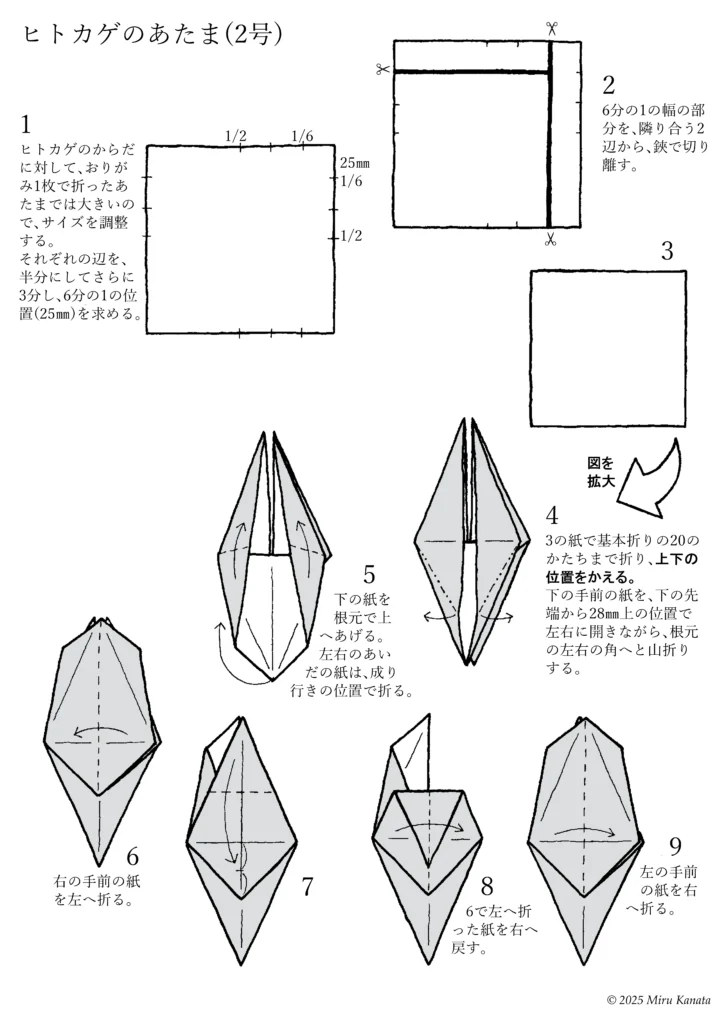
Charmander Head No. 2
1 One piece of origami paper is too large for Charmander’s body, so adjust the size. Halve each side and then divide it into thirds again to find the one-sixth position (25 mm).
2 Use scissors to cut off the one-sixth width section from the two adjacent sides.
3
(Enlarged image)
4 Fold the paper from step 3 to the basic fold shape of 20, changing the top and bottom positions. Open the bottom front paper to the left and right 28 mm above the bottom tip, and make mountain folds to the left and right corners at the base.
5 Lift the bottom paper up at the base. Fold the paper between the left and right in the position that comes naturally.
6 Fold the right front paper to the left.
7
8 Return the paper folded left in step 6 to the right.
9 Fold the left front paper to the right.
English Commentary
10
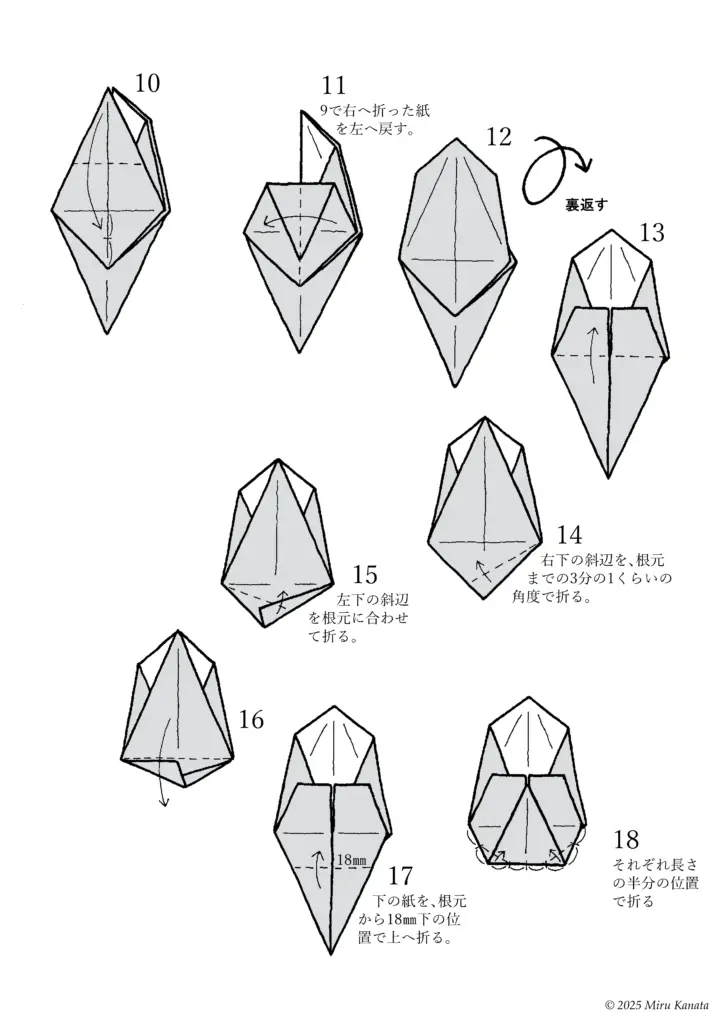
11 Return the paper folded to the right in step 9 to the left.
12
{Flip}
13
14 Fold the lower right diagonal side at an angle of about one-third of the way to the base.
15 Fold the lower left diagonal side to match the base.
16
17 Fold the bottom paper up at a position 18 mm below the base.
18 Fold each side at half its length.
English Commentary
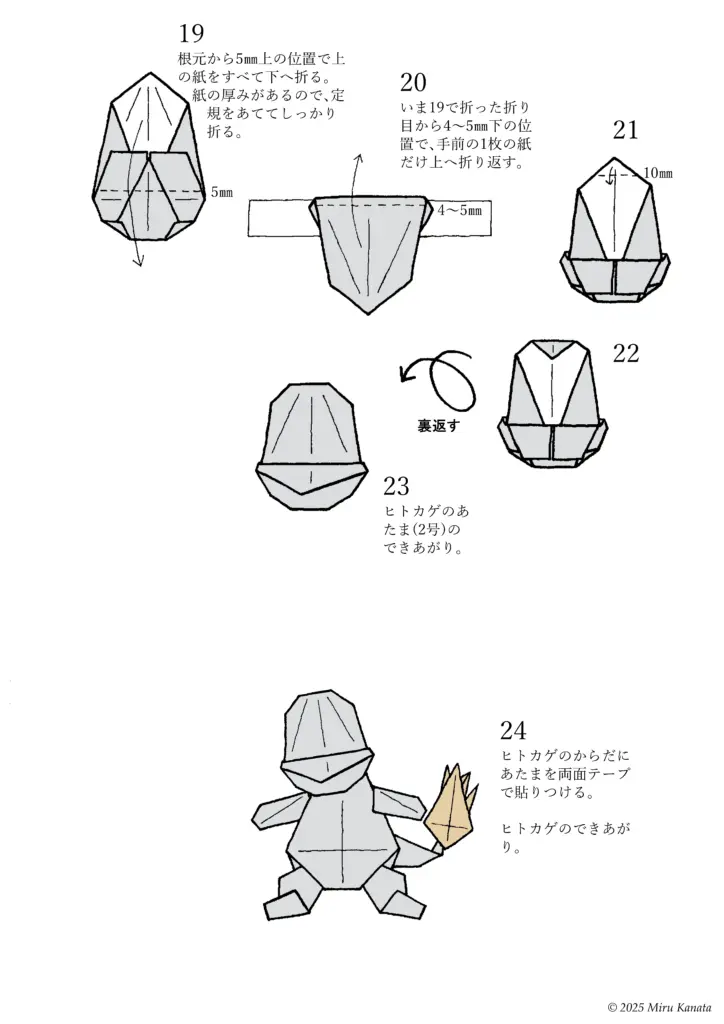
19 Fold all the top pieces of paper down 5mm above the base. The paper is thick, so use a ruler to fold it firmly.
20 Fold only the front piece of paper up 4-5mm below the fold you just made in 19.
21
22
{Flip}
23 Charmander’s head (No. 2) is finished.
24 Attach the head to the Charmander’s body with double-sided tape. Charmander is finished.
ヒトカゲのあたま 3号
English Commentary
Charmander Head No. 3
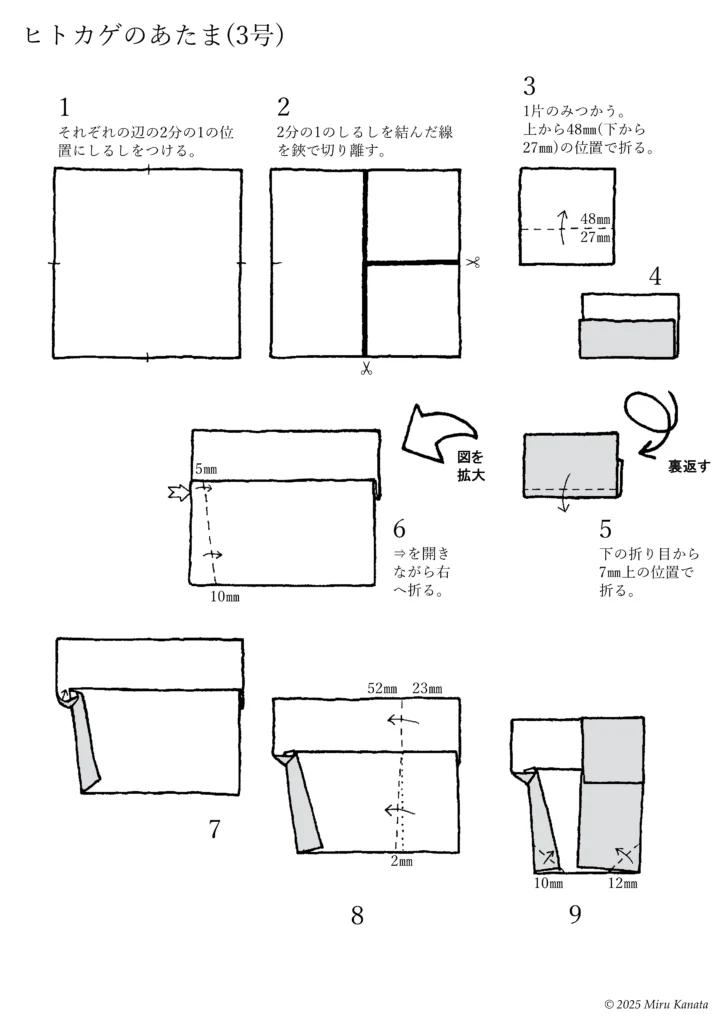
1. Make a mark at the halfway point on each side.
2. Cut the line connecting the halfway marks with scissors.
3. Use only one piece. Fold it 48 mm from the top (27 mm from the bottom).
4.
{Flip}
5. Fold it 7 mm above the bottom crease.
{Enlarge the diagram}
6. Fold to the right while opening the arrow.
7
8
9
English Commentary
10
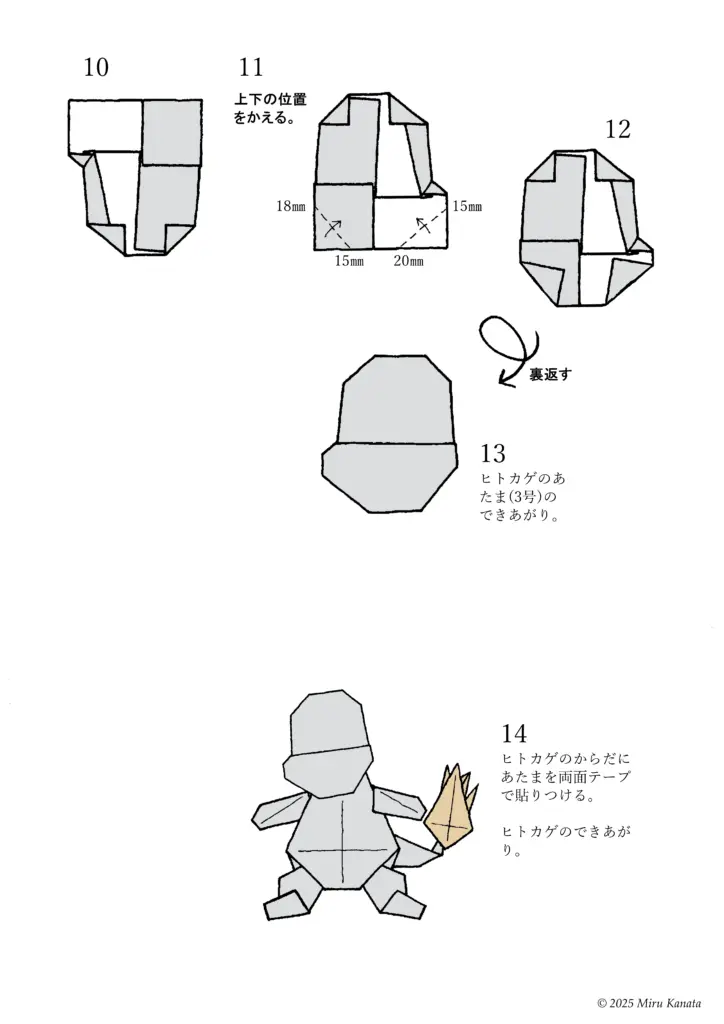
11 Change the top and bottom positions.
12
{Flip}
13 The Charmander’s head (No. 3) is finished.
14 Attach the head to the Charmander’s body with double-sided tape. The Charmander is finished.
ヒトカゲのからだ
English Commentary
Charmander’s Body
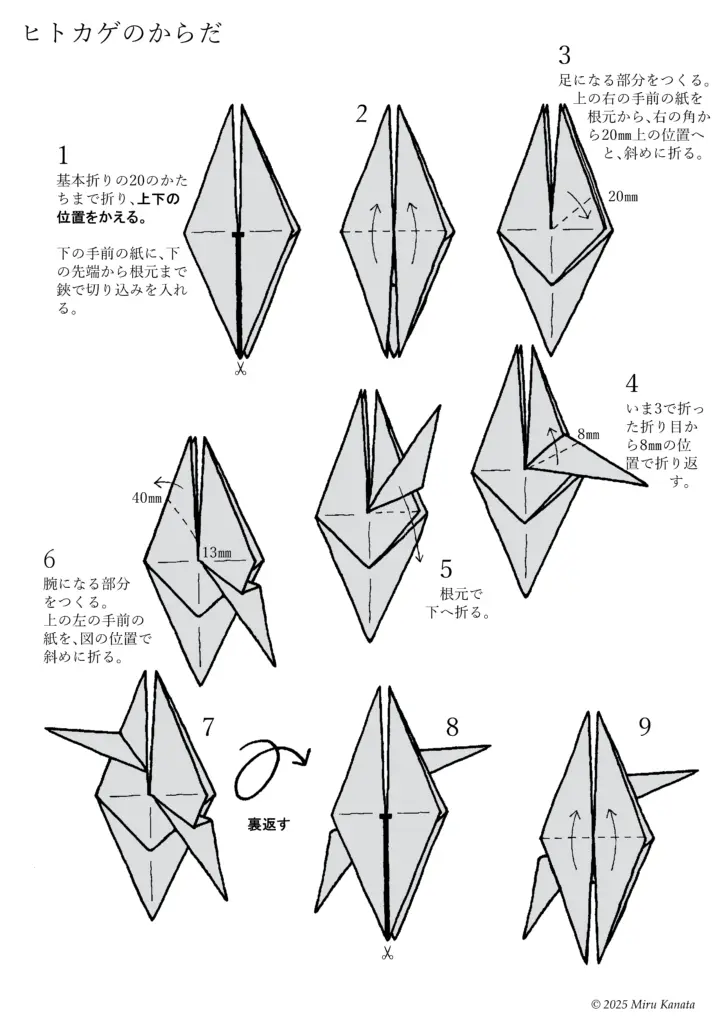
1 Fold it up to the basic 20 shape and change the top and bottom positions.
Make a cut with scissors in the bottom front piece of paper from the bottom tip to the base.
2
3 Make the parts that will become the legs. Fold the top right front piece of paper diagonally from the base to a position 20 mm above the right corner.
4 Fold it back 8 mm from the fold you just made.
5 Fold it down at the base.
6 Make the parts that will become the arms. Fold the top left front piece of paper diagonally in the position shown in the diagram.
7
{Flip it over}
8
9
English Commentary
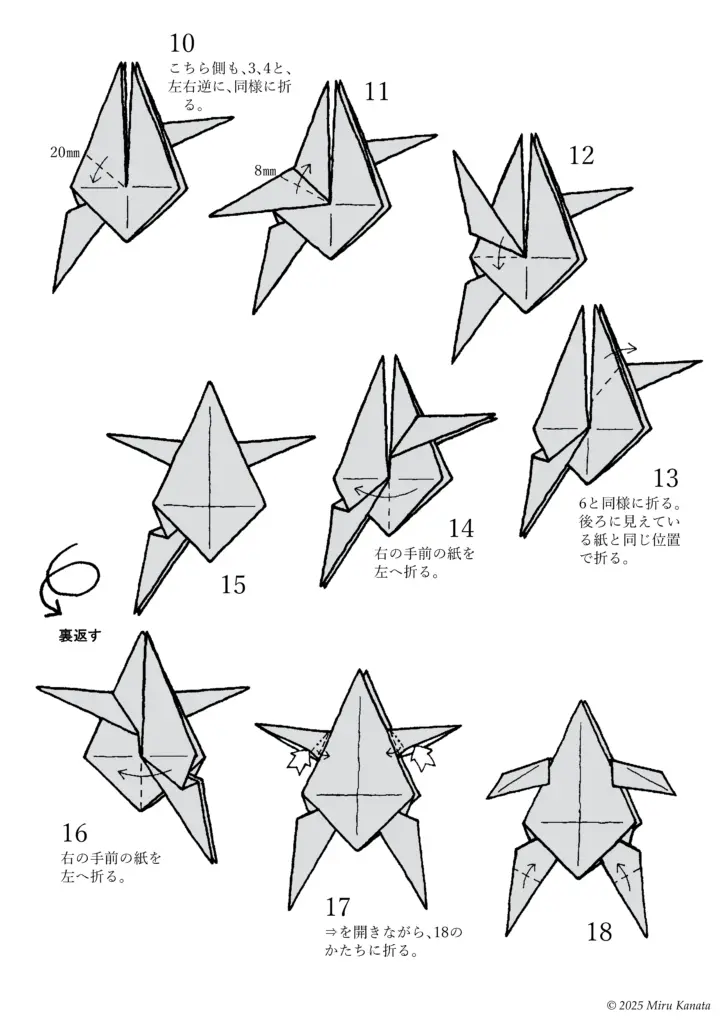
10 Fold this side in the same way as steps 3 and 4, reversing the left and right sides.
11
12
13 Fold in the same way as step 6. Fold in the same position as the paper visible in the back.
14 Fold the paper in front of you on the right to the left.
15
{Flip}
16 Fold the paper in front of you on the right to the left.
17 Open the arrow and fold it into the shape of 18.
18
English Commentary
19
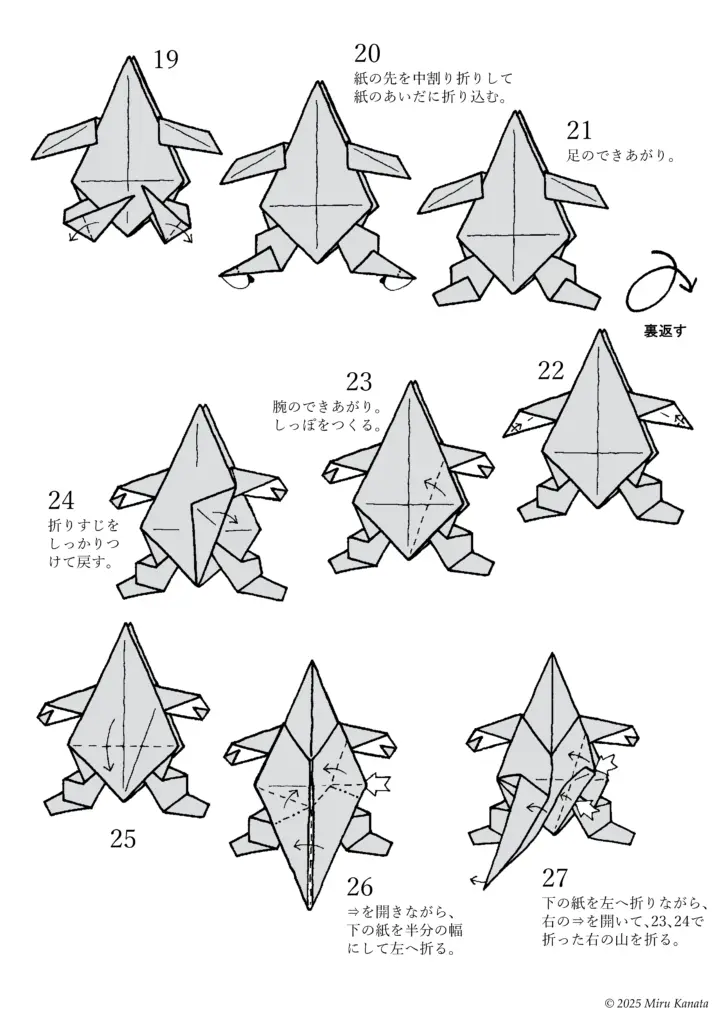
20 Fold the tip of the paper in half and fold it between the pieces of paper.
21 The legs are complete.
{Flip}
22
23 The arms are complete. Make the tail.
24 Make a firm crease and turn back.
25
26 While opening the arrows, fold the bottom paper in half to the left.
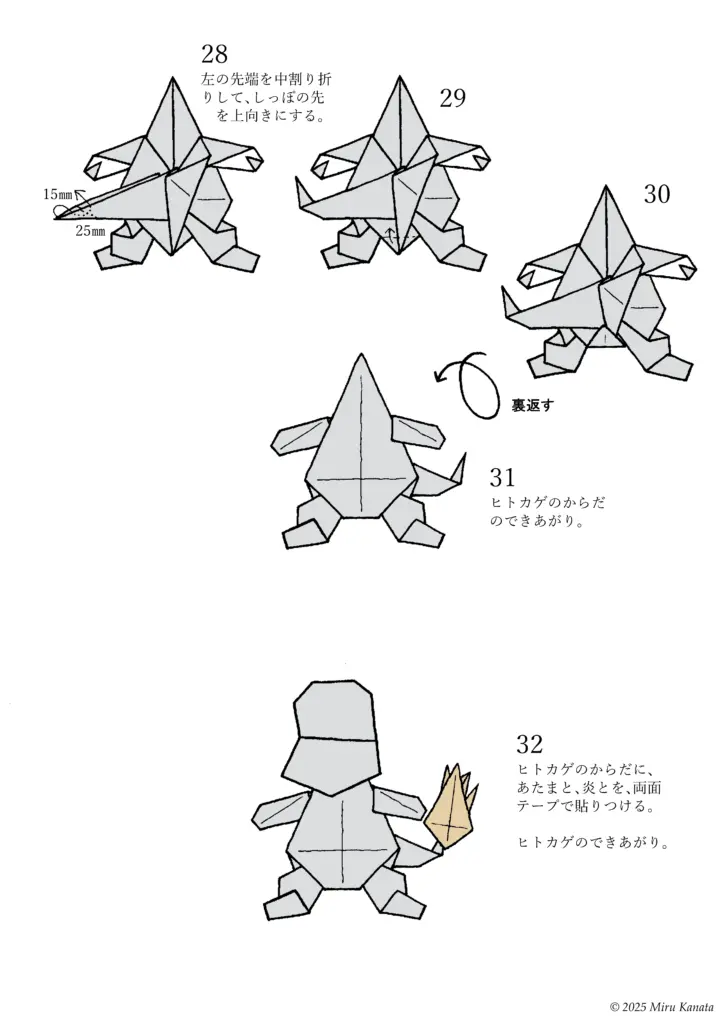
27 While folding the bottom paper to the left, open the right arrow and fold the right mountain that was folded in steps 23 and 24.
English Commentary
28 Fold the left tip in half so that the tip of the tail points upwards.
29
30
{Flip}
31 The Charmander’s body is finished.
32 Attach the head and flames to the Charmander’s body with double-sided tape. The Charmander is finished.
English Commentary
Flame on the tip of the tail
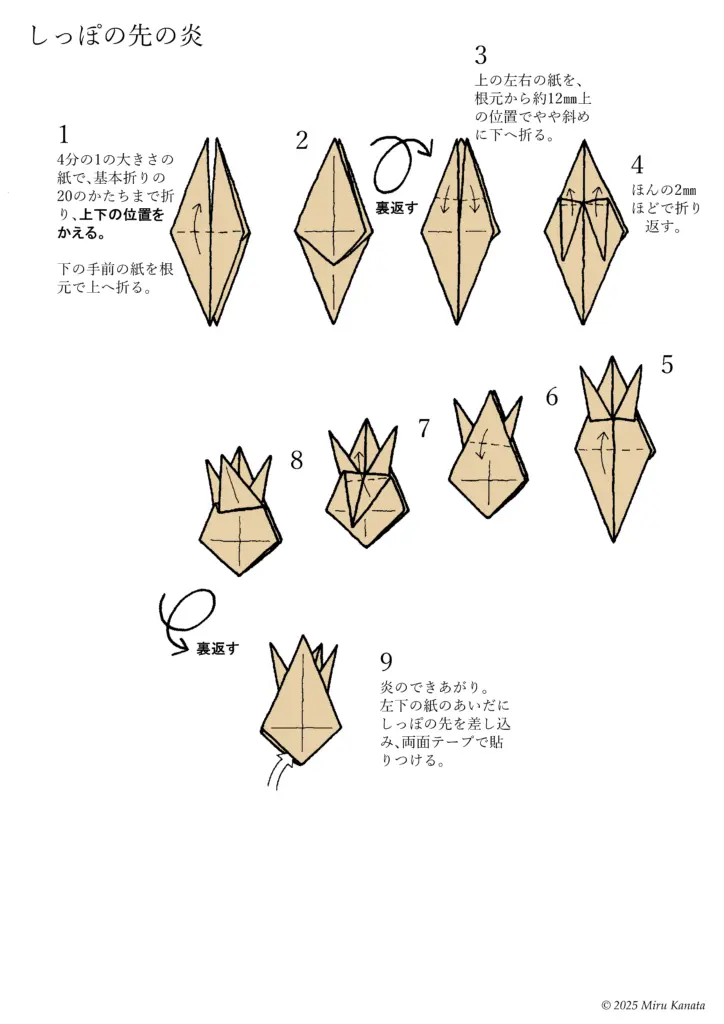
1 Fold a quarter-sized piece of paper into the basic 20 shape, then change the top and bottom positions.
Fold the bottom front piece of paper up at the base.
2
{Flip}
3 Fold the top left and right pieces of paper down at a slight diagonal, about 12 mm above the base.
4 Fold just 2 mm back.
5
6
7
8
{Flip}
9 The flame is complete. Insert the tip of the tail between the pieces of paper on the bottom left and attach with double-sided tape.
みるかなた本棚>Nice Origami素敵折紙>p004ヒトカゲ
◇ ◇ ◇