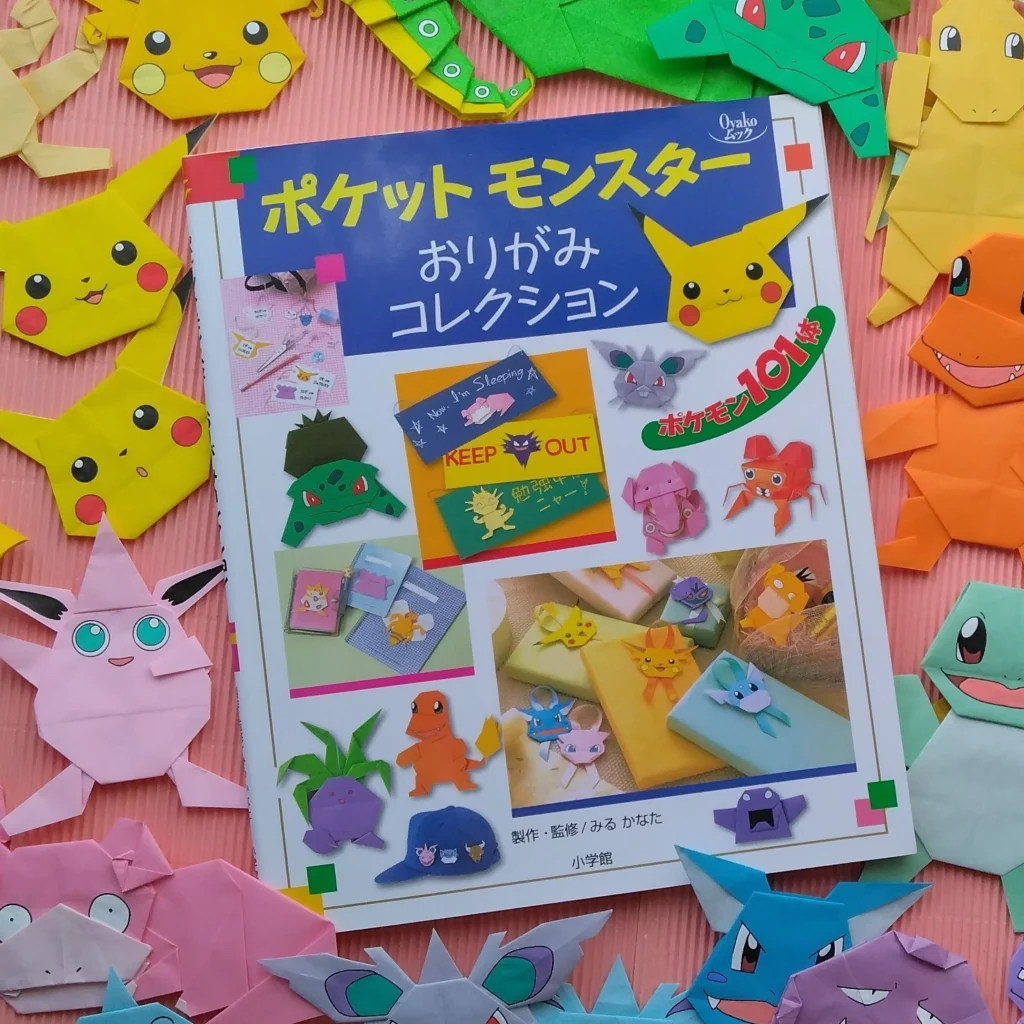
みるかなた本棚>『ポケットモンスターおりがみコレクション』>ポケモンおりがみ一覧表>0053 ペルシアン
◆0052 ニャース◆0053 ペルシアン◆
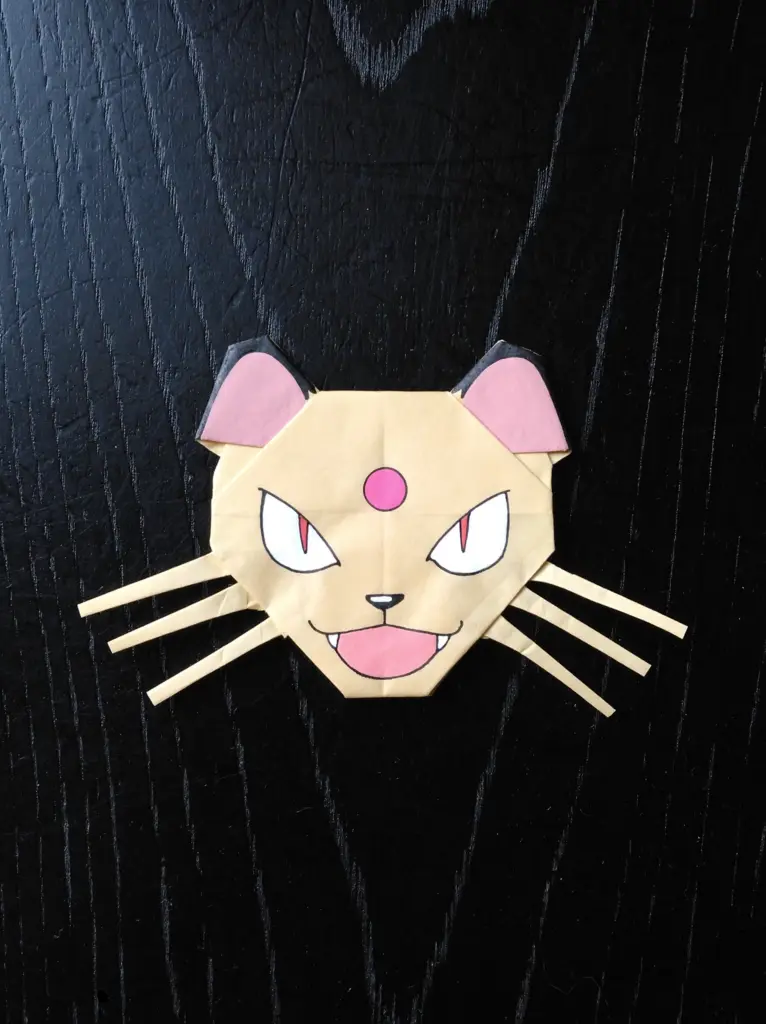
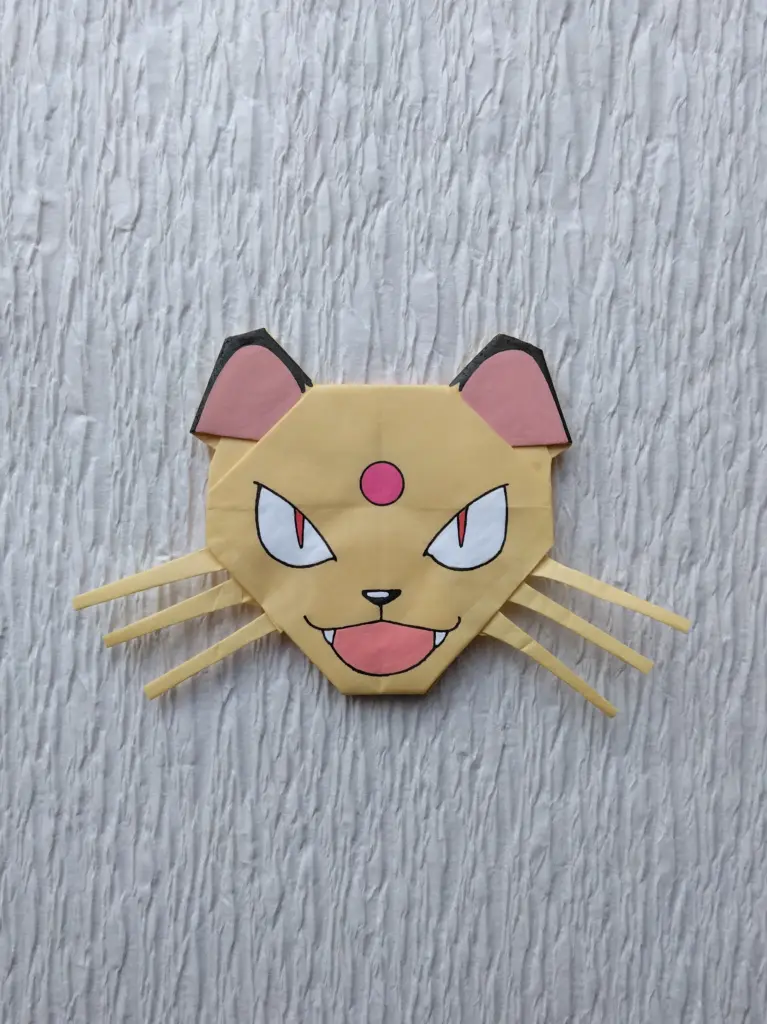
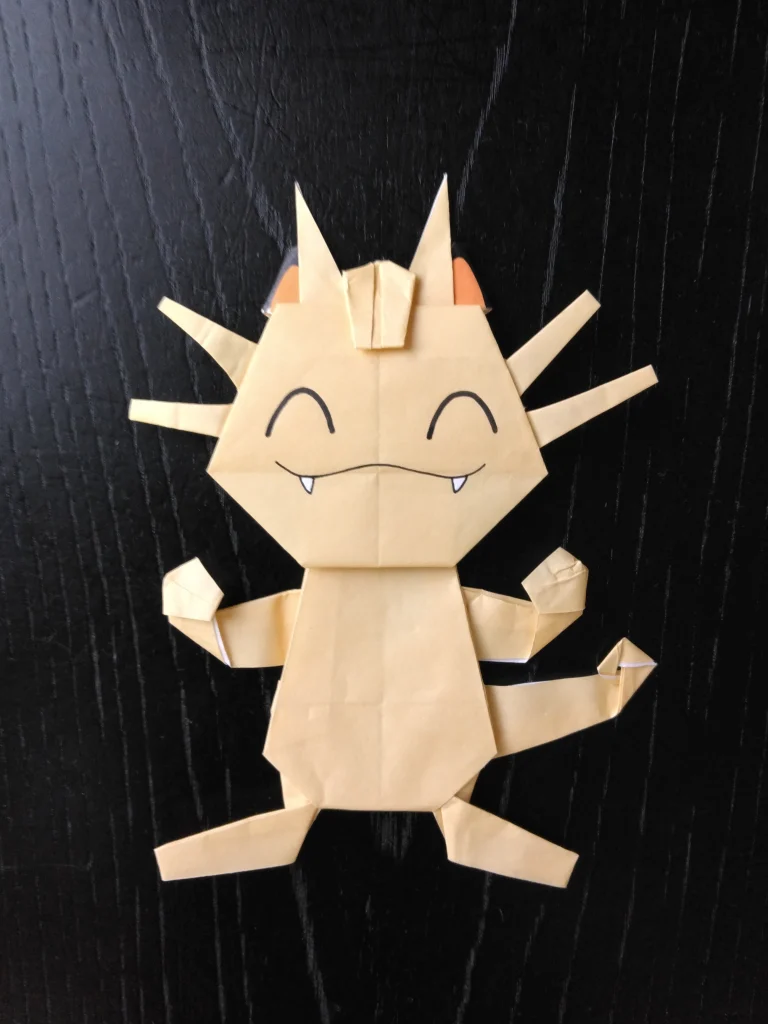
0053 ペルシアン
あごの角度をすっきり仕上げ、精悍な雰囲気を表現しました。
ひげもいい感じにできました。
★ゲームフリークのチェック
◆最初のチェックでOKをいただきました。
つくり方の折り図
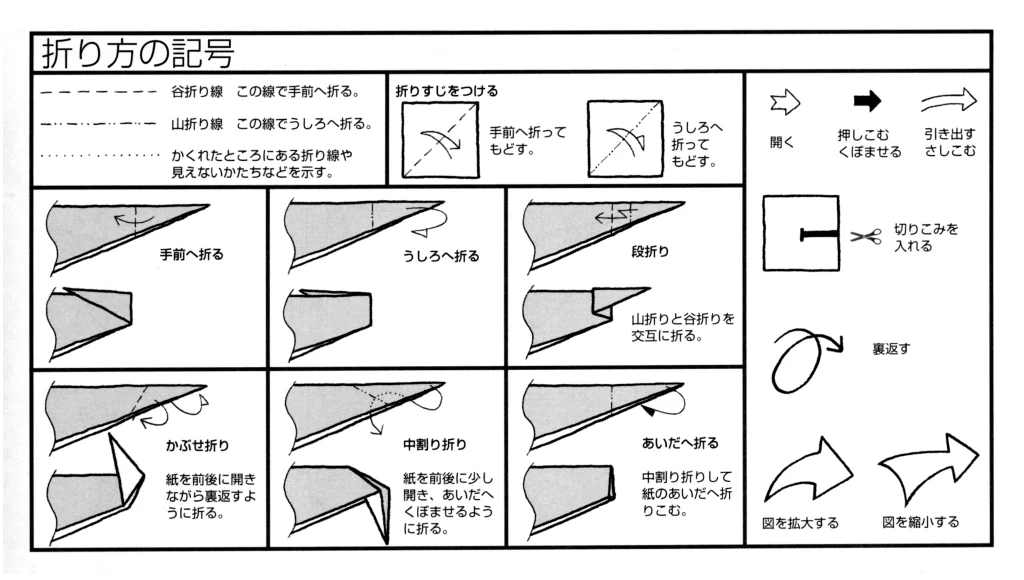
今回制作した折り図
■ペルシアンのあたまは、薄い黄色の紙で、まず基本折りの図20まで折る。
English Commentary
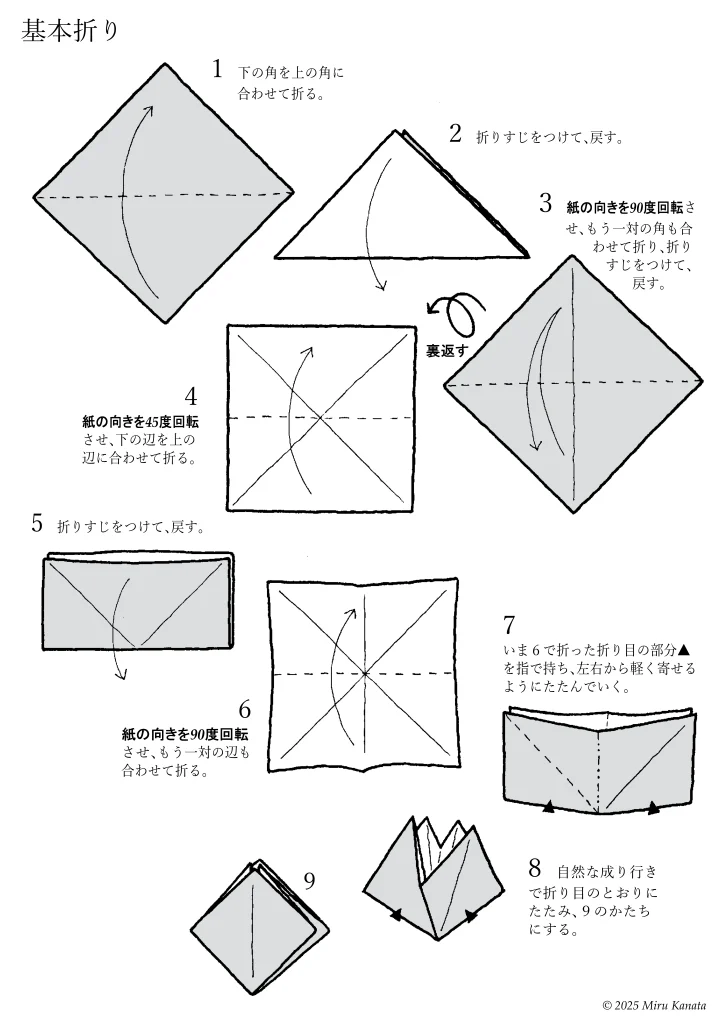
Basic Folding
1 Fold the bottom corner to meet the top corner.
2 Make a crease and return it to its original position.
3 Rotate the paper 90 degrees, fold the other pair of corners together, make a crease and return it to its original position.
{Flip}
4 Rotate the paper 45 degrees and fold the bottom edge to meet the top edge.
5 Make a crease and return it to its original position.
6 Rotate the paper 90 degrees and fold the other pair of edges together.
7 Hold the crease ▲ made in step 6 with your fingers and fold it gently from both sides.
8 Let it naturally fold along the creases to form the shape of 9.
9
English Commentary
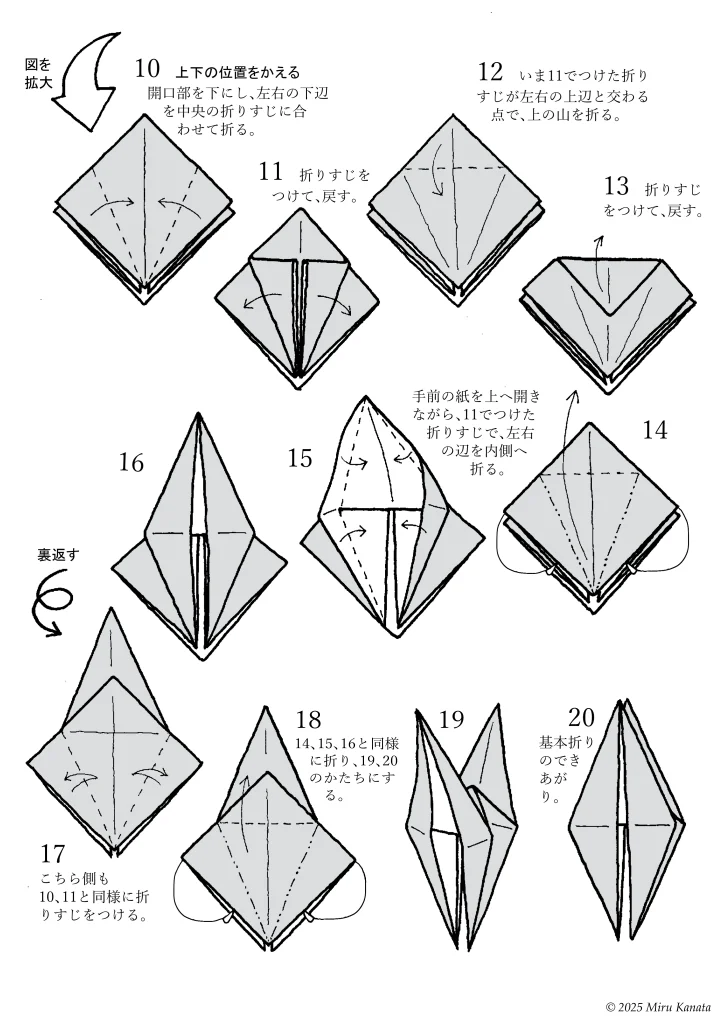
{Enlarge image}
10 Change the top and bottom positions.
With the opening facing downwards, fold the bottom left and right edges to meet the crease in the middle.
11 Make a crease and return.
12 Fold the top at the point where the crease made in 11 intersects with the top left and right edges.
13 Make a crease and return.
14 While opening the front paper upwards, fold the left and right edges inward along the crease made in 11.
15
16
{Flip}
17 Make creases on this side in the same way as 10 and 11.
18 Fold in the same way as 14, 15 and 16 to form 19 and 20.
19
20 The basic fold is complete.
English Commentary
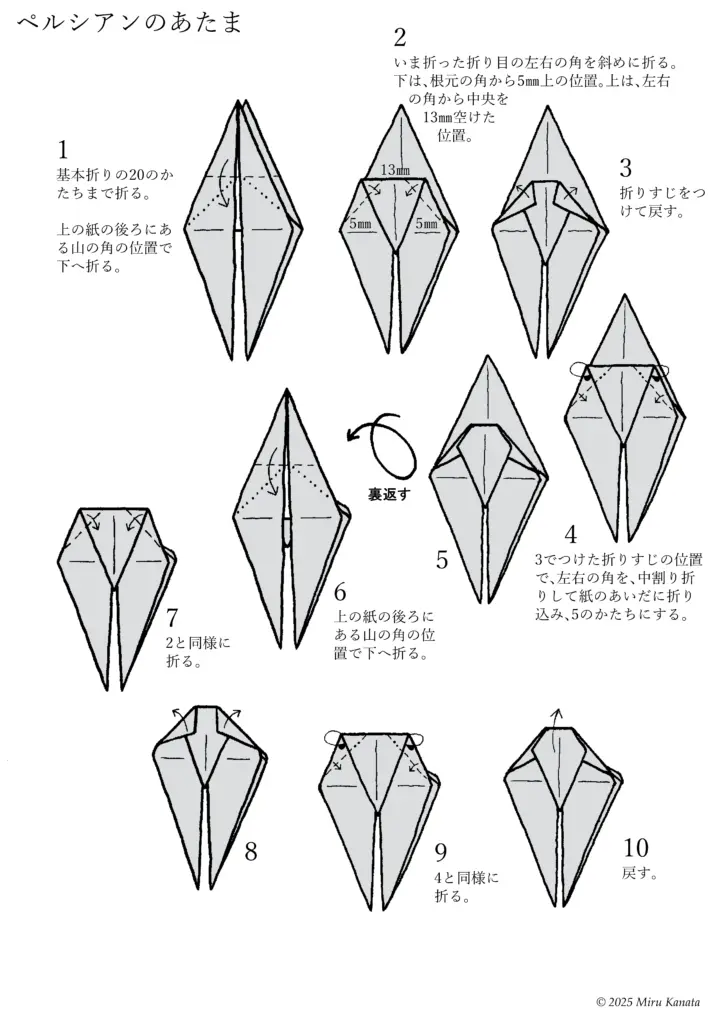
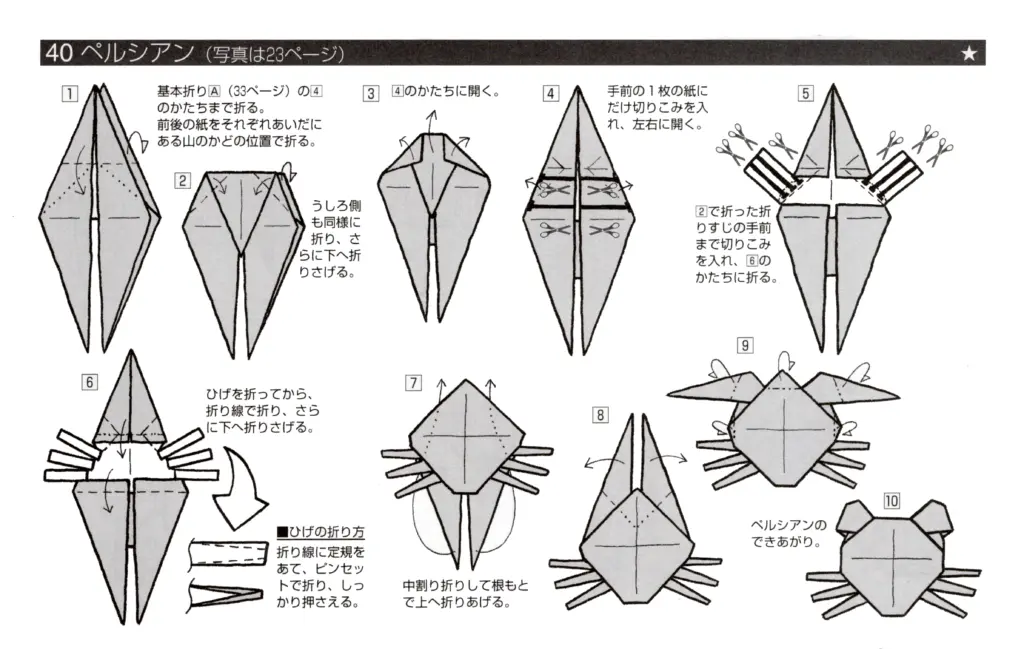
Persian Head
1 Fold to the shape of basic fold 20. Fold down at the position of the mountain corner at the back of the top paper.
2 Fold the left and right corners of the fold you just made diagonally. The bottom should be 5mm above the base corner. The top should be 13mm away from the center of the left and right corners.
3 Make a crease and return it to its original position.
4 At the crease made in 3, fold the left and right corners in between the sheets of paper to form the shape of 5.
5
{Flip}
6 Fold down at the position of the mountain corner at the back of the top paper.
7 Fold in the same way as 2.
8
9 Fold in the same way as 4.
10 Return it to its original position.
English Commentary
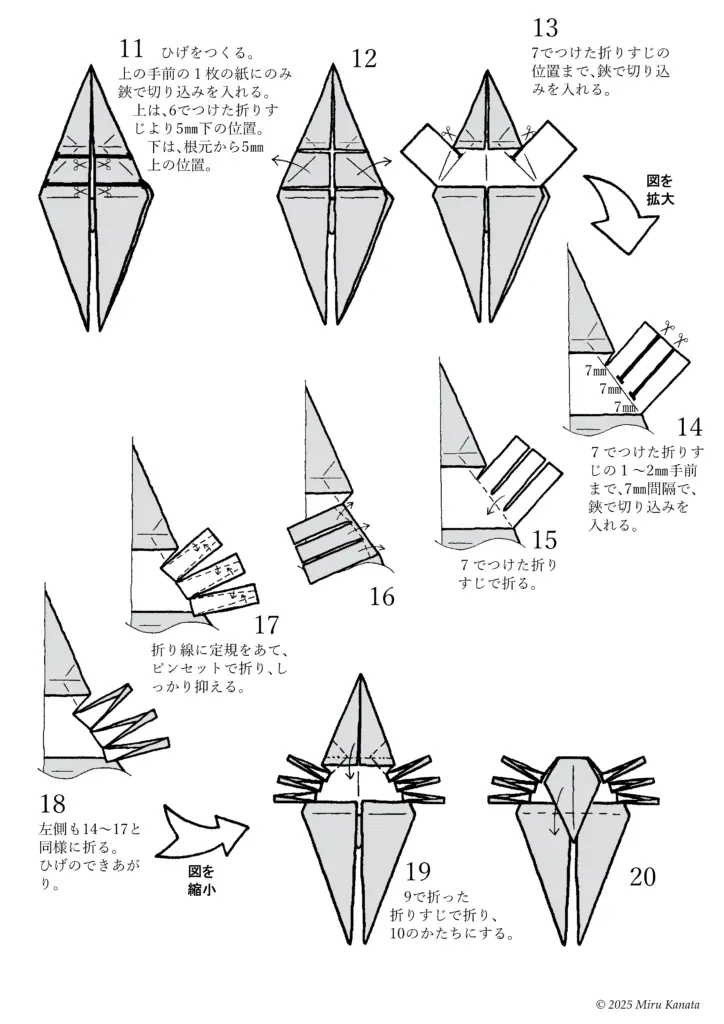
11 Make the whiskers. Use scissors to make cuts only in the top piece of paper closest to you. At the top, make cuts 5mm below the crease made in step 6. At the bottom, make cuts 5mm above the base.
12
13 Make cuts with scissors up to the crease made in step 7.
(Enlarged image)
14 Make cuts with scissors at 7mm intervals, 1-2mm in front of the crease made in step 7.
15 Fold along the crease made in step 7.
16
17 Place a ruler on the crease, fold with tweezers and hold firmly.
18 Fold the left side in the same way as steps 14-17. The whiskers are finished.
(Reduced image)
19 Fold along the crease made in step 9 to form the shape of step 10.
20
English Commentary
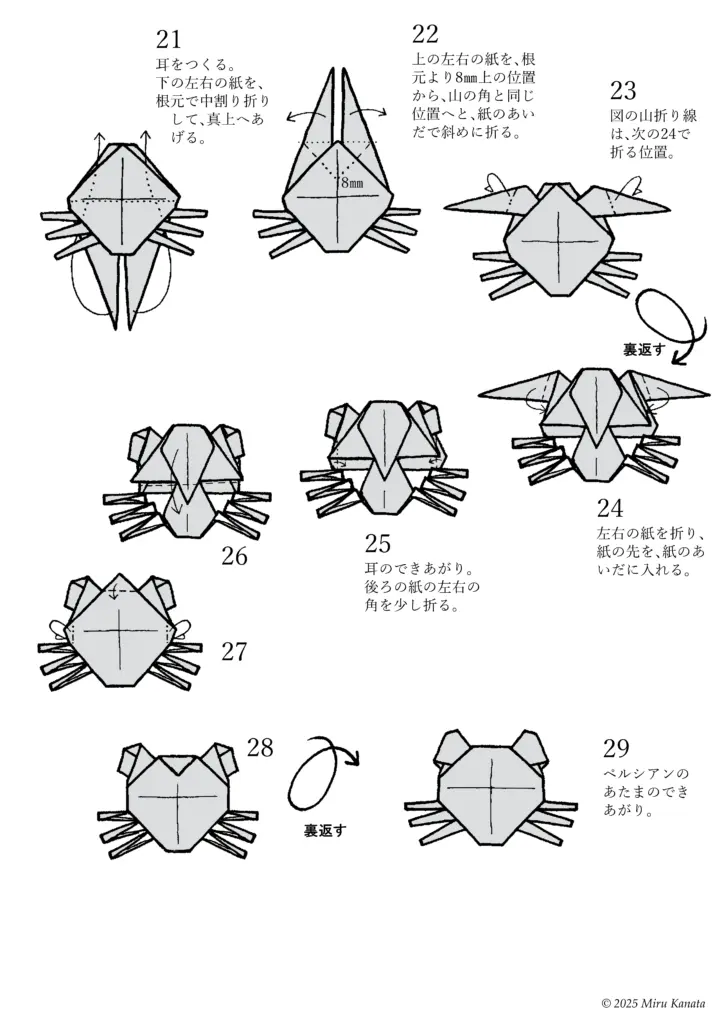
21 Make the ears. Fold the bottom left and right pieces of paper in half at the base and lift them straight up.
22 Fold the top left and right pieces of paper diagonally between the pieces of paper, from a position 8 mm above the base to the same position as the mountain corner.
23 The mountain fold line in the diagram indicates the position to fold in step 24.
{Flip}
24 Fold the left and right pieces of paper and place the tip of the paper between the pieces of paper.
25 The ears are finished. Slightly fold the left and right corners of the back piece of paper.
26
27
28
{Flip}
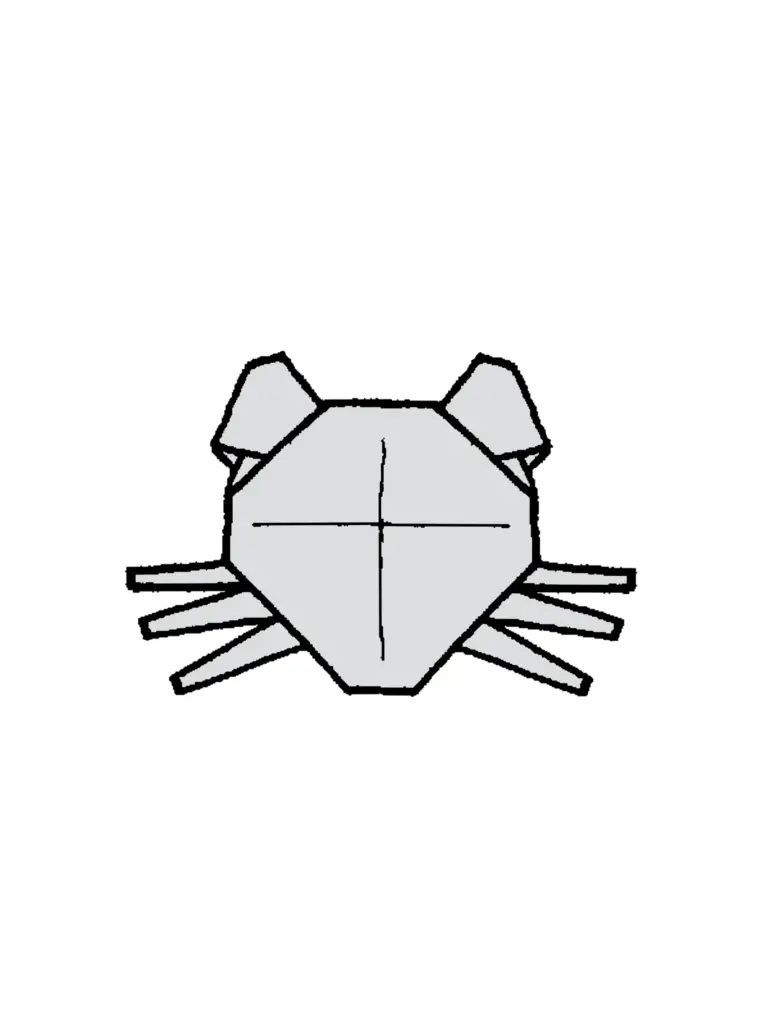
29 The Persian head is finished.
参考・2000年の本に掲載した折り図
みるかなた本棚>『ポケットモンスターおりがみコレクション』>ポケモンおりがみ一覧表>0053 ペルシアン
◇ ◇ ◇