
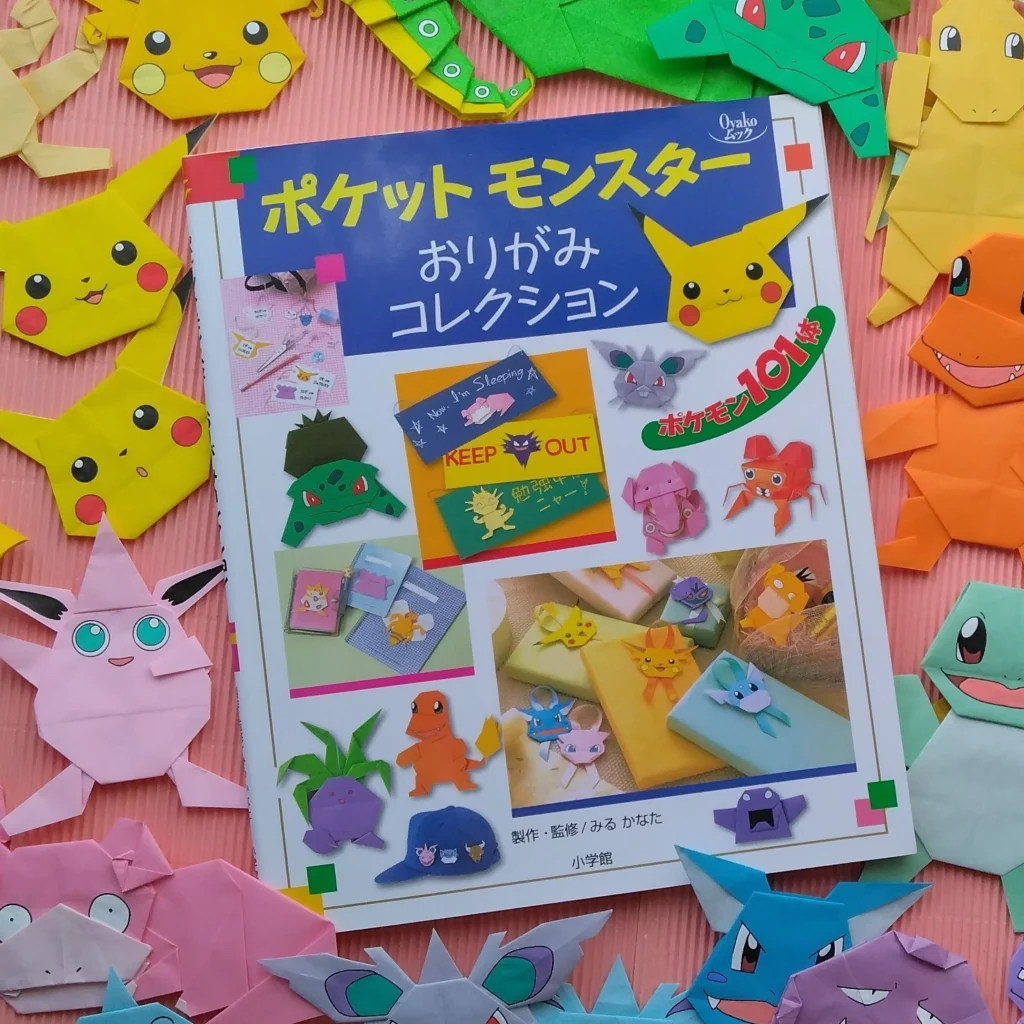
みるかなた本棚>『ポケットモンスターおりがみコレクション』>ポケモンおりがみ一覧表>0118トサキント
◆0118トサキント◆0119アズマオウ◆
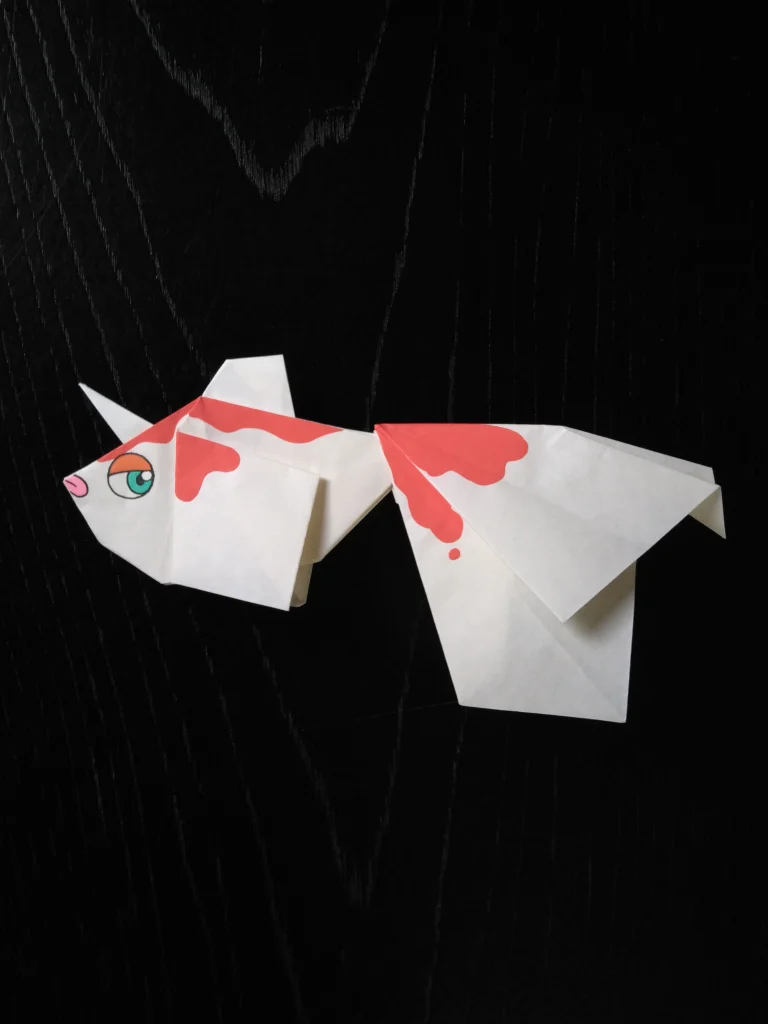
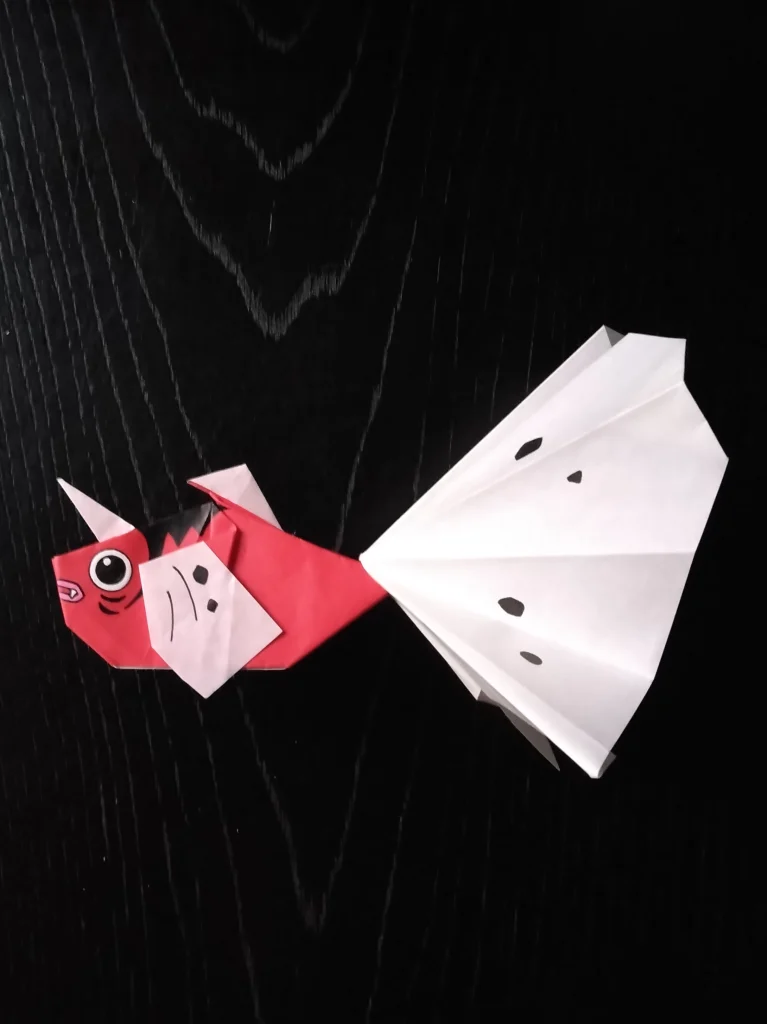
0118 トサキント
つのは難題です。背びれも難題です。
金魚とか魚とかのおりがみの、ふつうのつくり方では、とても無理ではないかと思います。
どう折り出したらいいか、深く無意識に降りて行ってしばらく漂っていました。
そして、論理的な整然とした方法をみつけました。
素直に折っていけば、つくることができます。
ぜひ楽しんでください。
つくった我ながら、できあがりの美しさに感動してしまいました。
なんてきれいなおりがみなんだろう!
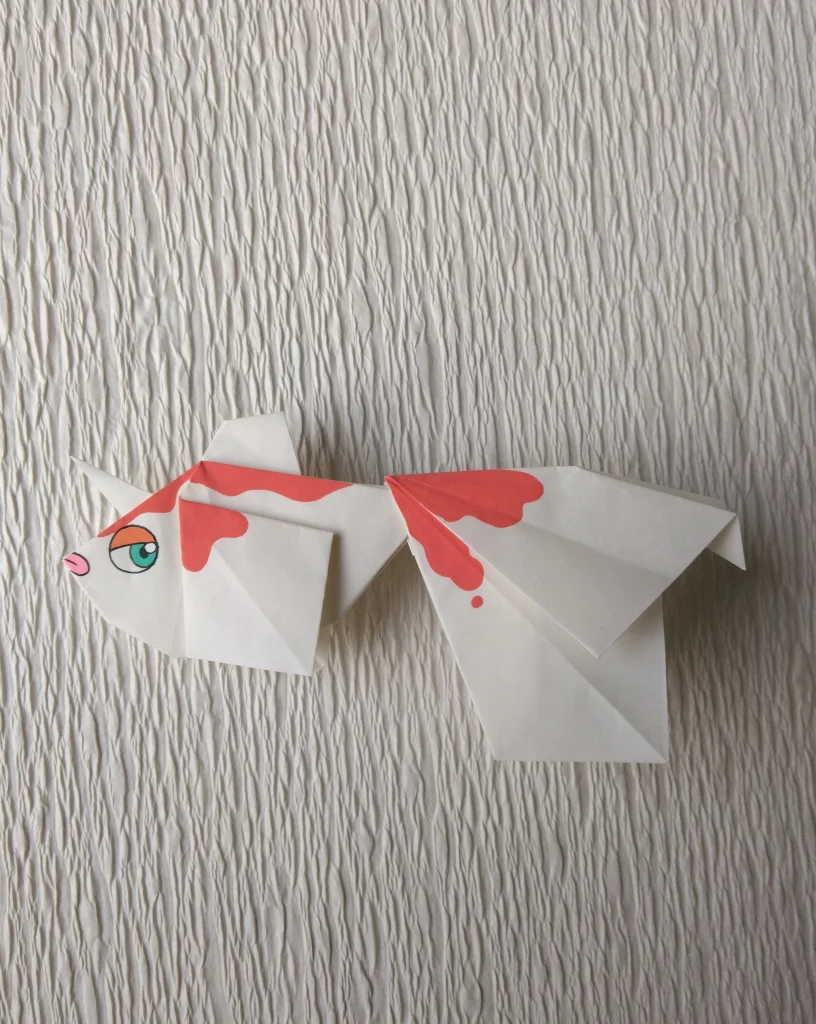
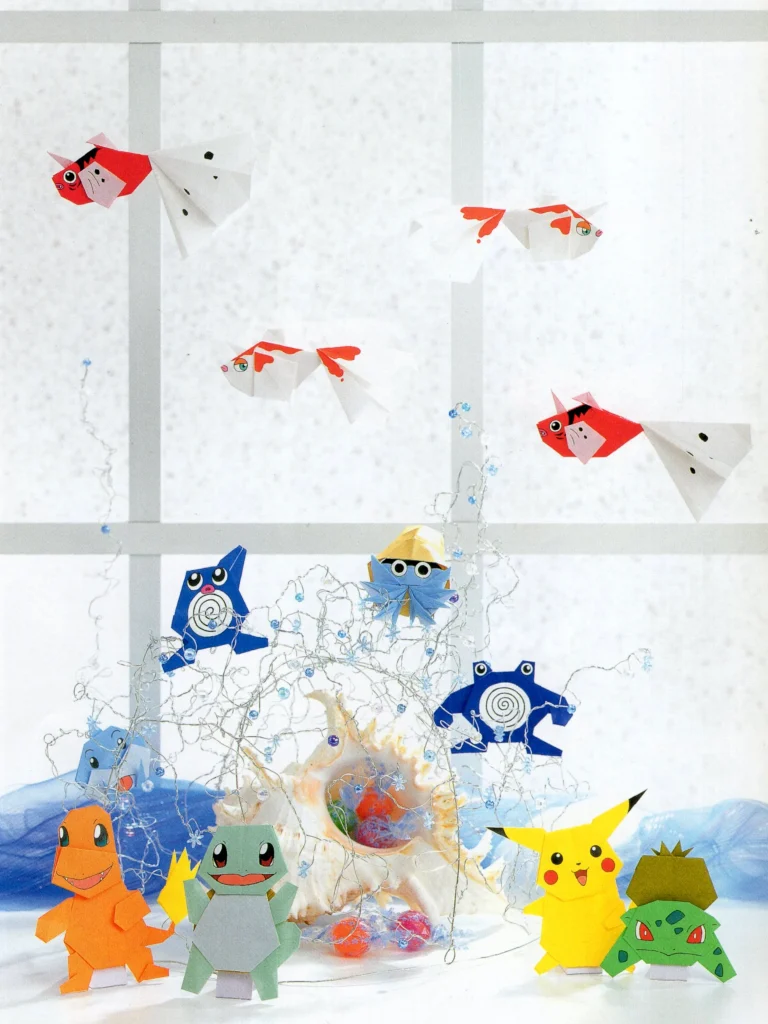
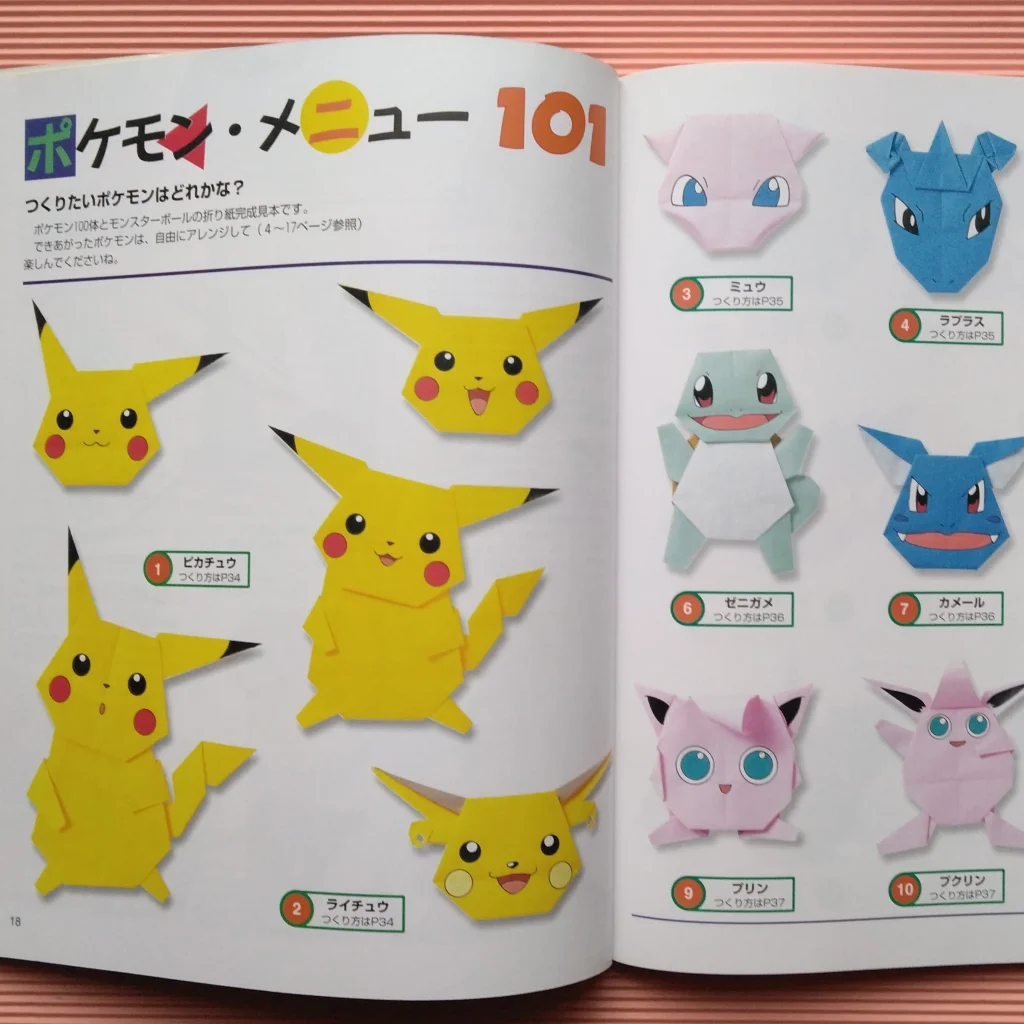
この作品は1999年に著作権者の監修を受け正式に許諾を得たものです。
★ゲームフリークのチェック
◆初めの試作品では「しっぽ部分をもう少し小さく」「からだと同じくらいのボリュームに」というご指摘がありました。
それで、しっぽの紙を少し切り取って小さいサイズにしました。
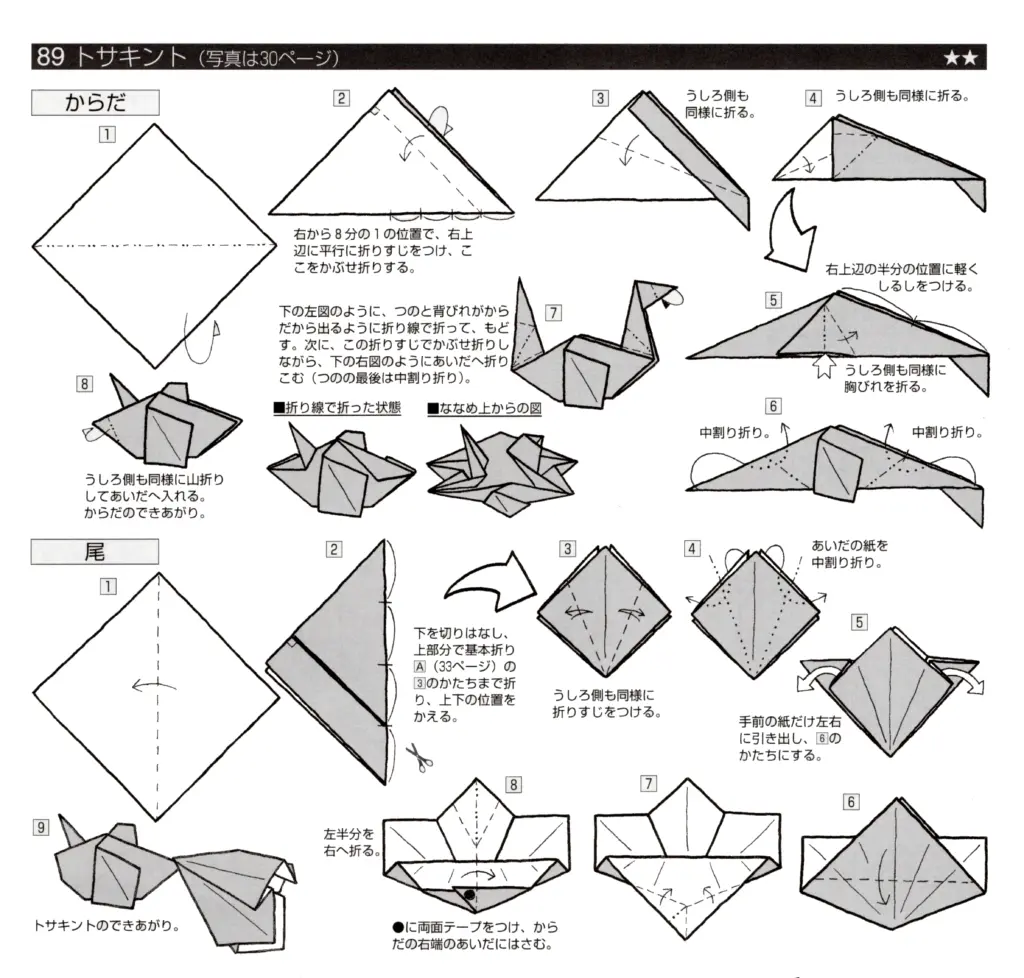
つくり方の折り図
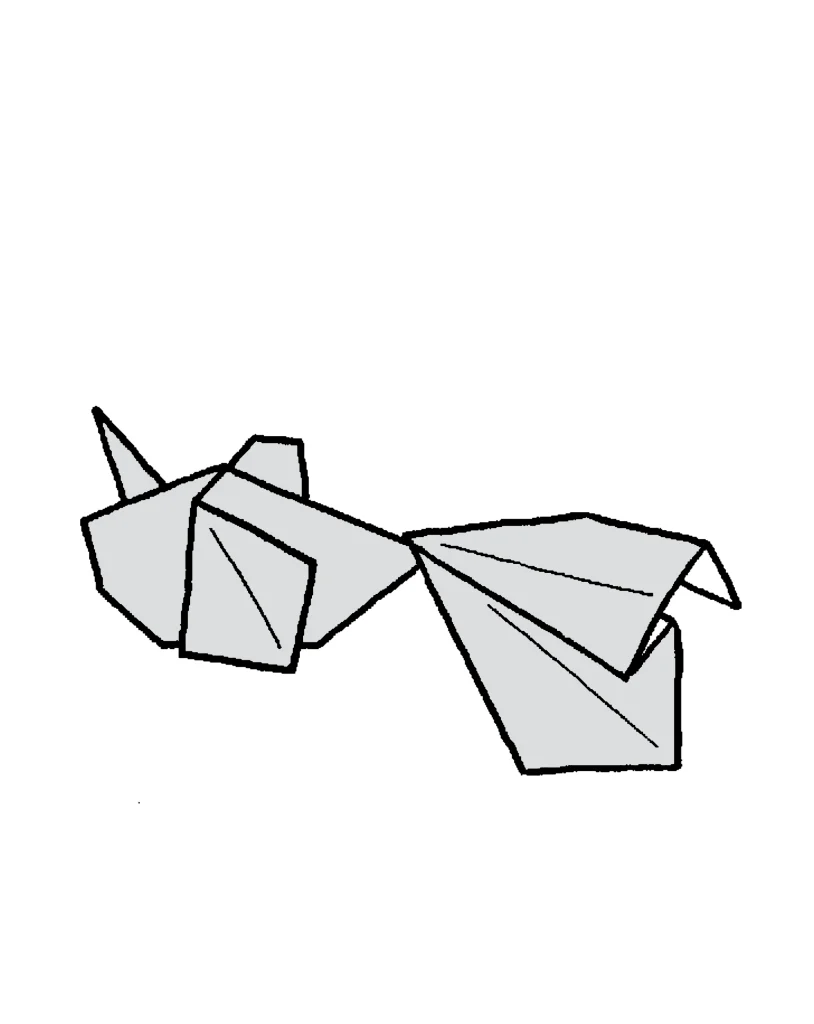
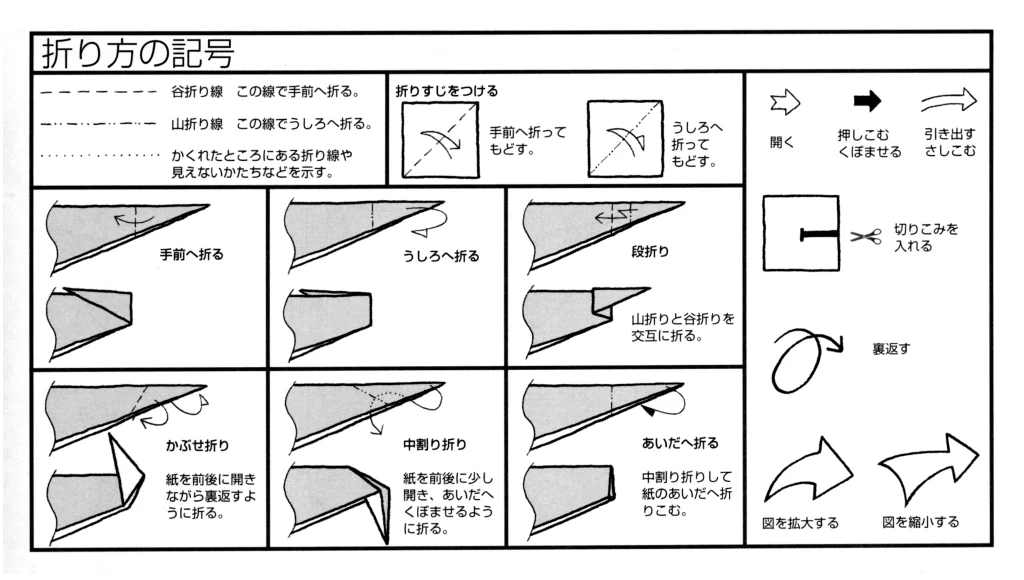
今回制作した折り図
◇折り図
1 トサキントのからだ
2 トサキントのしっぽ
■トサキントのからだ、は白色の紙で折る。
■トサキントのしっぽ、は白色の紙で折る。
1 トサキントのからだ
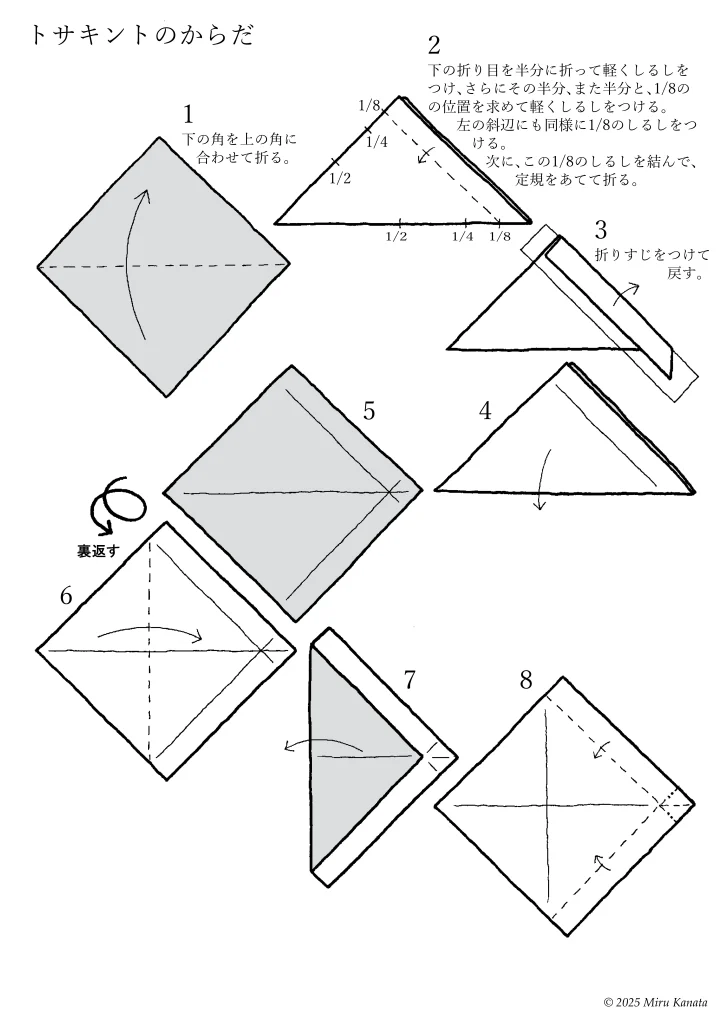
English Commentary
Goldeen’s body
1. Fold the bottom corner to meet the top corner.
2. Fold the bottom fold in half and make a light mark, then fold it in half again, and then in half again, until you find the 1/8 mark and make a light mark. Make a similar 1/8 mark on the left hypotenuse. Next, connect these 1/8 marks and fold using a ruler.
3. Make a crease and unfold.
4.
5.
{Flip}
6.
7.
8.
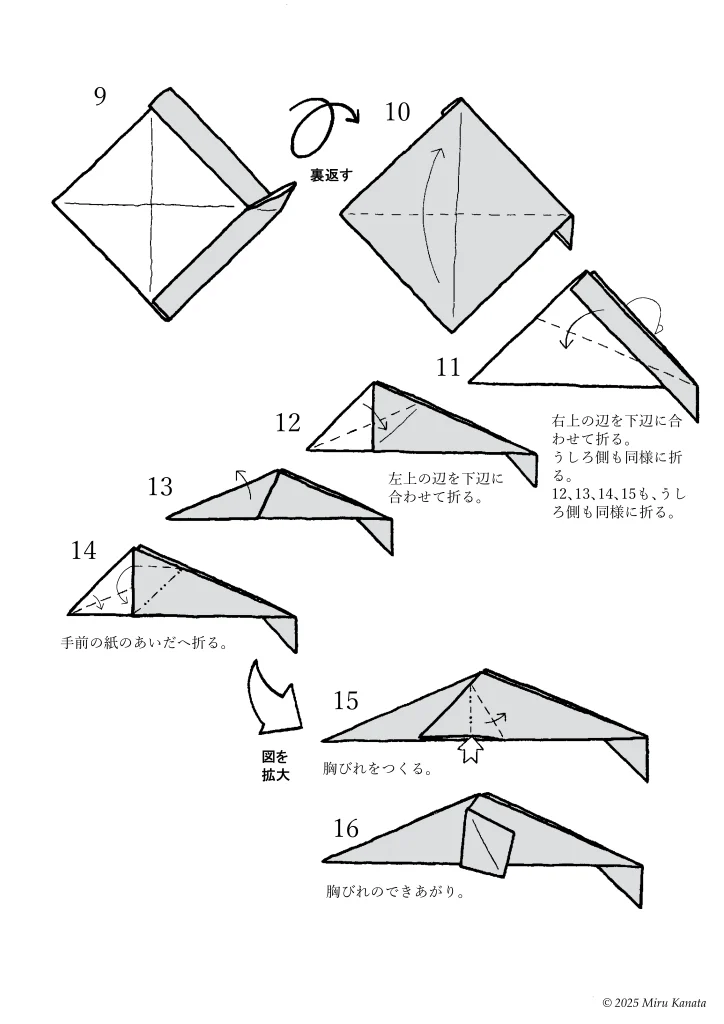
English Commentary
9.
{Flip}
10.
11. Fold the top right edge to meet the bottom edge. Fold the back side in the same way. (Fold the back side in the same way for steps 12, 13, 14, and 15.)
12. Fold the top left edge to meet the bottom edge.
13.
14. Fold it into the gap of the paper in front.
{Enlarge diagram}
15. Make the pectoral fins.
16. The pectoral fins are complete.
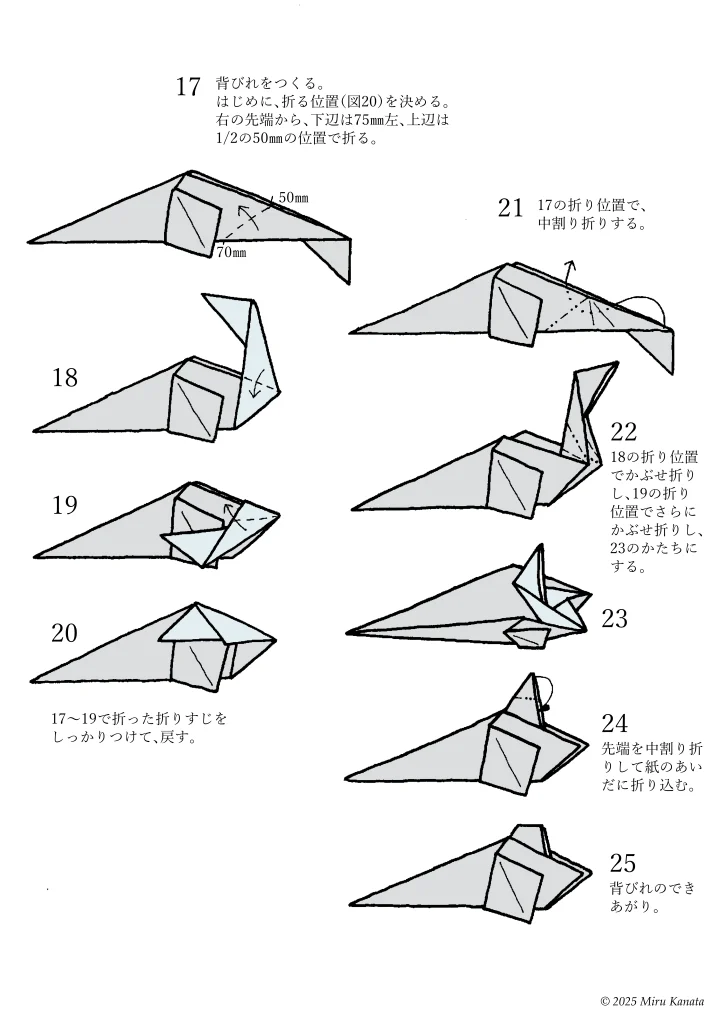
English Commentary
17. Make the dorsal fin. First, decide where to fold (Figure 20). Starting from the right tip, fold the bottom edge 75 mm to the left and the top edge 50 mm (halfway).
18.
19.
20. Make sure to crease the folds made in steps 17-19 and unfold.
21. Make an inside reverse fold at the fold position of step 17.
22. Make an overlay fold at the fold position of step 18, and then another overlay fold at the fold position of step 19 to create the shape shown in step 23.
23.
24. Make an inside reverse fold at the tip and tuck it between the layers of paper.
25. The dorsal fin is complete.
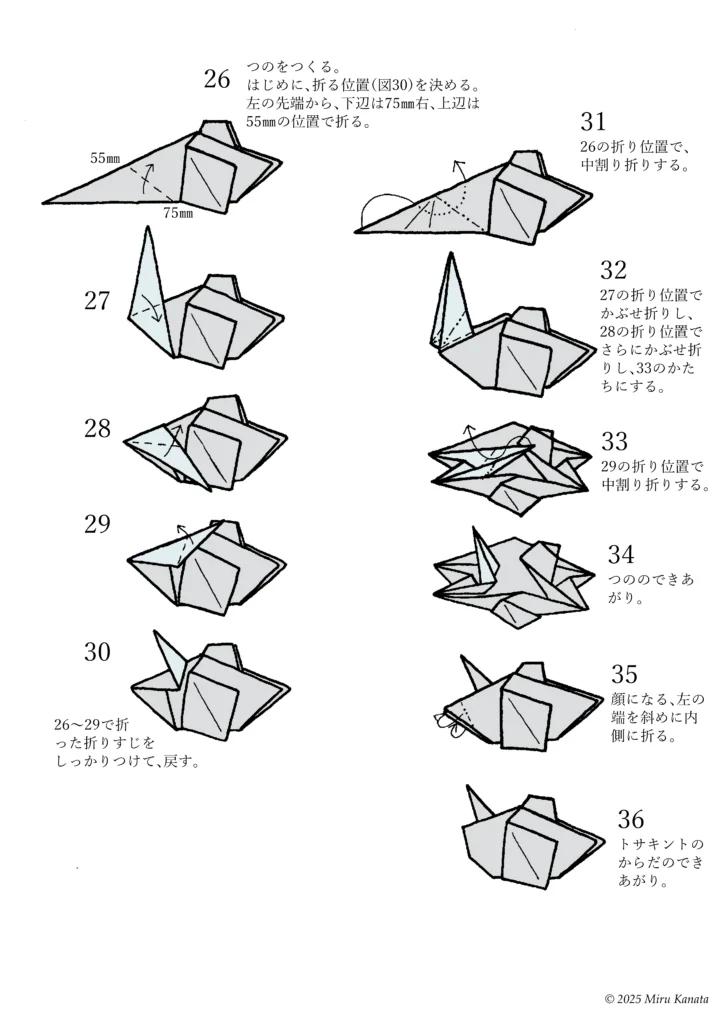
English Commentary
26. Make the horns. First, decide where to fold (Figure 30). Starting from the left tip, fold the bottom edge 75 mm to the right and the top edge 55 mm.
27.
28.
29.
30. Make sure to crease the folds made in steps 26-29 and unfold.
31. Make an inside reverse fold at the fold position of step 26.
32. Make an overlay fold at the fold position of step 27, and another overlay fold at the fold position of step 28 to create the shape of step 33.
33. Make an inside reverse fold at the fold position of step 29.
34. The horns are complete.
35. Fold the left end, which will become the face, diagonally inward.
36. The body of Goldeen is complete.
2 トサキントのしっぽ
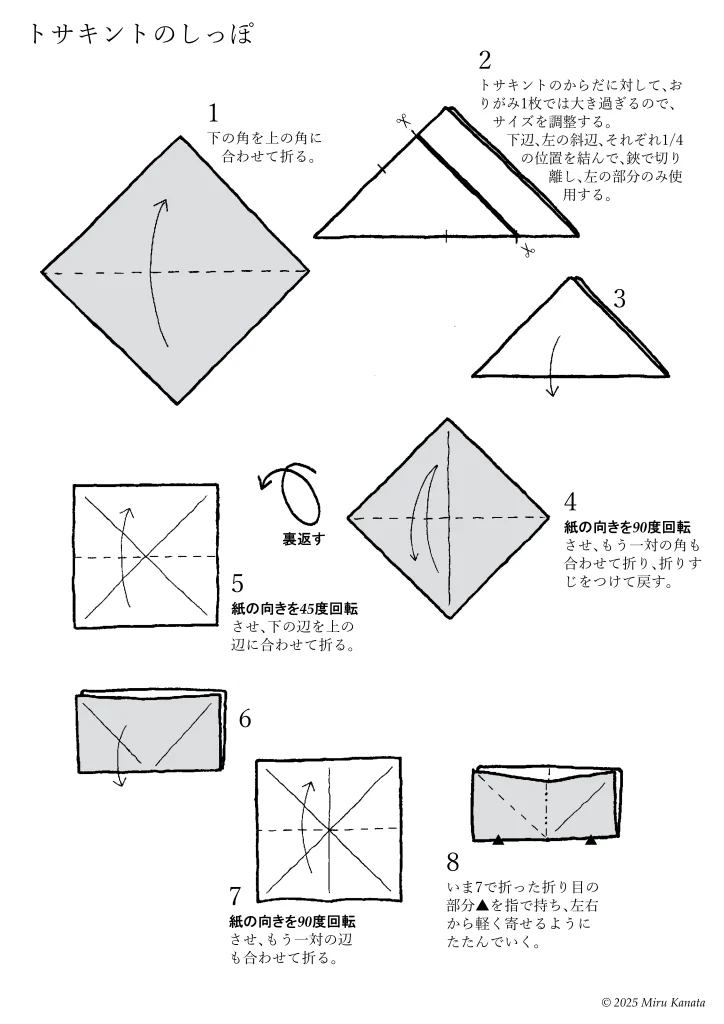
English Commentary
Goldeen’s Tail
1. Fold the bottom corner to meet the top corner.
2. One sheet of origami paper is too large for the body of the Goldeenth, so adjust the size. Connect the bottom edge and the left diagonal edge at the 1/4 point, cut with scissors, and use only the left part.
3.
4. Rotate the paper 90 degrees, fold the other pair of corners to meet, make a crease, and unfold.
{Flip}
5. Rotate the paper 45 degrees, and fold the bottom edge to meet the top edge.
6.
7. Rotate the paper 90 degrees, and fold the other pair of edges to meet.
8. Hold the crease you just made in step 7 with your fingers and gently fold it in from both sides.
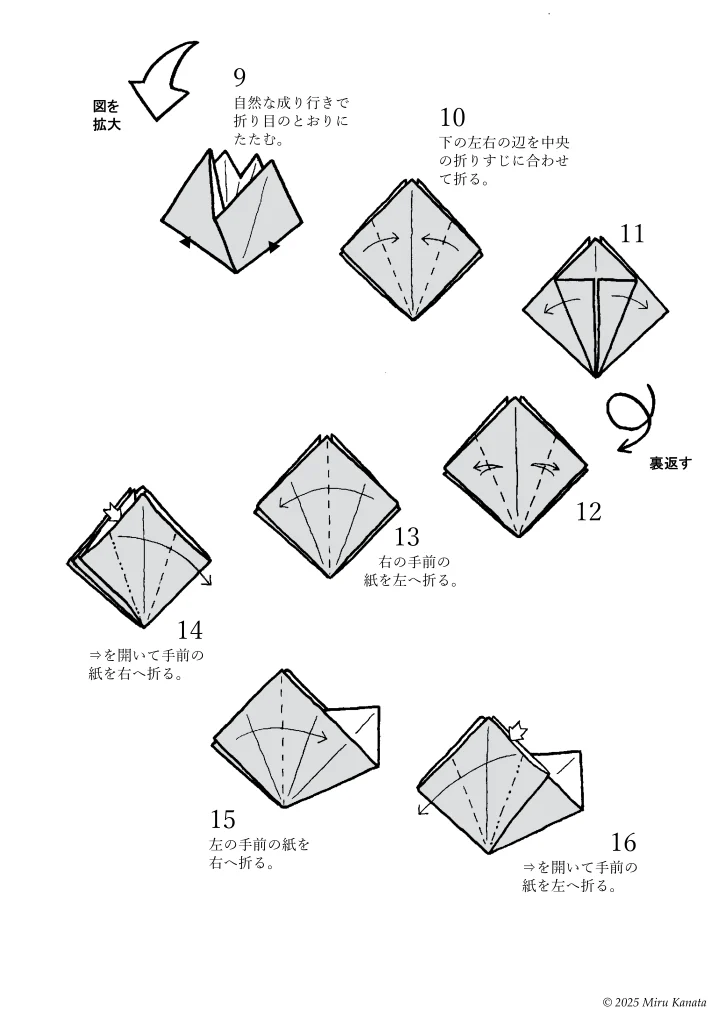
English Commentary
{Enlarge diagram}
9. Fold along the crease as it naturally progresses.
10. Fold the bottom left and right edges to meet the center crease.
11.
{Flip}
12.
13. Fold the front right piece of paper to the left.
14. Open the arrow and fold the front piece of paper to the right.
15. Fold the front left piece of paper to the right.
16. Open the arrow and fold the front piece of paper to the left.
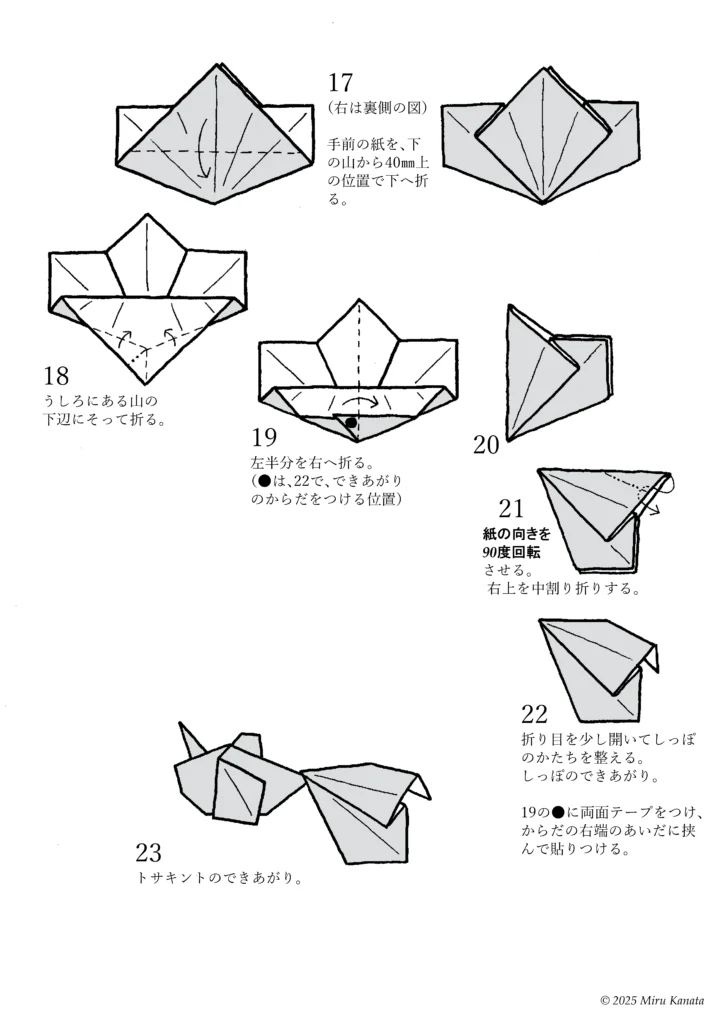
English Commentary
17. (The right side shows the reverse side) Fold the front piece of paper downwards at a position 40 mm above the bottom fold.
18. Fold along the bottom edge of the back fold.
19. Fold the left half to the right. (● indicates the position where the finished body will be attached in step 22)
20.
21. Rotate the paper 90 degrees. Fold the upper right piece of paper in an inside reverse fold.
22. Slightly open the fold and adjust the shape of the tail. Attach double-sided tape to the position marked with ● in step 19, and tuck it between the right edges of the body to attach it.
23. The Goldeenth is complete.
参考・2000年の本に掲載した折り図
みるかなた本棚>『ポケットモンスターおりがみコレクション』>ポケモンおりがみ一覧表>0118トサキント

◇ ◇ ◇