
みるかなた本棚>『ポケットモンスターおりがみコレクション』>ポケモンおりがみ一覧表>0113ラッキー
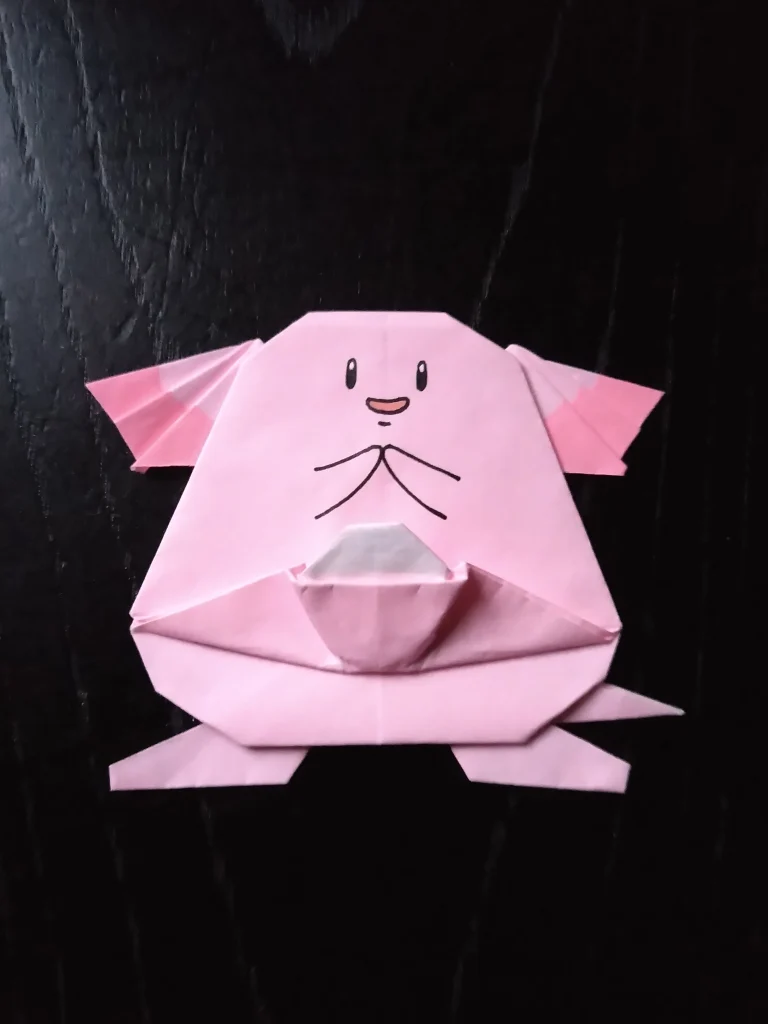
0113 ラッキー
ぷっくりとしたおなかの真ん中に、ポケットとたまご、という大胆なデザイン。
なんとか折り出す方法を思いつきました。これは、カイロスの、歯が取り巻いている口でも使用している折り方のヴァリエーションです。
あれから27年経ちますが、これよりもっといいアイディアは、まだ見つけることができていません。
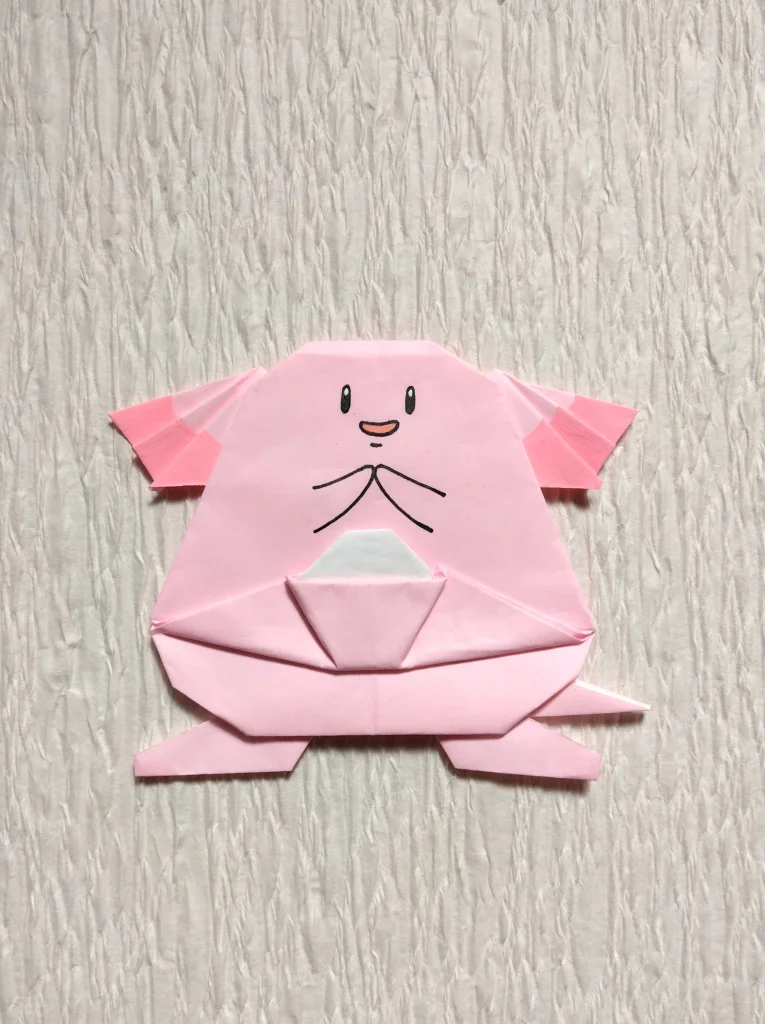
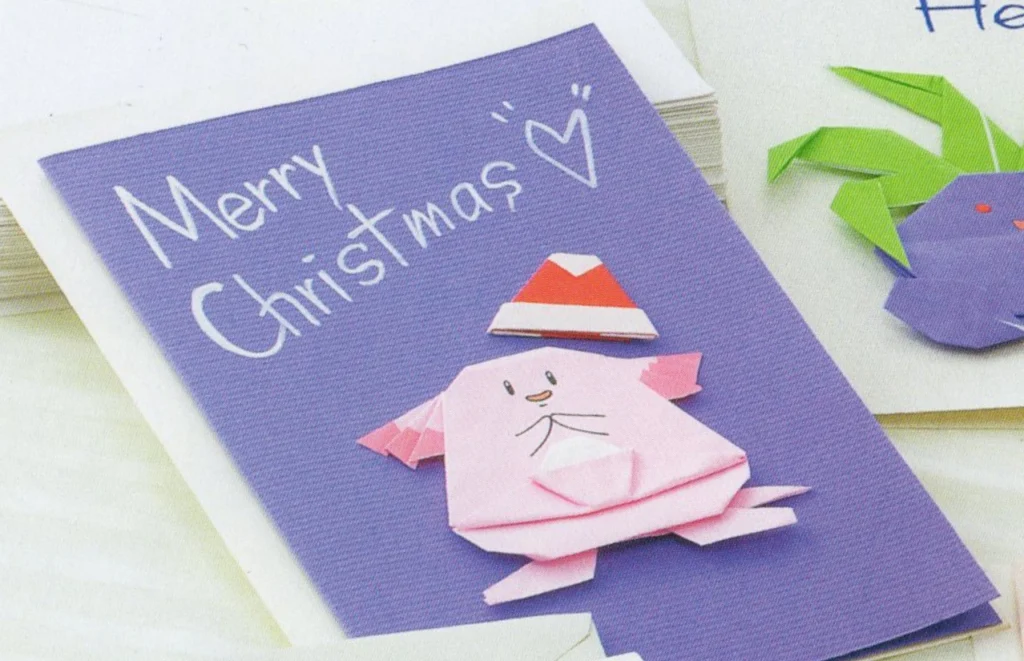
この作品は1999年に著作権者の監修を受け正式に許諾を得たものです。
★ゲームフリークのチェック
◆たまご部分を白く表現してください、とのことでした。
で、紙の裏面の白を利用することができないので、白い色を塗っています。
つくり方の折り図
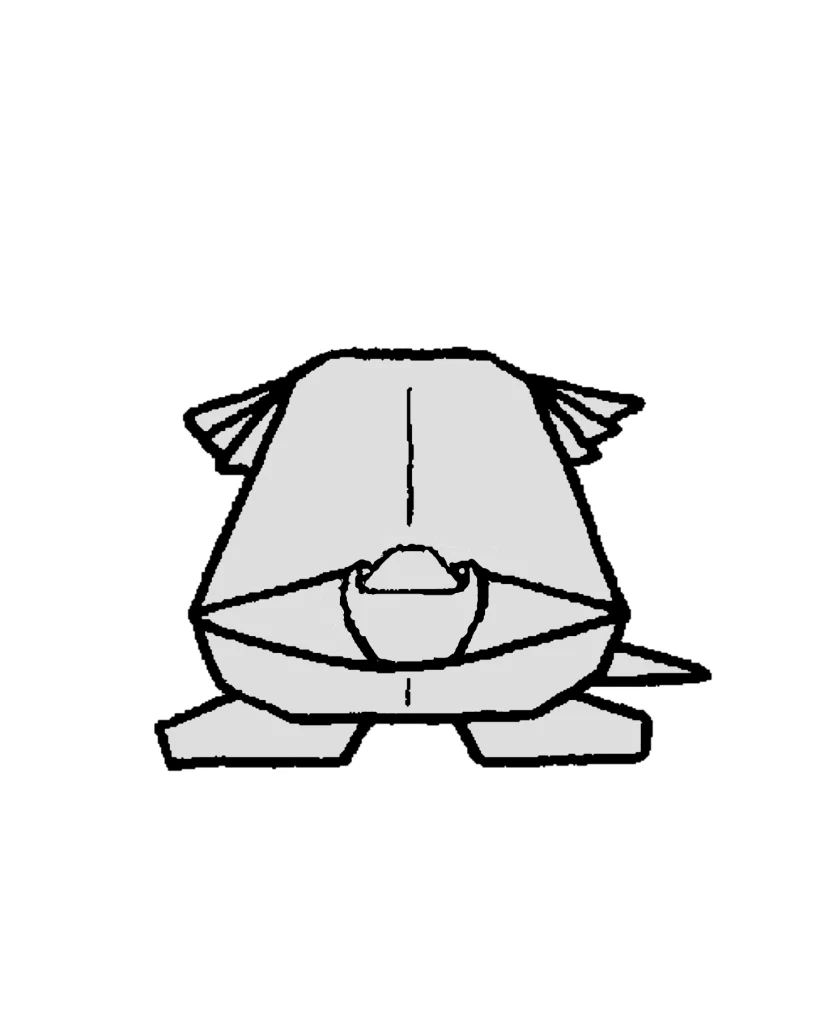
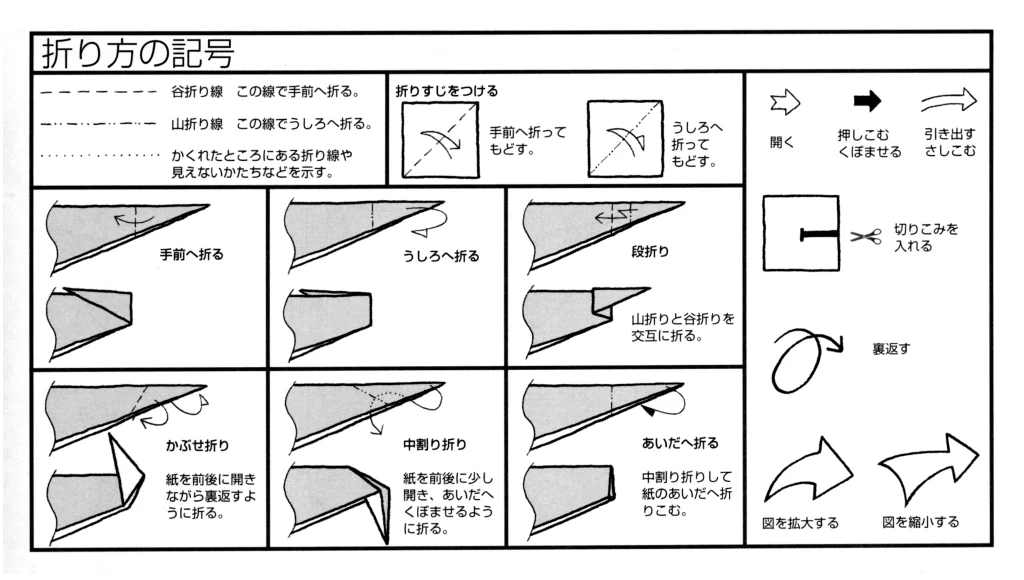
今回制作した折り図
◇折り図
1 基本折り
2 ラッキー
■ラッキーは、淡いピンク色の紙で、まず基本折りの図20まで折る。
1 基本折り
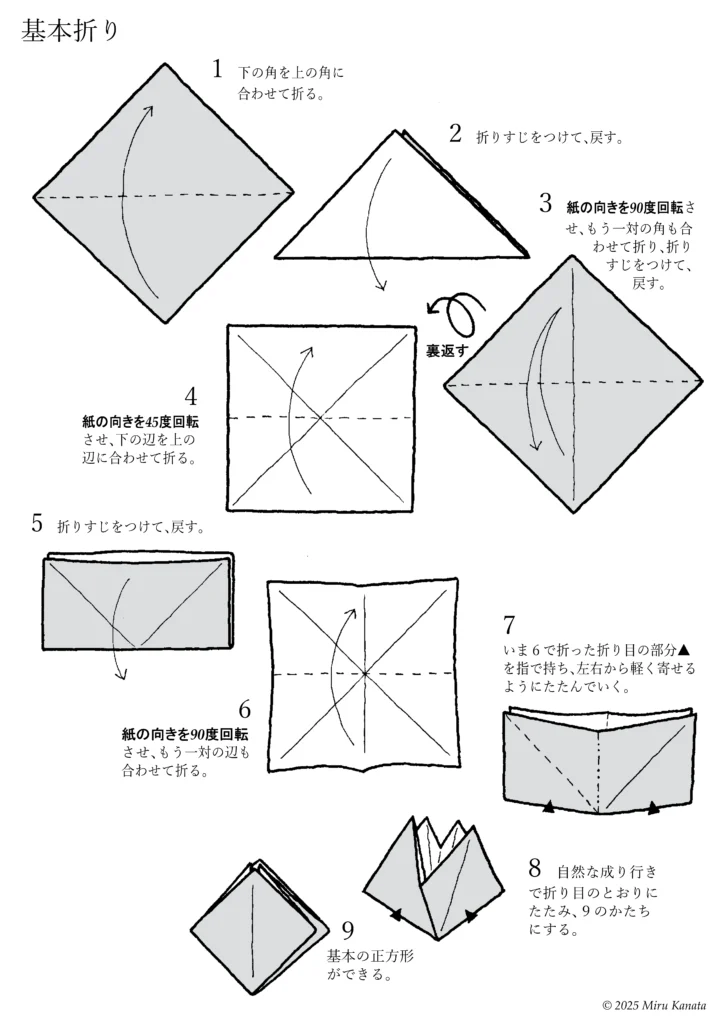
English Commentary
Basic Folding
1 Fold the bottom corner to meet the top corner.
2 Make a crease and return it to its original position.
3 Rotate the paper 90 degrees, fold the other pair of corners together, make a crease and return it to its original position.
{Flip}
4 Rotate the paper 45 degrees and fold the bottom edge to line up with the top edge.
5 Make a crease and return it to its original position.
6 Rotate the paper 90 degrees and fold the other pair of edges together.
7 Hold the crease ▲ made in step 6 with your fingers and fold gently from both sides together.
8 Let the paper naturally fold along the creases to form the shape of 9.
9 A basic square is created.
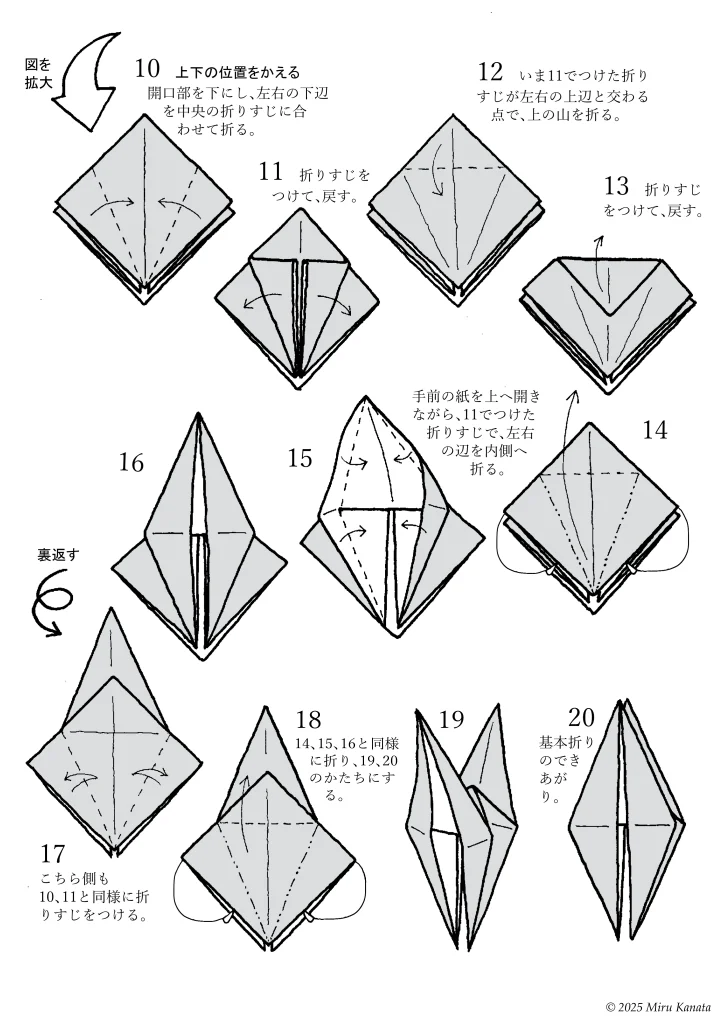
English Commentary
{Enlarge image}
10 Change the top and bottom positions.
With the opening facing downwards, fold the bottom left and right edges to meet the crease in the middle.
11 Make a crease and return.
12 Fold the top at the point where the crease made in 11 intersects with the top left and right edges.
13 Make a crease and return.
14 While opening the front paper upwards, fold the left and right edges inward along the crease made in 11.
15
16
{Flip}
17 Make creases on this side in the same way as 10 and 11.
18 Fold in the same way as 14, 15 and 16 to form 19 and 20.
19
20 The basic fold is complete.
2 ラッキー
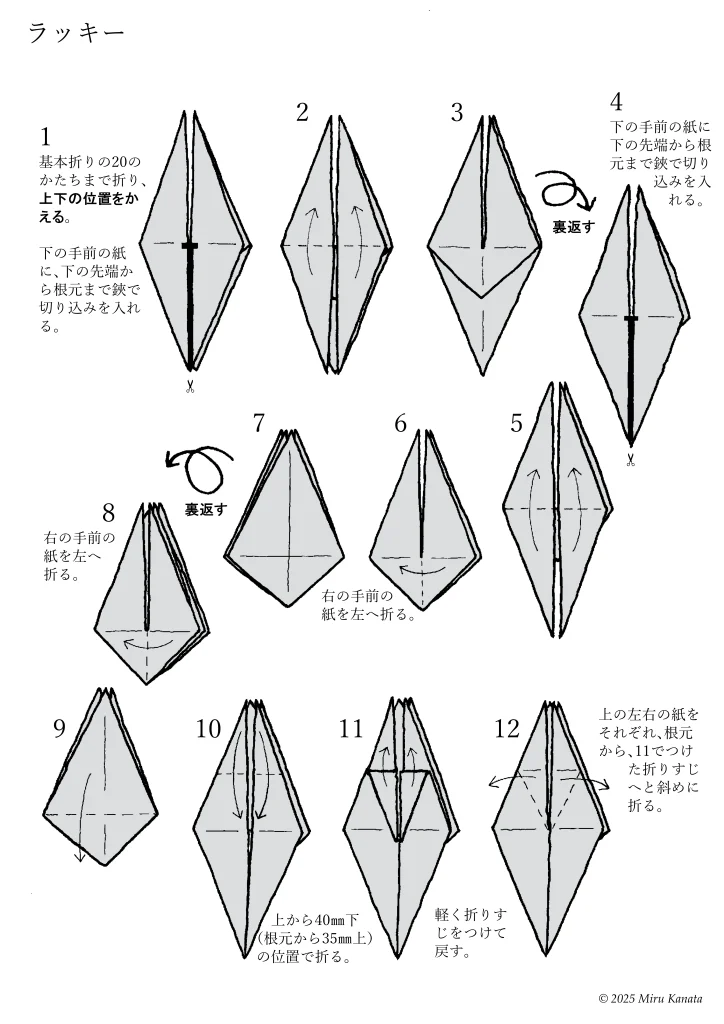
English Commentary
Chansey
1. Fold to the shape of the 20th basic fold, then change the top and bottom positions. Make a cut with scissors from the bottom tip to the base of the bottom front paper.
2.
3.
{Flip}
4. Make a cut with scissors from the bottom tip to the base of the bottom front paper.
5.
6. Fold the right front paper to the left.
7.
{Flip}
8. Fold the right front paper to the left.
9.
10. Fold downwards at a position 40 mm below the top (35 mm above the base).
11. Lightly crease and unfold.
12. Fold the top left and right papers diagonally from the base to the position of the crease made in step 11.
English Commentary
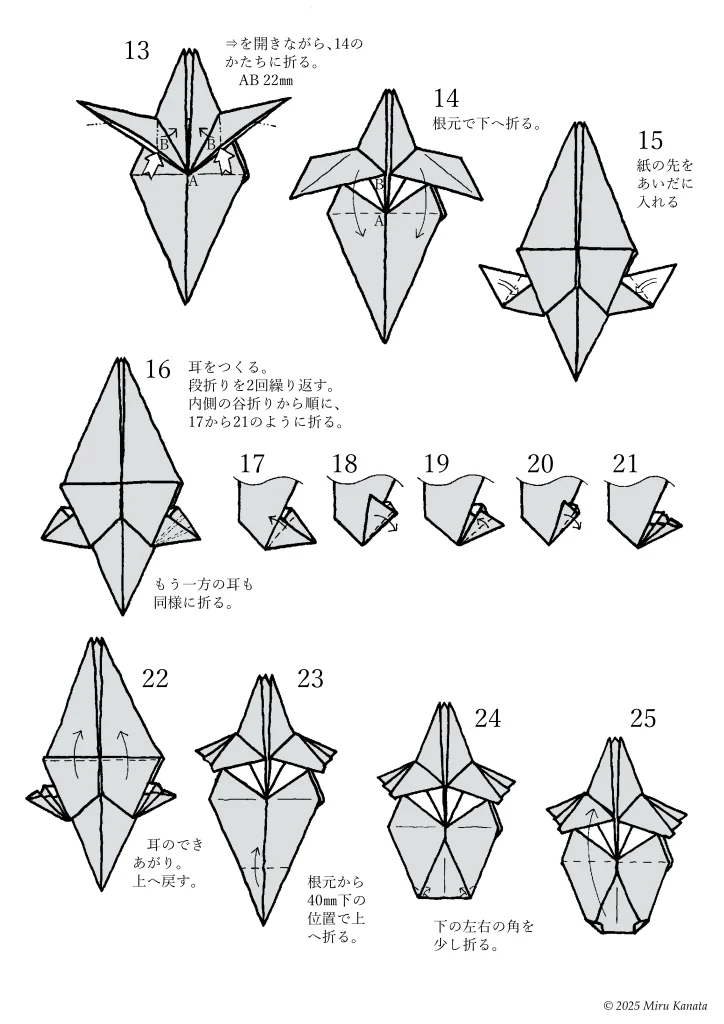
13 Fold the paper into the shape shown in 14, opening the arrow. AB 22mm.
14 Fold the base downwards.
15 Insert the tip of the paper in between.
16 Make the ears. Starting from the inner valley fold, fold as shown in 17 to 21, repeating the step fold twice. Fold the other ear in the same way.
17
18
19
20
21
22 The ears are complete. Return to the top.
23 Fold upwards at a position 40mm below the base.
24 Fold the bottom left and right corners slightly.
25
English Commentary
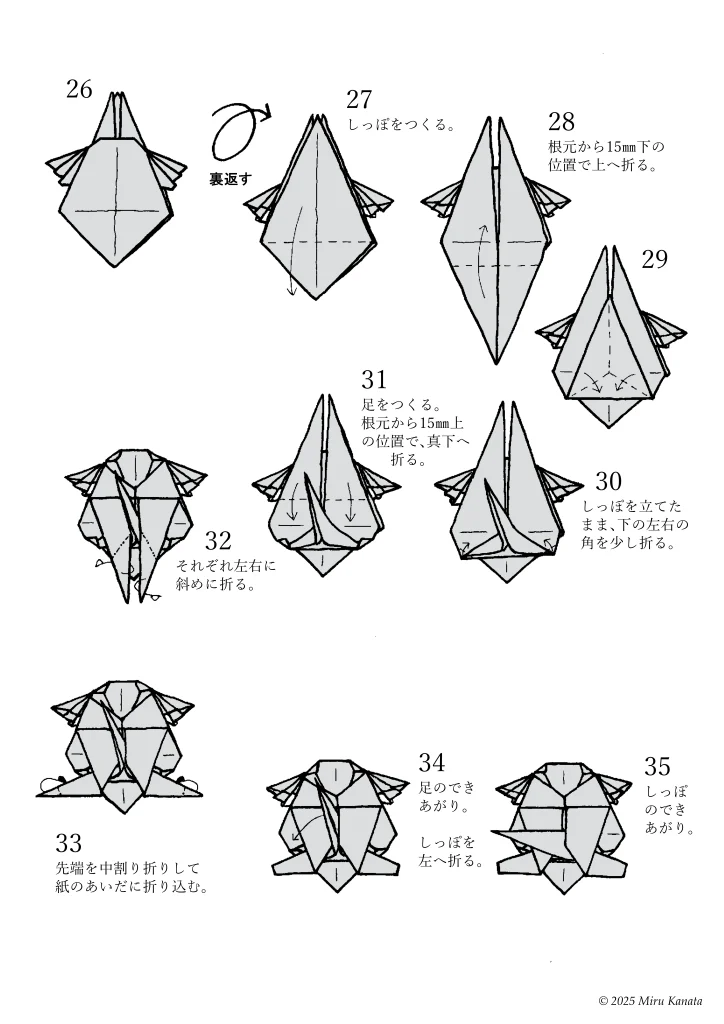
26
{Flip}
27 Make the tail.
28 Fold it upwards 15mm below the base.
29
30 With the tail standing upright, fold the lower left and right corners slightly.
31 Make the legs. Fold it straight down 15mm above the base.
32 Fold each side diagonally to the left and right. 33
Fold the tip of the paper inwards and tuck it between the layers of paper.
34 The legs are finished. Fold the tail to the left.
35 The tail is finished.
English Commentary
{Flip}
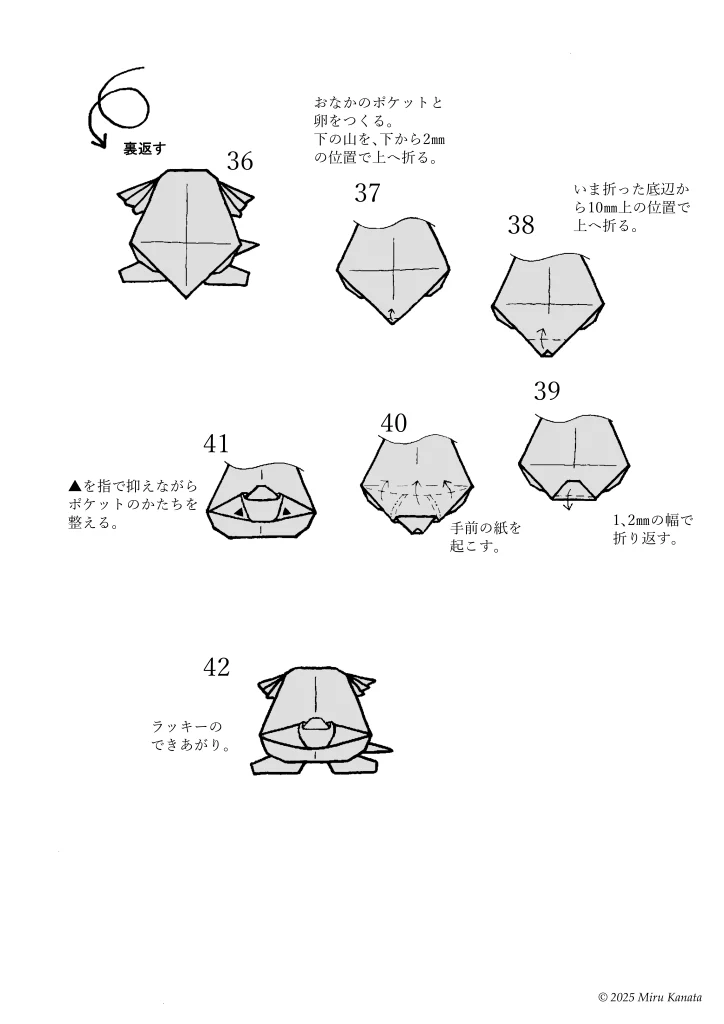
36
37 Make the belly pocket and egg. Fold the bottom fold upwards at a position 2 mm from the bottom.
38 Fold upwards at a position 10 mm above the bottom edge you just folded.
39 Fold back with a width of 1 or 2 mm.
40 Lift the front paper.
41 While holding down the ▲ with your finger, adjust the shape of the pocket.
42 Chansey is finished.
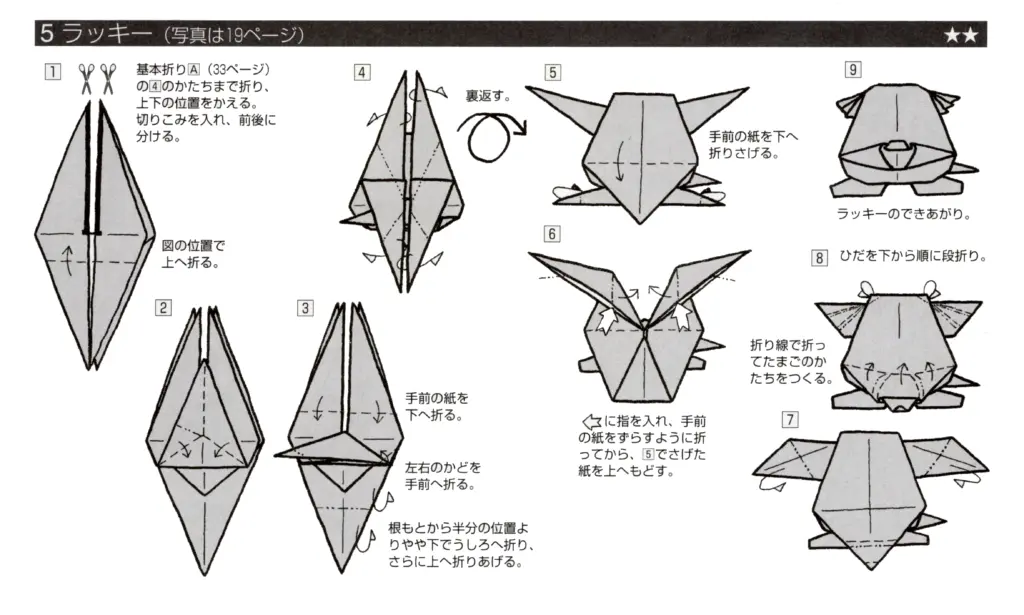
参考・2000年の本に掲載した折り図
みるかなた本棚>『ポケットモンスターおりがみコレクション』>ポケモンおりがみ一覧表>0113ラッキー

◇ ◇ ◇