
みるかなた本棚>『ポケットモンスターおりがみコレクション』>ポケモンおりがみ一覧表>0175トゲピー
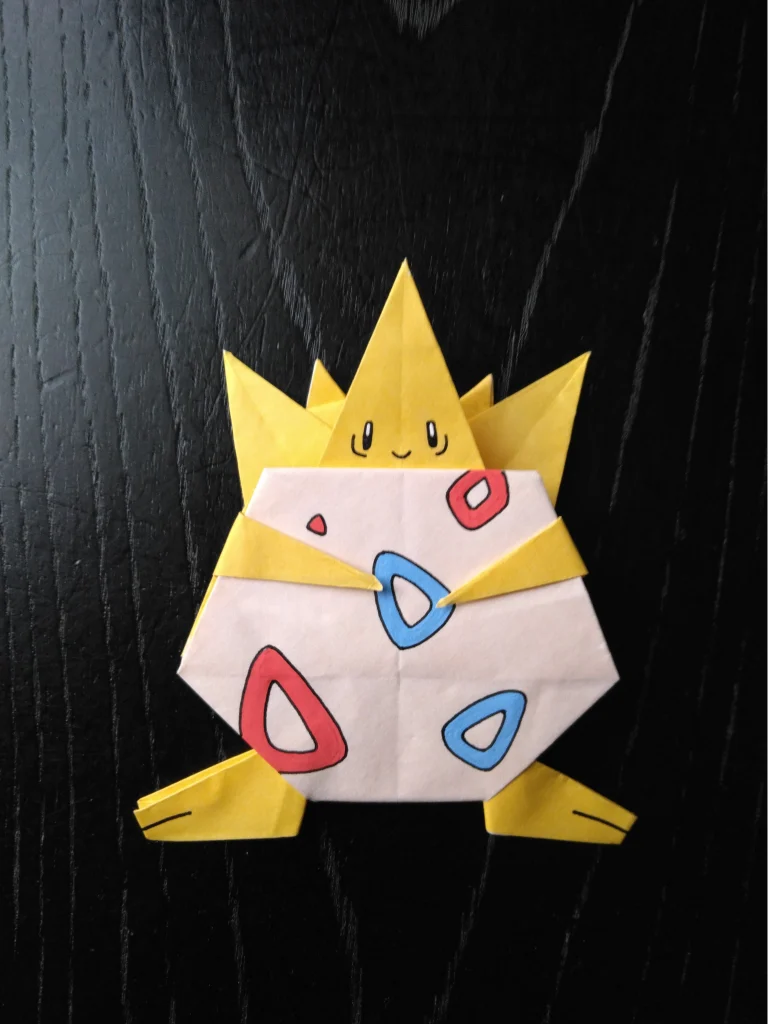
0175 トゲピー
かたちの綺麗さにこだわって、美しいバランスになるよう、気を配りました。
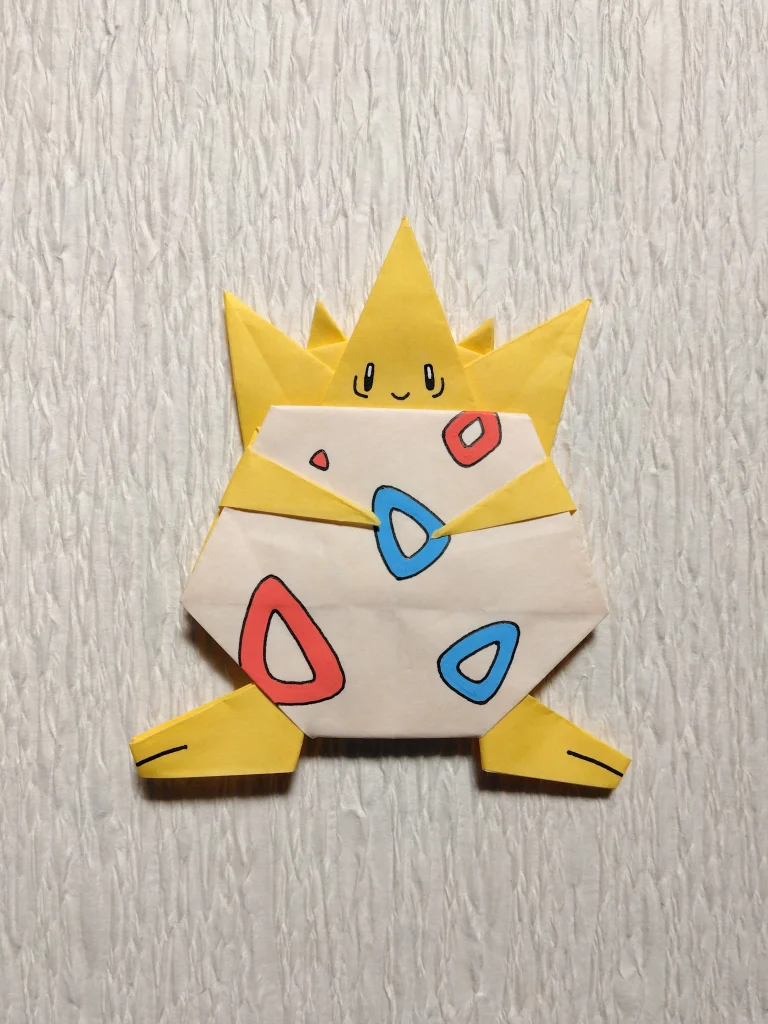
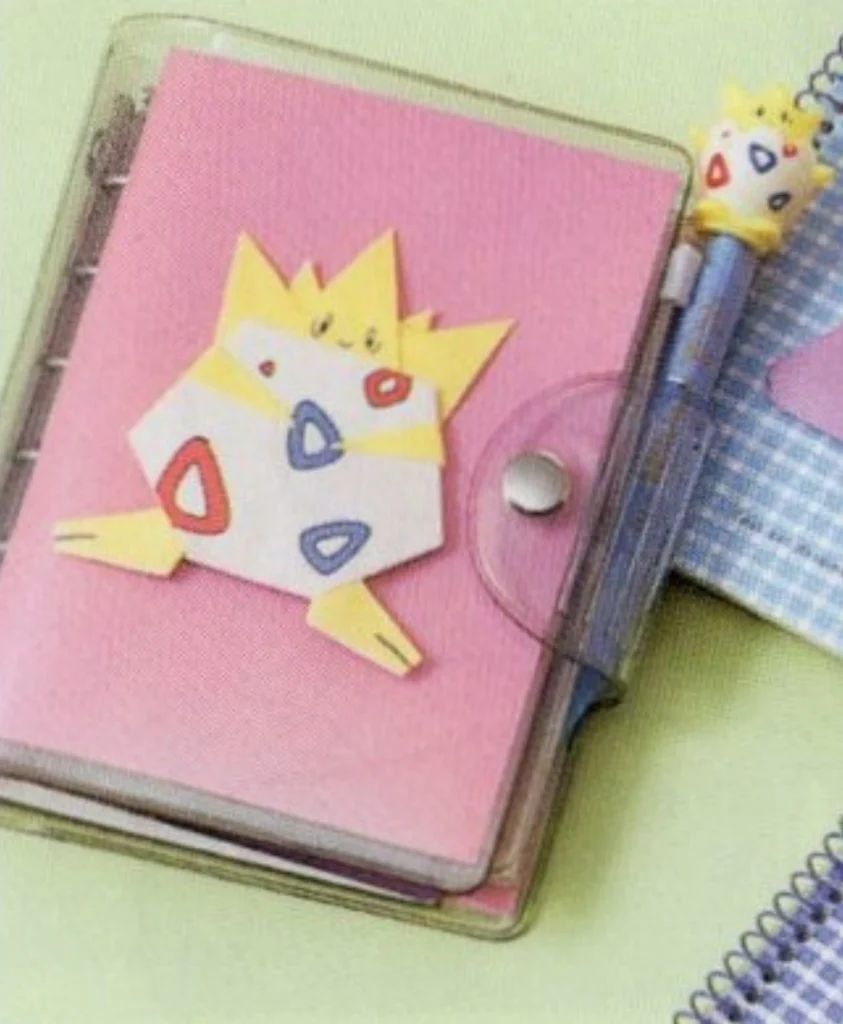
この作品は1999年に著作権者の監修を受け正式に許諾を得たものです。
★ゲームフリークのチェック
◆つくったもの数点見ていただきました。その中で、からだ全体のバランスはこれがよいとのことでした。
◆つくったものの中には、あたまのとげの数が3本のものも5本のものもあったのですが、「5本で」というご指定でした。
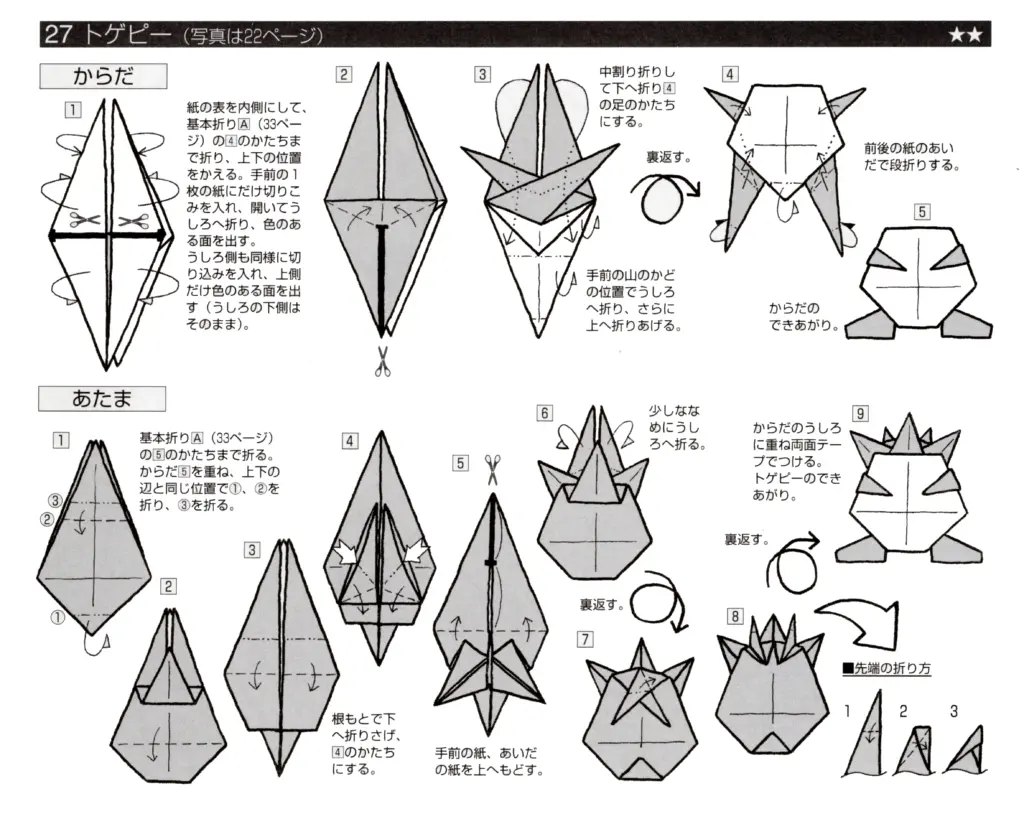
つくり方の折り図
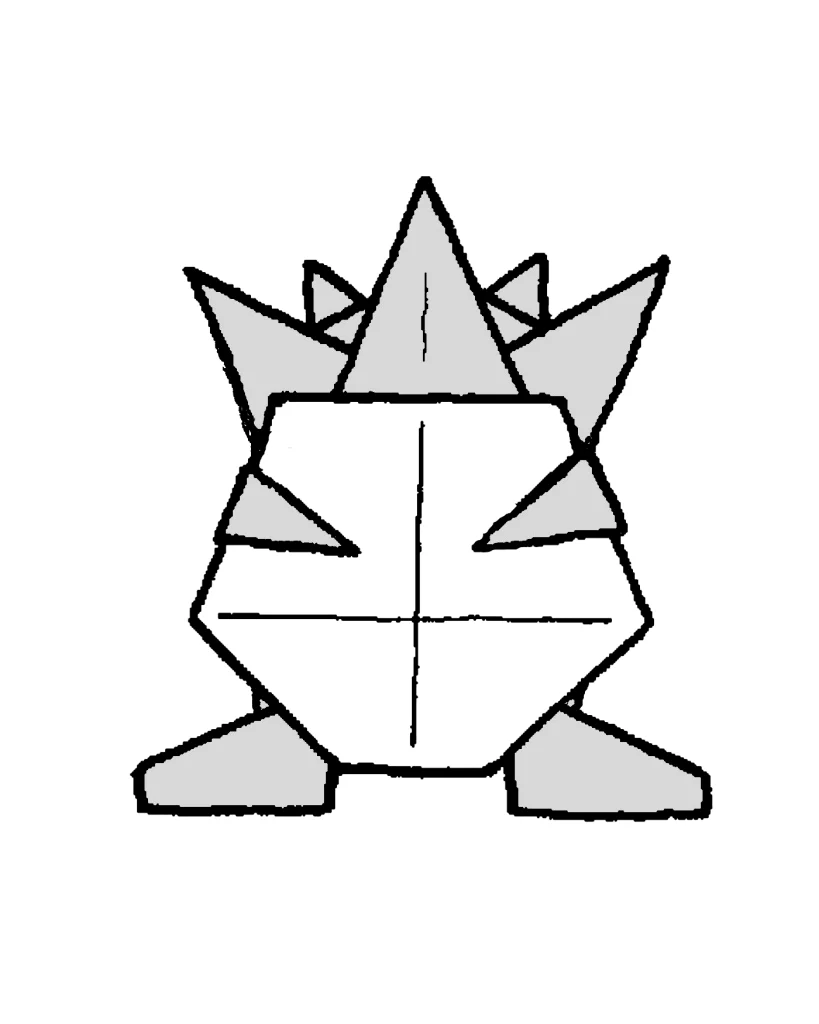
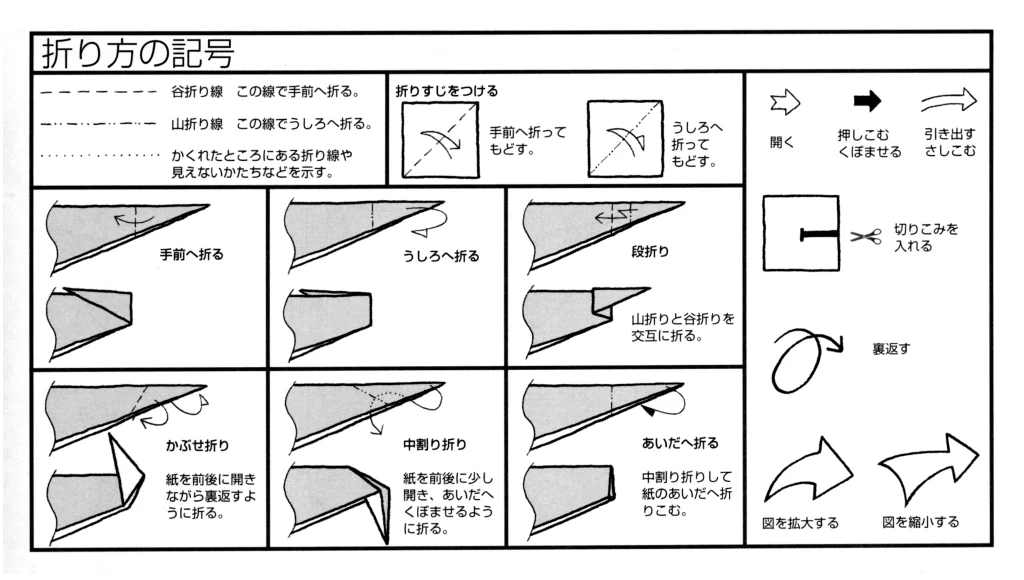
今回制作した折り図
◇折り図
1 基本折り
2 トゲピーのあたま
3 トゲピーのからだ
■トゲピーのあたまは、クリーム色の紙でまず基本折りの図20まで折る。
■トゲピーのからだは、クリーム色の紙で、紙の表裏を逆にして、基本折りの図20まで折る。
1 基本折り
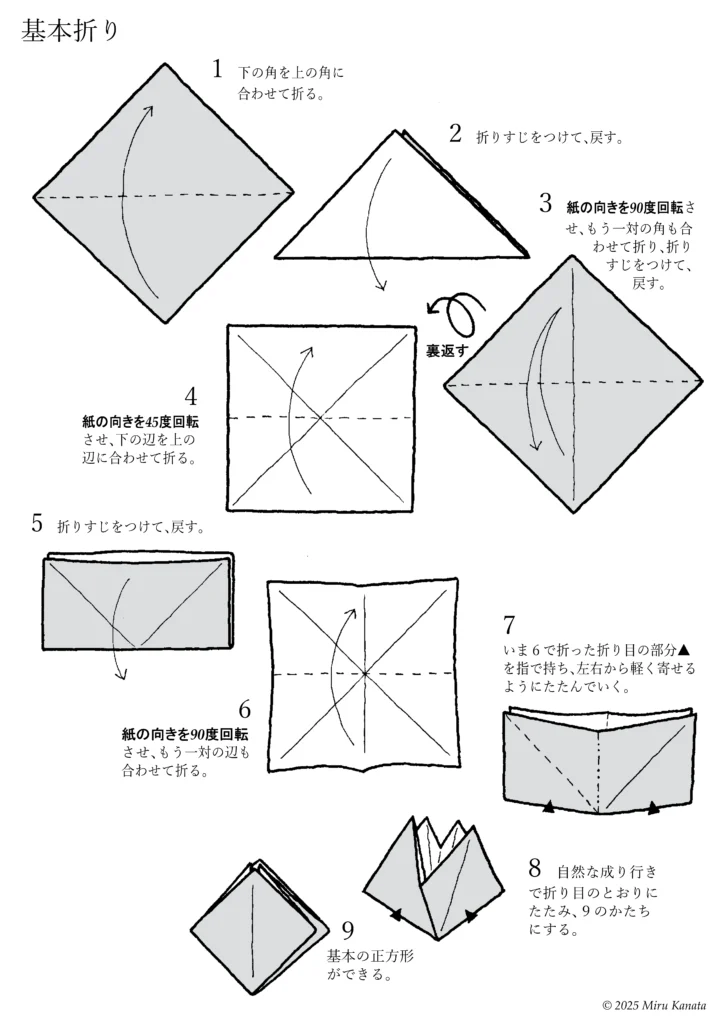
English Commentary
Basic Folding
1. Fold the bottom corner to meet the top corner.
2. Make a crease and return it to its original position.
3. Rotate the paper 90 degrees, fold the other pair of corners together, make a crease and return it to its original position.
{Flip}
4. Rotate the paper 45 degrees and fold the bottom edge to line up with the top edge.
5. Make a crease and return it to its original position.
6. Rotate the paper 90 degrees and fold the other pair of edges together.
7. Hold the crease ▲ made in step 6 with your fingers and fold gently from both sides together.
8. Let the paper naturally fold along the creases to form the shape of 9.
9. A basic square is created.
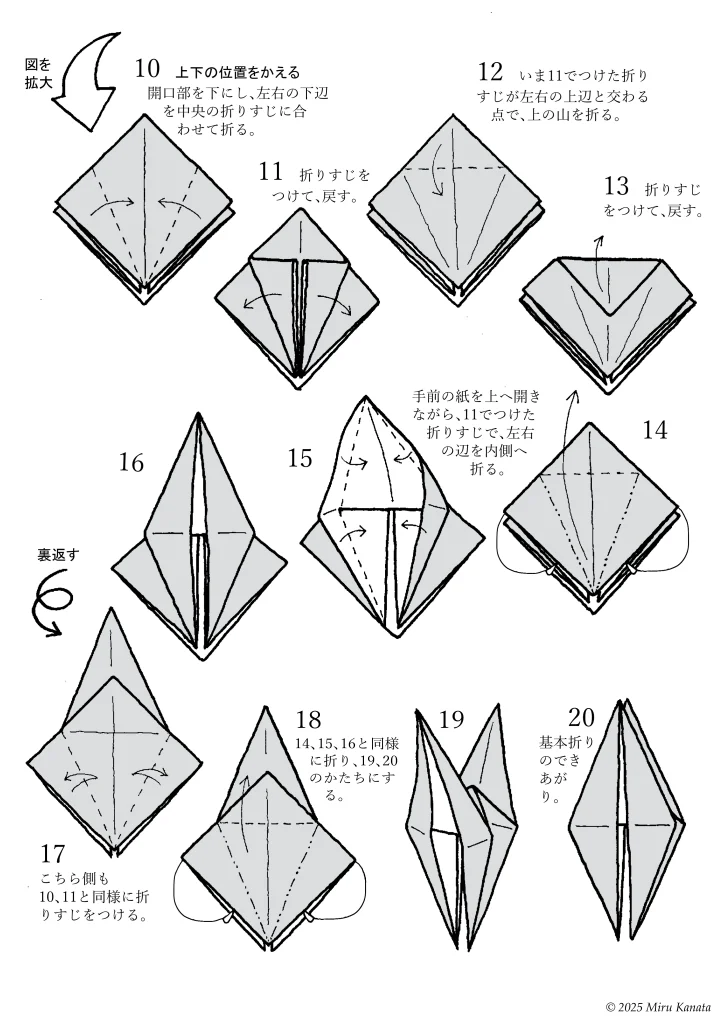
English Commentary
{Enlarge image}
10. Change the top and bottom positions.
With the opening facing downwards, fold the bottom left and right edges to meet the crease in the middle.
11. Make a crease and return.
12. Fold the top at the point where the crease made in 11 intersects with the top left and right edges.
13. Make a crease and return.
14. While opening the front paper upwards, fold the left and right edges inward along the crease made in 11.
15.
16.
{Flip}
17. Make creases on this side in the same way as 10 and 11.
18. Fold in the same way as 14, 15 and 16 to form 19 and 20.
19.
20. The basic fold is complete.
2 トゲピーのあたま
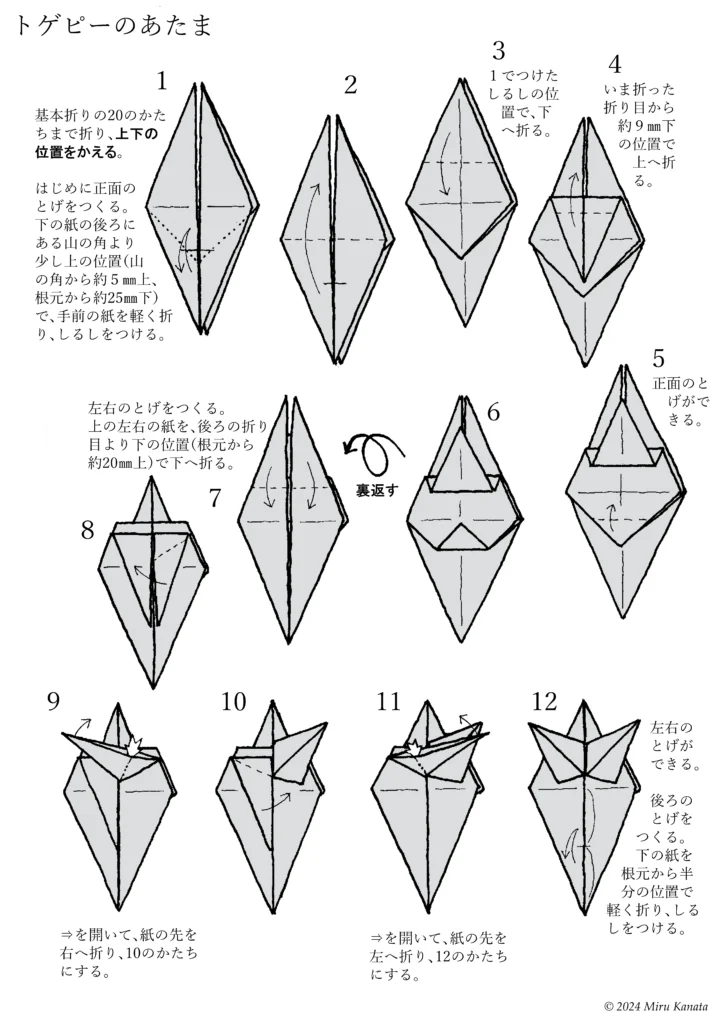
English Commentary
Togepi’s head
1. Fold the paper to the shape of basic fold 20, then change the top and bottom positions. First, make the front spike. Lightly fold the front paper and make a mark slightly above the corner of the mountain on the back of the bottom paper (about 5 mm above the corner of the mountain, and about 25 mm below the base).
2.
3. Fold down at the mark made in step 1.
4. Fold up about 9 mm below the crease you just made.
5. The front spike is now formed.
6.
{Flip}
7. Make the left and right spikes. Fold the top left and right pieces of paper down at a position below the crease on the back (about 20 mm above the base).
8.
9. Open the arrow and fold the tip of the paper to the right to make the shape of 10.
10.
11. Open the arrow and fold the tip of the paper to the left to make the shape of 12.
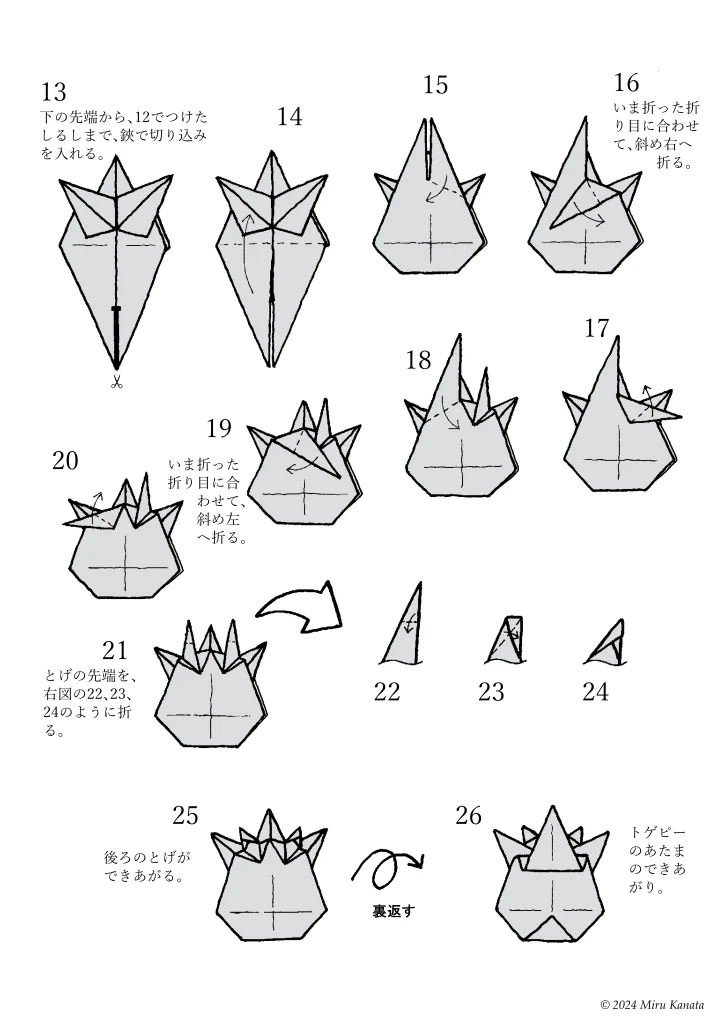
12. The left and right spikes are now formed. Next, create the spikes at the back. Lightly fold the bottom paper in half from the base and mark the spot.
English Commentary
13. Make an incision with scissors from the bottom tip to the mark made in step 12.
14.
15.
16. Fold diagonally to the right along the crease you just made.
17.
18.
19. Fold diagonally to the left along the crease you just made.
20.
21. Fold the tips of the spikes as shown in 22, 23, and 24 in the diagram on the right.
22.
23.
24.
25. The back spikes are complete.
{Flip}
26. Togepi’s head is complete.
3 トゲピーのからだ
English Commentary
Togepi’s body
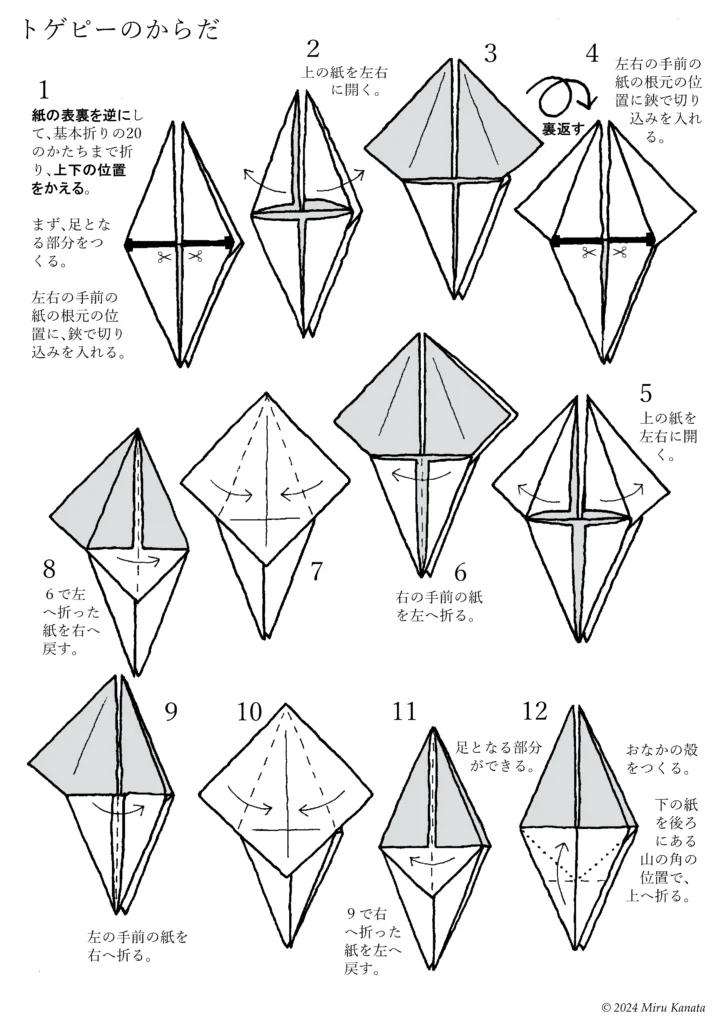
1. Reverse the front and back of the paper and fold it to the shape of basic fold 20, then change the top and bottom positions. First, make the parts that will become the legs. Make cuts with scissors at the base of the front left and right pieces of paper.
2. Open the top piece of paper to the left and right.
3.
{Flip}
4. Make cuts with scissors at the base of the front left and right pieces of paper.
5. Open the top piece of paper to the left and right.
6. Fold the front right piece of paper to the left.
7.
8. Return the paper that was folded to the left in step 6 to the right.
9. Fold the front left piece of hair to the right.
10.
11. Return the paper that was folded to the right in step 9 to the left.
12. The parts that will become the legs are now complete. Next, make the shell of the belly. Fold the bottom piece of paper upwards at the position of the corner of the mountain at the back.
English Commentary
13.
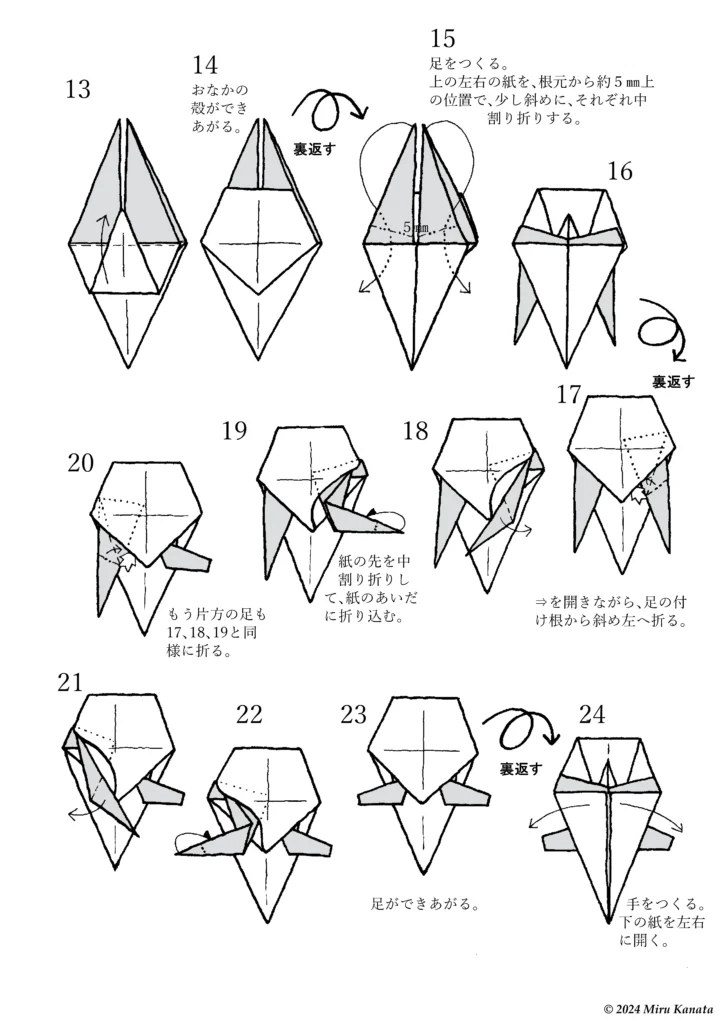
14. The belly shell is completed.
{Flip}
15. Make the legs. Fold the top left and right pieces of paper in a reverse fold at a slight angle, about 5 mm above the base.
16.
{Flip}
17. While opening the arrows, fold diagonally to the left from the base of the leg.
18.
19. Fold the tip of the paper in a reverse fold and tuck it between the pieces of paper.
20. Fold the other leg in the same way as 17, 18, and 19.
21.
22.
23. The legs are completed.
{Flip}
24. Make the hands. Open the bottom paper to the left and right.
English Commentary
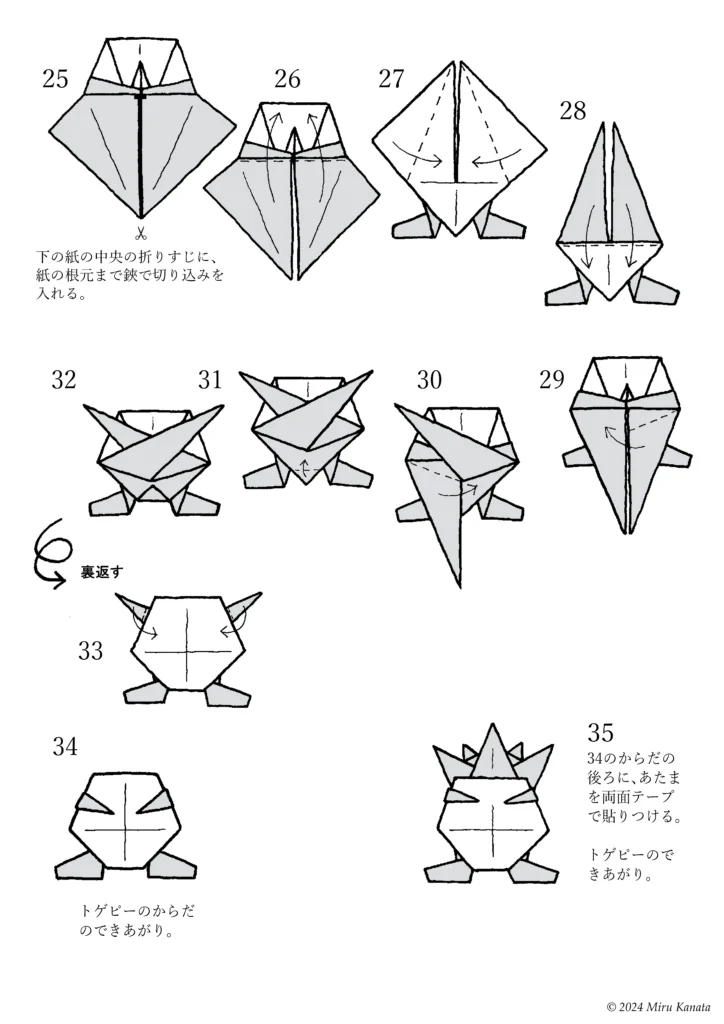
25. Make a cut with scissors along the center fold of the paper below, all the way to the base of the paper.
26.
27.
28.
29.
30.
31.
32.
{Flip}
33.
34. Togepi’s body is complete.
35. Attach the head to the back of the body from step 34 with double-sided tape. Togepi is complete.
参考・2000年の本に掲載した折り図
みるかなた本棚>『ポケットモンスターおりがみコレクション』>ポケモンおりがみ一覧表>0175トゲピー

◇ ◇ ◇